Sponsor Link:
UTSource.net Reviews
It is a trustworthy website for ordering electronic components with cheap price and excellent quality.
Setting it up

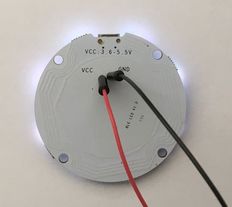 1. Before powering this module, be aware that the LEDs on this module is considerably bright and for those who cannot handle it, it is advised to use this module with caution. Firstly, start by powering up this module via its micro-USB input or its power input pins at the front and back of the module. Do keep in mind that the acceptable input operating voltage for this module is between +3.6 - +5 volts. The pictures indicate the both methods to power this module. Once the module is powered, the LEDs will go through a series of light patterns and colours to start up.
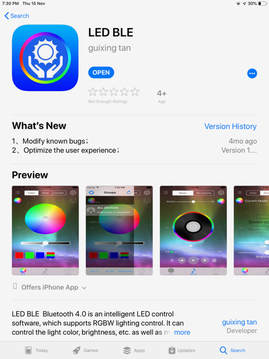
 2. Next, get onto an Android or iOS device and download the app titled "LED BLE" from the App Store or the Play Store. Make sure that Bluetooth is enabled on your device. In this example, an iOS device will be used for demonstration.
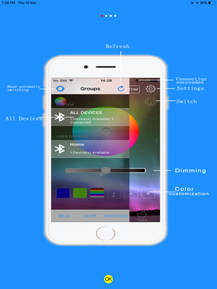
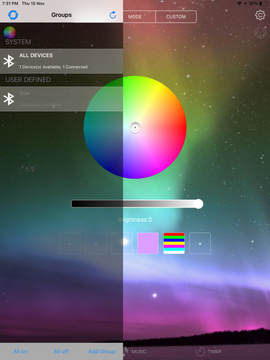 3. Now, open up the app and click on the three menu bars you see on the top left of your screen. If the Bluetooth module is powered up properly, under "Groups" and under "ALL DEVICES", it will say "1 Device(s) Available; 1 Connected". This means that your LED Module is not linked to your electronic device. If you have more than one LED Bluetooth Module, more devices will show up. The bottom controls on that menu page saying "All on" and "All off" turns the devices linked, on or off. You can add more groups to separately control multiple devices by pressing "Add Group".
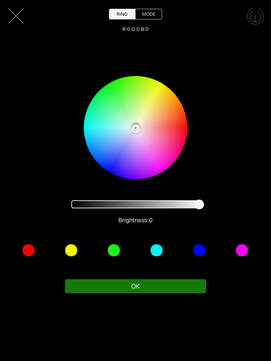
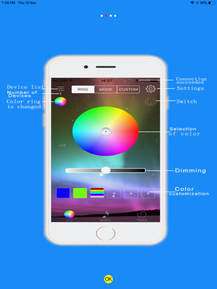
 4. The page you see first, is the main home page, where you can control the current colour and brightness of your LED module with moving that cursor on the larger spectrum circle. There are memory slots as well for your own custom colours as seen in the second picture above, where you can click on the boxes and select your custom colour, mode, speed and brightness for a constant colour or a pattern to save. You can click on any of the boxes at any time to change to the pattern or colour saved in that memory slot.
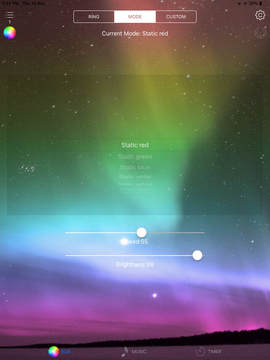
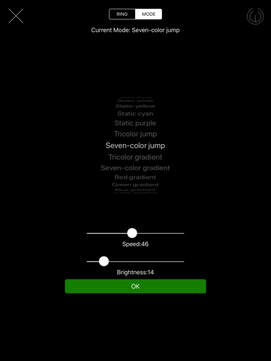
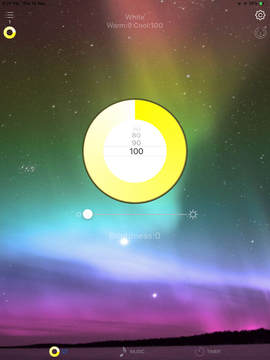
 5. On that page, if you click "MODE" on the tabs above, it will take you to a page where you can select options for the module to change colours, either in a static, jump, gradient or flash form. There are sliders for you to change the speed and brightness of the module's patterns. If you click on the multi-colour circle on the top left of the page (under the menu bar icon), it will take you to a page where you can change the colour specifically and how warm or cool the colour is. There is a brightness slider as well.
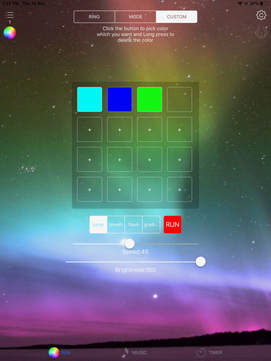
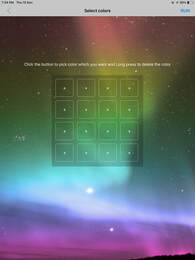
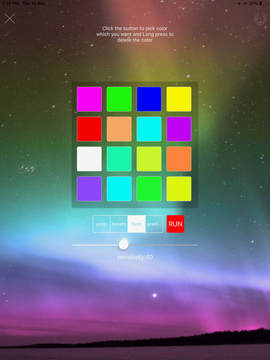
 6. Furthermore, on the top menu page named "CUSTOM", you can customise the pattern which you would like, by clicking on the 16 available squares for your colour selection. The pattern will start from the top leftmost square and move its way down to the bottom rightmost square. You can change how the transitions from colour-to-colour is like with the four buttons below the squares, and there are speed and brightness sliders which you can control. The big red square named "RUN" will activate the colour pattern upon your press. If you click on the multi-colour circle on the top left of the page (under the menu bar icon), it will take you to a page where you can change the colour specifically and how warm or cool the colour is.
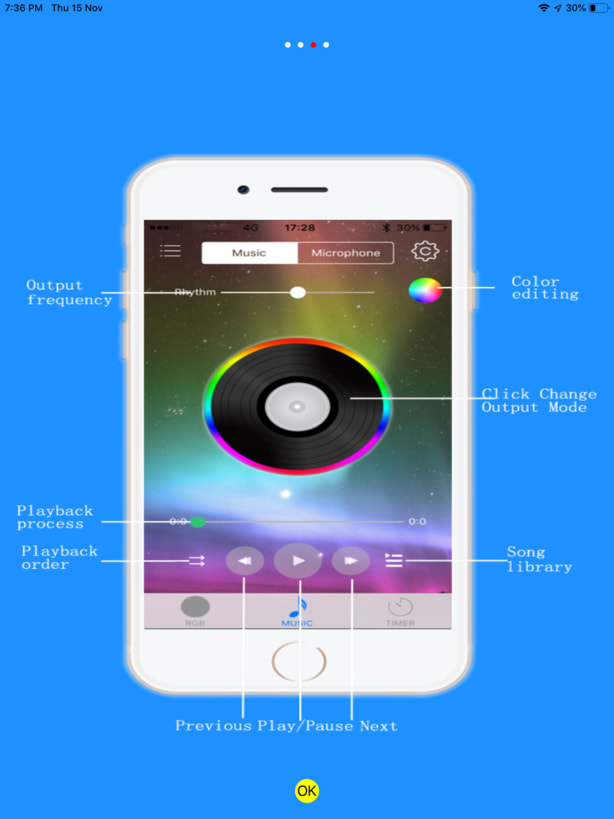
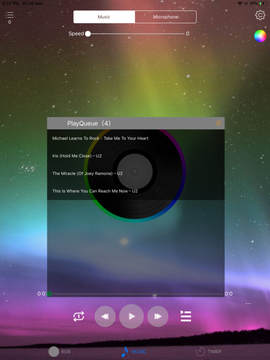 7. Now, if we look at the bottom menu tabs, click on the tab named "MUSIC". At the bottom, you can immediately see the play button, the 'next song' button and the 'last song' button (arrows left and right) which you can press to either pause or play the music, and switch between songs in your library queue. To import music from your device's libraries to the app, click on the 'three lines' to the right of the 'next song' (right arrow) button. You can select which music you will like, and your music queue as well.

 8. The far left button, towards the left of the 'last song' (left arrow) button, changes the sequence of how the music is playing which choices such as: Random Play (plays any song from your queue), Sequential Play (plays the queue songs in the sequence you have set) and Single Play (plays the first song selected one time only).
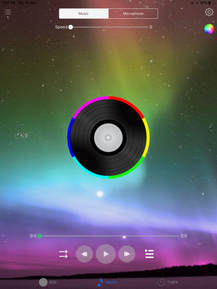
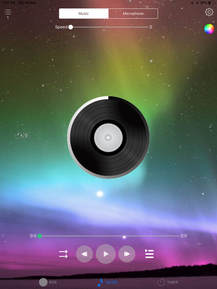
9. If you click on the music disk in the middle of the screen, you can change the light pattern on your LED module, with 4 different patterns, as shown by the image above. There is a speed slider for the light pattern speed located below the top menu tabs also.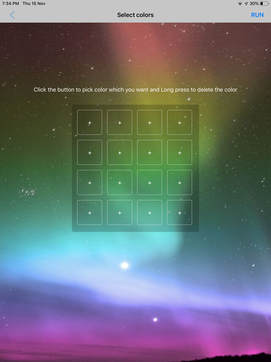 10. You can also set your own custom pattern by clicking the colour button, located below the settings button at the top right of the page. You will see those 16 squares again, and you can click on those individual squares to sequence your colours, which will be used alongside the music you selected. Make sure you press "RUN", located at the top right of that customisation page to activate your sequence.
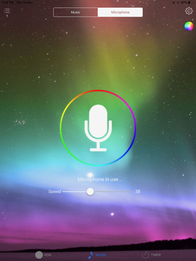

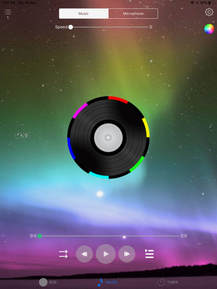
 11. If you click on the top menu tab, named "Microphone", on the "MUSIC" page, it will bring you to a page, where the LED module will light up and display patterns when your microphone's audio is heard. You can click on the big microphone button in the middle of the screen to scroll through a variety of patterns which the LED module will display and the speed slider is also located below the microphone button, which changes the speed of the LED patterns. The customisation button is also located below the settings button at the top right of the page, which enables you to set your own custom pattern.
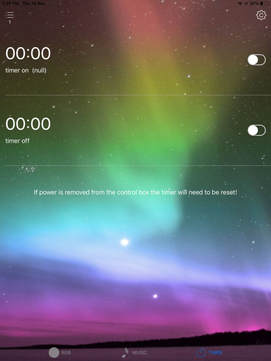
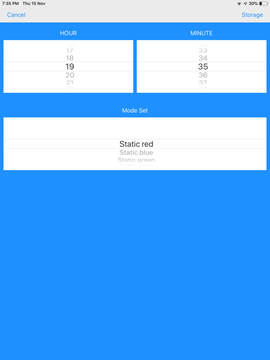 12. Now, if you move to the "TIMER" page on the bottom menu buttons, this page allows you to set timings on when you would like your LED module to be in operation or not. If you click on the text named "timer on (null)", you will be brought to a sub-page where you can set the hour and minute, which controls when you would want to turn on the LED pattern , there are also options on that sub-page for you to set the mode (static/tricolour/seven-colour/warm% (colour)). Make sure you click "Storage", on the top right of the sub-page to save your timings and mode.
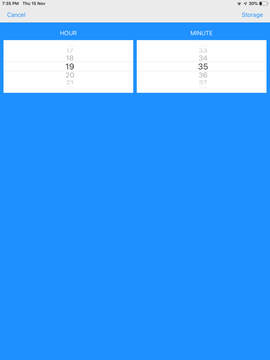 13. If you click on the text "timer off" on that same "TIMER" page, it will bring you to a similar sub-page (as talked about above on Step 12). However, this allows you to set when you would like the LED module to be turned off. On the sub-page, you can set the hour and minute to your own preference. Again, make sure you click "Storage", on the top right of the sub-page for you to save your timings. As soon as you do that, everything should be good to go.
 14. Now, we will cover the settings menu, which is represented by that gear icon, located on the top right of every page. Once you click on it, a menu should slide in from the right and the first setting, named "Rhythm", lets you customise your own pattern, as we have talked about before with those 16 squares. You can just click that "RUN" button on that customisation page to activate that pattern whenever you want. Through my testing, I don't think that this function works properly as it does not activate any patterns when activated.
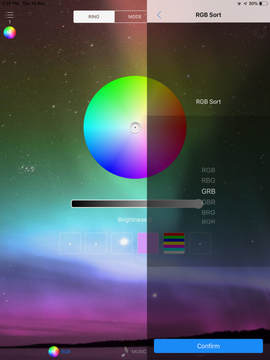 15. There is also a sub-page called "RGB Sort" on the settings page, which allows you to scroll through a variety of colour options with the three RGB colours (red, green and blue) and display patterns based on those colour combinations. Through my testing, it looks like this function doesn't affect any of the colours or patterns being displayed.
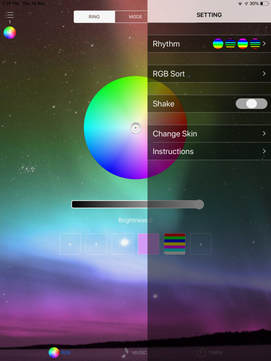
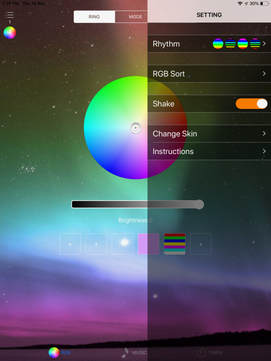 16. The following function on this settings page is another sub-page, called "Shake", where you can turn it on by pressing that slider icon next to it. This function is supposed to change your current pattern or colour with a shake of your device, but I think that this is not working as I have tested it, as the colour does not change on the LED module with any shakes of my device.
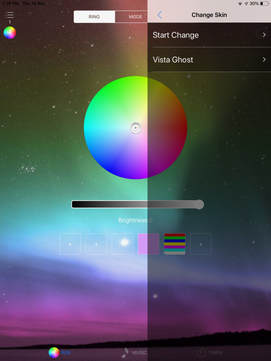 17. For cosmetics of this app, there is the "Change Skin" button, which you can press. This changes the background picture of the app. If you want to select an image from your device's camera roll or library, click on the "Start Change" button, and if you want to change it back to the default background image (as seen in all pictures here), click on the "Vista Ghost" button and it will automatically change it back. This function works as it should be.
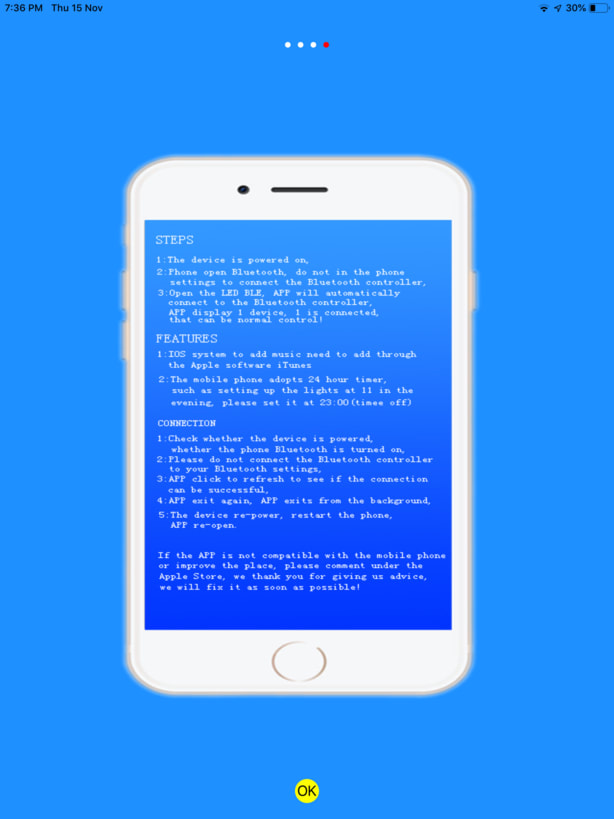 18. Lastly, the last sub-page on the settings page is the sub-page named "Instructions", where you can click it and it will take you to slides with labels, which tell you how the different pages work and what to do to start. Those slides act like a recap to everything which has been covered here. Plus, now, you would know everything about the module and the app, as we are now finished with the setup!
Conclusion
Overall, I think that this LED module is a very cool piece of electronic equipment because it includes a very simple LED driver on-board, plus a Bluetooth communication tool to an accompanying app. With the addition of an app, a user can do so many things, with a simple user interface and multiple features. The physical layout of the LED module focuses on simplicity where this can be used as a utility tool on a car, as a plant decoration, or for small event lighting as well. Thus, someone can easily make this device portable, with a nice case powered by a power bank or batteries alone. I also think that with the price of this module, it can be considered to be a cheap consumer electronic device! You can check out the review I did on this product if you're more interested in the detailed specifications and other factors of this product as well!
Amazing opportunities
Also, be sure to check out PCBWay, a leading manufacturer and distributor in PCB design and manufacturing. They have amazing prices and excellent quality in their services, so don't miss out on them! Plus, PCBWay has an amazing website, online Gerber viewer function and a gift shop so make sure to check out their links below:
PCBWay Free Online Gerber Viewer Function: https://www.pcbway.com/project/OnlineGerberViewer.html
PCBWay Gift Shop: https://www.pcbway.com/projects/gifts.html
Make sure you check out the review for this product by clicking here.
Enjoy! Contact us for any inquiries!