kodera2t
-
Tube stand for experiment
06/24/2019 at 02:59 • 0 commentsThe case of subminiature tube or, utmost MT tube, lead wire can sustain for breadboard experiment. But the case of ST or GT, or Acorn tube, they are heavy or projecting on the bottom and we need some support for experiment. So this time I made 3D printable tube support.
![]()
![]()
Electrode of ST or GT can be accessed from the bottom. This kind of stable support is quite important especially for the high voltage case (like more than 200V)
These designs are uploaded my Acorn base, or ST base.
-
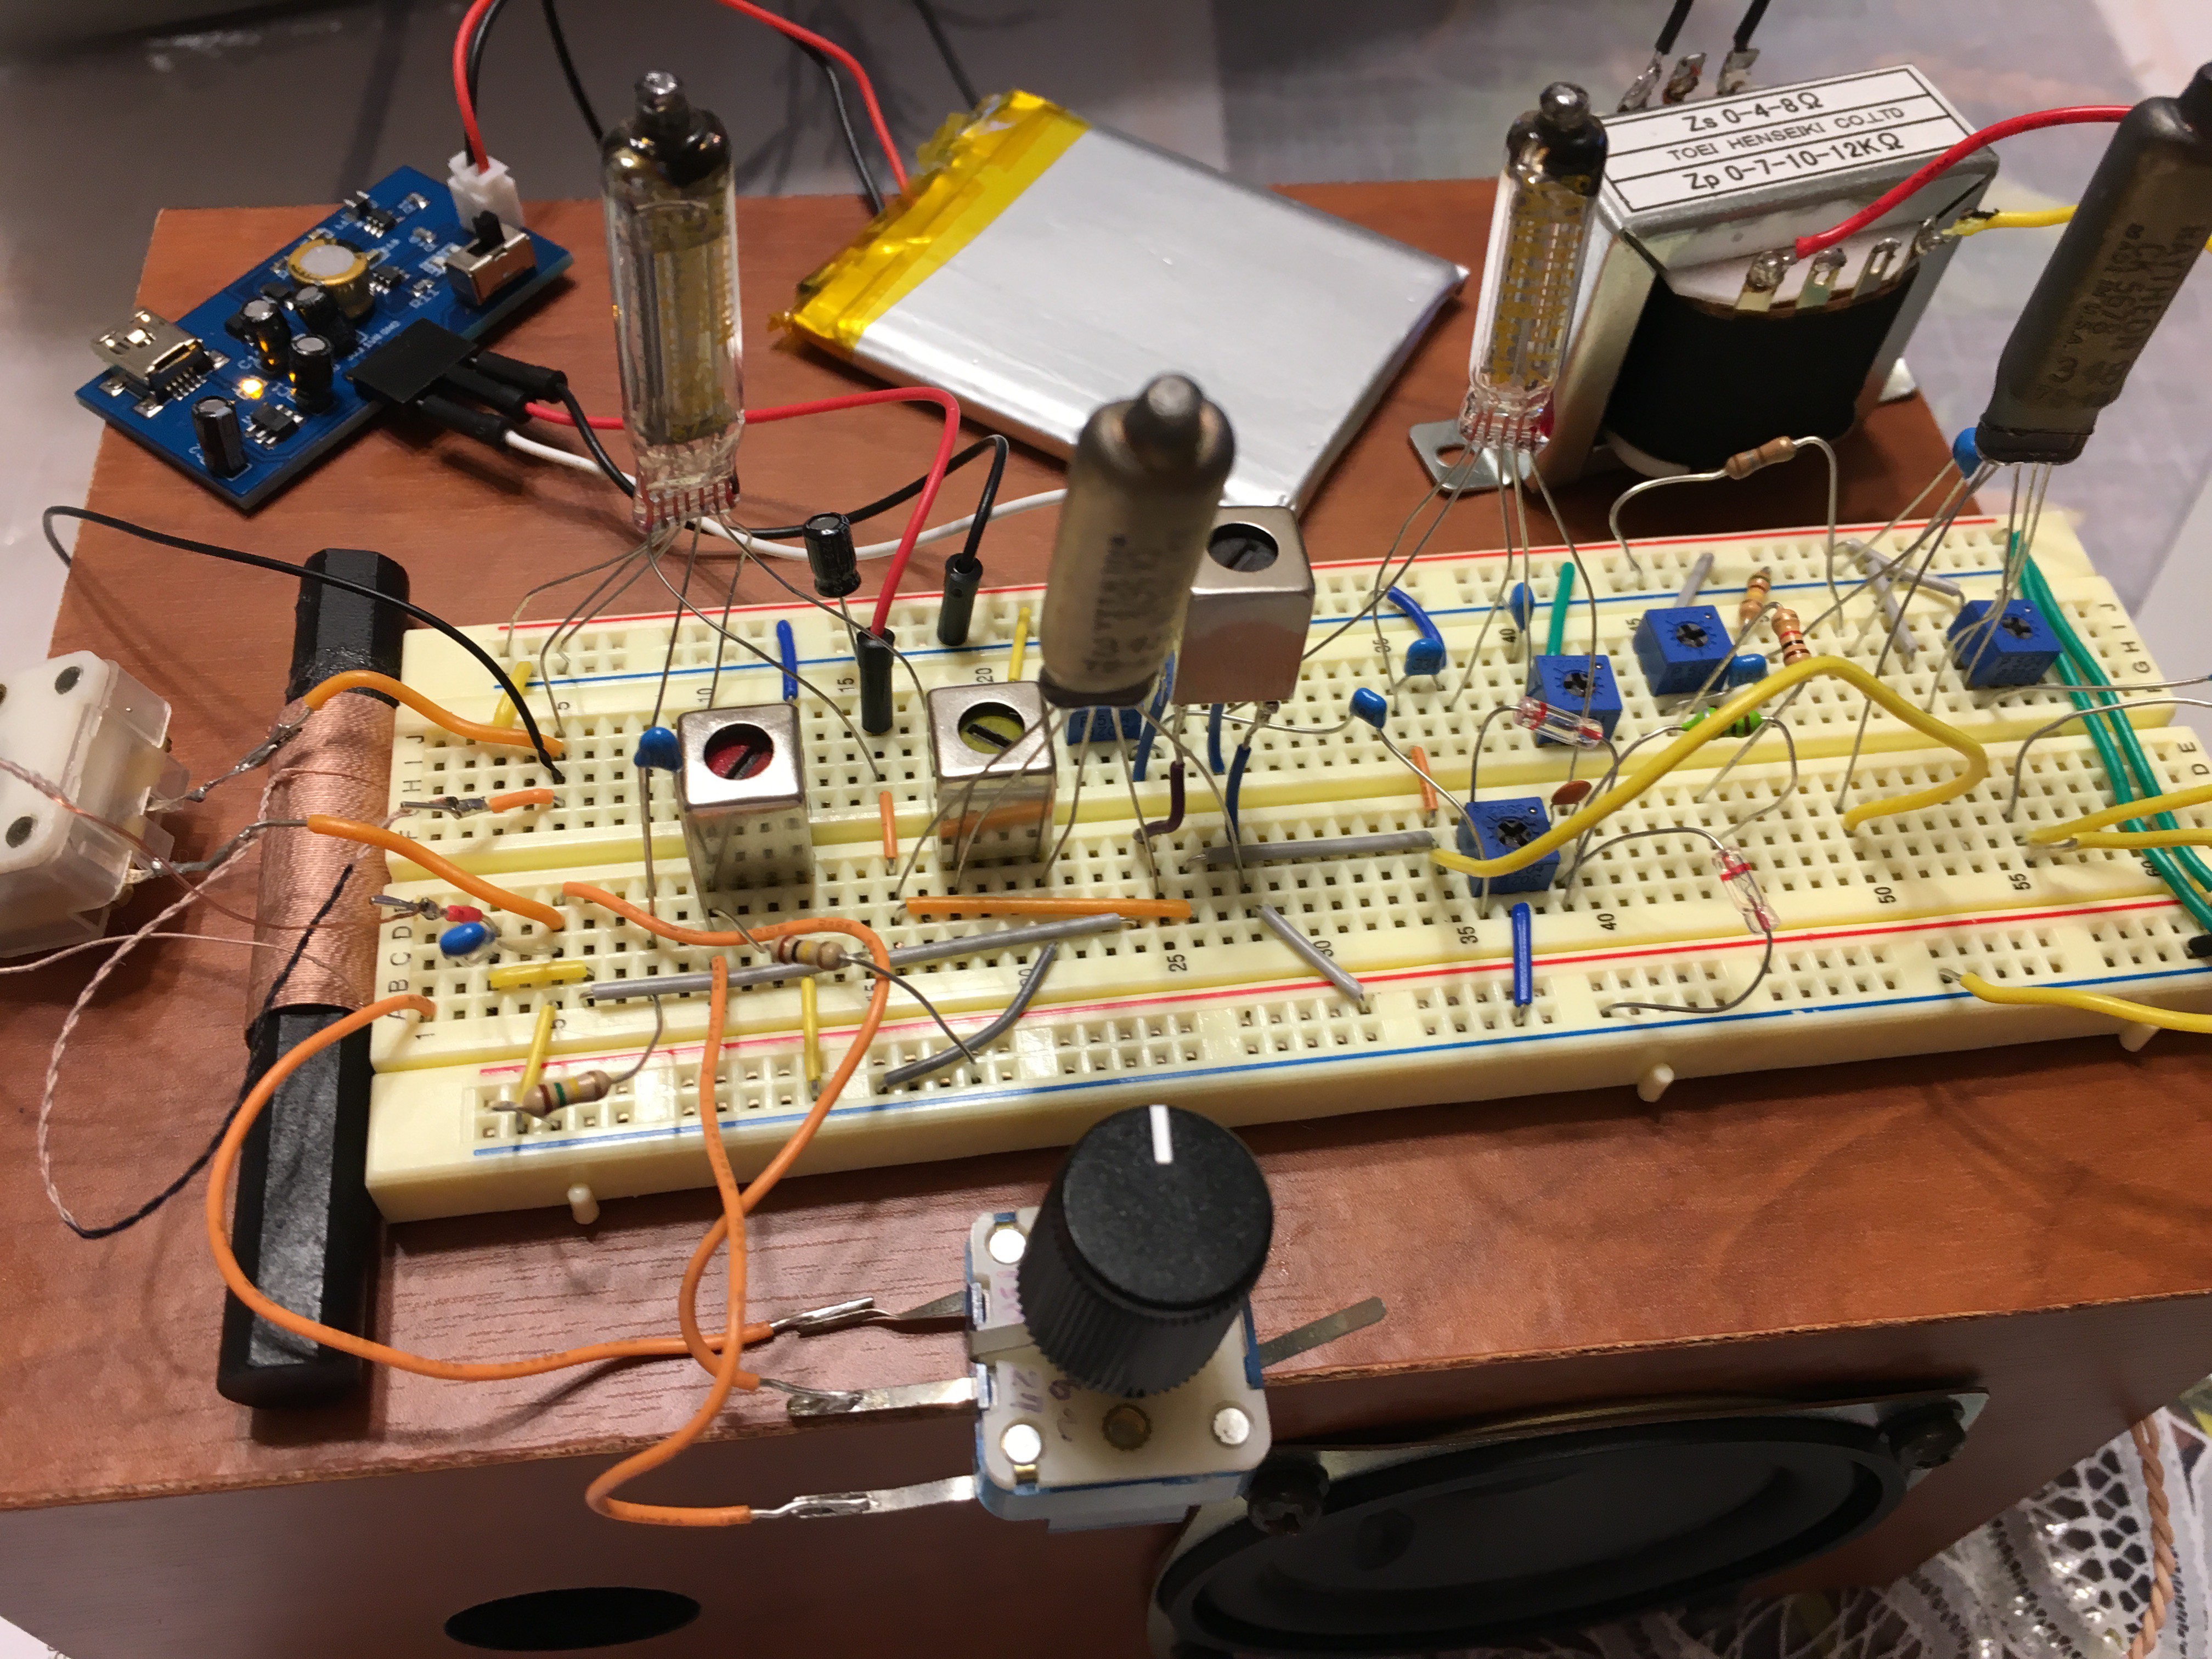
Ultimate crazy amplifier by Russian IV-3A
06/23/2019 at 10:26 • 4 comments![]()
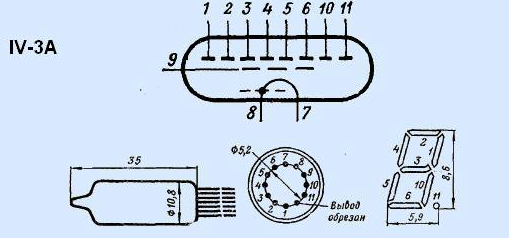
We can find 7-segment VFD by very low price. At least lower price than 300B. But the structure is "direct heated triode"
![]()
The strange (from view point of audio application) point is, multiple anode working for segment driving. For the audio, we can connect all of anode and just use "Anode".
![]()
And I inserted in class-D power amplifier,,, the moment of truth,,,
Indeed, sound is super awesome! Wonderful!!!!
-
Super-regenerative receiver experiment
06/23/2019 at 02:15 • 0 comments![]()
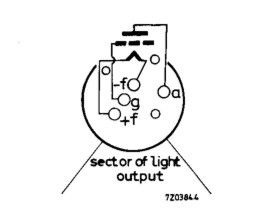
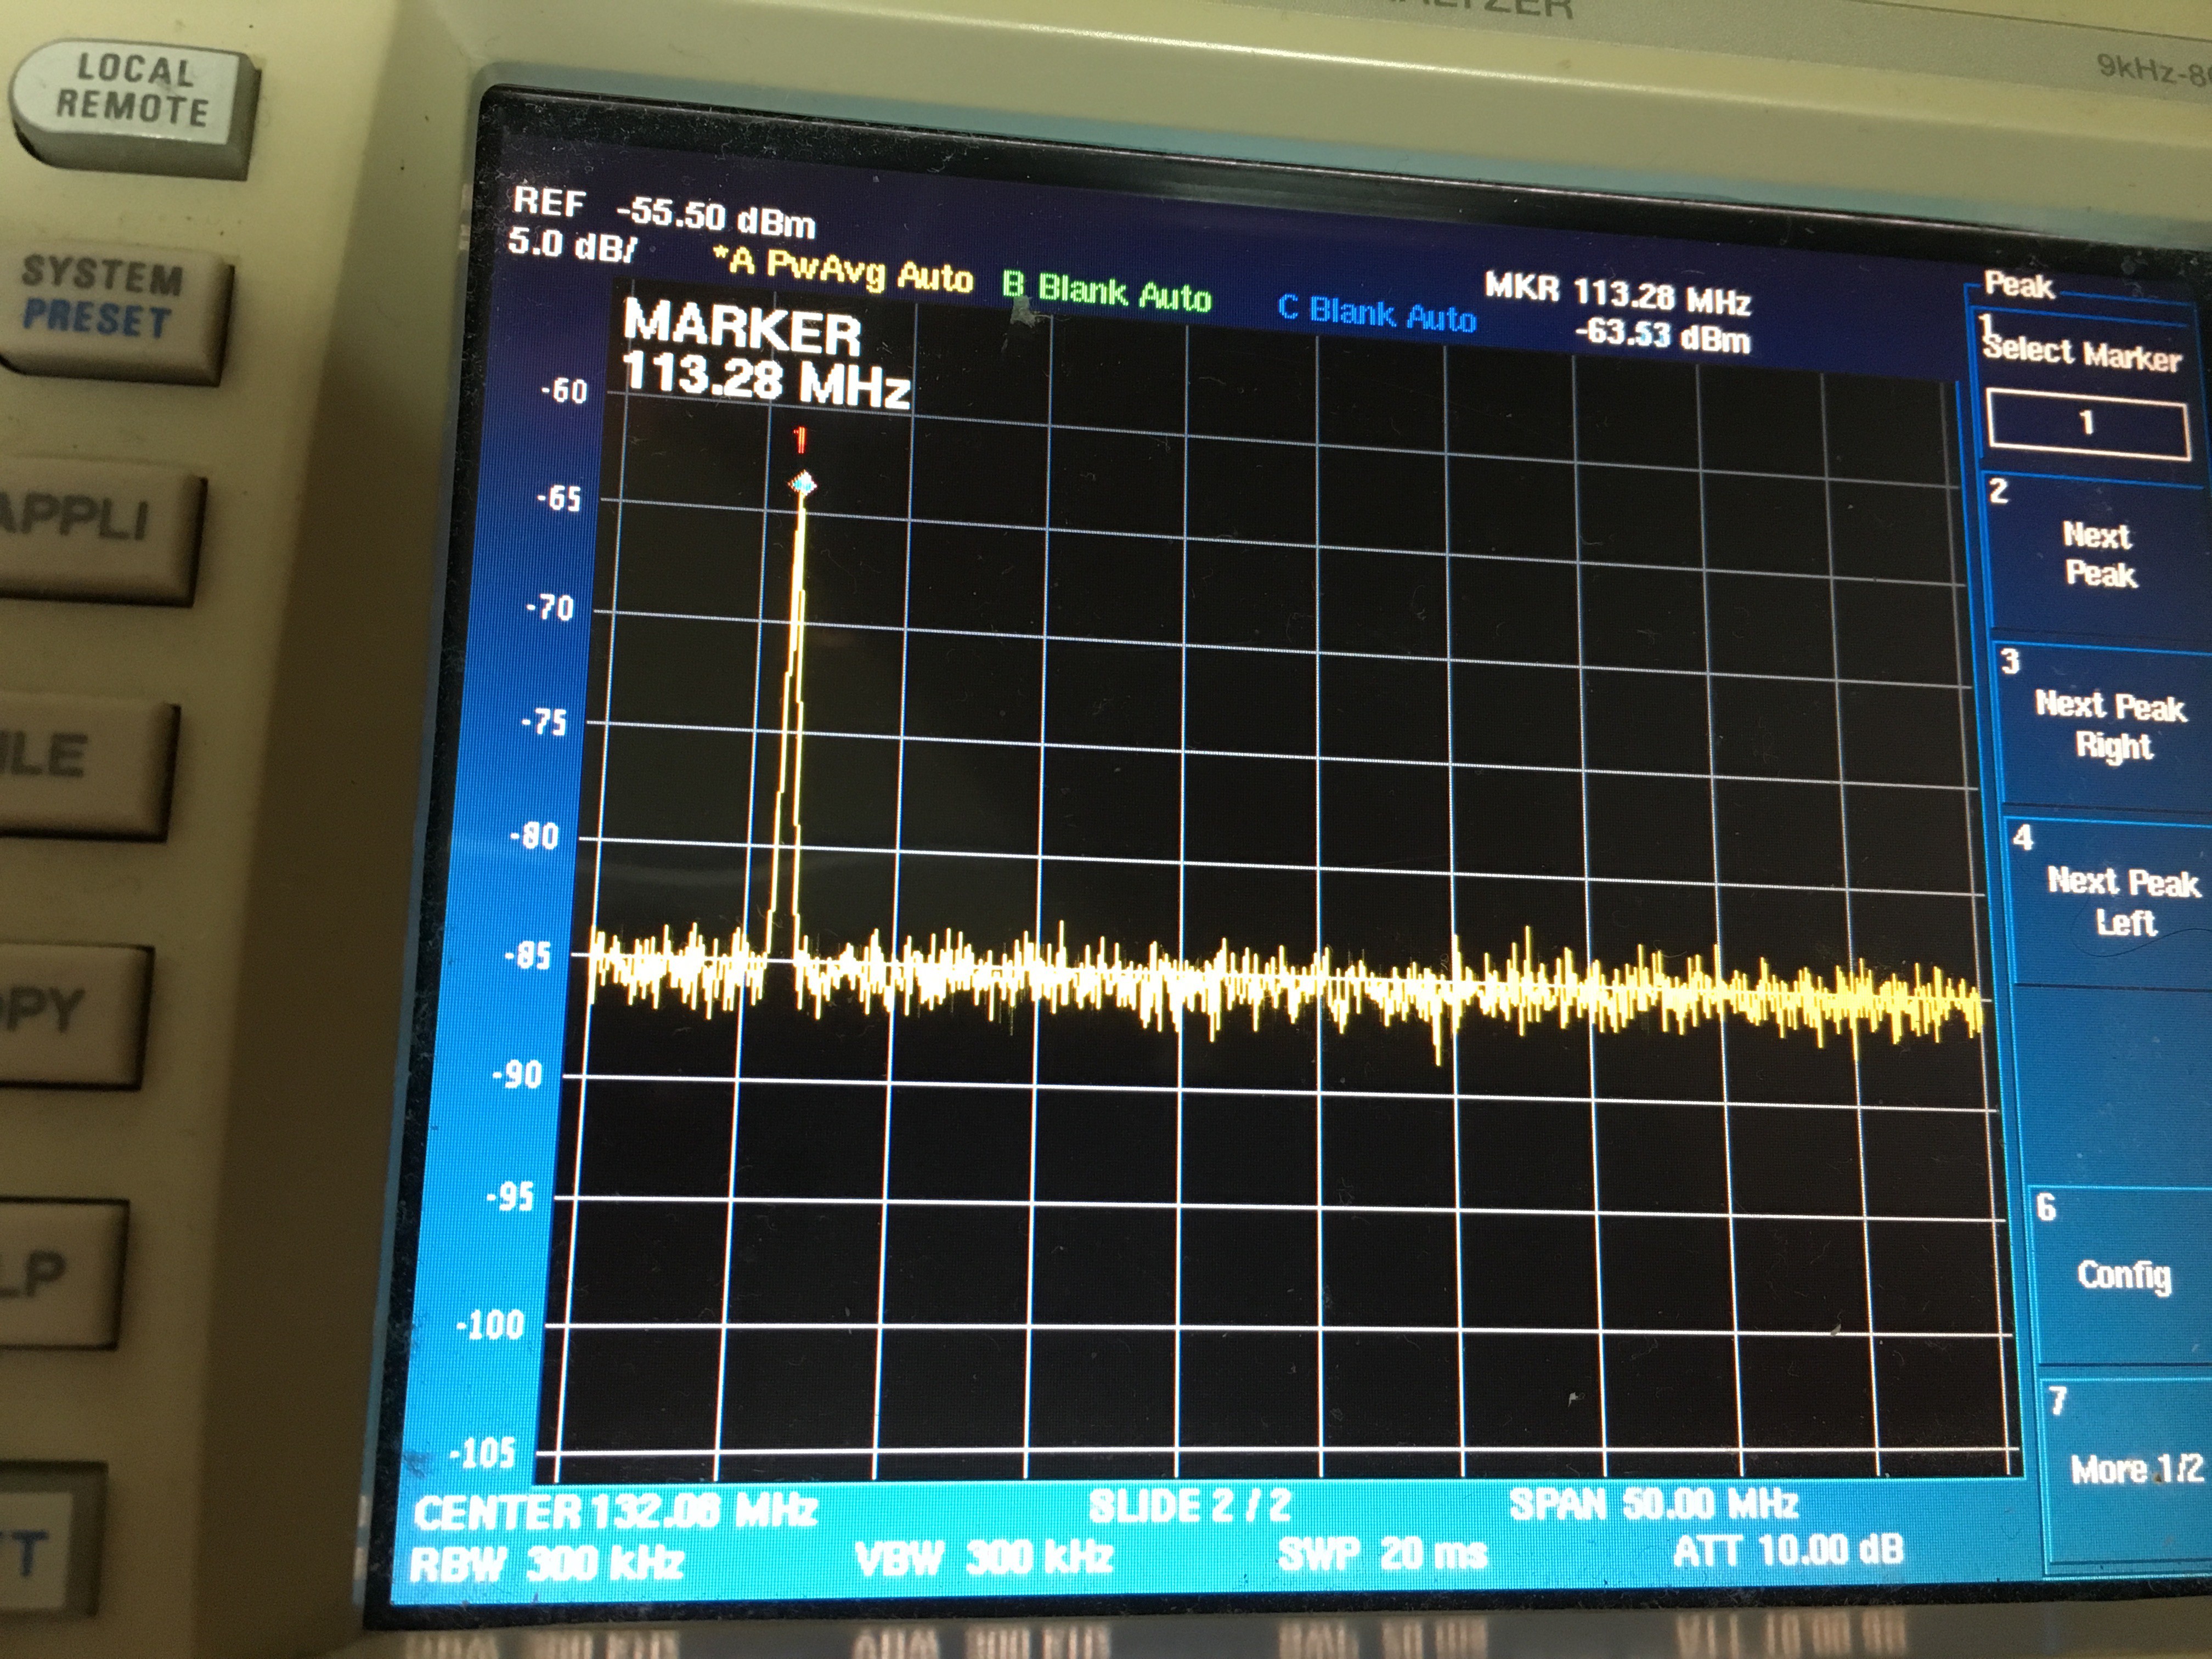
I know "suer-regenerative" is quite simple circuit but has very high sensitivity. Long time ago, I've seriously studied super-regenerative at 2.4 GHz and more for practical application. ( I like super-regenerative but not regenerative..) Realization of super-regenerative by vacuum tube was an assignment for me since I was a child. This time I made receiver by Acorn 955 tube made in 1944, during WWII.
![]()
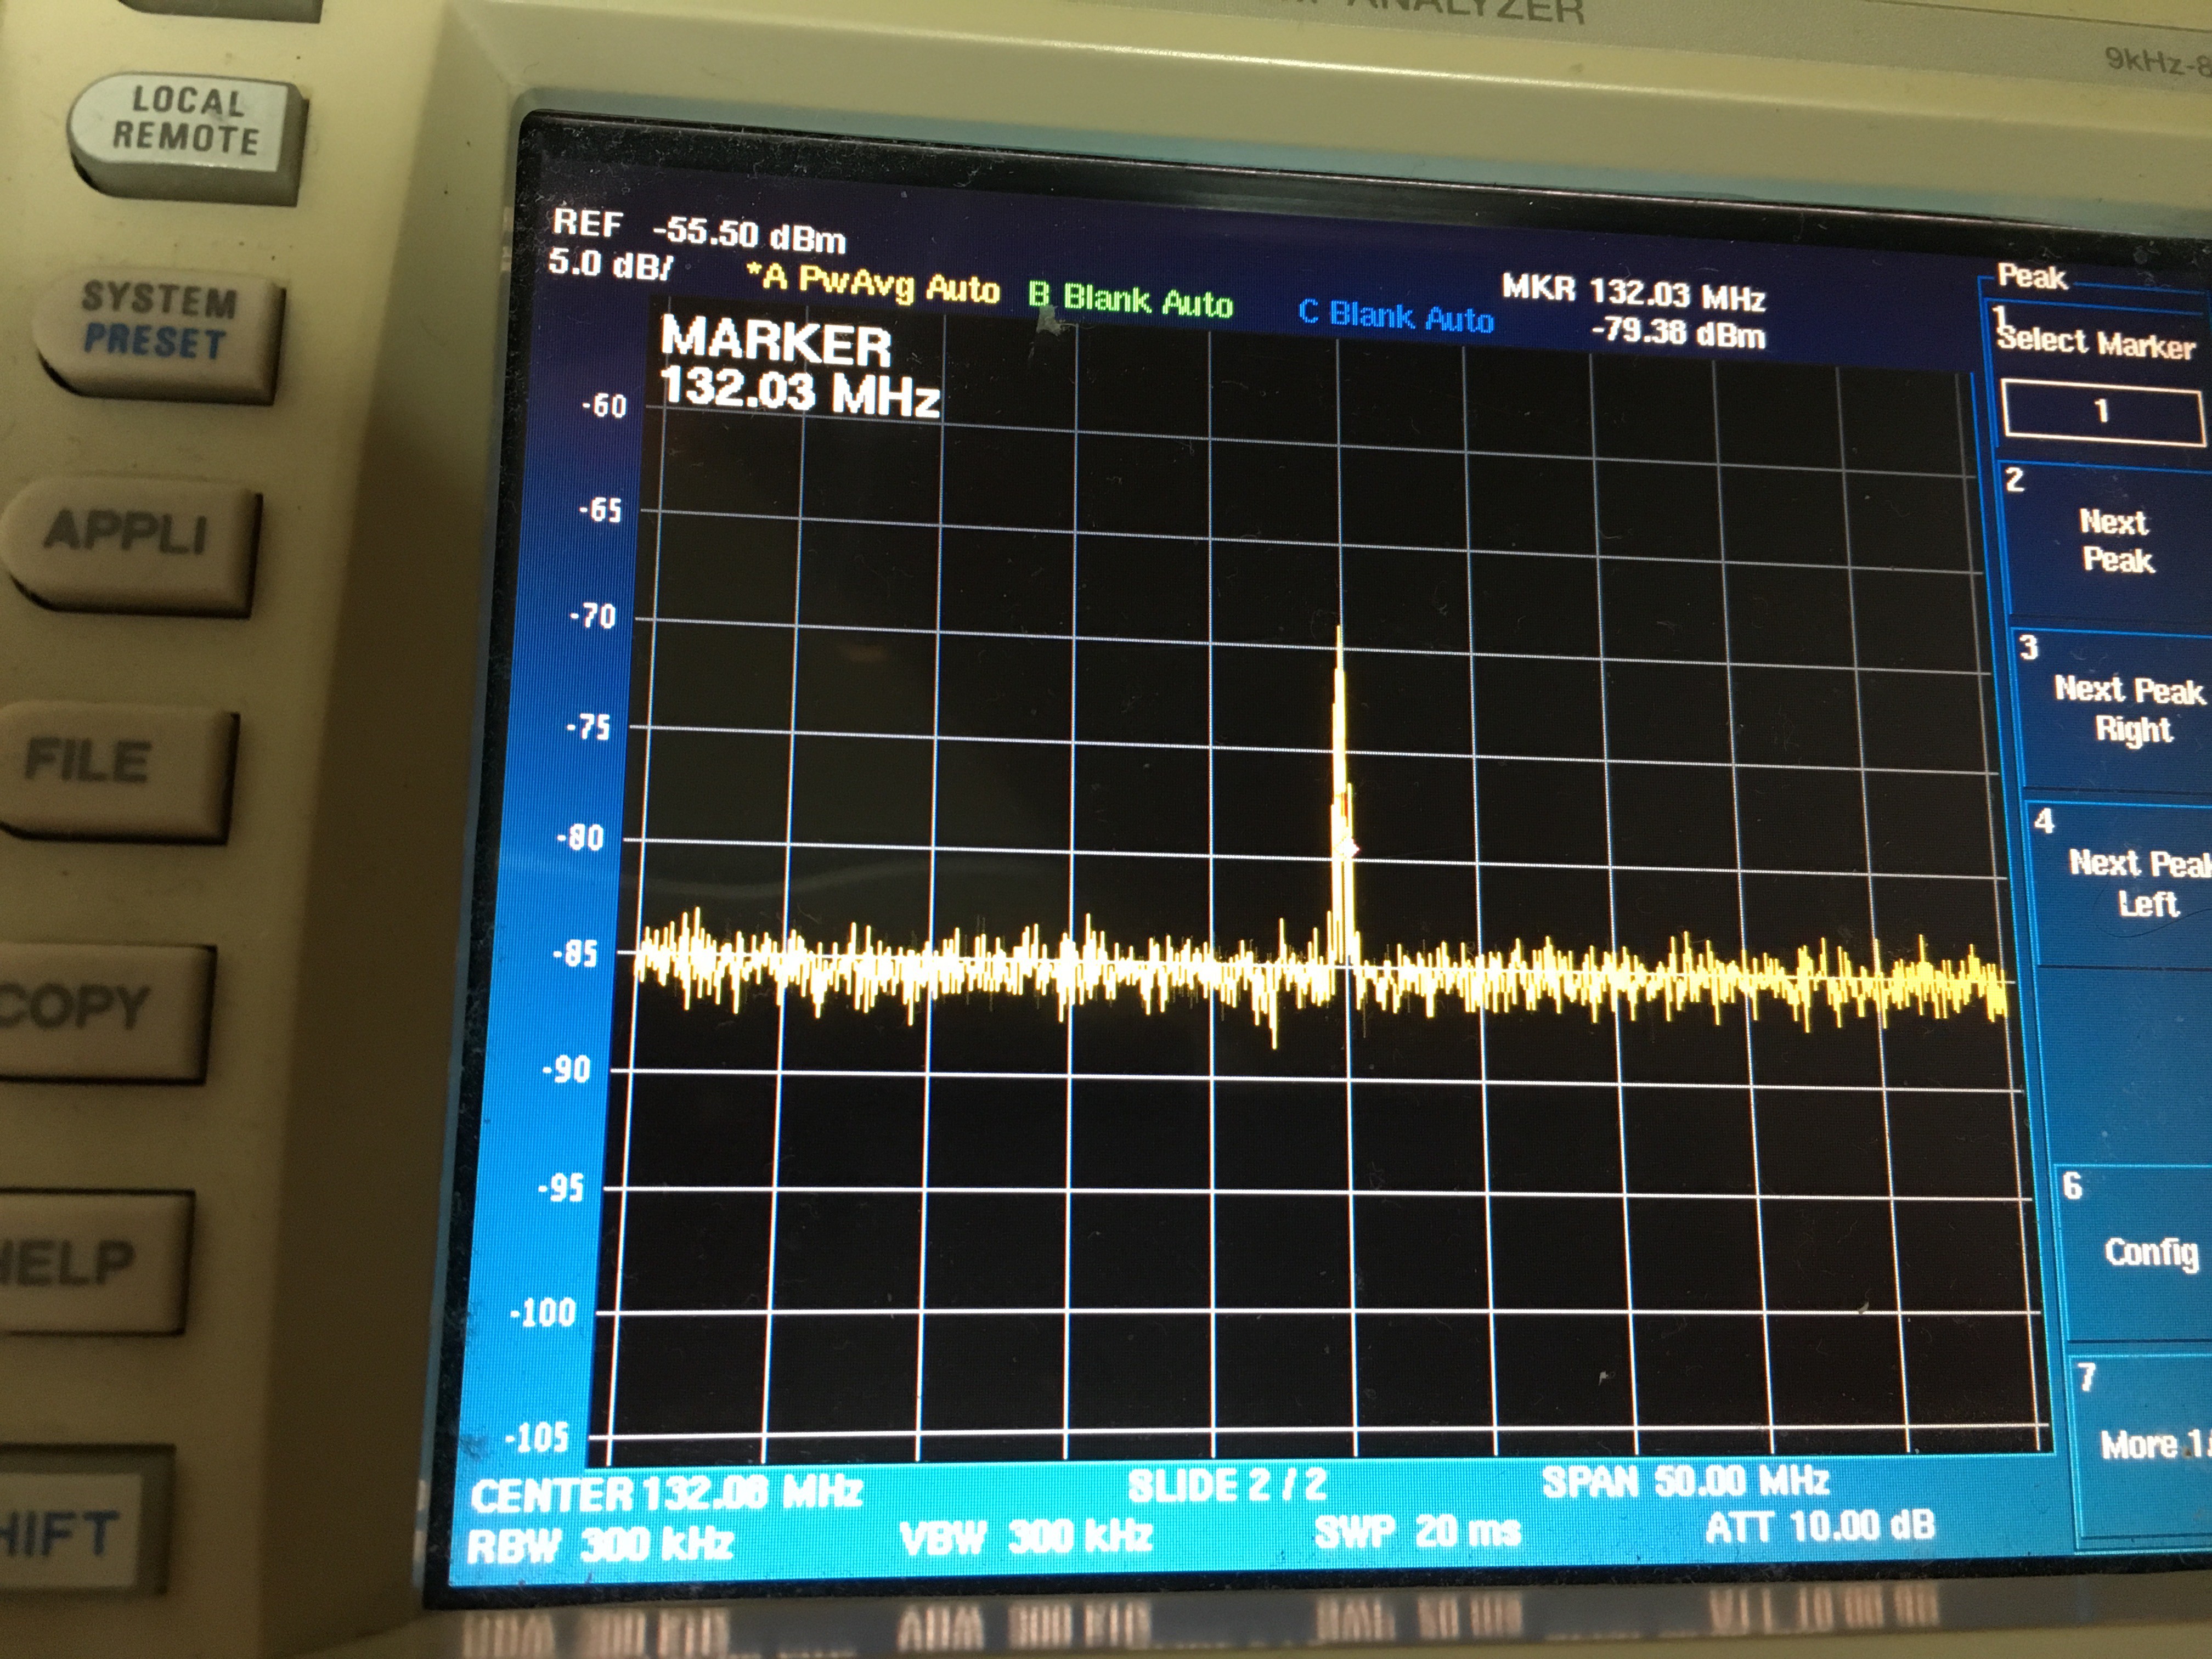
Basically super-generative is a "quenched" oscillator and its receiving frequency can be observed by spectrum analyzer. This also leads to one issue, spurious radiation and we have to insert head amp for isolator, or we should not connect good antenna. I received aviation communication but it is "spontaneous" and I could not make video...
On-board variable capacitor can tune receiving frequency from 113 MHz to 132 MHz, mosty covering "air-band".
![]()
![]()
-
One small tips for low voltage heater tube
06/18/2019 at 13:18 • 0 commentsI got a question regarding IV-15 heater voltage in hackaday messaging system. The questioner burns out more than 10 tubes of IV-15 and asked me how I use. The answer may be useful for all (except for vacuum tube expert), and would like to show,
The instance of power on, the resistance of heater is quite low (proportion to temparature) and if you simply apply the rated voltage, for example 1.0 V, it will burn out. The remedy is quite simple and was a common sense in 60 years ago of vacuum tube era, "insert tens ohm (for example 20 ohm) in series to heater and apply the rated voltage."
Reading battery-driven vacuum tube circuit, especially lower (< 3 V) heater voltage tube circuit on article and books, we can find "R" in series to heater. Especially low voltage heater tube has a low ohmic value for enough current flow by the rated voltage, so they are more fragile than 6V or 12V or higher voltage heater tube. In the vacuum tube, plate and grid are separated and very strong to voltage application (they are separated and basically no current flow if heater is not ready..), BUT in the all of vacuum tube, heater are, naturally, connected and ready to over-current. Actually heater is weak point of vacuum tube.
-
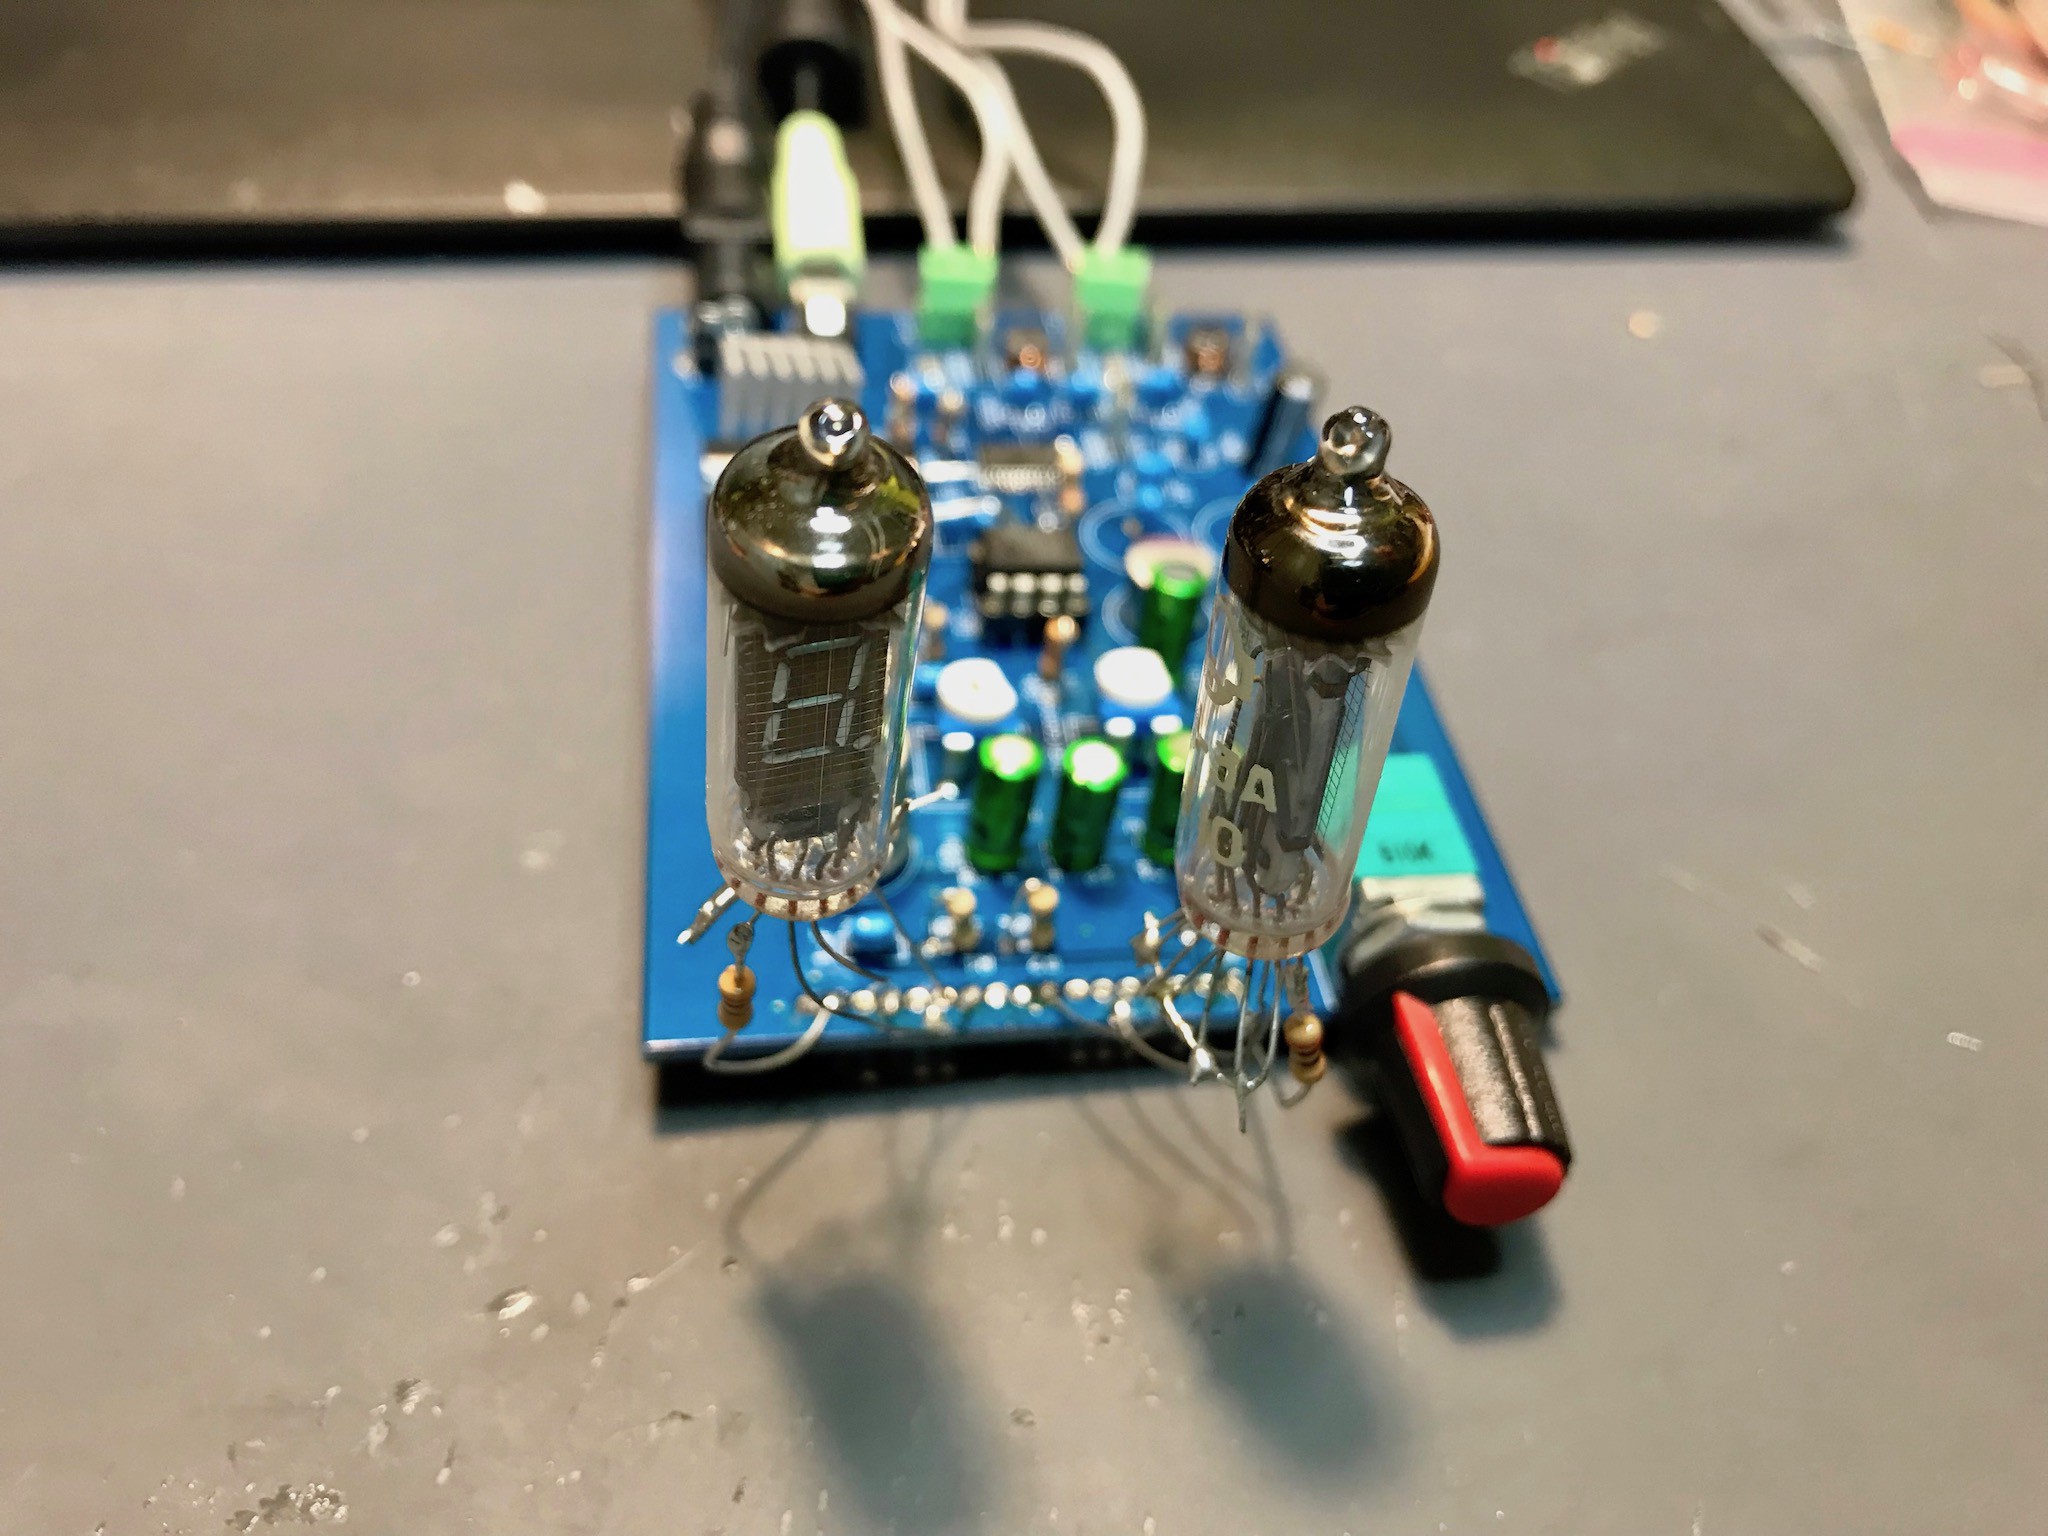
Practical VFD-triode based power amplifier
06/16/2019 at 03:11 • 0 comments![]() As presented in the previous log, yes, VFD which has triode structure works perfectly for audio application! This time I just swapped this triode (VFD) with Nutube in my class-D power amplifier. Indeed, the sound is super wonderful, and as above picture, now it becomes my main power amplifier!!!!!!!!!
As presented in the previous log, yes, VFD which has triode structure works perfectly for audio application! This time I just swapped this triode (VFD) with Nutube in my class-D power amplifier. Indeed, the sound is super wonderful, and as above picture, now it becomes my main power amplifier!!!!!!!!!Actual operation is presented in the movie below, please check it!
-
Various vacuum tube to be explored
06/15/2019 at 12:33 • 4 commentsI got several interesting vacuum tube. My policy to buy tube is,
- Less than $10 per tube. I am not high-end audio maniac, and also not so rich.
- Should be something unusual and looks interesting
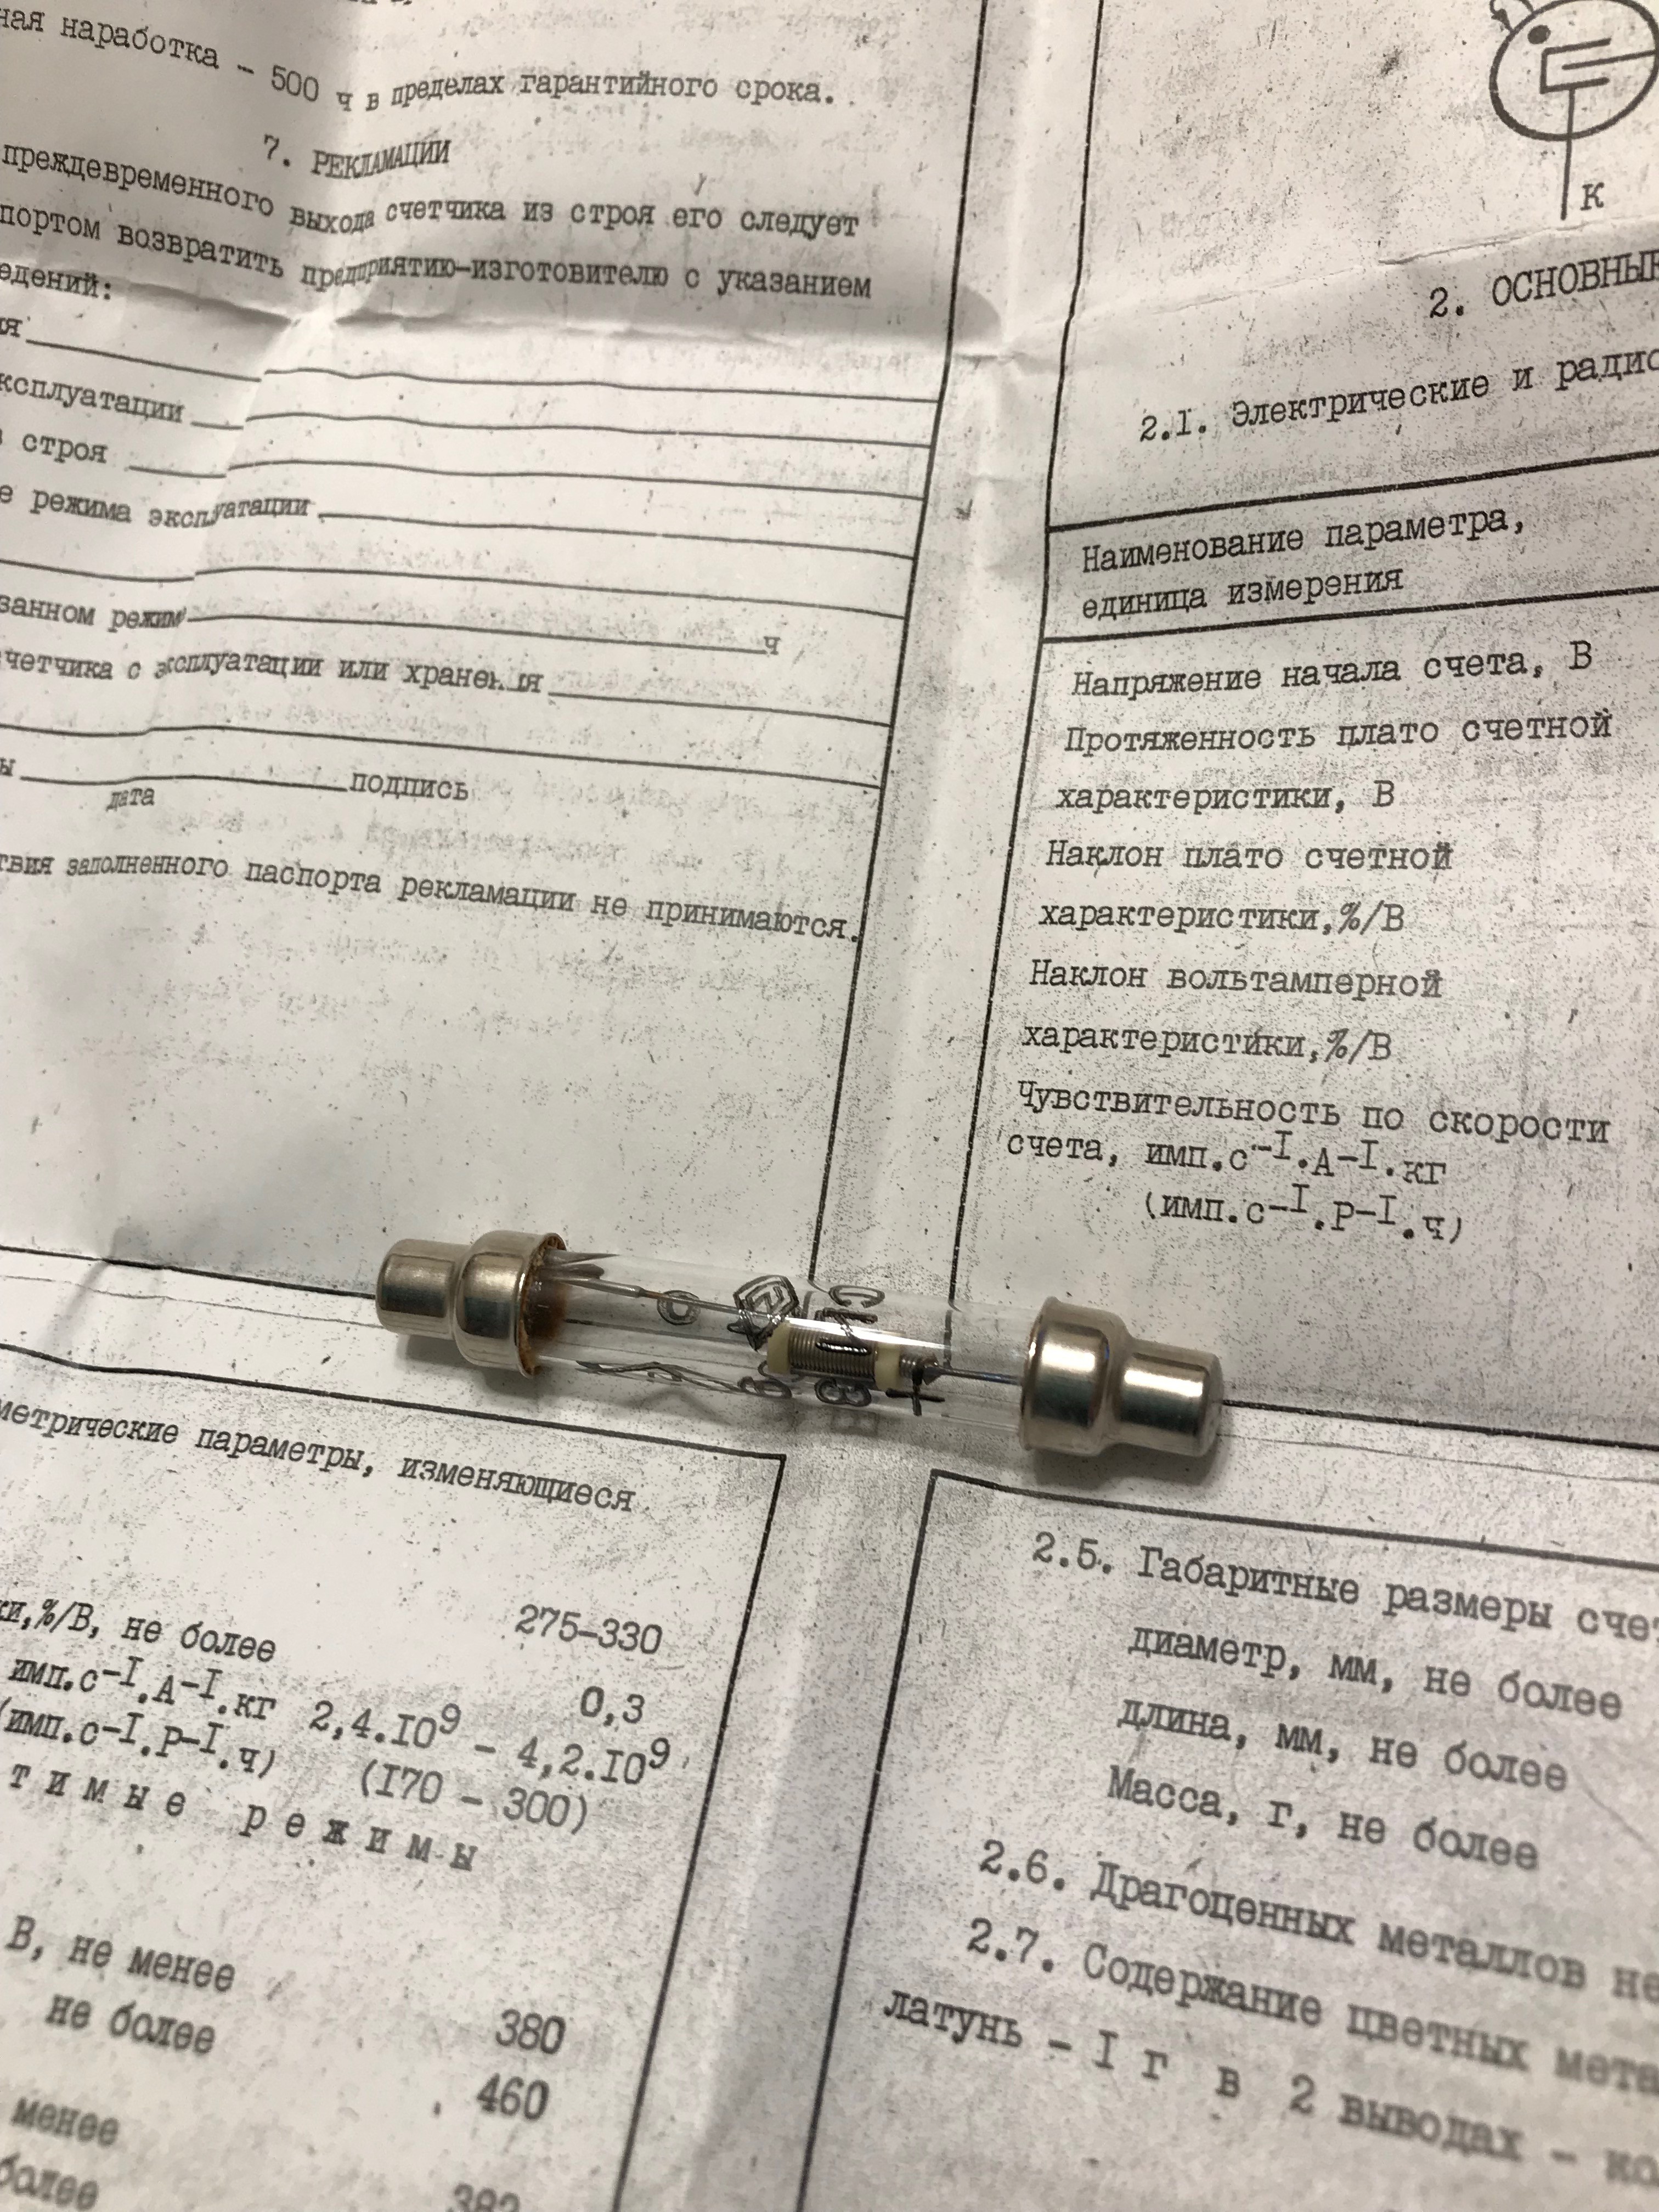
This time, the first Geiger-Müller tube is exceptionally expensive (but $20).
![]()
It is Russian tube, and I will make Geiger counter someday...
![]()
Second one is just a 7-segment VFD. Can we make 7-channel audio amplifier (if ignoring channel isolation)?
![]()
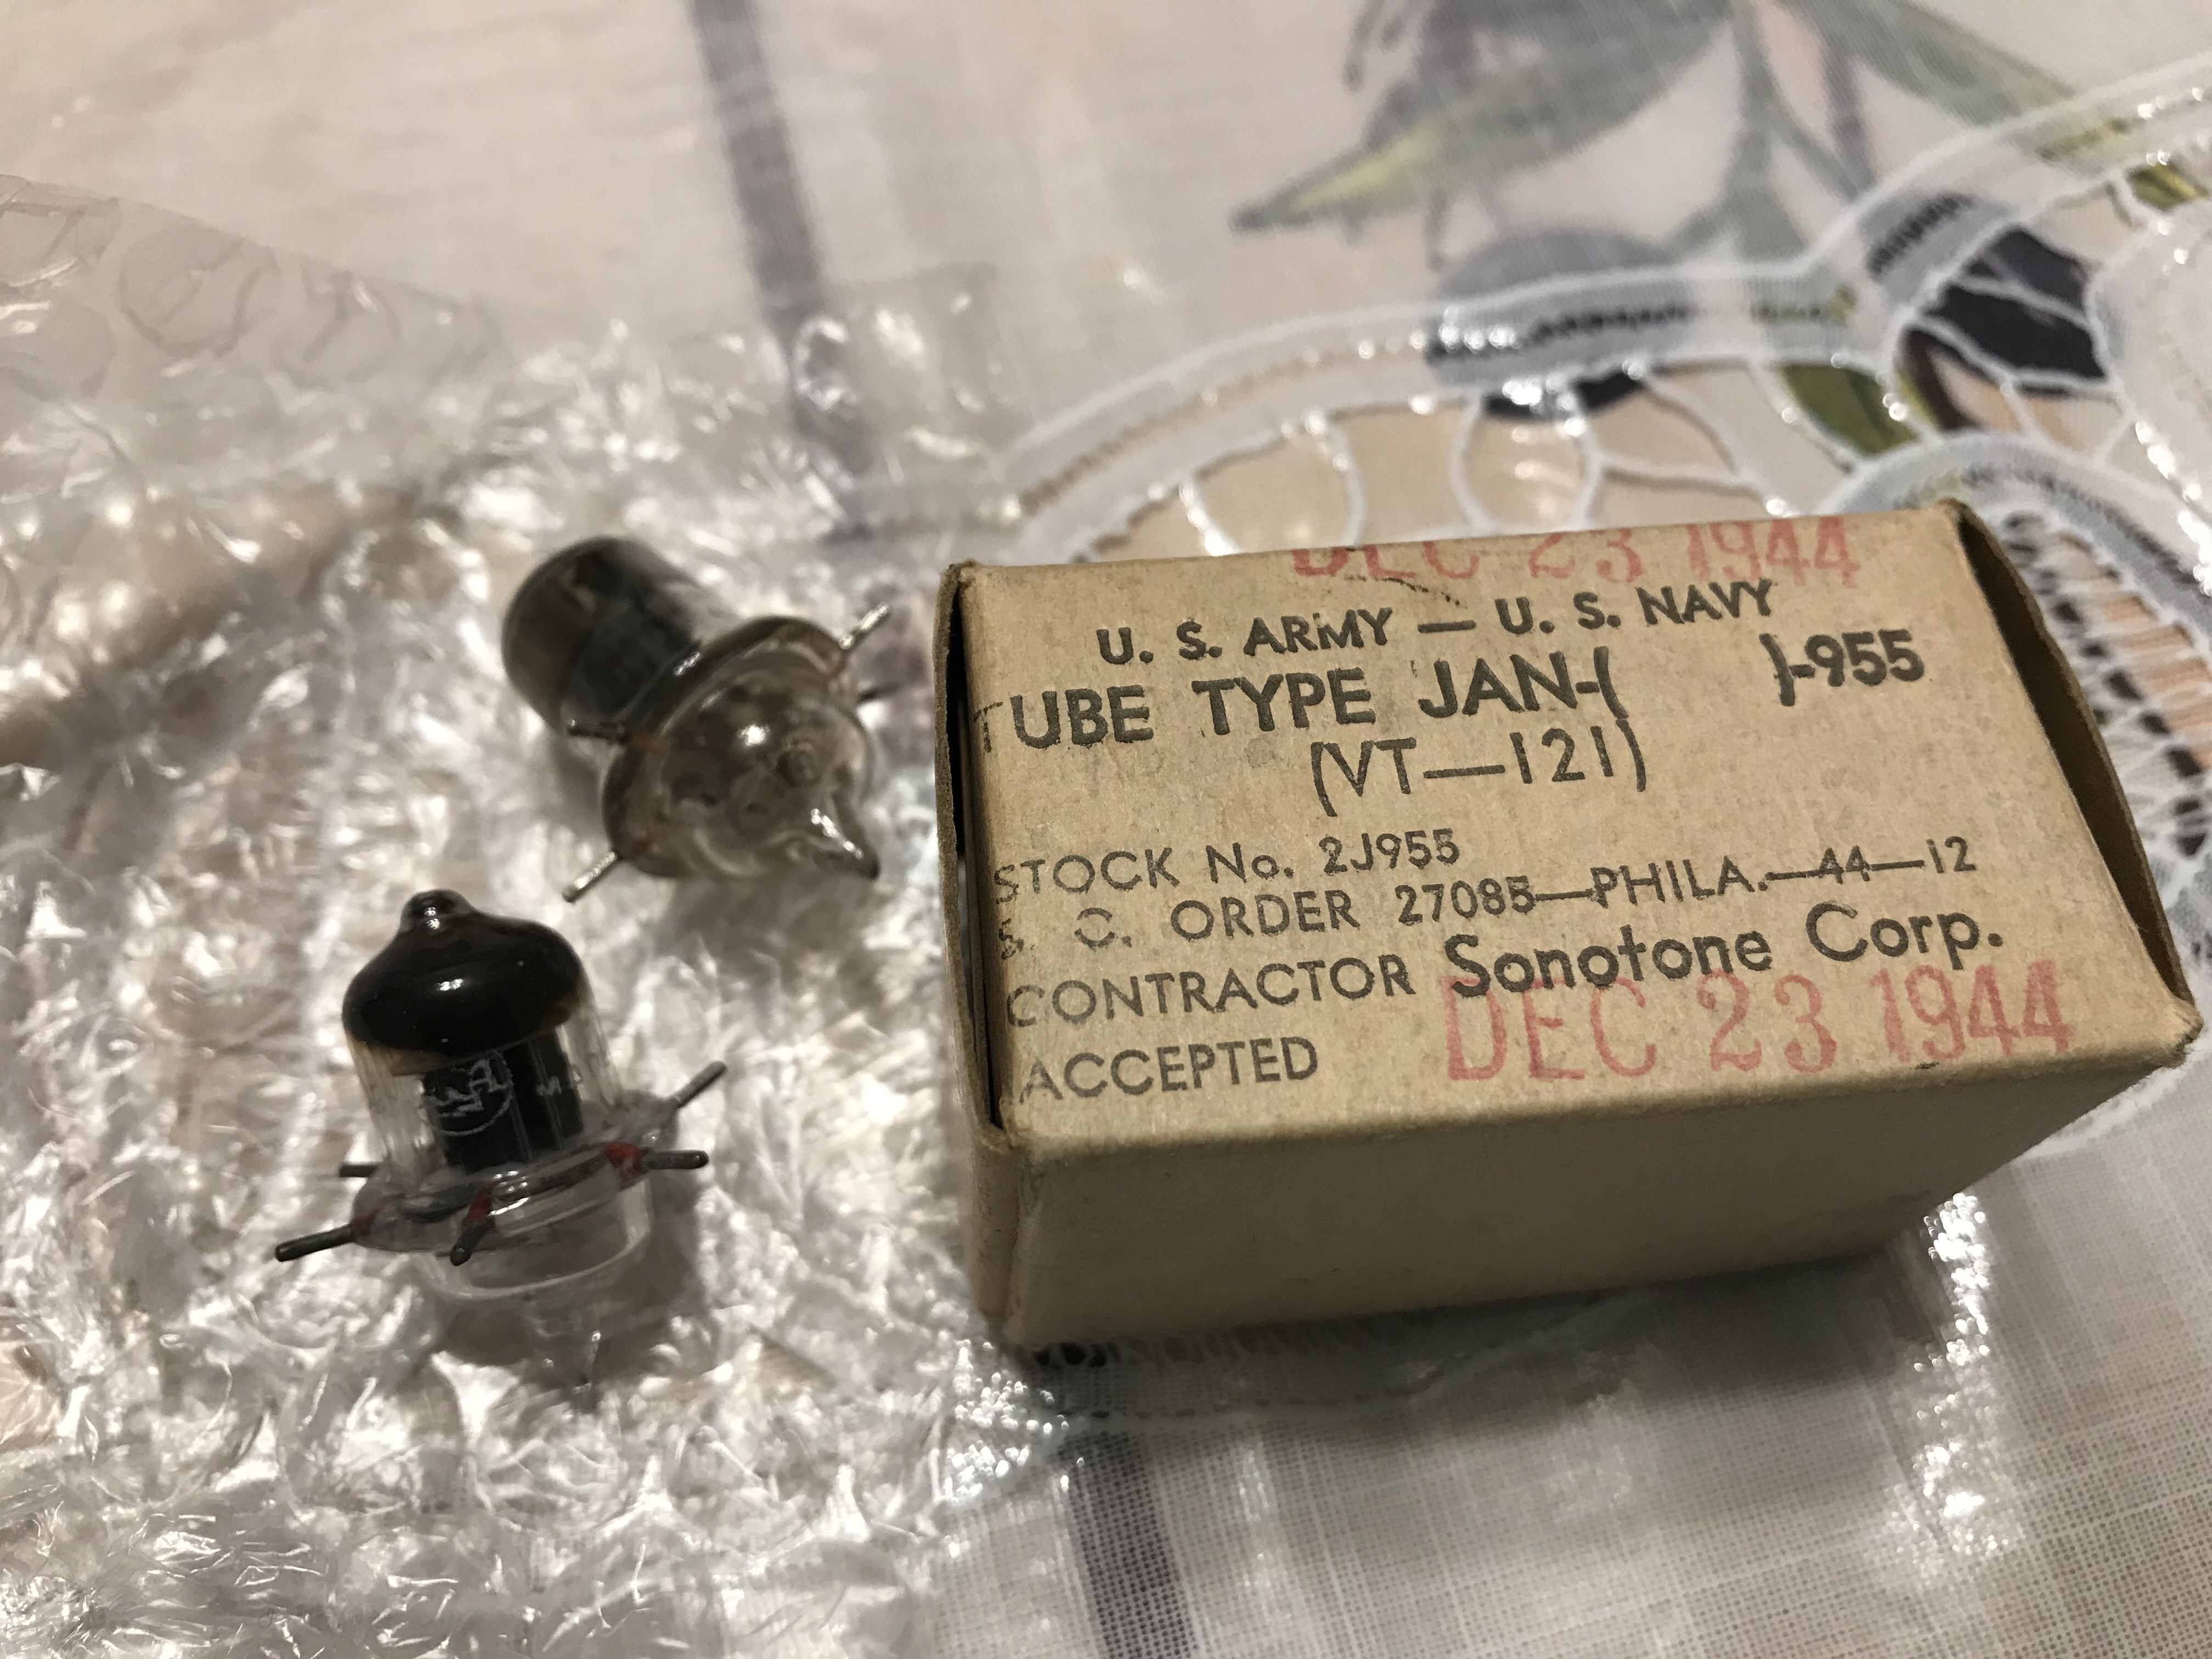
Third one is historical "Acorn" made in 1944. We can find lots of VHF and UHF circuit examples. I hope I will make super-regenerative receiver...
![]()
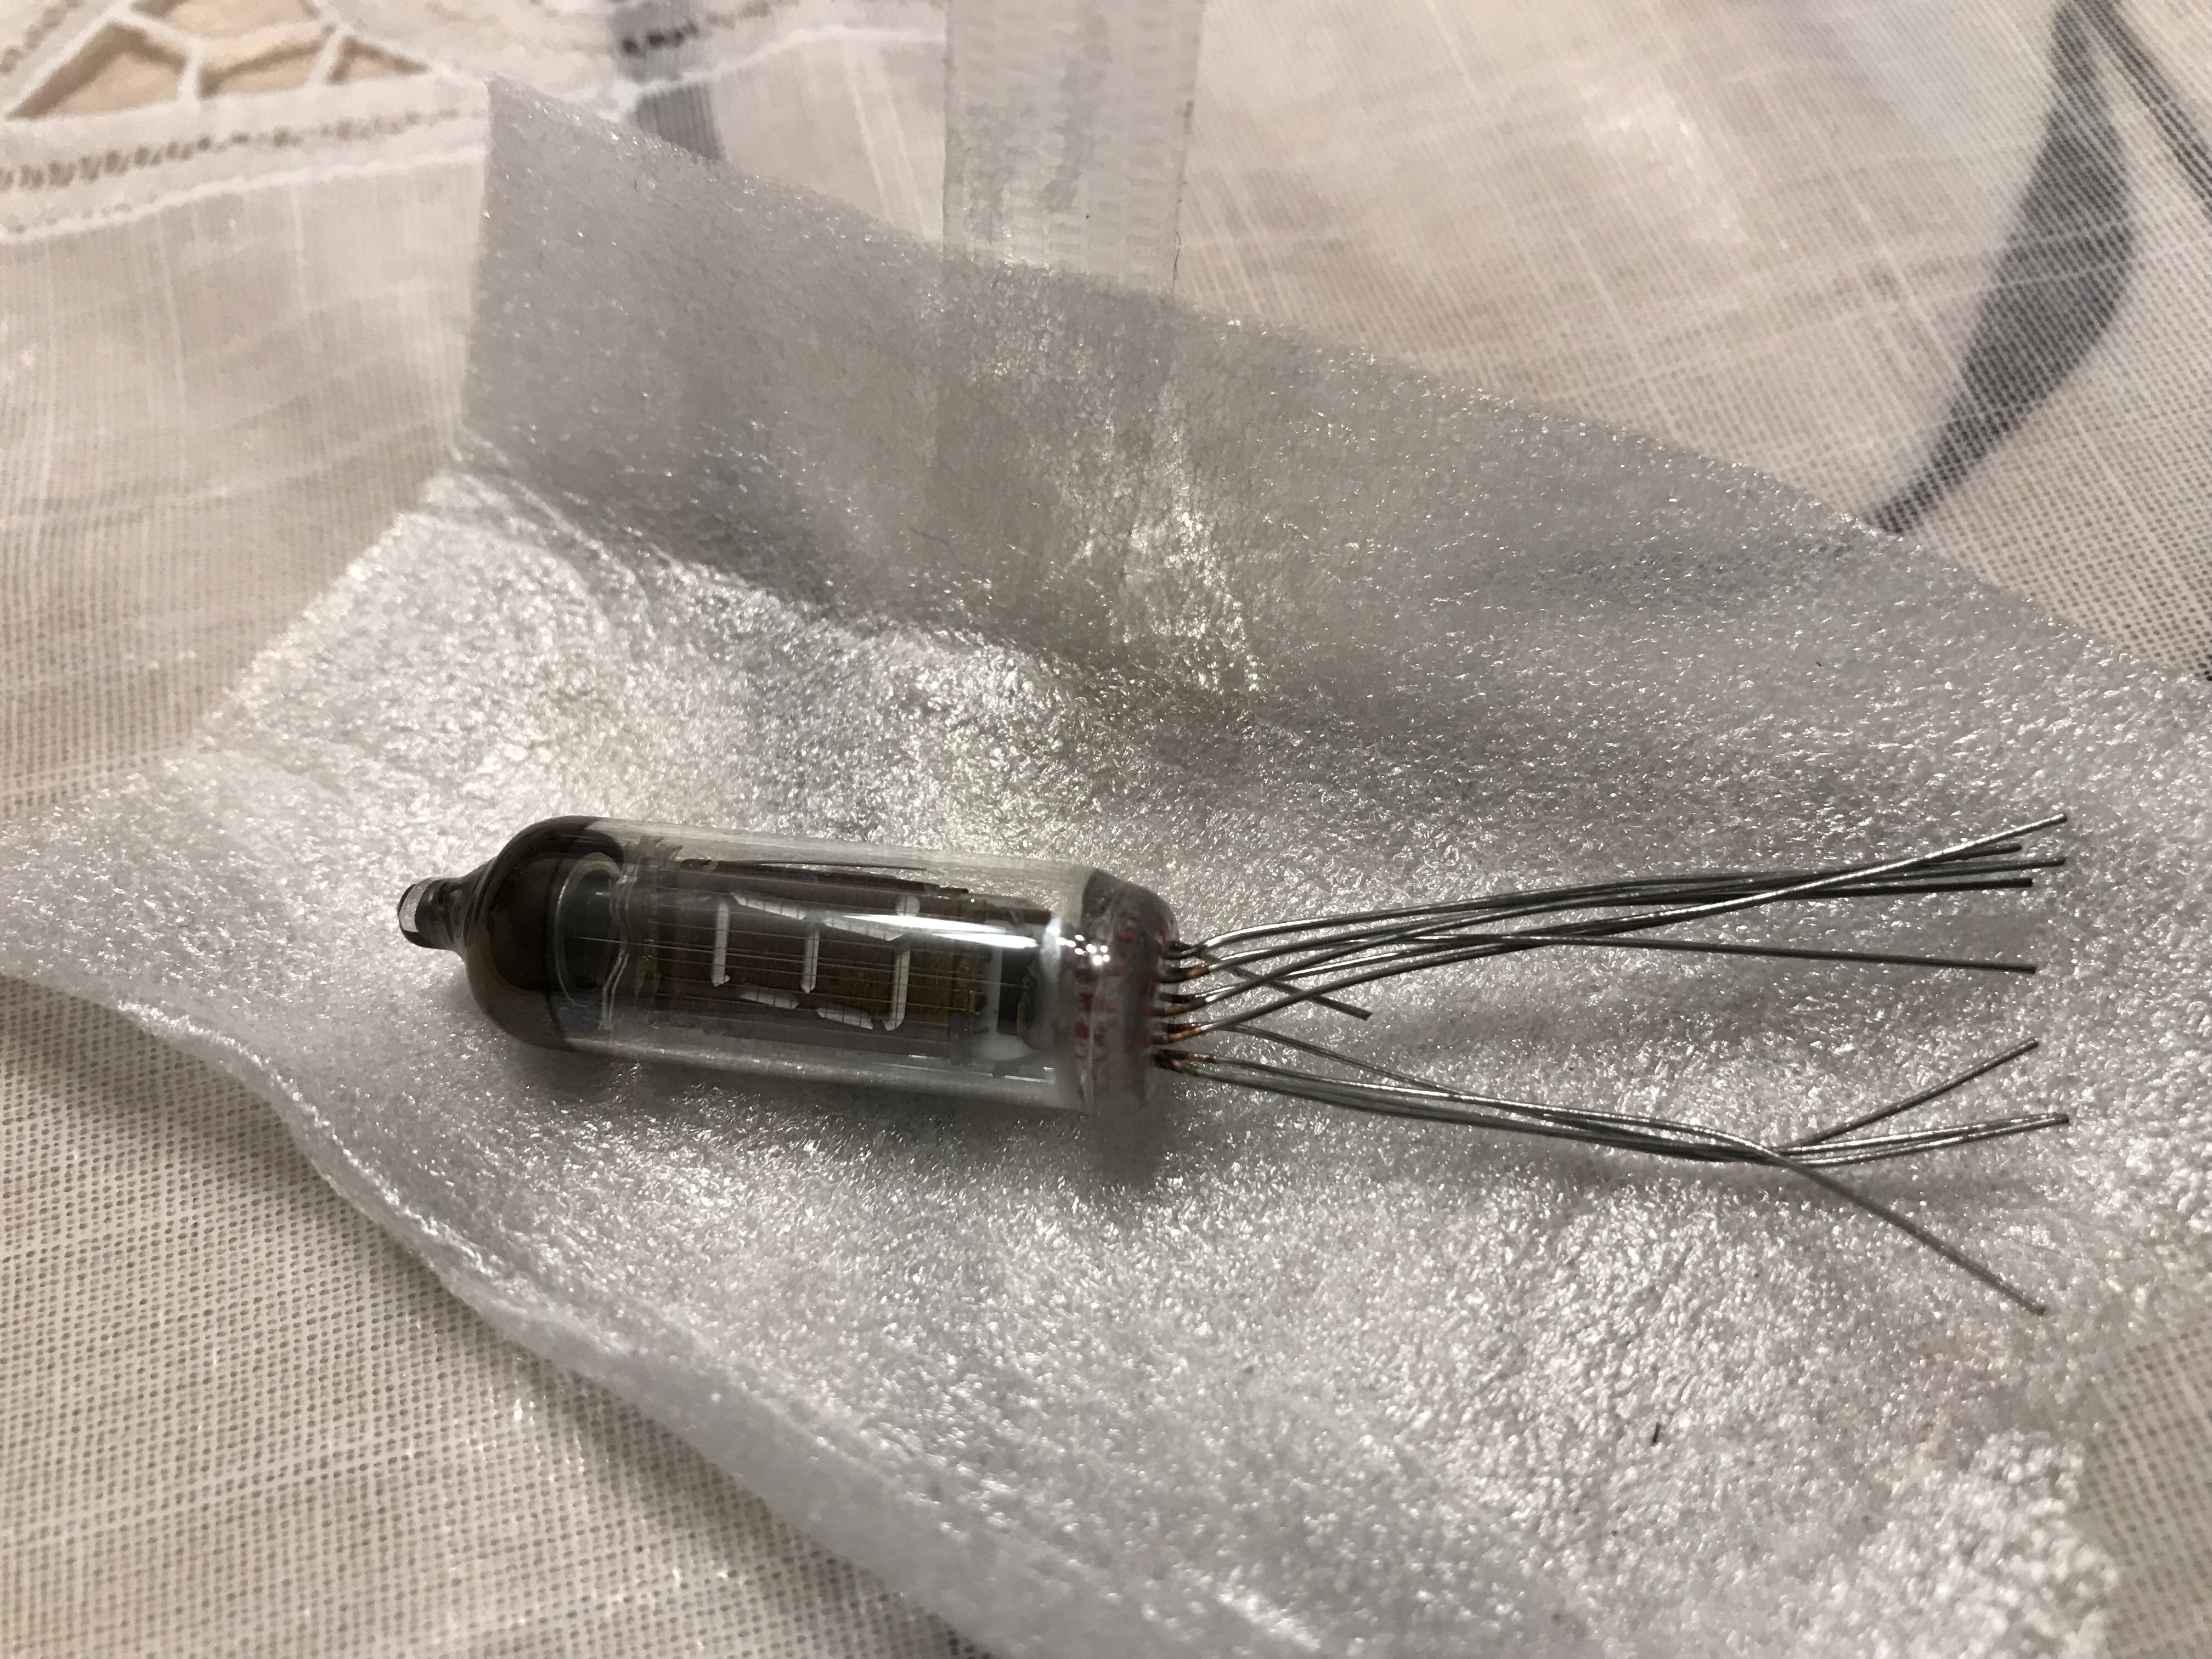
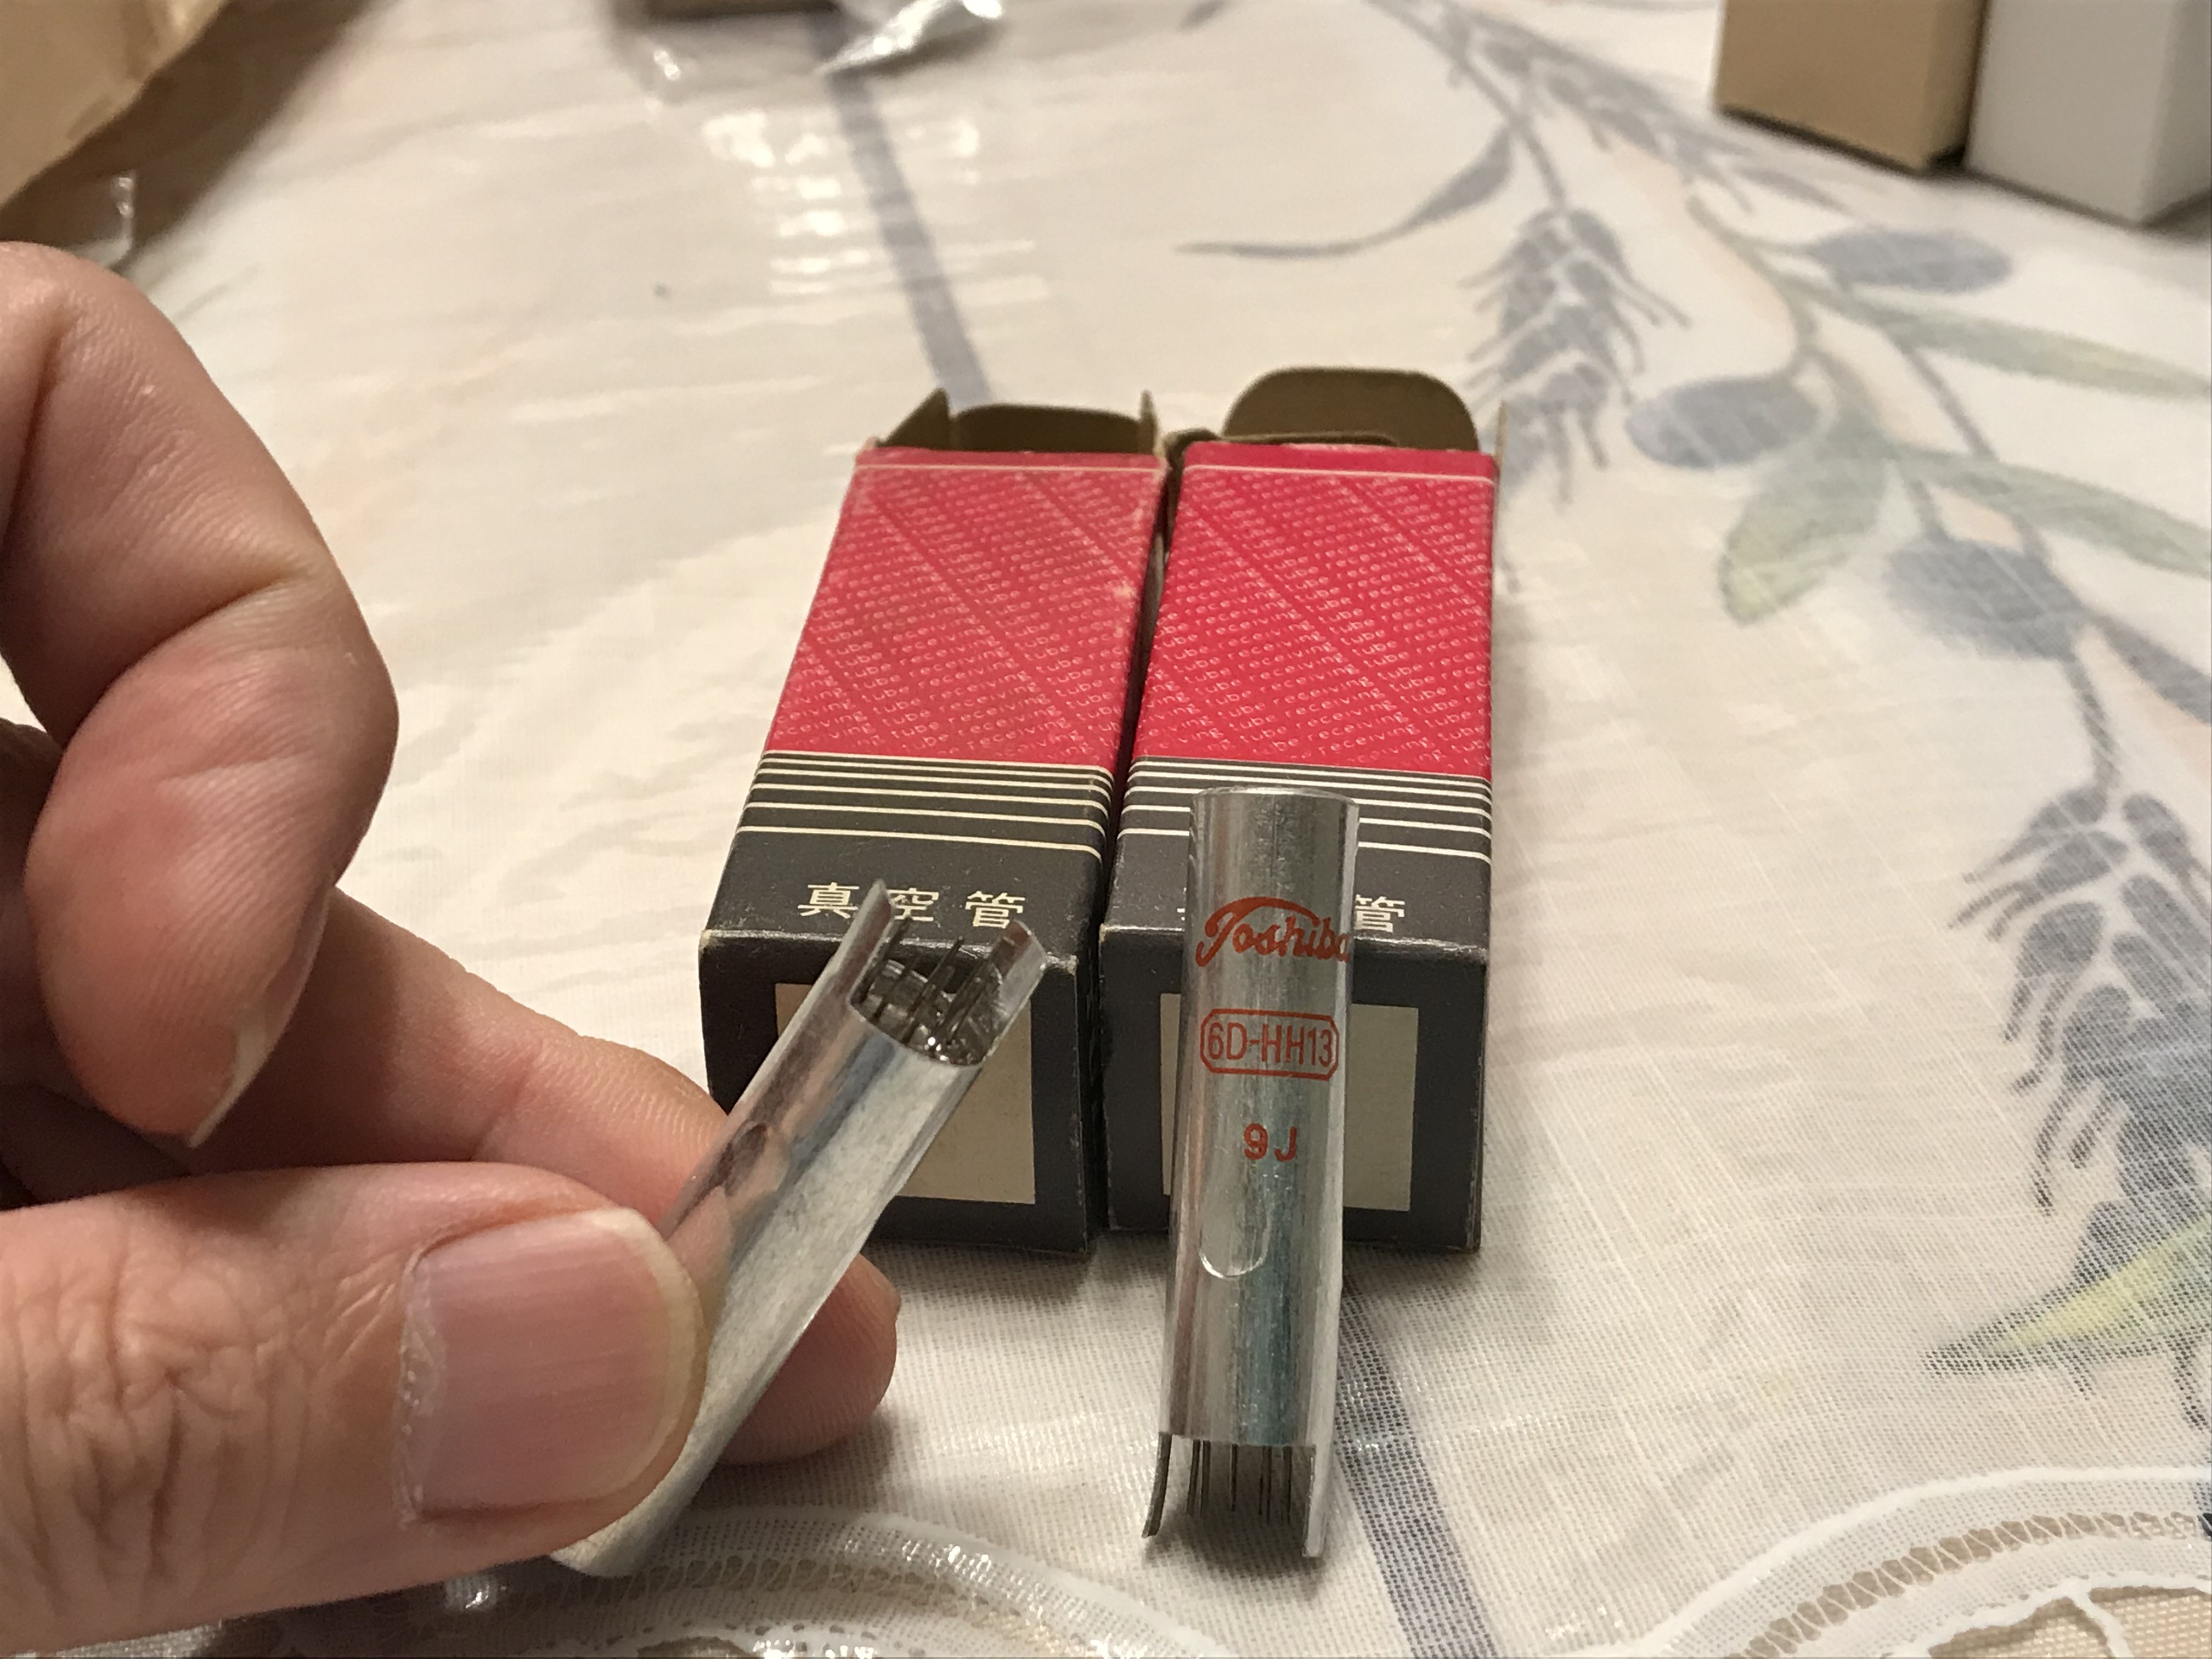
Fourth ones are 6D-HH13, dual triode in the last era of vacuum tube made by Toshiba. It has a longer Nuvistor shape, and was utilized in VHF amplifier..
![]()
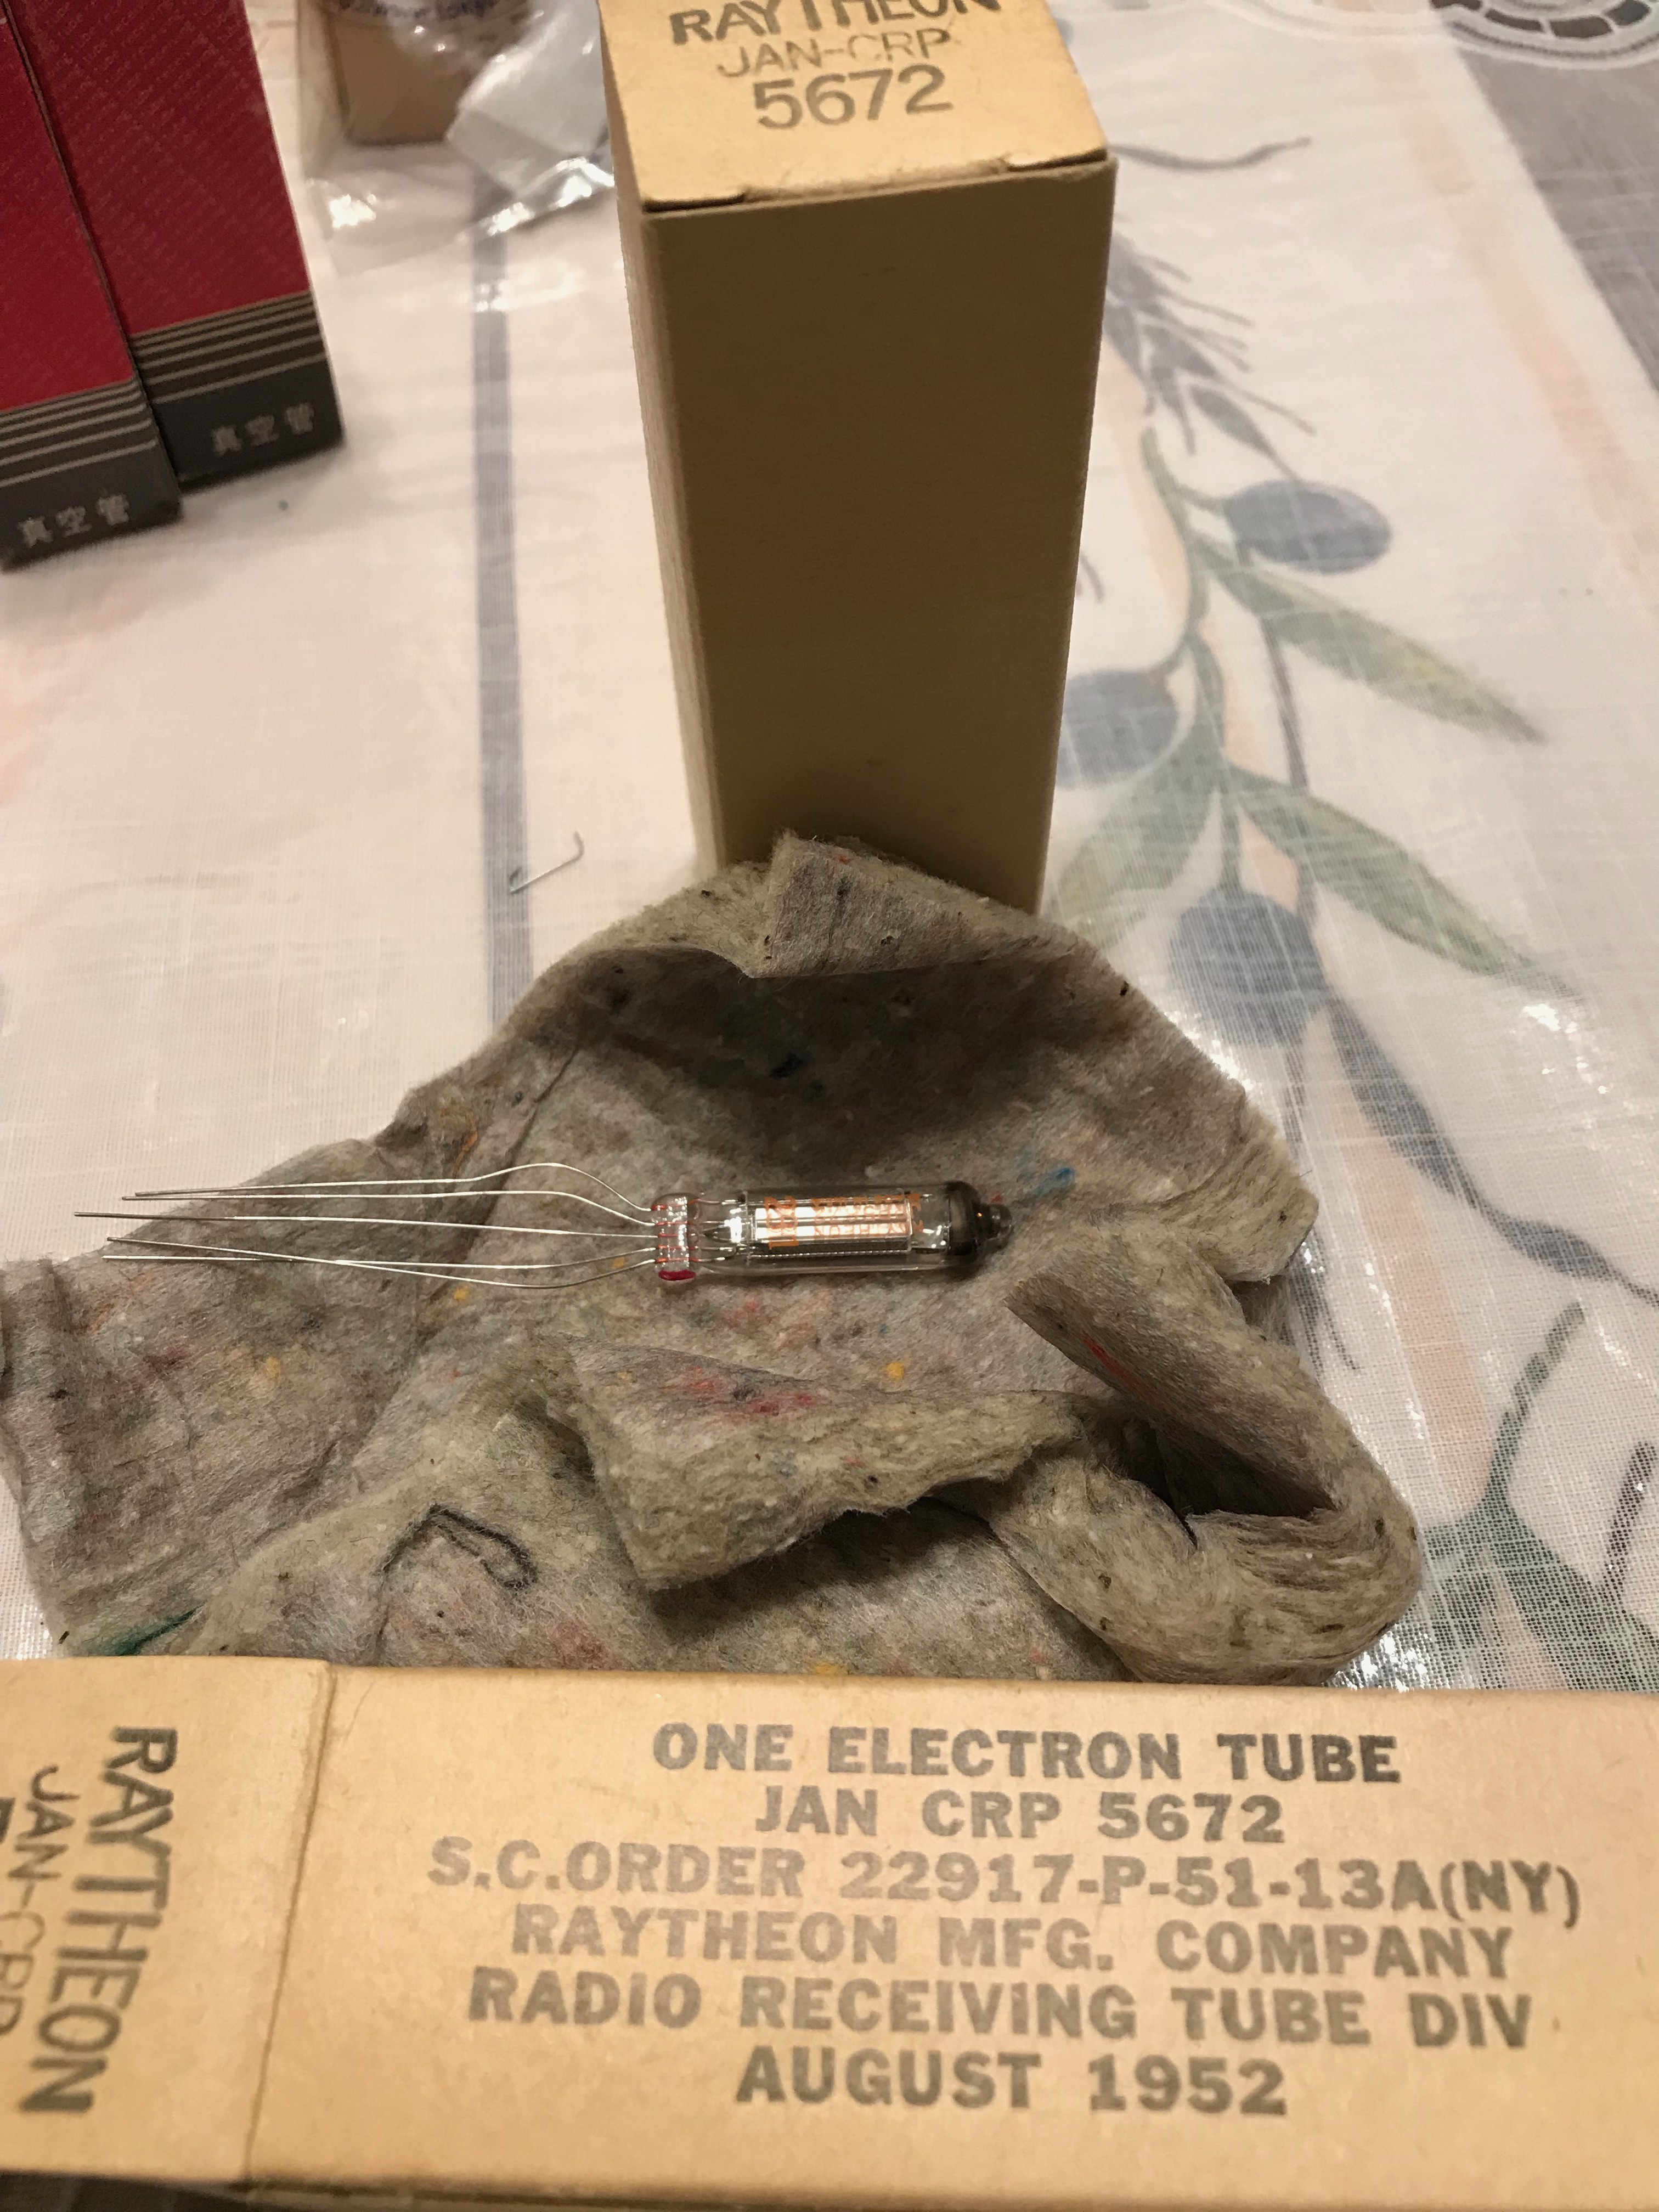
The last one is 5672, a power pentode by Raytheon in 1952. All of them are around 500-800JPY in Japan. So still lots of vacuum tube is available, and I guess LPC810 will be available for coming tens years..?
-
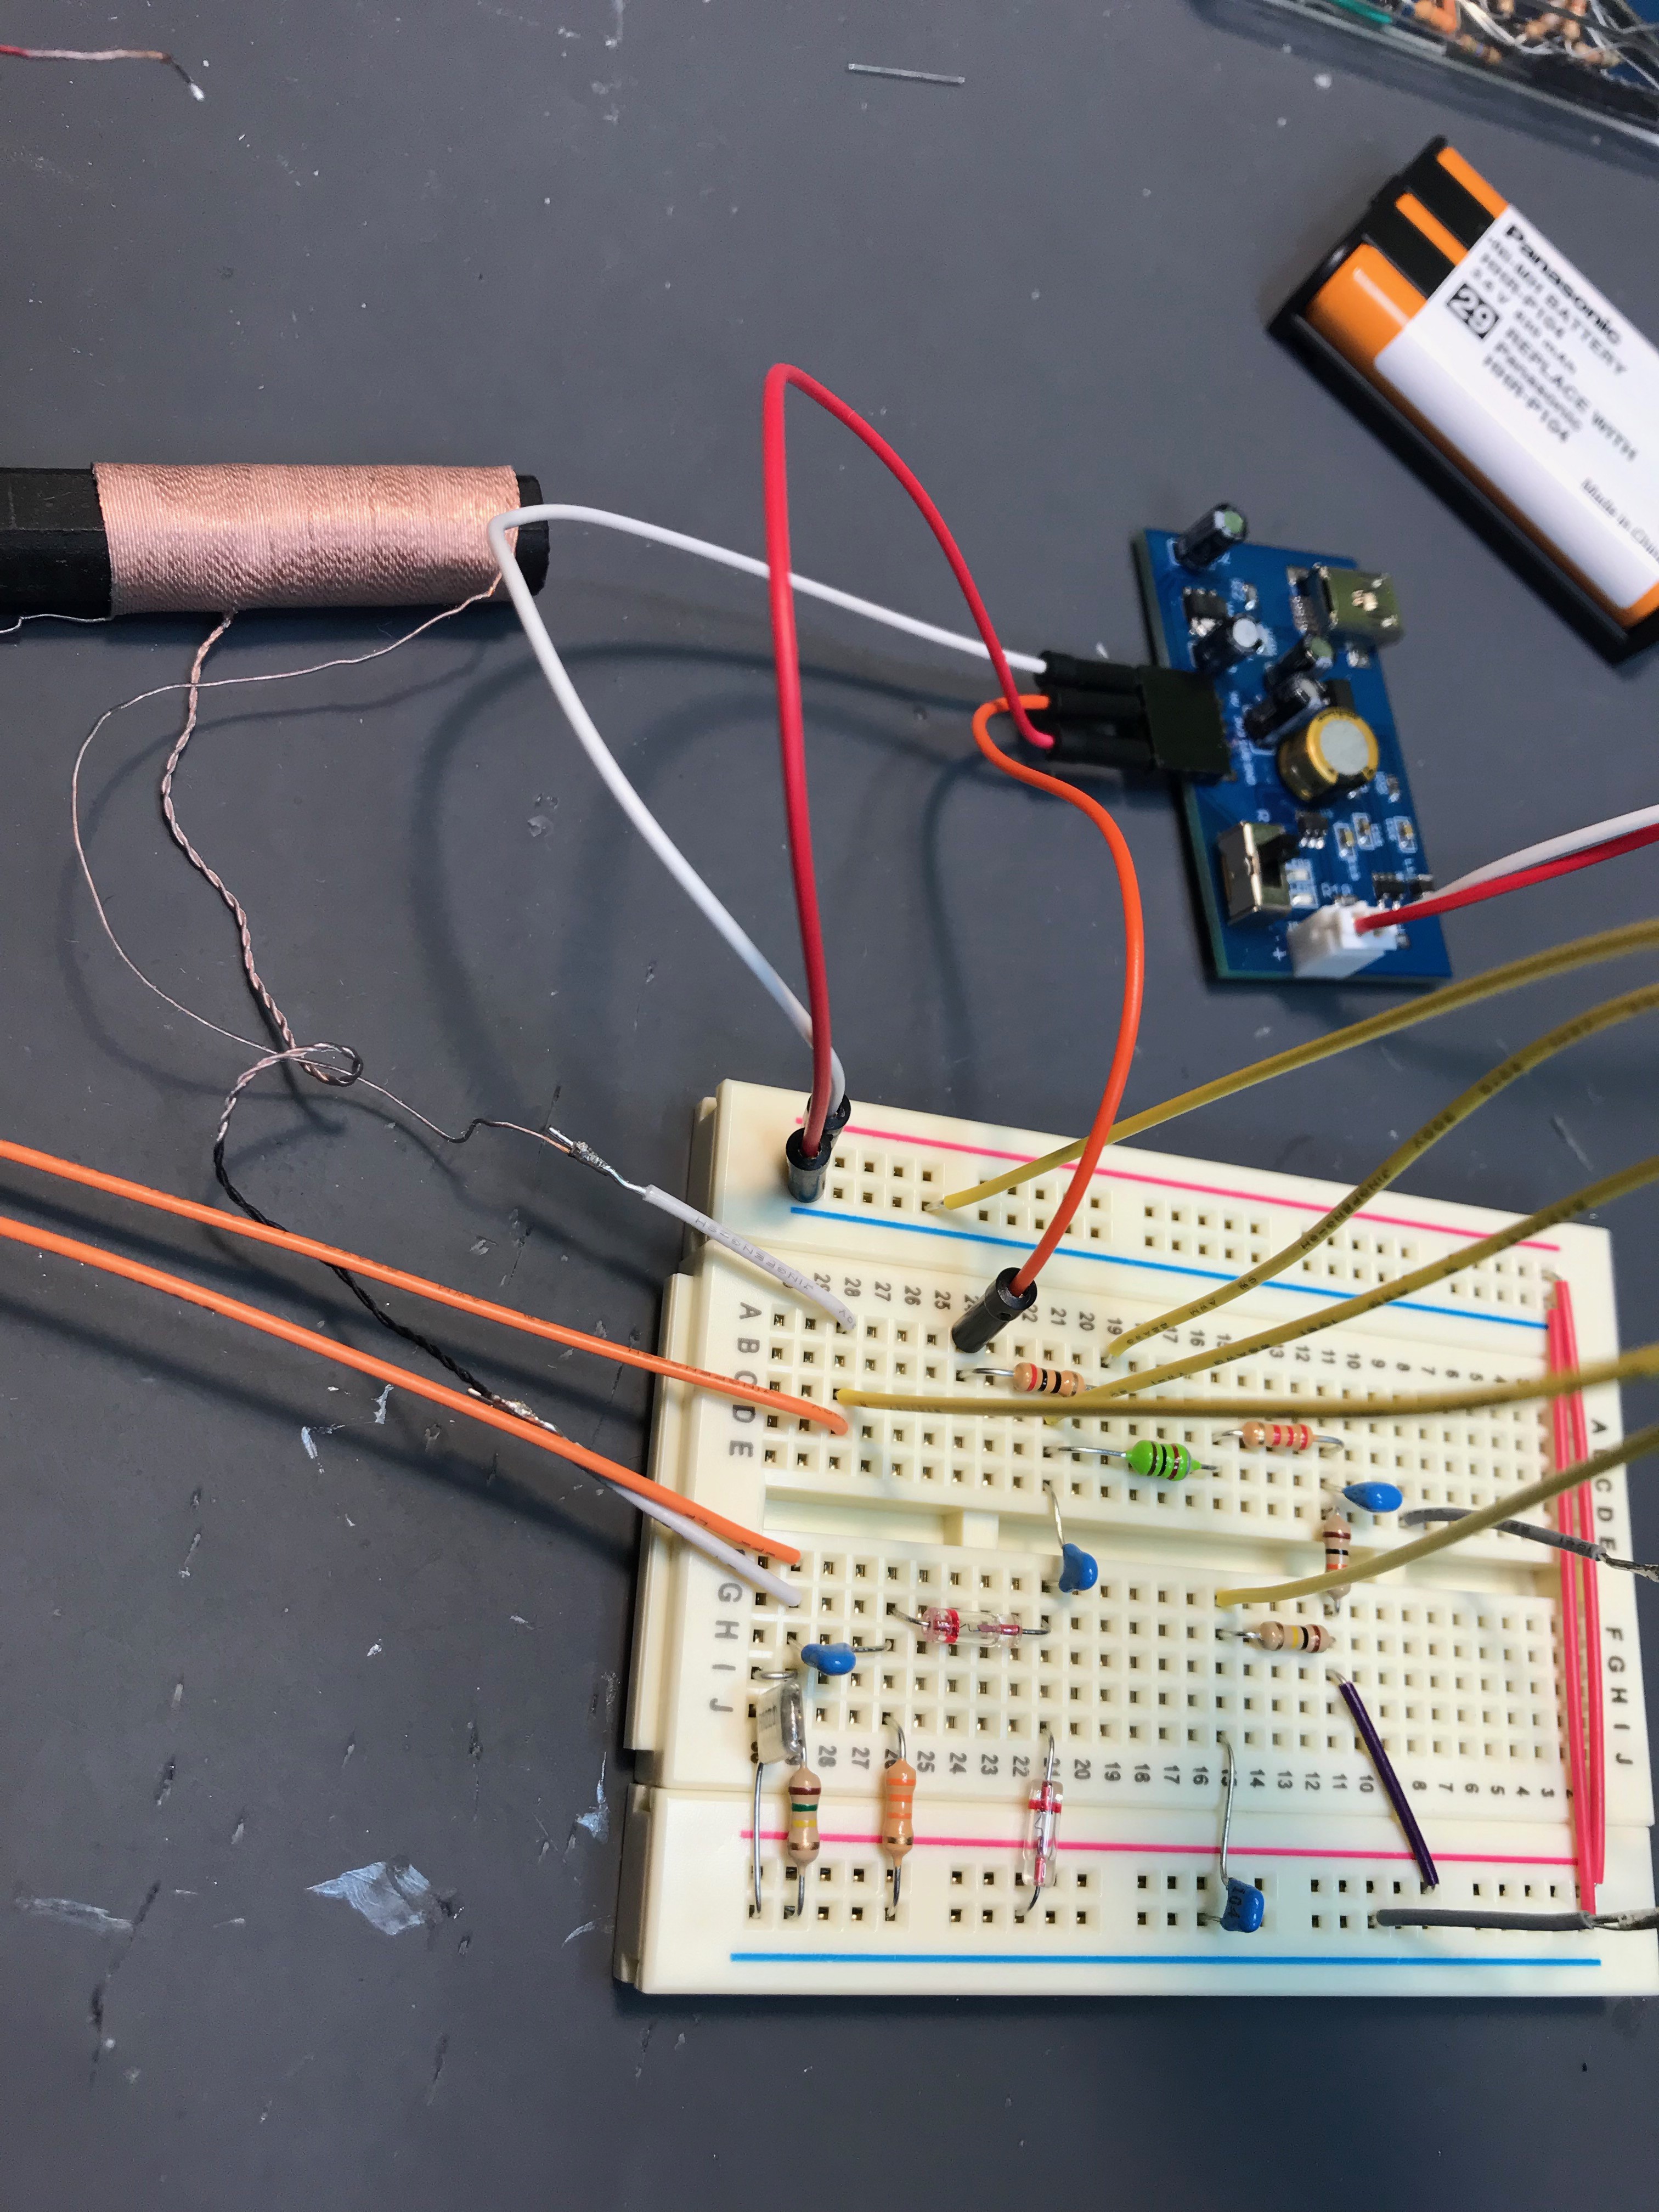
How to start vacuum tube experience on breadboard?
06/15/2019 at 05:46 • 0 commentsToday I will show how to start your vacuum tube experience on solder less breadboard.
![]()
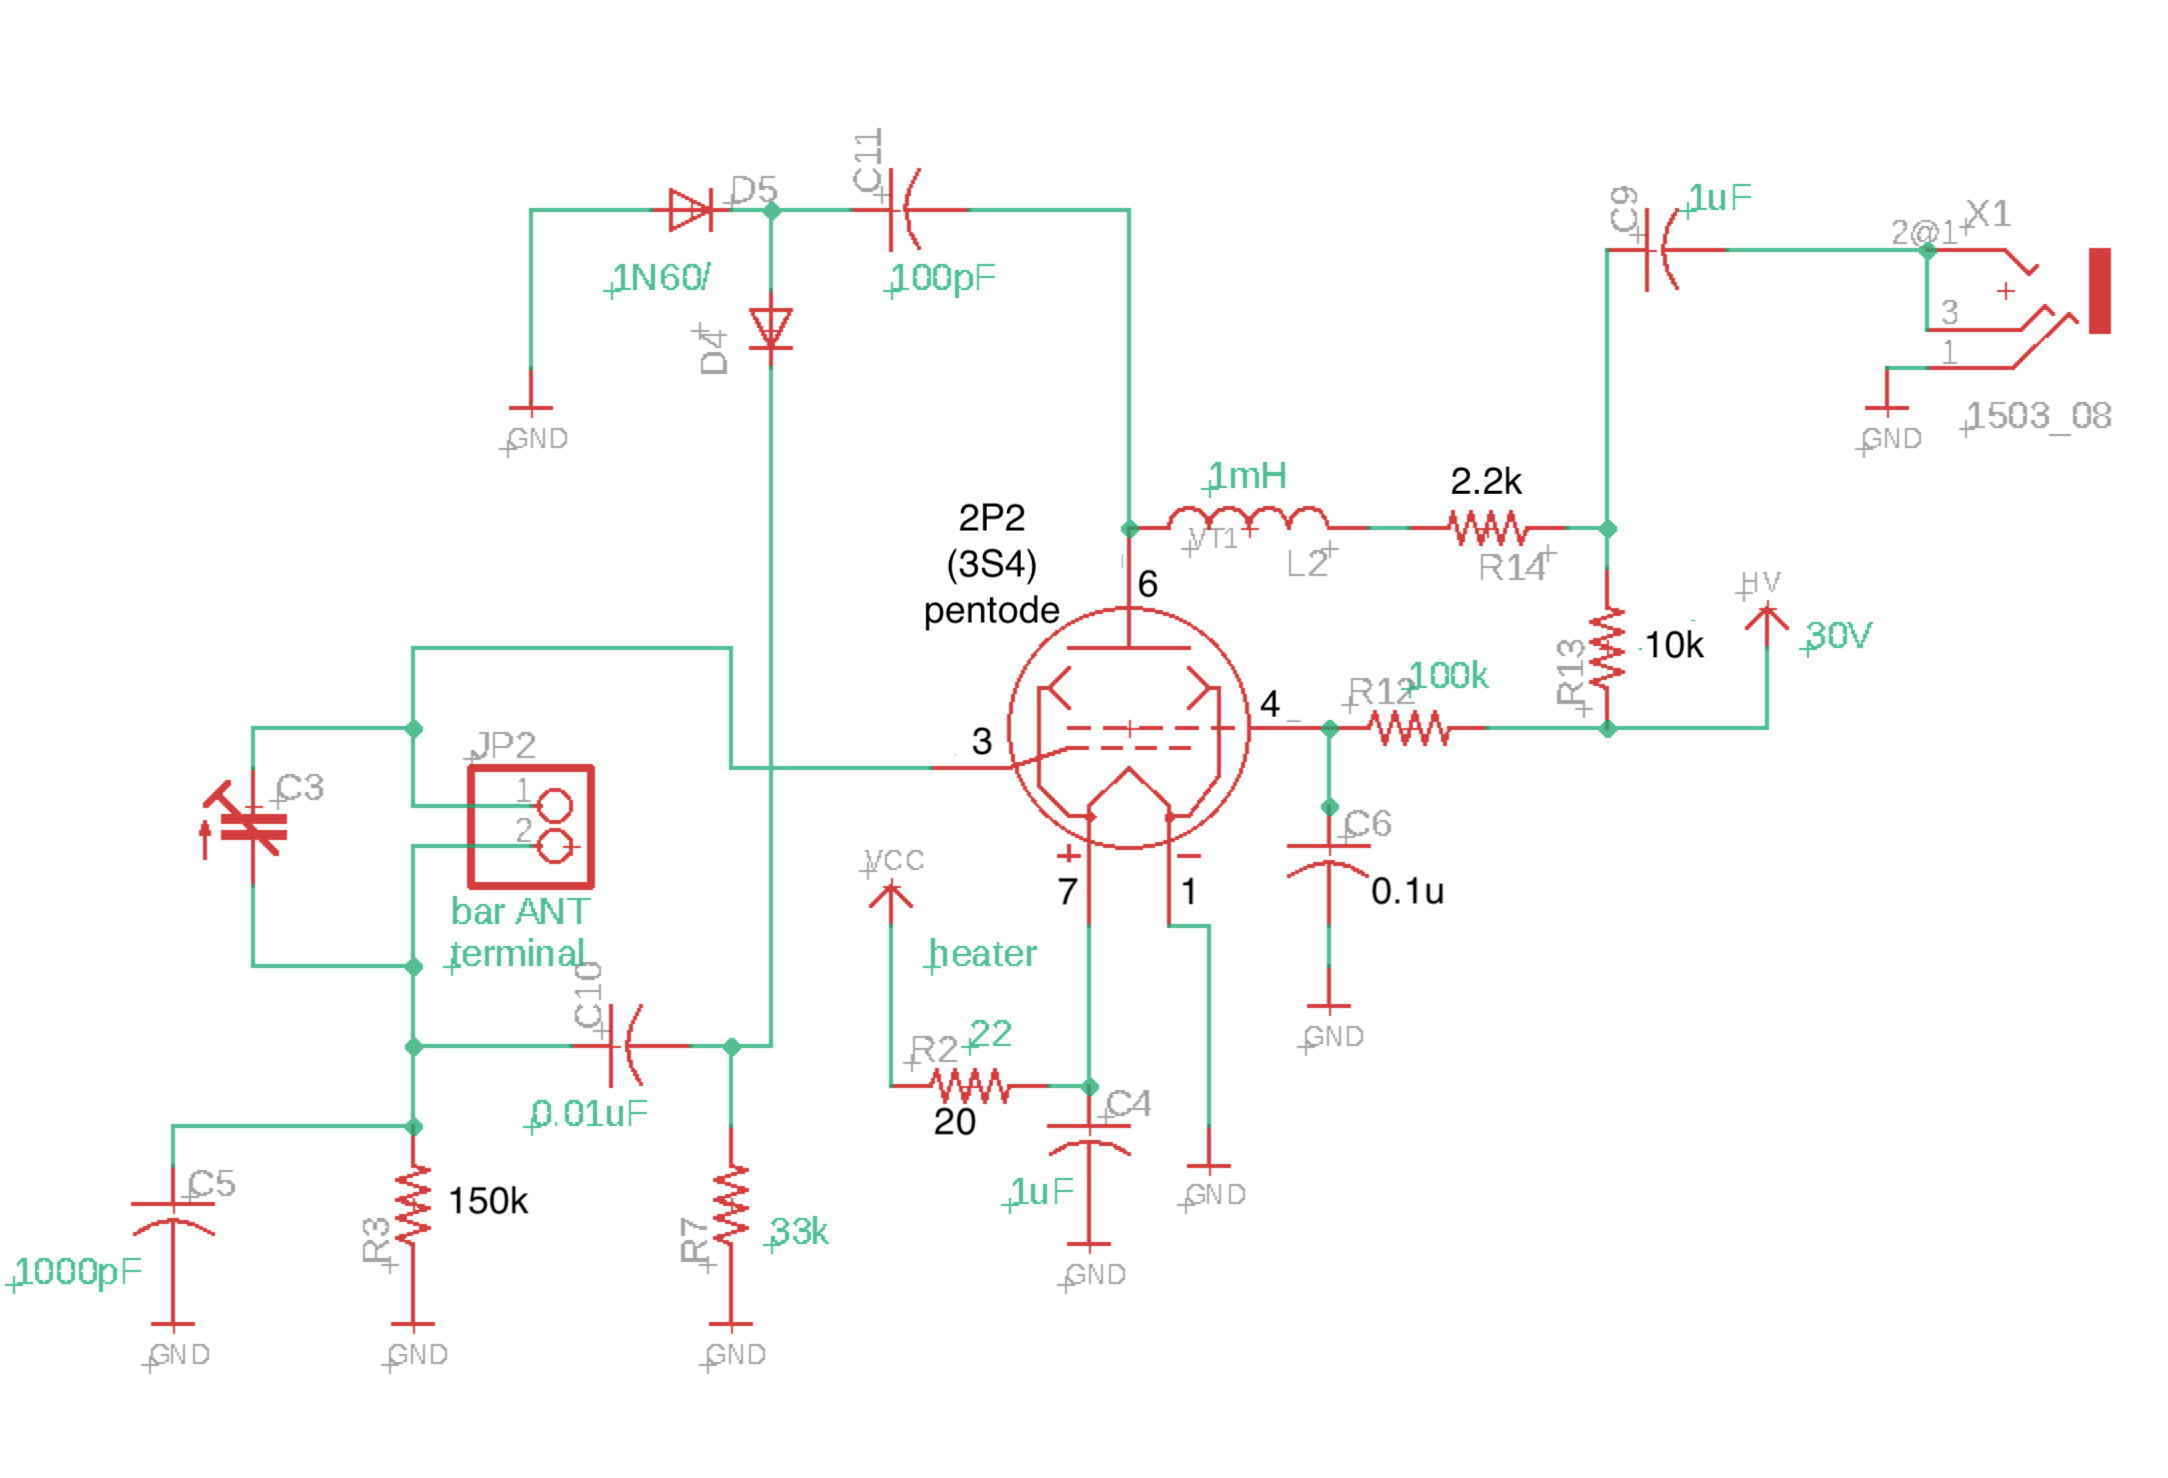
This is the objective circuit of today. It is reflex single tube radio and quite simple but shows very high sensitivity (and not so unstable as regenerative receiver..) Let's start now!
![]()
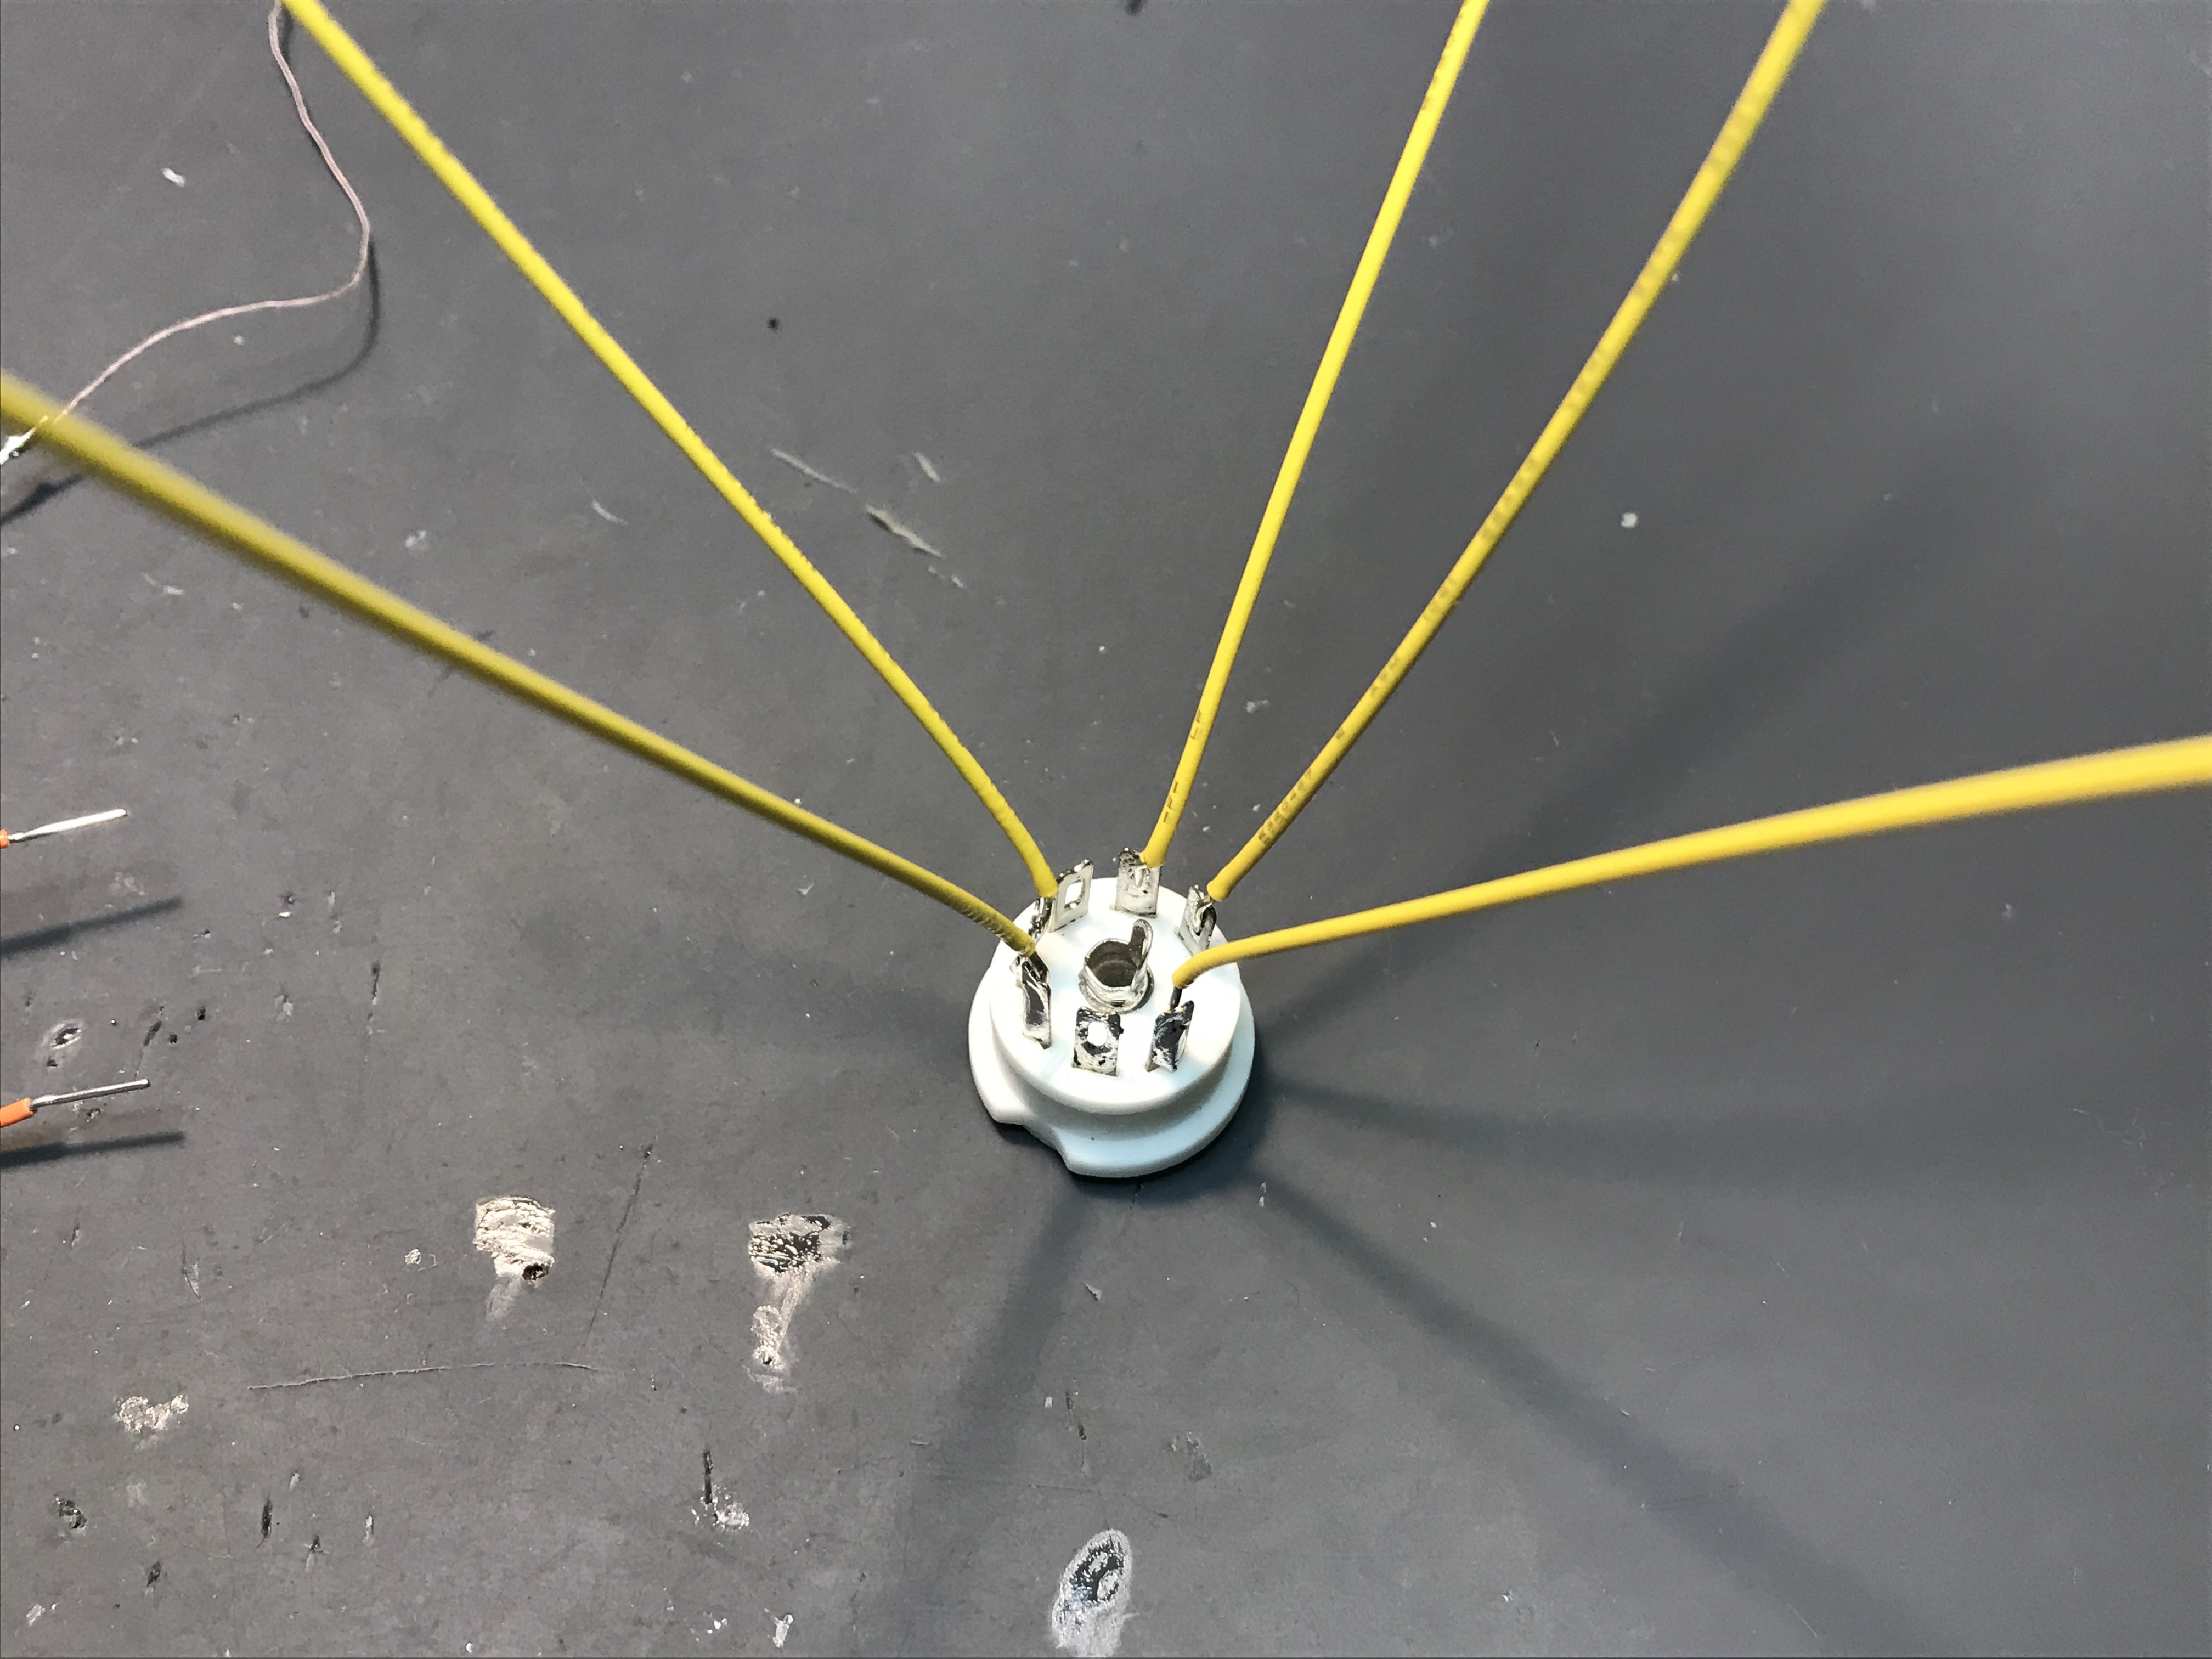
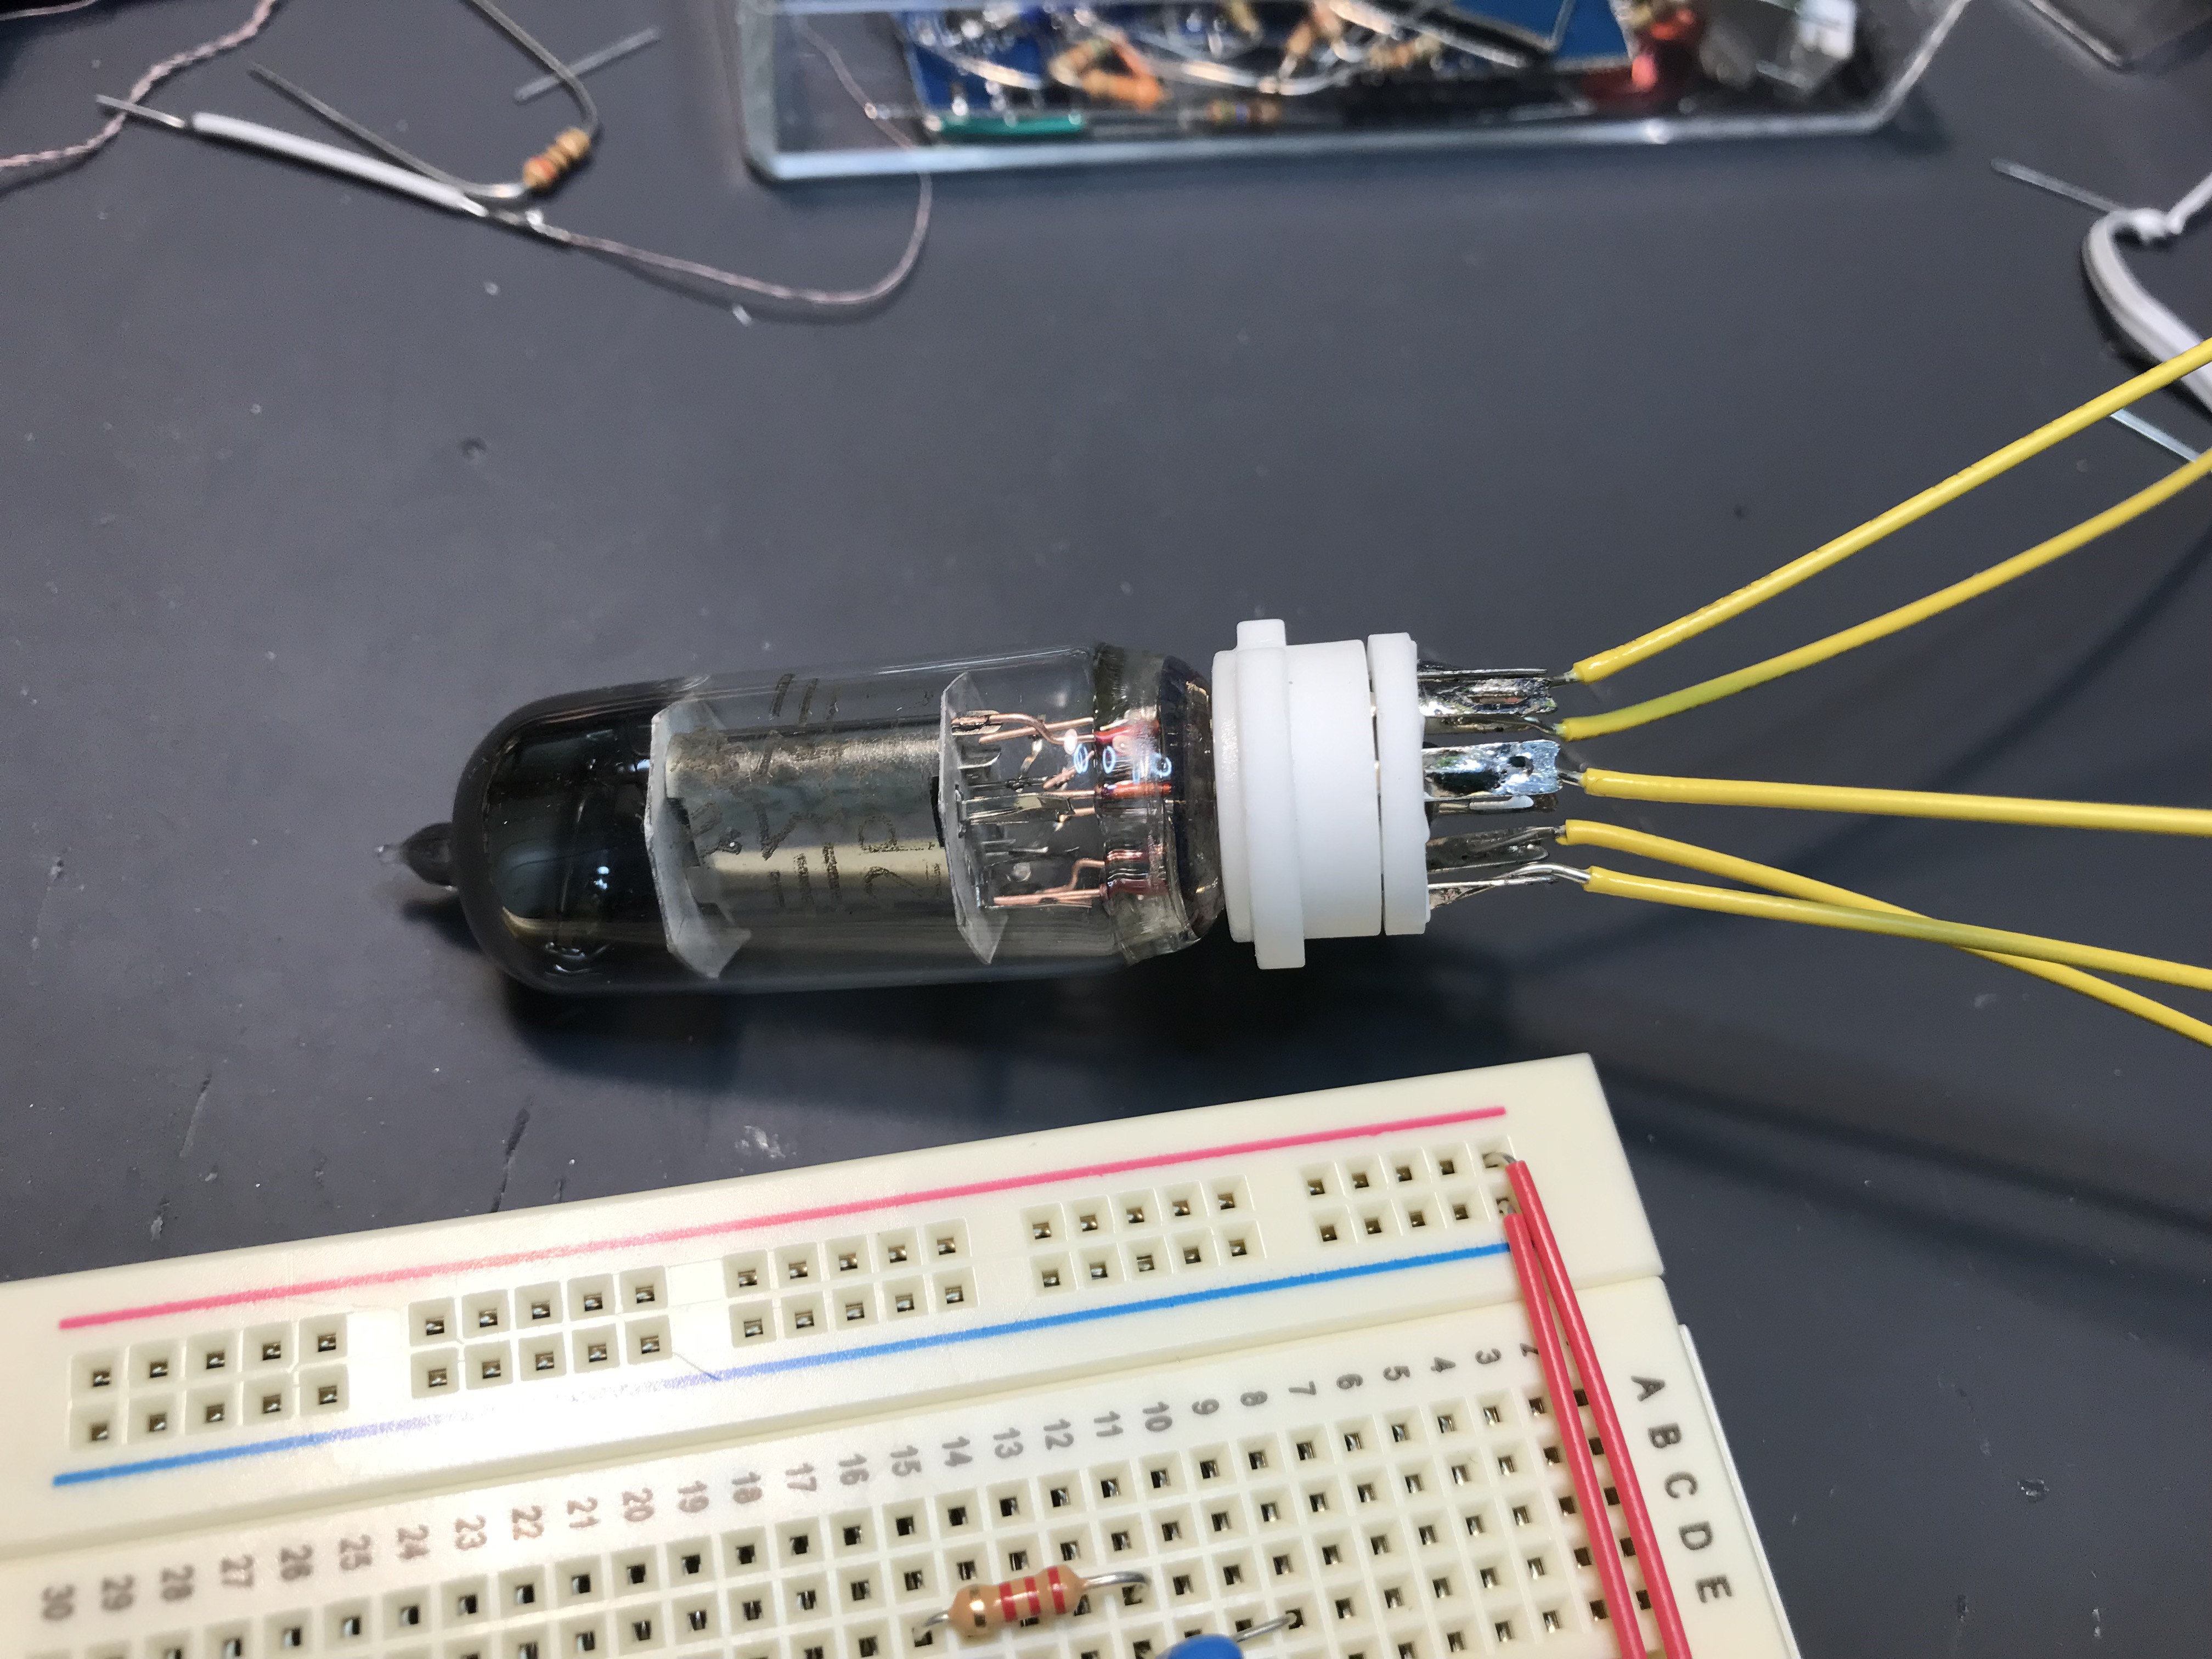
First of all, let's solder the wires to vacuum tube socket. Except of subminiature tube, vacuum tube requires "socket" (originated in incandescent lamp..). For breadboard connection, let's solder the wires to the pins. Some of vacuum tube as NC pin or overlapping pin, so not always we don't need every pins soldered.
![]()
This is the completed one. 2P2(3S4) has 2-6 pin overlapping and also #5 is the heater center point and this time we don't need to solder 2 and 5 pins.
![]()
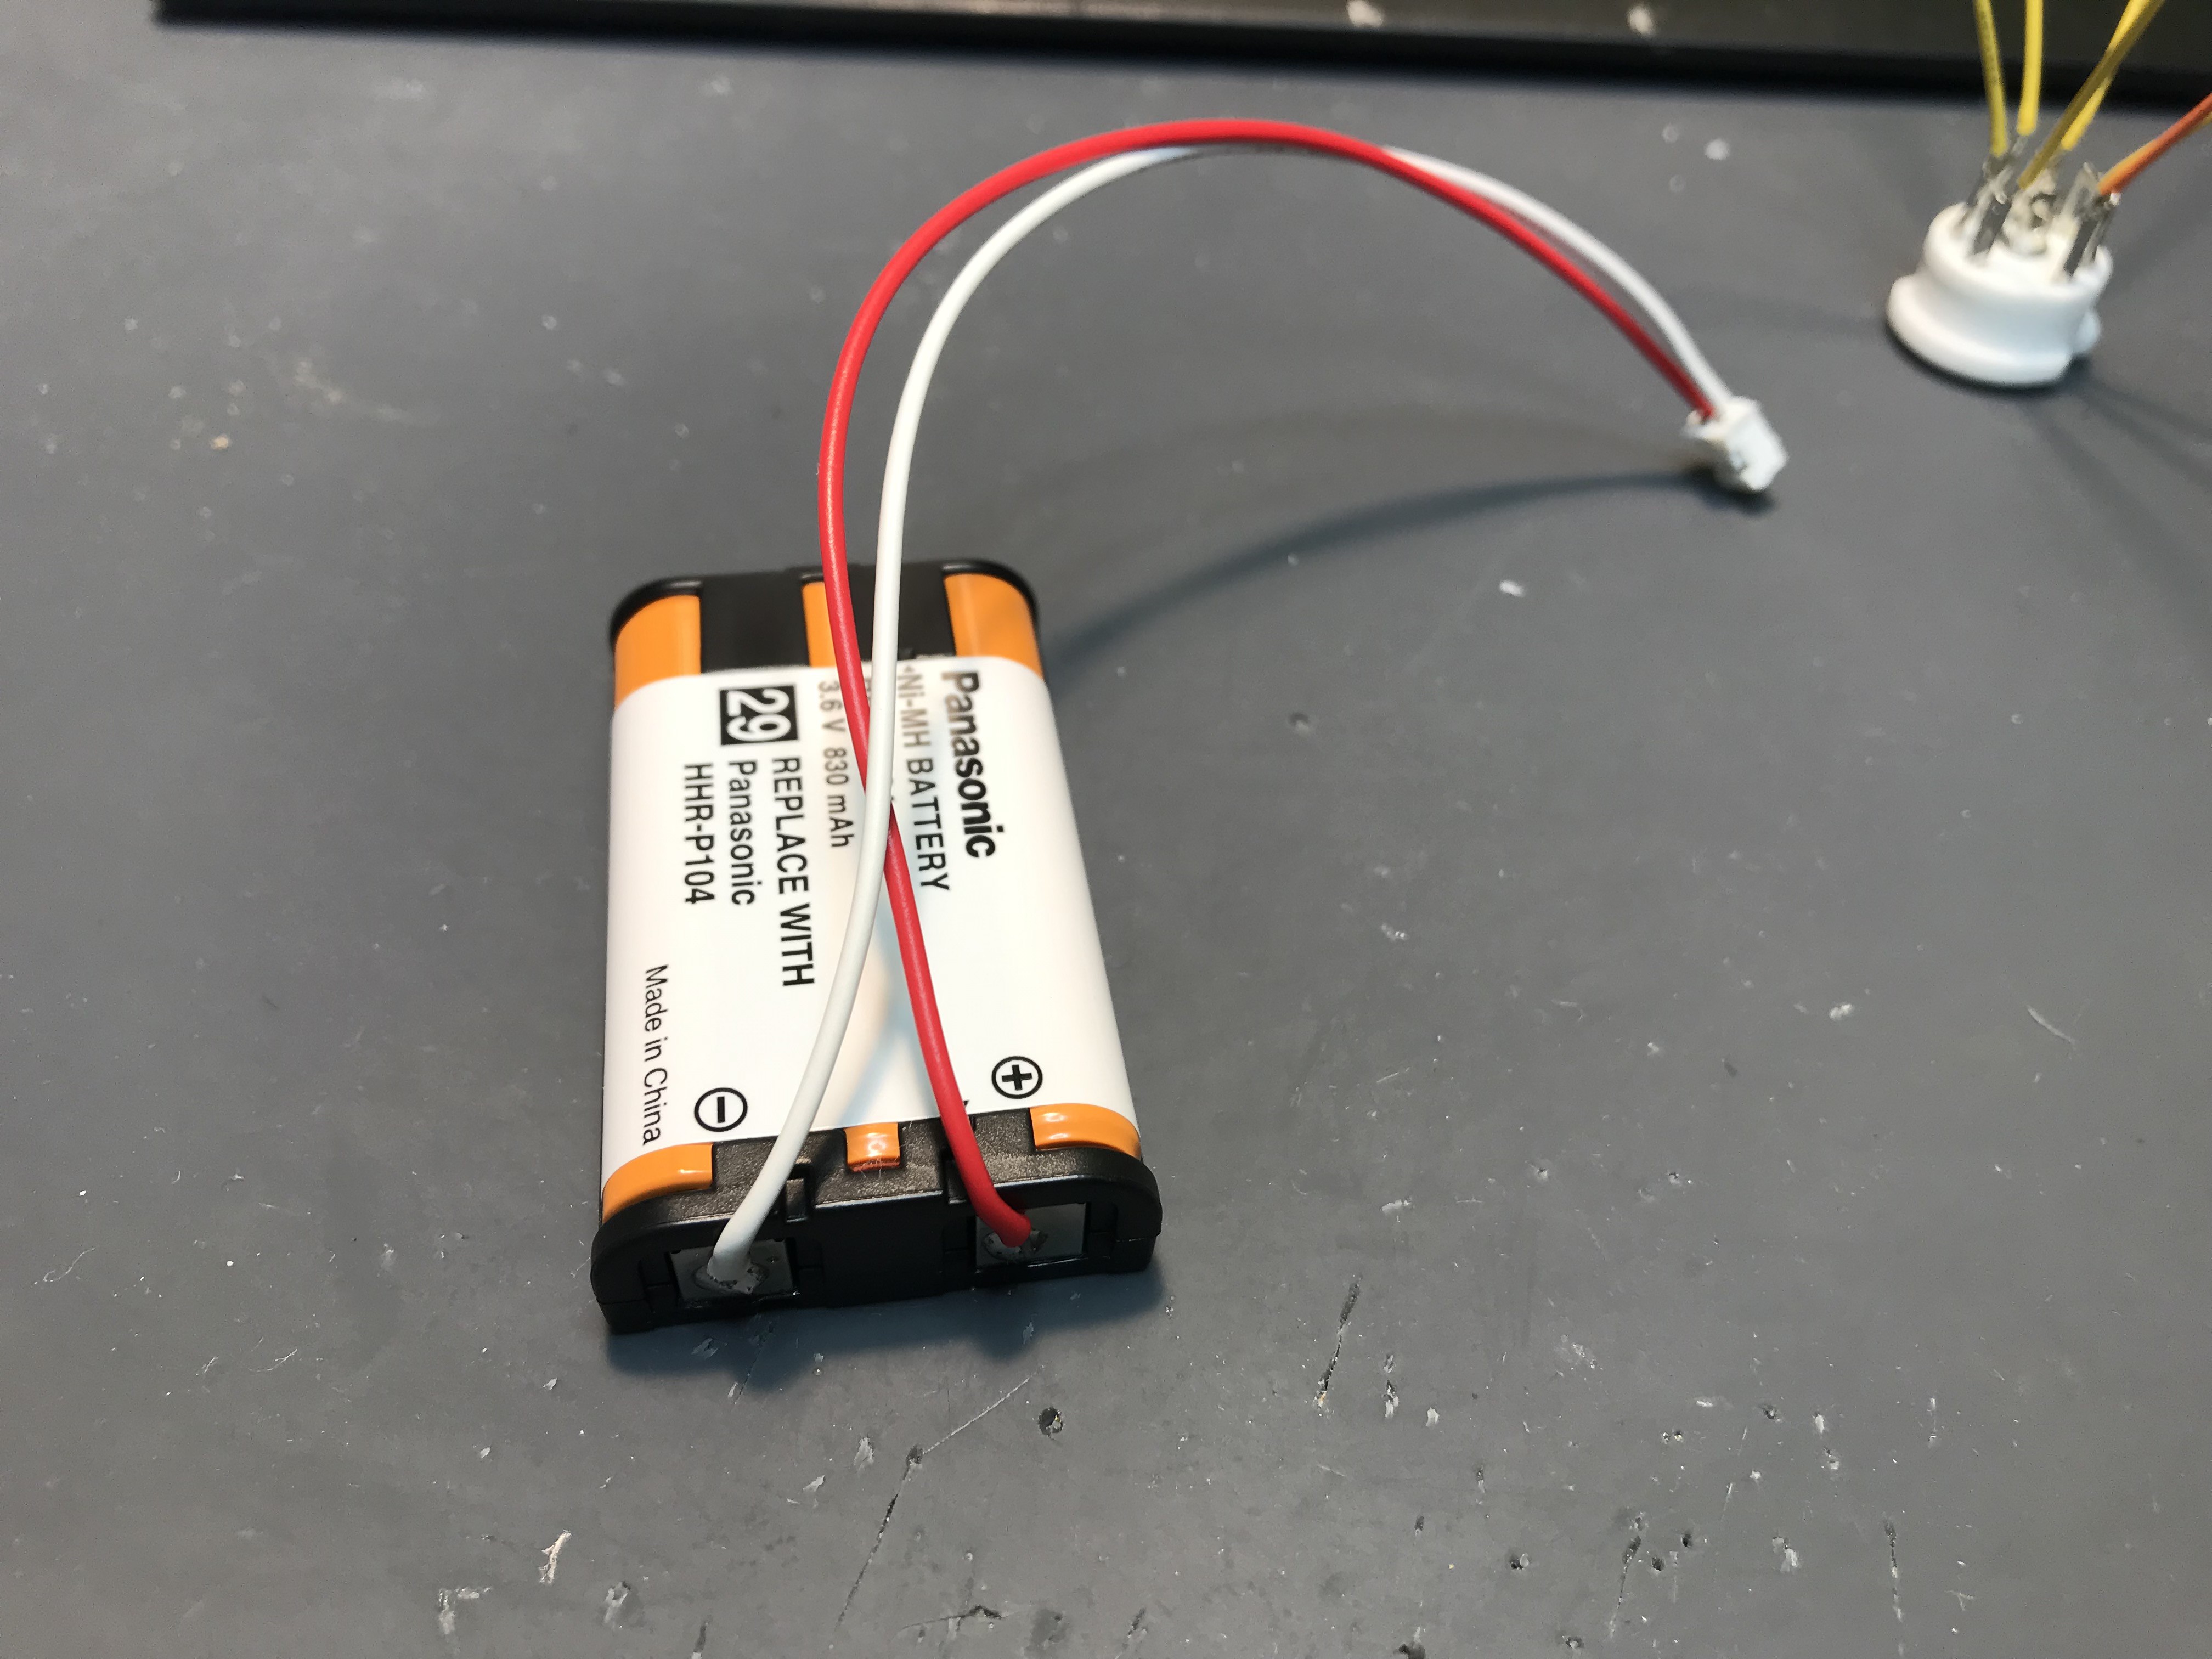
And now let's solder the battery connector as above. Please keep "red" to +. and...
![]()
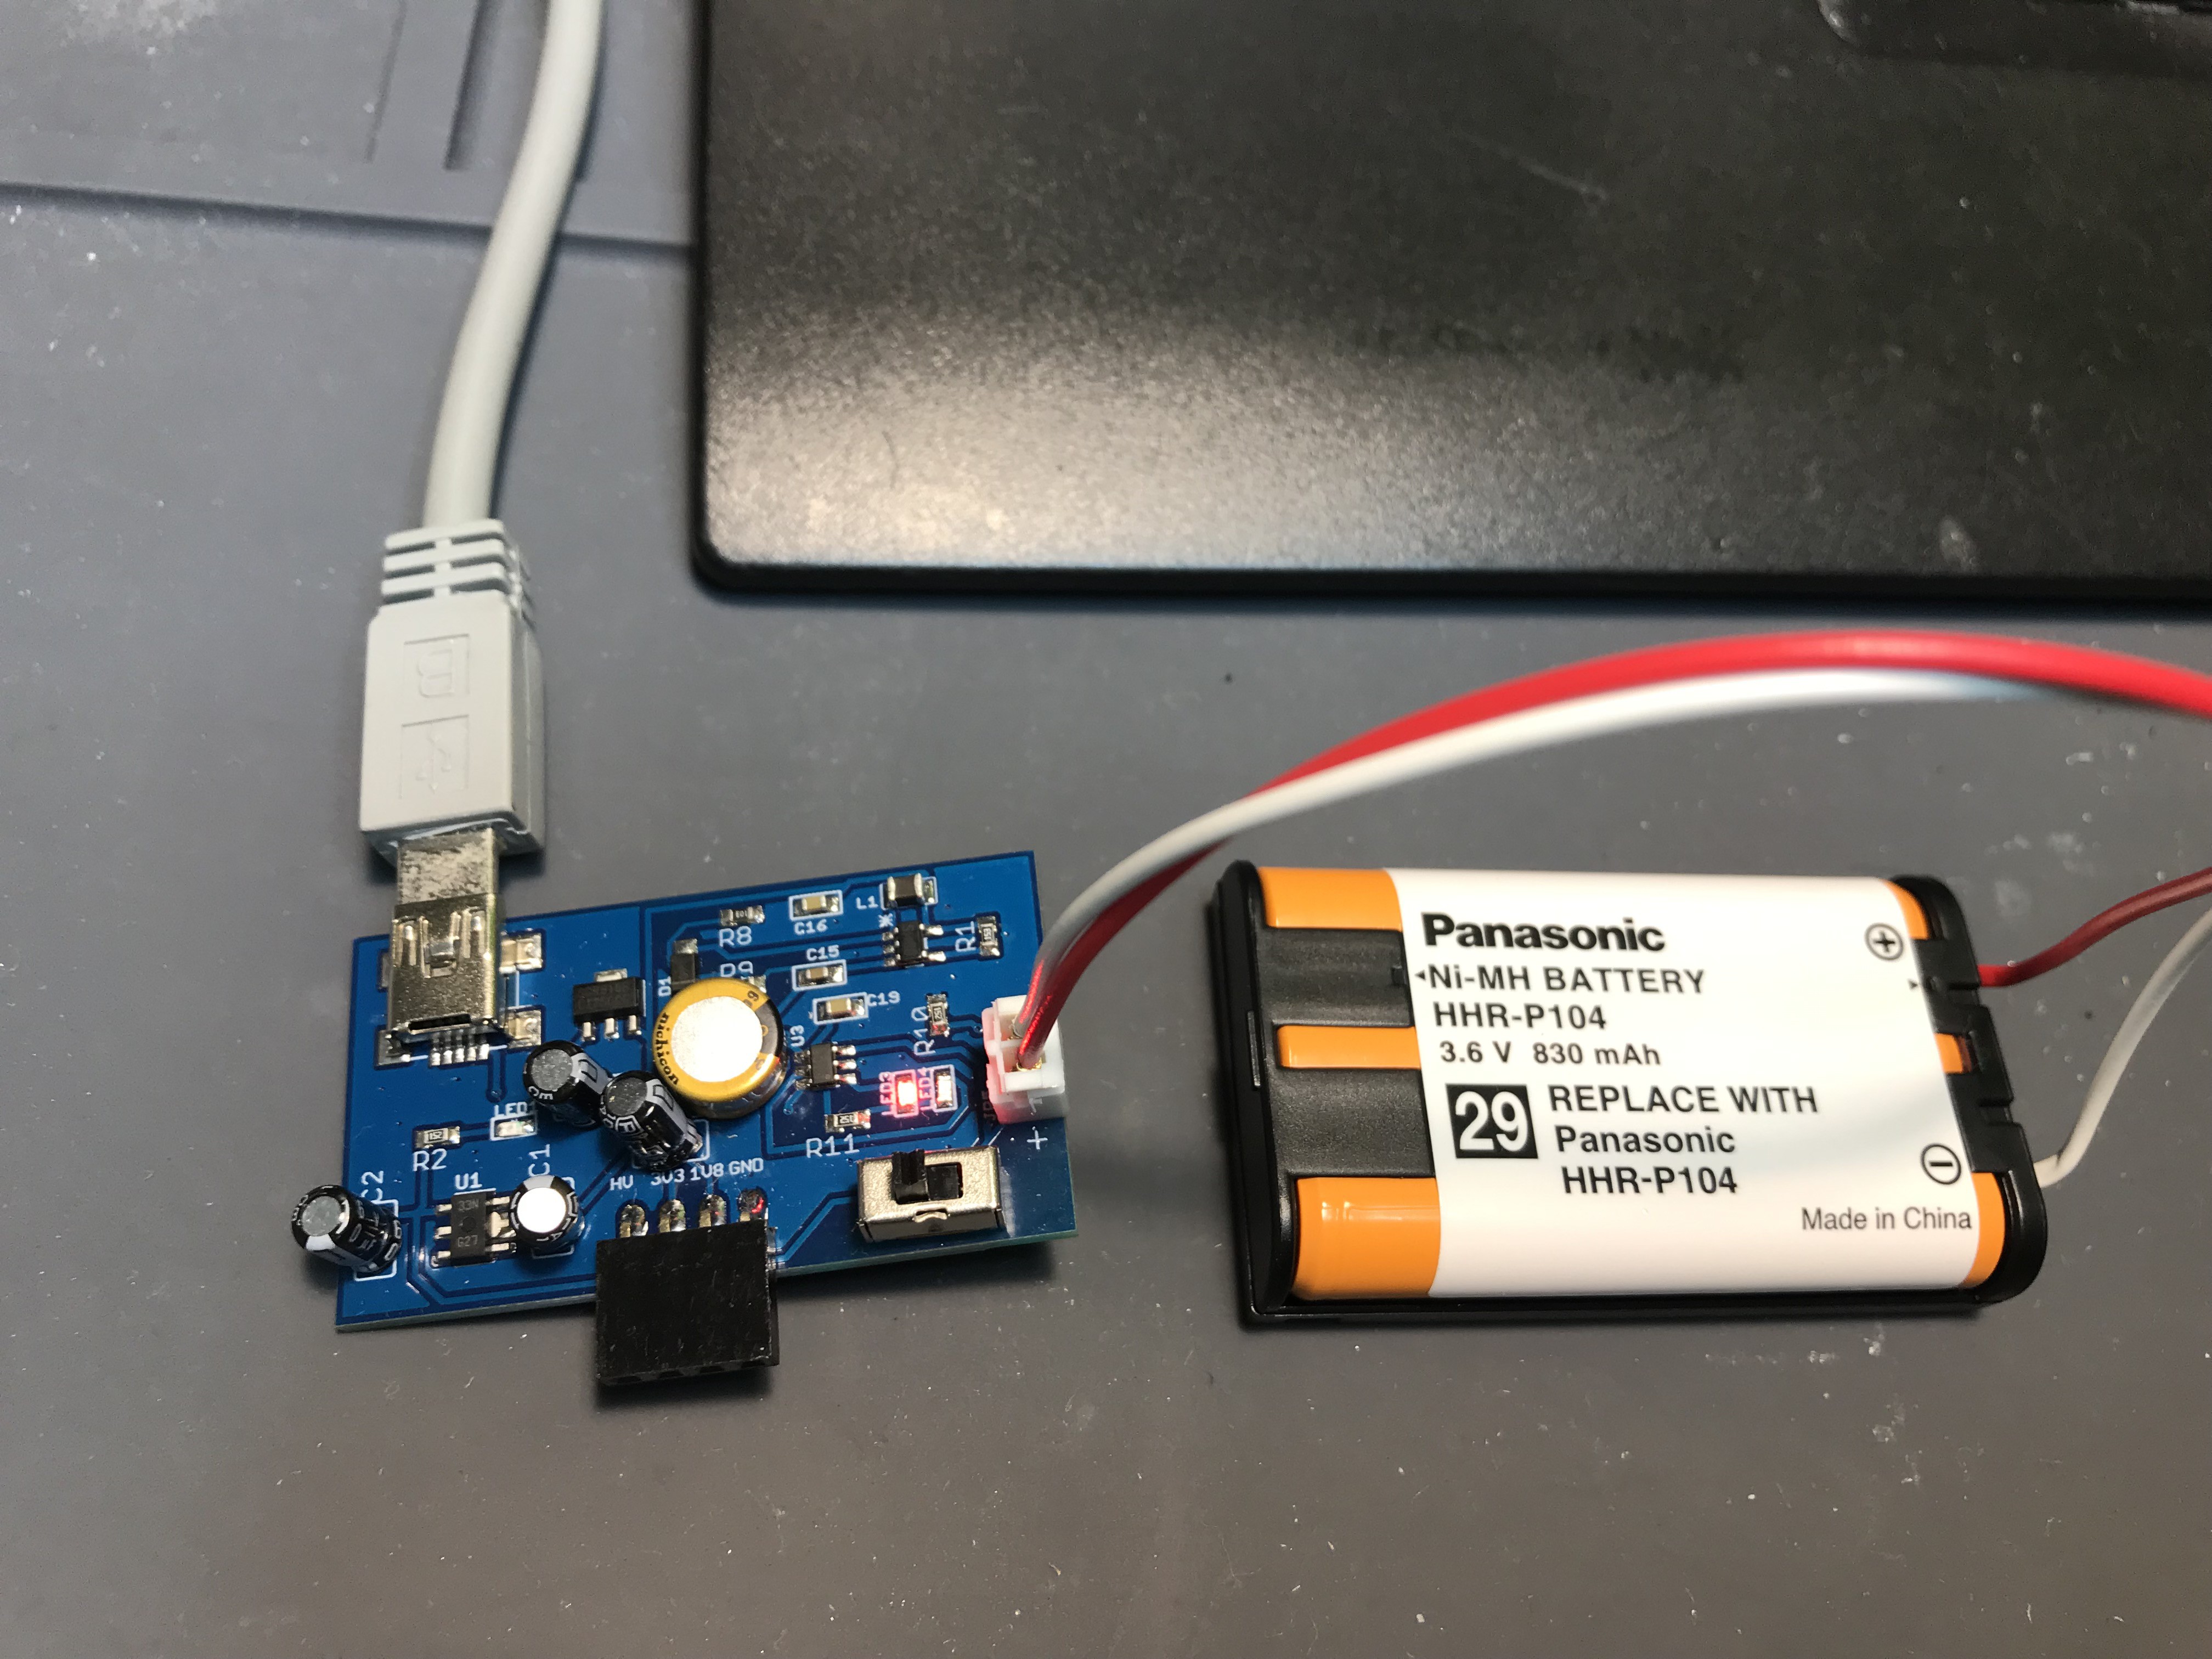
Now let's start charging Ni-MH battery during preparation by connecting connector with power supply PCB. When charging is done, on-board LED will turns to Green.
![]()
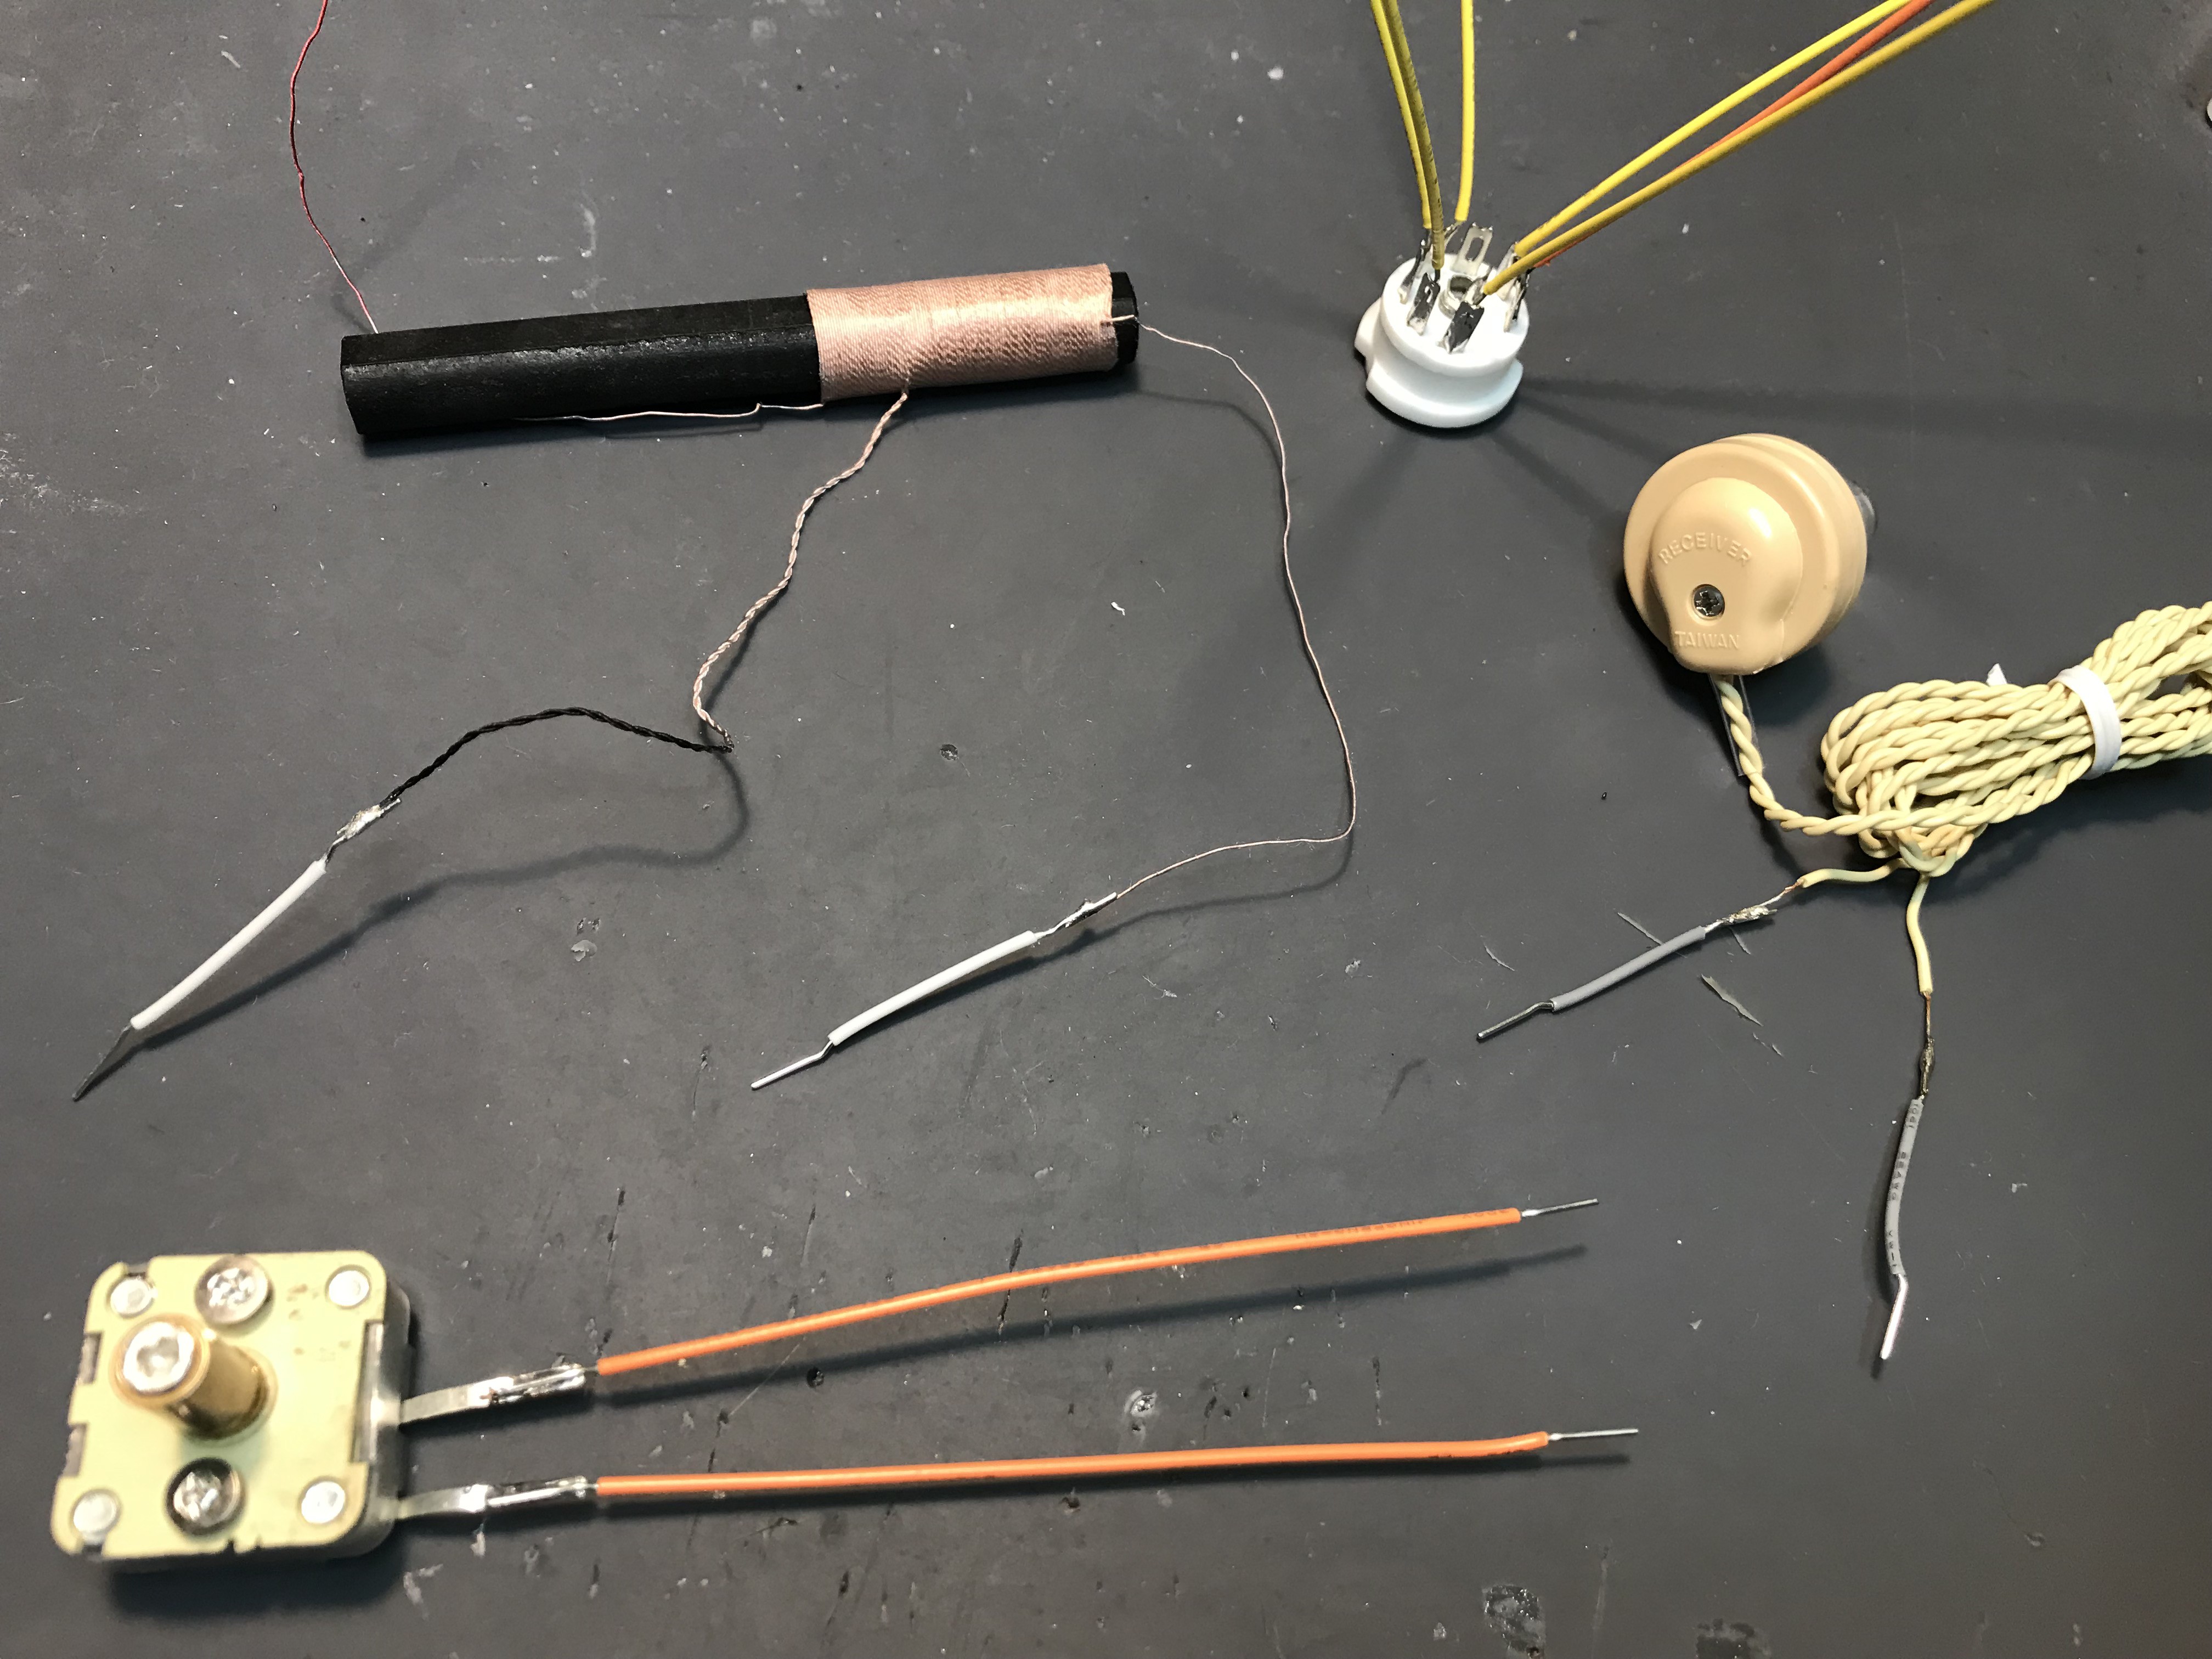
In the same manner, let's solder "jumper wires" to (1) variable capacitor, (2) ferrite bar antenna, (3) ceramic earphone, as above.. Now the soldering works are done.
![]()
![]()
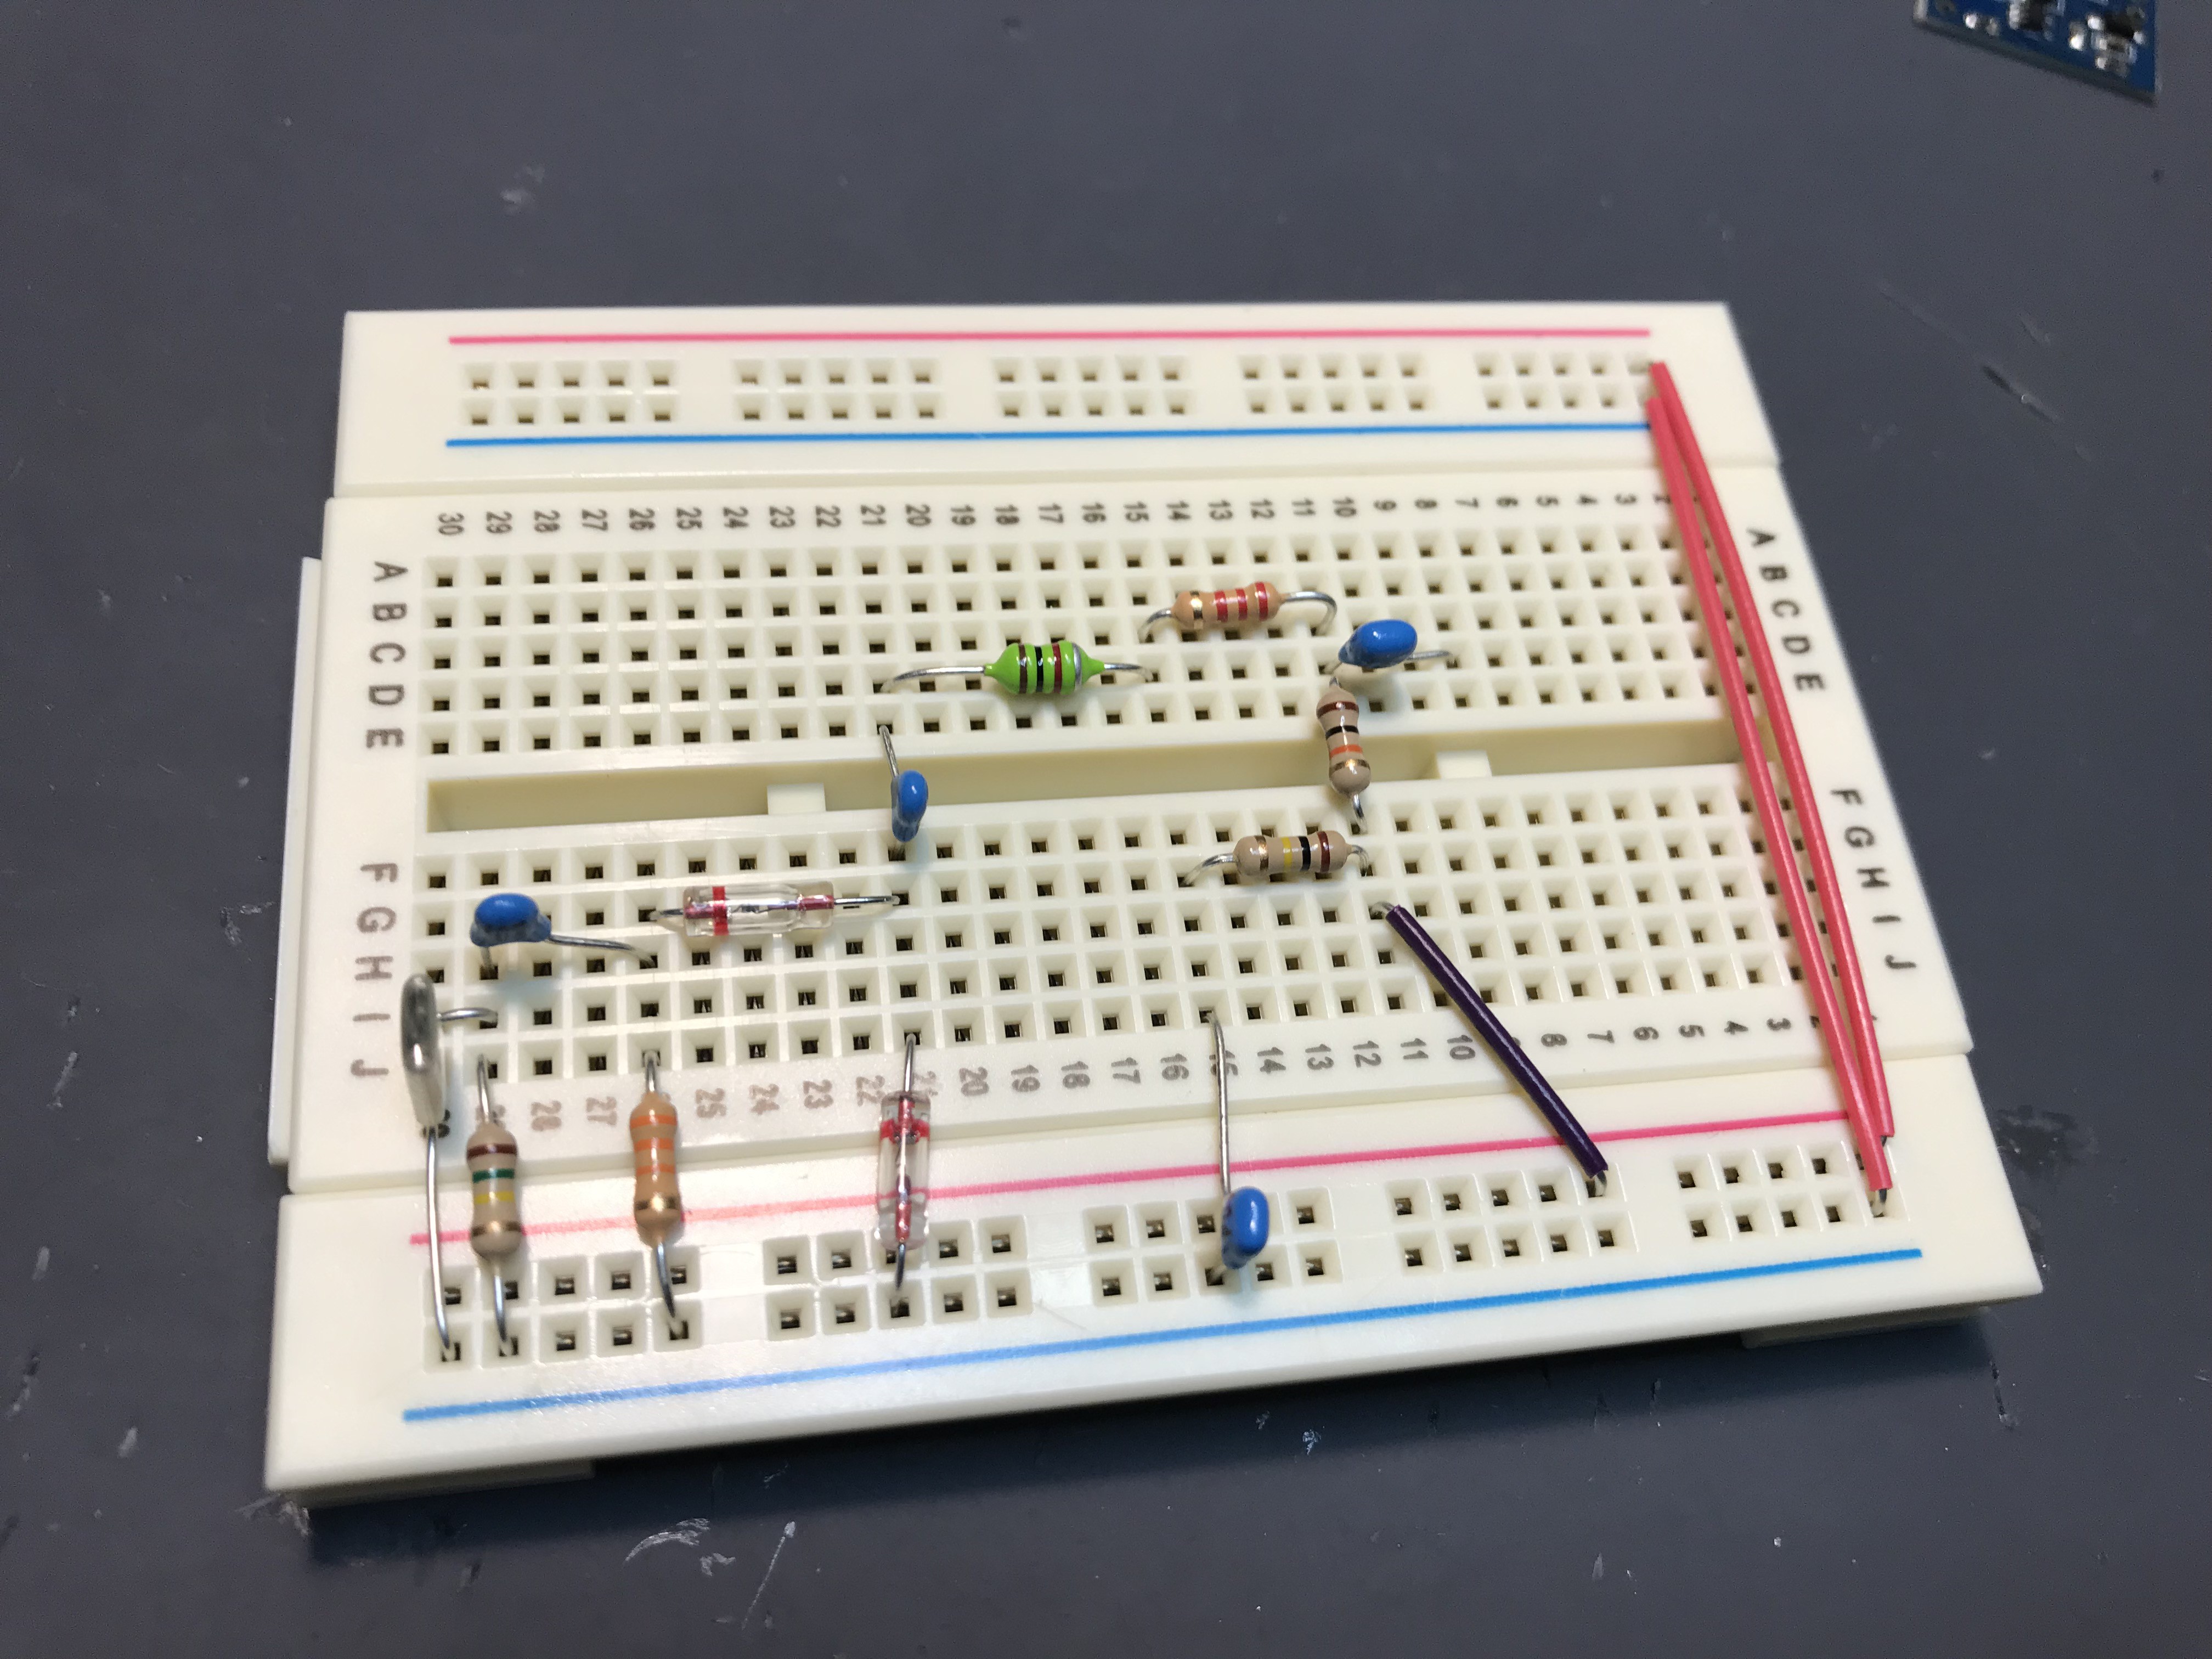
Now let's again see the schematic and wires all components on the solder less breadboard. If the connection is well, actual layout does not matter for the operation.
![]()
And now let's plug vacuum tube to the socket. I recommend to do it before connecting to breadboard....
![]()
And let's connect all of the components, variable capacitor, ferrite bar, ceramic earphone and vacuum tube. At this time, please check short circuit between HV (+30 V line to GND). It should not be connected and if connected, power supply PCB may be destroyed.
![]()
And finally let's connect breadboard to the power supply!
![]()
The moment of truth...... by changing tuning capacitor you will hear AM stations with very loud volume!
For those who may not find all of parts, I will release parts kit on indie soon. Enjoy vacuum tube experience!!
and this kit will be released at my tindie store by $42. Stay tuned!!
-
Russian VFD works triode?,,, naturally...?
06/13/2019 at 11:21 • 3 commentsSo as reported in the yesterday's log, I got VFD which structure is actually triode. So I simply swapped it with Nutube in my high-resolution audio DAC.
![]()
The moment of truth...... please see the following video.
-
Mysterious item from Ukraine..
06/12/2019 at 12:33 • 1 comment![]()
I got a mysterious item from Ukraine. It looks like subminiature tube but rather it is VFD.
The name of it is IV-15 and it seems it is compatible with DM-160. The data sheet says,
![]()
just a few months ago, this symbol was mysterious symbol but now I can understand. It is direct-heated TRIODE. Indeed I can find several people who realized amplifier by this VFD, and it seems not difficult. I will measure its frequency response and check if "VFD radio" is feasible or not. (As for Nutube, its transition frequency is less than 1MHz and impossible to make radio (except for LW radio))....
-
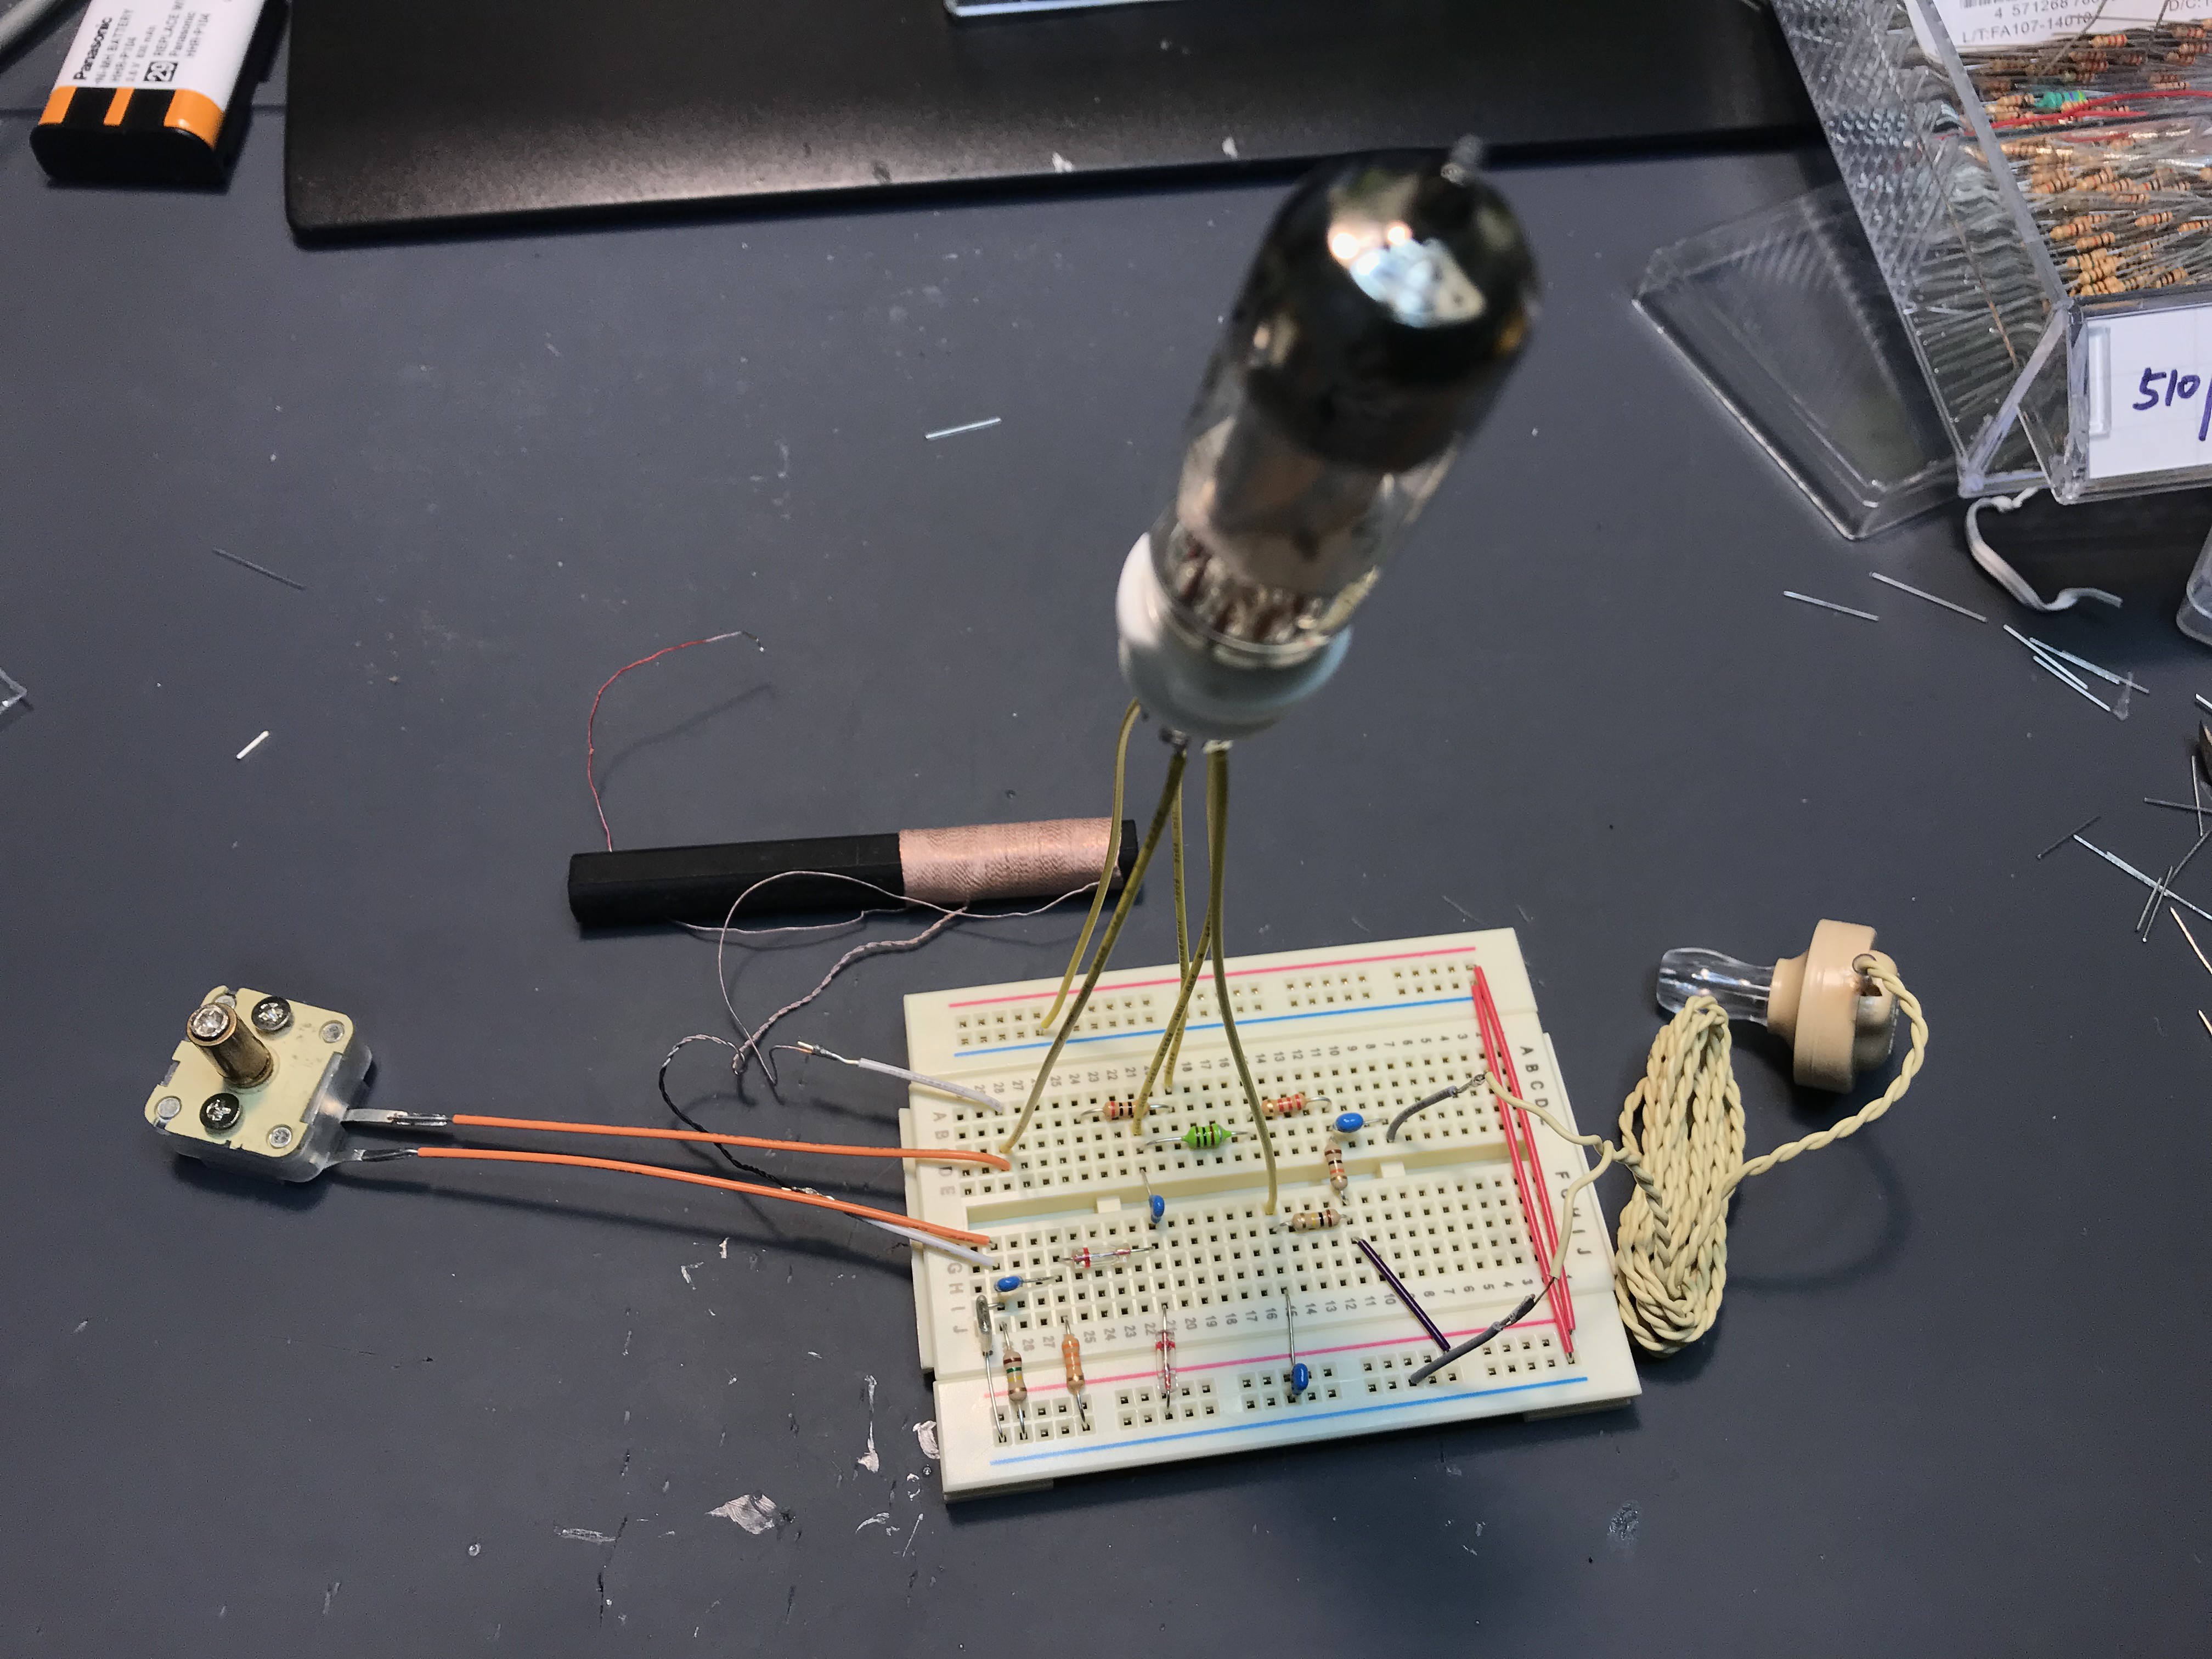
Quick update: full sub-miniature tube superheterodyne radio
06/11/2019 at 12:06 • 0 comments![]()
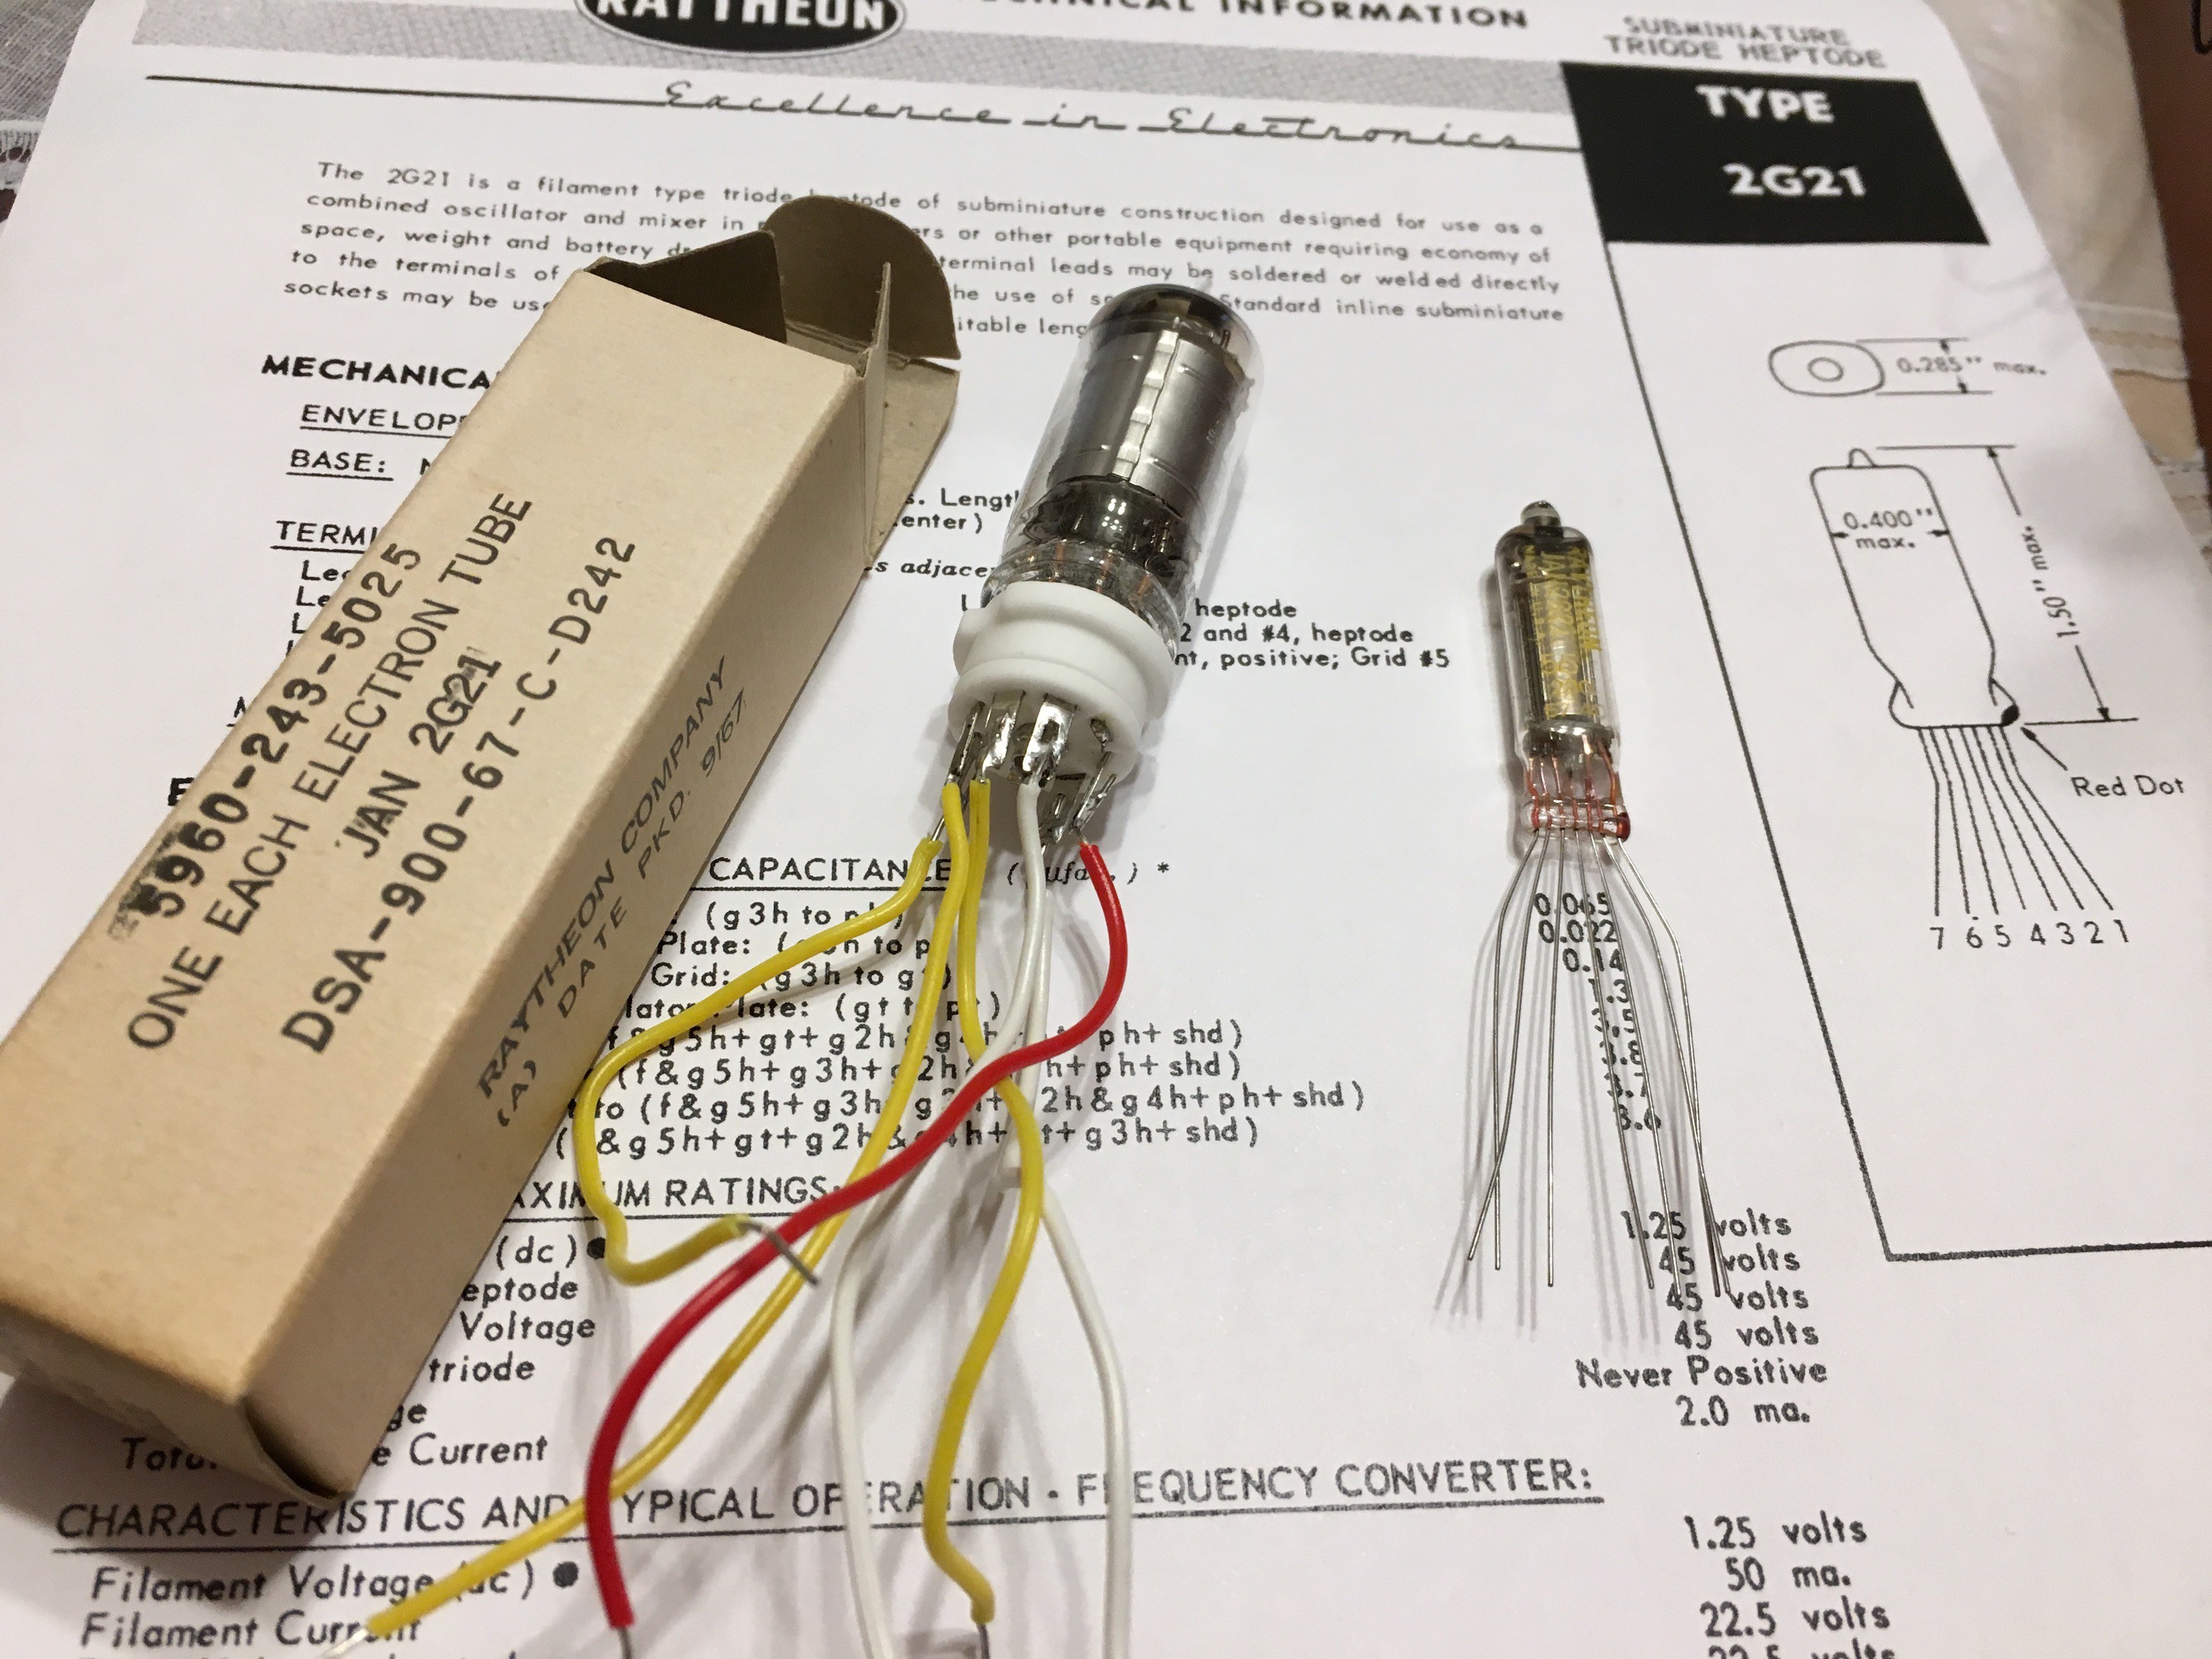
This time I got a heptode subminiature tube, 2G21. I guess this tube was widely used in 50's and 60's ? Vacuum tube era pocket radio. I've used MT tube 1R5 heptode and this time I simply swapped it with 2G21, without any parameter modification.
One additional note: Resistor between plate of triode (#3) and GND should be set for 150k (1R5 was 100k), otherwise local oscillator will cease in a few minutes..
![]()
As shown in the image, now the radio is fully made by subminiature tube. You may notice two variable capacitor for the radio... YES, the double variable capacitor certainly change both receiving resonator and local oscillator resonator but my ferrite bar antenna does not resonate where I need if I use double variable capacitor. Thus I used independent variable capacitor for receiving resonator. (I have to double tune for local oscillator and receiving resonator, but it is working..) Actual operation can be found in the following movie.. have fun!
Vacuum tube game in 21st century
Playing vacuum tube is not so difficult as expected. Let's play great heritage of human being by modern technology!


 As presented in the previous log, yes, VFD which has triode structure works perfectly for audio application! This time I just swapped this triode (VFD) with Nutube in my class-D power amplifier. Indeed, the sound is super wonderful, and as above picture, now it becomes my main power amplifier!!!!!!!!!