A PewPew shield for the TinyPICO
To make the experience fit your profile, pick a username and tell us what interests you.
We found and based on your interests.
This weekend I have been working on user documentation. It is now available here:

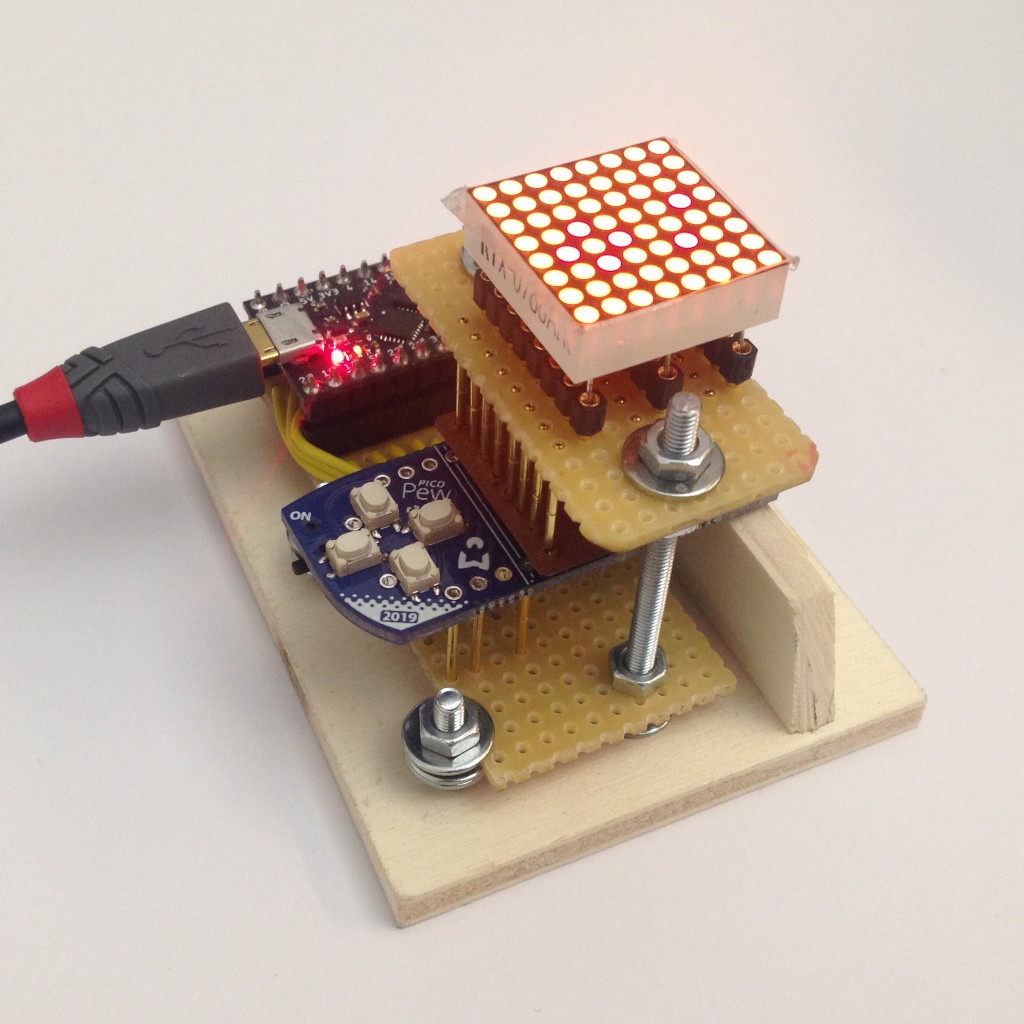
With the pogo pins that have arrived in the meantime, I have built a testing jig that can reliably connect a TinyPICO and an LED matrix to a half-assembled PicoPew. I have also written a testing program that uses the open/short detection feature of the IS31FL3733 LED driver to detect any disconnected or shorted LEDs, then displays some patterns on the matrix that help visually identify if any LEDs are disconnected or any rows or columns are connected together, and finally displays the state of the buttons. It gives feedback through differently colored blinking of the TinyPICO’s DotStar and through output on the serial console, and gracefully restarts the testing sequence when the connection to the PicoPew is broken.
I ran the 10 boards assembled by PCBWay through this and am pleased to report that all of them work flawlessly. That makes me happy, because it means that I can get a good yield without testing at the factory, which would have been a hassle – building a more robust version of the testing jig, shipping it to China, writing instructions for it.
After receiving good PCBs from PCBWay I also wanted to give their PCB assembly service a try and ordered a test run of 10 boards with all the SMD components mounted. They arrived before the holidays and I have now finally gotten around to taking a closer look.
After visual inspection and continuity-testing all the buttons, I am pretty satisfied with them. The soldering is clean, nicer than if I had done it myself, with no bridges between close pads e.g. in the center of the d-pad, and anything relevant to function looks good.
Two boards have cosmetic defects in the solder mask: One, a small speck of exposed and HASL-coated ground plane on the back side. The other, a bit of missing solder mask under an area mostly covered by silkscreen in the bottom left corner on the front, so that the white silkscreen was printed on bare copper, which makes it appear slightly pinkish, surrounded by some silver HASL dots where the silkscreen has holes. Nothing to be overly worried about though.
The single biggest flaw is that, despite my instructions to use capacitors of at most 1.0 mm height (the ones I have are 0.9 mm), they used 1.2 mm high ones (square cross-section), which means that the LED matrix placed over them now does not sit flush on the board, but leaves a gap of about 0.2 mm on one side. Apparently I didn’t insist on that clearly enough, and I couldn’t spot it on the review photo because it was taken from the top, so the thickness of the components was not visible.
I also tried to functionally test one, but it turned out to be very difficult to hold a TinyPICO, the PicoPew board, and an LED matrix together in such a way that all needed pins make reliable contact. All I can say is that it appears to work, but I can’t be certain that all LEDs are connected correctly. Doing this properly will have to wait until the pogo pins I have ordered arrive.
The boards came individually packaged in zip-lock ESD bags, which is great, because it means I will be able to insert the additional components and ship the kits in the same bags. I hadn’t left any instructions on packaging, but will be sure to explicitly request this on follow-up orders.
I had submitted single-board Gerber files and asked them to panelize them in whatever way best fits their process. They chose to make 1×2 panels with breakaway rails at the top and bottom and sent me Gerber files for that for review. I didn’t spot it at that time, but when I saw the assembly review photos, I was a bit worried that the mouse bites on the paneling tabs, which they had placed centered on my original board outline, might have been a little too close to the outermost plated through-holes for the LED matrix that lay in the middle of a tab, and breaking off the tab when depaneling might break through one of these holes rather than through the mouse bites. This turned out unfounded, all the holes were intact – obviously the plating adds some reinforcement, and apparently the engineer who placed the mouse bites knew what they were doing. Still, next time I am going to ask for these mouse bites to be moved a little further out, which also makes for a cleaner board outline.
This Friday, November 22nd, I am going to join @de∫hipu at the HeroFest gaming festival in Bern, where he secured a booth to exhibit the PewPews, and will bring my PicoPews.
When thinking about how to present them, I wondered whether it would be possible to stream their display content to a larger screen. They have WiFi and a beefy processor, after all. At first I was thinking of implementing a VNC server, but then decided against that when the color palette experiments described in the previous logs showed that I would need to transform the color values before they could be sensibly displayed on a typical RGB display. With VNC, I would have to do that in the server (or write a customized client on the desktop, but that would defeat the purpose of using a standard protocol in the first place). I would rather avoid spending that CPU time on the device, potentially slowing down the games.
My next choice was WebSockets, which already provide message framing and would allow the client to be written in HTML/JavaScript so that it could run on a variety of devices. I knew that MicroPython had some support for WebSockets for its WebREPL. Pretty soon, I had a proof of concept that was working amazingly well, following the frame rate of the PicoPew without a hitch and with no noticeable lag.
[video]
At every pew.show() call, when a client was connected, the same buffer of red/green values that would be sent over I2C to the LED driver was also packed into a binary WebSocket message and sent to the client.
This was still without the color transformation in the client. After adding that, prettifying the looks, and also transmitting the state of the buttons at every pew.keys() call, it now looks like this:
The client code is remarkably short and simple, all graphics are done declaratively using SVG. All that SVG manipulation and rerendering is taking some toll on CPU usage though, probably drawing into a canvas procedurally would be more efficient there.
The code is available in a separate branch “remotedisplay” in the Git repository.
In a comment to the previous log, @de∫hipu suggested relaxing the requirement that the userdata bits have no influence on the visible color, in exchange for getting more colors for smooth gradients. In other words, going from the left palette to something like the right one in the picture below (rearranged to show the periodicities more clearly).
The bitwise interpretation then becomes
| 7 | 6 | 5 | 4 | 3 | 2 | 1 | 0 | |
|---|---|---|---|---|---|---|---|---|
| 0 | 0 | darkness | red | green | red/green compatible | |||
| 0 | 1 | hue | brightness | single-color compatible | ||||
| 1 | red | green | true-color | |||||
where the lower bits of darkness and hue may be used as userdata.
I gave this a try and tested it both with a dedicated program that blinks the userdata bits on all colors of the palette and with the Sokoban game. The results were: A shift of 8 (the higher userdata bit) is visible everywhere. A shift of 4 (the lower userdata bit) is hardly visible in the brighter colors, more so in the darker ones. In the Sokoban game, the difference is not noticeable in the red/green, green, and red color schemes. It is noticeable in the yellow and orange schemes. (In the red scheme, there is still strictly no difference, the colors are still repeated. This is because I want a color scheme that is full red, but it can’t start at the very end of the hue spectrum, because there still needs to be room for the userdata shifts.)
This looks promising, but the decision is not entirely clear. It becomes a question of priority – what is more important, better gradients or strictly invisible userdata? Thinking about it, I now tend towards the former. The gradients may come in handy e.g. in the Maze3D game, where I want to show depth as darkness, whereas using the frame buffer for userdata storage was a bit of a hack anyway – a nice trick to simplify a tutorial, but not a model to follow in more complex projects.
Let’s keep this change for now and see how far we get. As a side effect, there are now 13 instead of 4 single-hue schemes, more finely granulated by hue. I didn’t update the tint.py scheme selector though.
(To explain the title, there are now 197 distinct colors in the default palette. In the previous one, there were 145.)
So far, my pew Library has only displayed the same four black/red/green/orange colors as existing PewPew devices with red/green displays. The IS31FL3733 LED driver however supports 256 shades of brightness per color component. Let’s take advantage of that!
There is no precedent for how to handle this in the pew API, because so far no PewPews except for some of Radomir’s internal prototypes have supported more than 4 colors. The opportunity is mine to come up with a way that can hopefully be standardized in the future.
The existing pew.Pix drawing surface class supports 256 colors. With only two color components and 64 pixels, that ought to be enough for anybody. No need to extend anything there until we get to the RGB PewPew.
But how to choose the palette mapping the 256 possible values to a sensible subset of the 65536 possible colors? Some desirable properties are the following:
The second and third property contradict each other: The second requires that the most significant bit of each component is placed in bit 0 and 1, respectively, while the third requires placing them with their group. They cannot both be satisfied by the same set of colors. However, there is enough space in the 256 colors to have two sets that satisfy one each. So at least a program gets the choice of whether to degrade gracefully to 4-color devices or to use true-color mode.
Here is a palette I have come up with according to these considerations. (The colors don’t look that crummy on the real device, but I had some trouble converting the values from the yellowish green, super-bright red, and vastly different gamma of the LED matrix to something suitable for computer monitors.)
Examined in terms of the bits of the color value, it works like this:
| 7 | 6 | 5 | 4 | 3 | 2 | 1 | 0 | |
|---|---|---|---|---|---|---|---|---|
| 0 | 0 | darkness | user data | red | green | red/green compatible | ||
| 0 | 1 | hue | user data | brightness | single-color compatible | |||
| 1 | red | green | true-color | |||||
Besides this default palette, programs should be able to set an arbitrary palette of their own. In addition, rather than setting a completely new palette, they should be able to cyclically shift the palette by a specified offset. This is useful for certain sorts of color animations, and by selecting specific offsets in the default palette it also allows the user to choose the color scheme to use for four-color programs.
This is now implemented in the library as a new API function pew.palette(), and as the next step I intend to write some demos using it to put it to the test.

The first r2 PicoPew was successfully assembled and appears to be working fine. This time I did both sides in the reflow oven, that worked without the IC and switch falling off from the underside. I’m pretty happy with the r2 layout and don’t see any immediate need for a further revision.
In parallel, I was working on making the device more comfortable to hold. In particular the power switch has sharp corners that cut into one‘s fingers. Since I couldn‘t find any other place for that switch on the crowded board, I decided that the only way out would be to cover it with some kind of enclosure. That would have the added benefit of protecting the electronics from potential ESD damage from constantly touching the contacts, and the exposed components of the TinyPICO from mechanical damage.
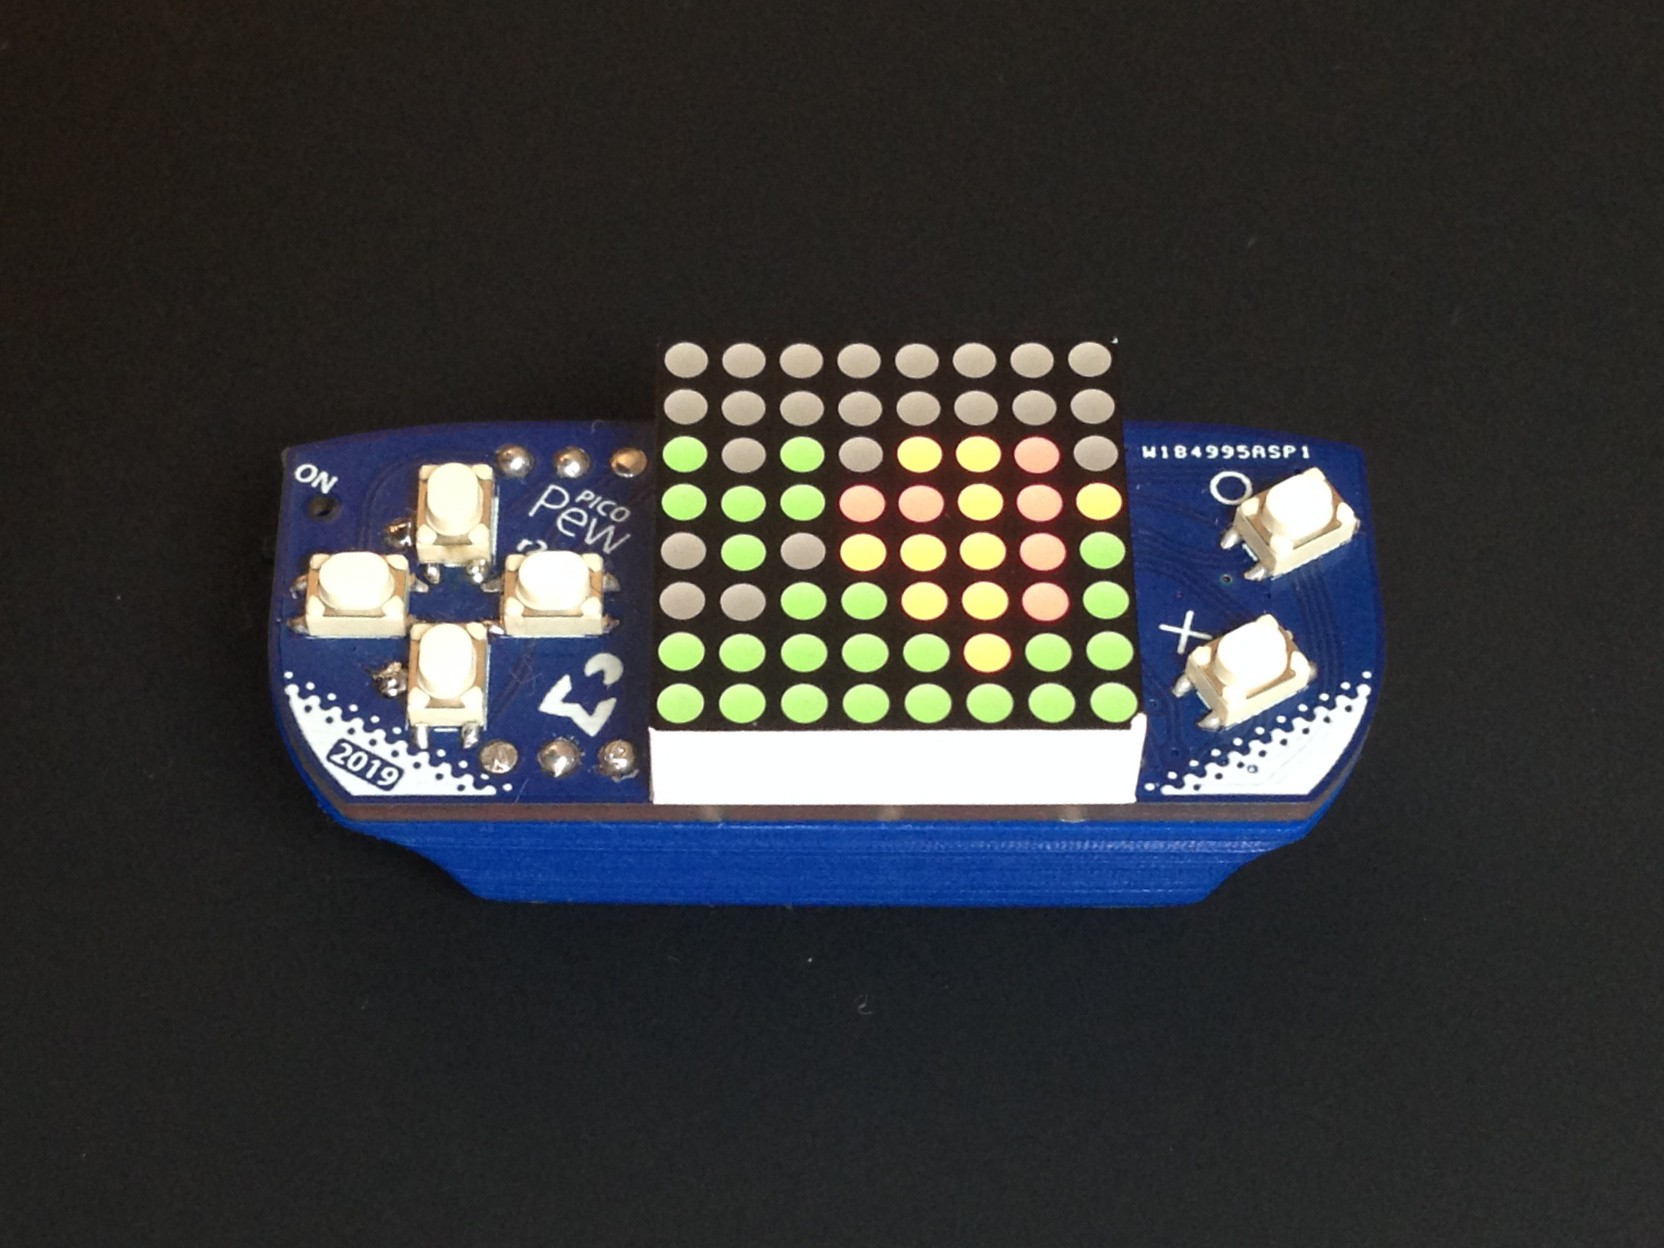
I briefly thought about laser-cut wood or acrylic, similar to the PewPew Standalone frame, but then settled on 3D printing a plastic shell. I designed it in Onshape with the main goal of adding no thickness to the device and generally using as little volume as possible. For this reason, the antenna is still exposed, but its surface sits flush with the bottom of the case, which otherwise covers all of the TinyPICO. The case is held in place by friction-fitting on the TinyPICO, no stronger attachment is needed because during use it is pressed against the PicoPew board anyway. The shrink-wrap-like interpolation between the rectangular shape of the TinyPICO and the wider, rounded PicoPew board looks a bit awkward, but makes for nice rounded indentations for the index fingers. After printing a first version and applying some tweaks to the design (for one thing, I had forgotten to leave holes for the charging LED and dotstar), I printed the second revision yesterday and am satisfied with it for now.
The design files for the hardware as well as the software are now available on GitHub. The enclosure design is in Onshape.

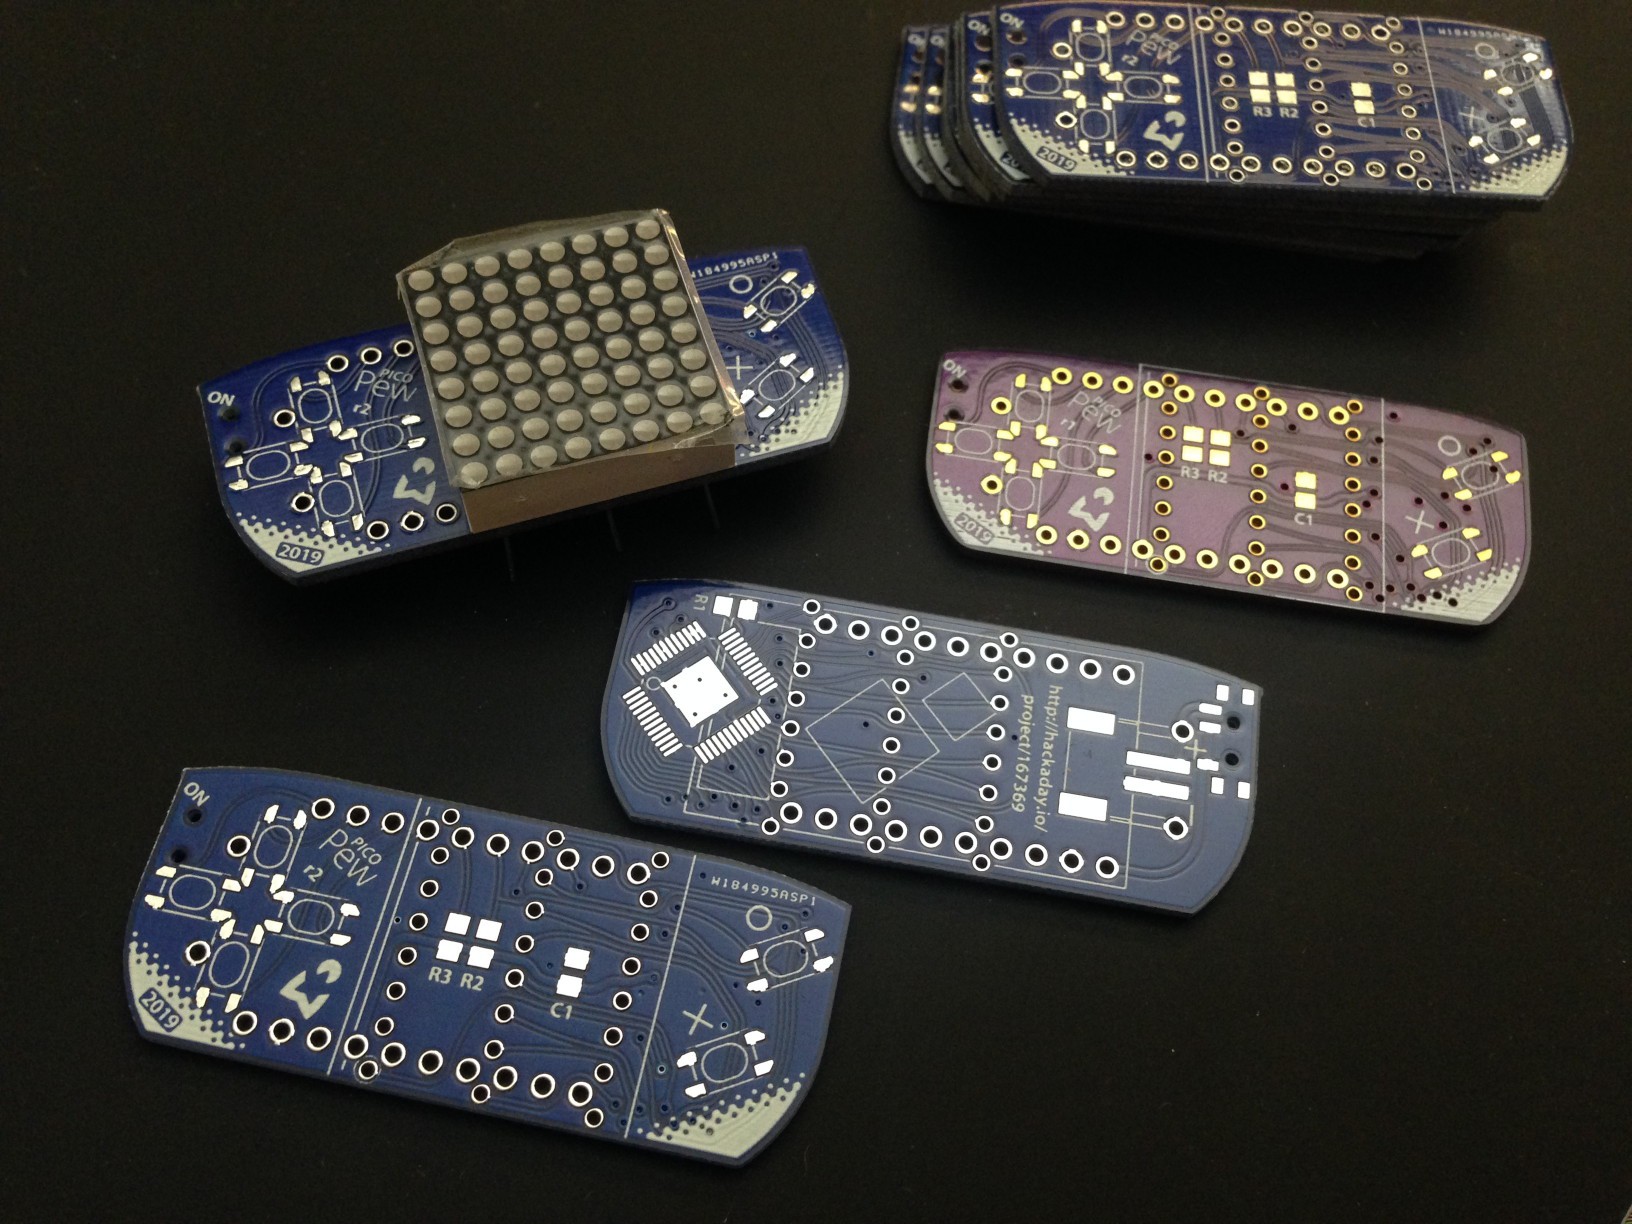
Revision 2 of the PCB has arrived from PCBWay and is looking good!
This time, just in case I might want to produce a small series of PicoPews later and be too lazy to solder them all by myself, I wanted to try a PCB manufacturer that also offers assembly services. Based on these reviews, I went with PCBWay.
I will save final judgement until I have assembled one, but at the first glance, the result looks pretty good. Silkscreen quality is much better than on the r1 boards from OSH Park. They are cut out without any leftover tabs or mouse bites, only a small bump in one corner, which saves me some work. Via drills are dead center. Some traces look marginally thinner, but it’s hard to judge without a microscope.
Revision 2 has some minor tweaks to the layout, in particular the outer holes for the matrix are moved further out. As expected, this requires more force to bend the pins, but it’s still possible to get the matrix to sit flush. In addition, there is a JST connector footprint for those who want to connect a battery that way – I won’t, because there’s no space for it in the small package I’m after.

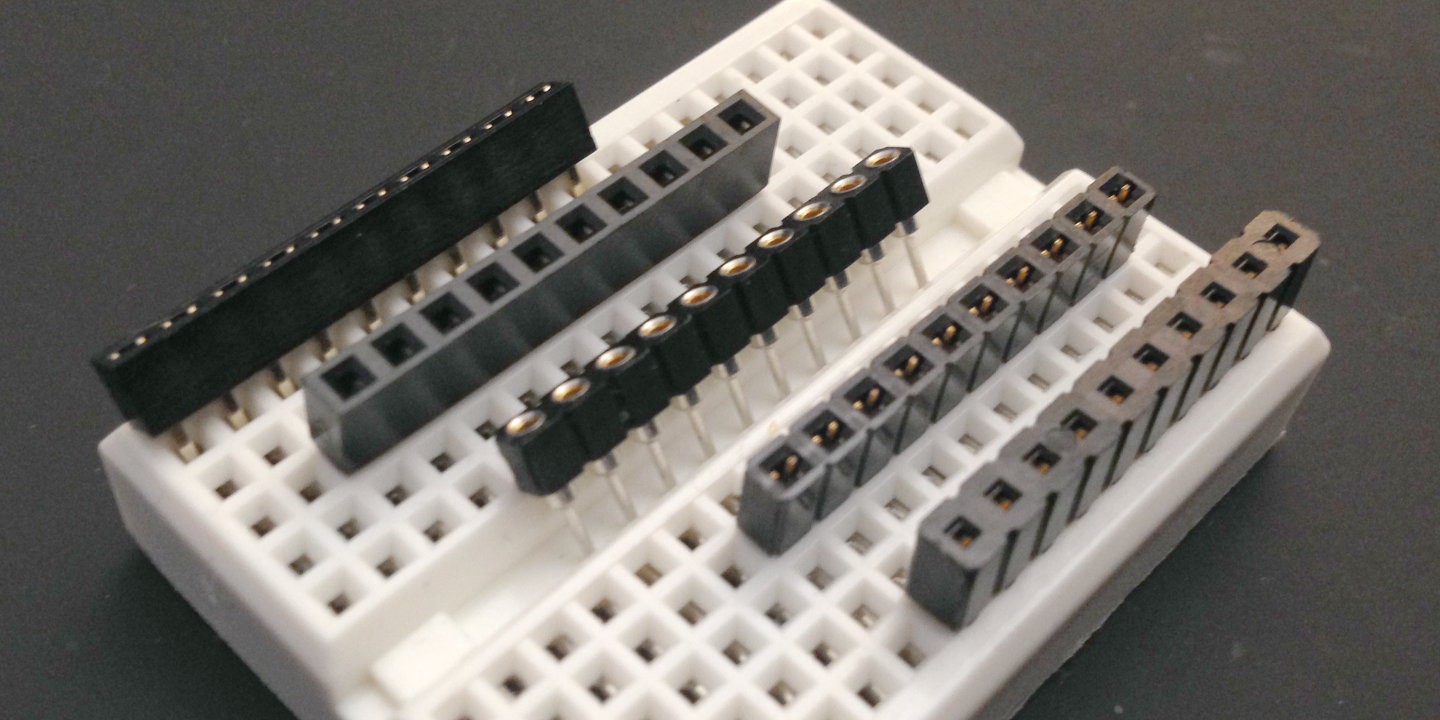
Attempting to make the whole package thinner, I went looking for shorter female pin headers than the 8 mm ones I had used. At western distributors, I found four manufacturers with suitable products: Samtec, 3M, PRECI-DIP, and Mill-Max. Three of them offered free samples, so I ordered some. With mixed success: One didn’t react to my inquiry at all. One sent me two pieces of the same part instead of the two different ones I had ordered. And one wrote the wrong country on the package and sent it on an odyssey around the world until it finally made it to me. In addition, I found one AliExpress seller, “E-Simpo”, who had two promising parts. They didn’t offer samples, but their 100-piece bags were affordable enough to risk an order.
So I ended up with 5 different samples to test, ranging in height from 3.5 mm to 5.0 mm. They all worked well mechanically with the 0.63 mm square pins of the male header. All but one were 2.54 mm wide, some with grooves between the pins, which would be an advantage, because that’s where my matrix pins lie. At 3.05 mm width, the Samtec CES-110-01-L-S was the first to be eliminated, because it covered more than half of the matrix holes, despite grooves. The remaining four were compared not only by height, but also by the insertion depth of the pin, because I wanted to leave as long pins as possible on the TinyPICO to keep it breadboard-friendly and compatible with other shields, rather than locking it in to the PicoPew. Champion in that regard was the E-Simpo 5 mm, which lets the pin go all the way through. Incidentally, it looks almost exactly the same as the ones sold by Adafruit in their “Short Feather Header Kit”.
| groove | height (mm) | insertion depth (mm) | |
|---|---|---|---|
| Samtec SLW-110-01-F-S | y | 4.5 | 2.9 |
| Mill-Max 801-47-010-002000/012000 | y | 4.2 | 3.9 |
| E-Simpo 5mm | n | 5.0 | 5.0 |
| E-Simpo 3.5mm | n | 3.5 | 2.7 |
To fit a battery between the two boards, I need a gap of about 5.5–6 mm between the board surfaces. This could be achieved either by a 3.5 mm female header and the 2.5 mm plastic part of the male header, or by any of the three larger female headers and a gap, with the plastic part of the male header on the outside of the TinyPICO. The former case would definitely not be breadboard-friendly though, with only 2.7 mm pins remaining, and the latter, even with the longest pins afforded by the 5 mm header, only barely worked with the breadboards I tried.
Alternatively, I could mount the TinyPICO upside-down, with the components facing inward. That would require me to redesign the PicoPew board layout, but it would have the advantage of a nicer outer surface, with only the PSRAM chip sticking out. However, that wouldn’t be the usual way a TinyPICO is mounted on a breadboard or on another shield, and, more importantly, it turned out that to make space for the battery between the antenna and the USB plug, the whole thing would have to be made very thick again. With the plastic part of the male header on the outside, an 8 mm female header would be needed, and while the maximum thickness would actually be about the same, it would make the whole thing look much thicker. With the plastic part of the male header on the inside, a 5 mm female header would suffice. In both cases, the TinyPICO would just barely remain breadboard-friendly again, due to the space taken by the antenna.
With none of the options totally appealing, I decided to go with the first solution for now, but with the headers swapped: By putting the female 3.5 mm header on the TinyPICO, I could make it breadboard-friendly by inserting the short end of a male header – at the expense of some height, but that shouldn’t usually matter on a breadboard.
I assembled a second one of the three r1 boards that way and ended up with a perfectly working, nice and thin second PicoPew. The total thickness is about 0.5 mm thinner than a Feather board with a PewPew Lite now, but it looks thinner because it’s only the antenna sticking out that much.
This time,...
Read more »I assembled the first PicoPew today, and it worked on the first try! That made me happy. The only thing that didn’t work right was that I had the X and O buttons swapped, which was a simple fix in the software since the GPIO assignment is arbitrary.
Soldering the 0.5 mm pitch eTQFP chip with a soldering iron and solder wire worked acceptably once I found the desoldering wick to remove excess solder stuck between the pins, even without additional flux (I thought there was a flux pen at the FabLab but there wasn’t). Still, for the next try I am going to buy solder paste and use the hot air rework station or ask colleagues to borrow a reflow hotplate or oven.
Soldering the buttons worked much better than I had feared, it was no problem at all to get them down without shorting the very close solder pads in the center of the d-pad.
The matrix with the bent pins worked acceptably too, but the outer holes are really close to the ones for the pin header and I accidentally filled two with solder while soldering the latter. Also, with the header covering about half of the holes, first inserting the matrix and then soldering it without leaving too large molten marks on the plastic was a challenge. I wonder if there is any way I can make this easier to assemble. I can probably move the holes 0.1–0.2 mm further out, that might help, even though it requires more bending.
What gave me most trouble was actually the female pin headers. Their pins just wouldn’t take on solder properly, even after scraping them with a knife and with sandpaper. They seem to make good enough mechanical and electrical contact now, but I’m a little suspicious. It occurs to me now I could have tried the stackable ones that came with the TinyPICO, maybe they would work better.
With the standard-height headers, the whole thing gets really thick, and there is space for more than two of the LiPo batteries inside. I should look for shorter headers, like the ones Adafruit sells for the Feather boards.
I still need to add the battery, and then I’ll play with it for a while to see if it’s comfortable to hold or anything else needs improvement. I suspect it will be less comfortable to hold than the PewPew Lite FeatherWing, which has a somewhat well-defined box shape because the Feather board has the same dimensions as the shield in front, whereas on the PicoPew there are many edges and protrusions on the back.
Other observations for revision 2:
Create an account to leave a comment. Already have an account? Log In.
Hmm, nope, spelling it like that in the description and log doesn’t seem to turn it into a link either. Help?
there should pop up a helper with his profile picture, that's how I got it to work
Description is dumb, I use the Details instead, it's a bit smarter.
Interesting, now it works in the Details and Logs editor. Maybe I wasn’t waiting long enough for the popup. In the Description it really doesn’t seem to be supported. Thanks for the hint!
Become a member to follow this project and never miss any updates
@de∫hipu