 Joshua Broekhuijsen
I've got it almost 100% of the way, now - though it wasn't an easy road to get there. Let's see if I can list the things that went wrong...
- My UART was transmitting LSB-first, which... is probably universally true but I didn't anticipate it. Simple enough: change my char from 0x24 to 0x12 and transmit that instead. Woo!
- I was calculating parity wrong for the apple TV - my original code (which I will not post because it was absolutely awful) was XORing all the bits to the left, but then checking parity on the rightmost bit - again a simple fix; just had to change the bit-shift direction on each operation for the parity function.
- The apple remote spec is... interesting. It includes a provision for "Remote ID", which is 8 bits - so there are 255 possible remote IDs, and any given apple TV is listening for only one of them, I think. When making my code I chose an arbitrary "0x37", but turns out that 1/255 chance shot-in-the-dark was wrong. I ended up taking my apple remote and an IR demodulator to an oscilloscope (that I dearly wish I owned, but, alas, do not) and manually decoded the remote ID - turned out to be 0xAE.
- Had to sanity check every single remote code "fixer" function - I pass it just the command and brand, say "l08" for "LG, command 0x08" which represents power toggle on my TV. The function is supposed to "correct" it - take that minimal data and generate a uint32_t full of the right bits to transmit. Long story short: each of those was wrong because I screwed up my bitwise operations. All fixed now, thanks to some debugging time with Mr. Oscilloscope.
Once I actually got my very first bit of success - toggling the TV power - it felt like the end was in sight. I've spent some time polishing, and came to a few realizations:
- I didn't much like the way some of the UI elements were working - for instance, a single button to turn on the TV, change the input, turn on a device (apple TV or blu-ray player) just... wasn't working out; particularly since it was the only way to get to the remote for that device. I opted to make the buttons up top just bring me to the remote for the given device (unless there isn't one), and then include a button to "switch source here" on that specific device remote.
- The load times when making a new request to the ESP for another html page - say "tv.html" followed by "apple.html" - were frustratingly long. I changed the architecture to hold all the button data for each remote in a JSON object, then dynamically "build" the elements on the remote when requested - this way the remote load time is dependent on my device's javascript speed, rather than my ESP8266's wifi speed.
- I was having some intermittent issues with the websocket when I left the page alone - I changed it to verify the websocket connection (and re-establish it if necessary) each time I press or release a button.
Once I felt confident enough, I soldered it all onto some protoboard. Please note that I generally like to design circuit boards in KiCAD, tinker with them for 134 years, then get them manufactured so they're nice and orderly - my protoboard soldering is... not pretty. Fortunately, it IS functional. The trailing wire you see in the pictures below is my cut-up power cable from an old USB charger.

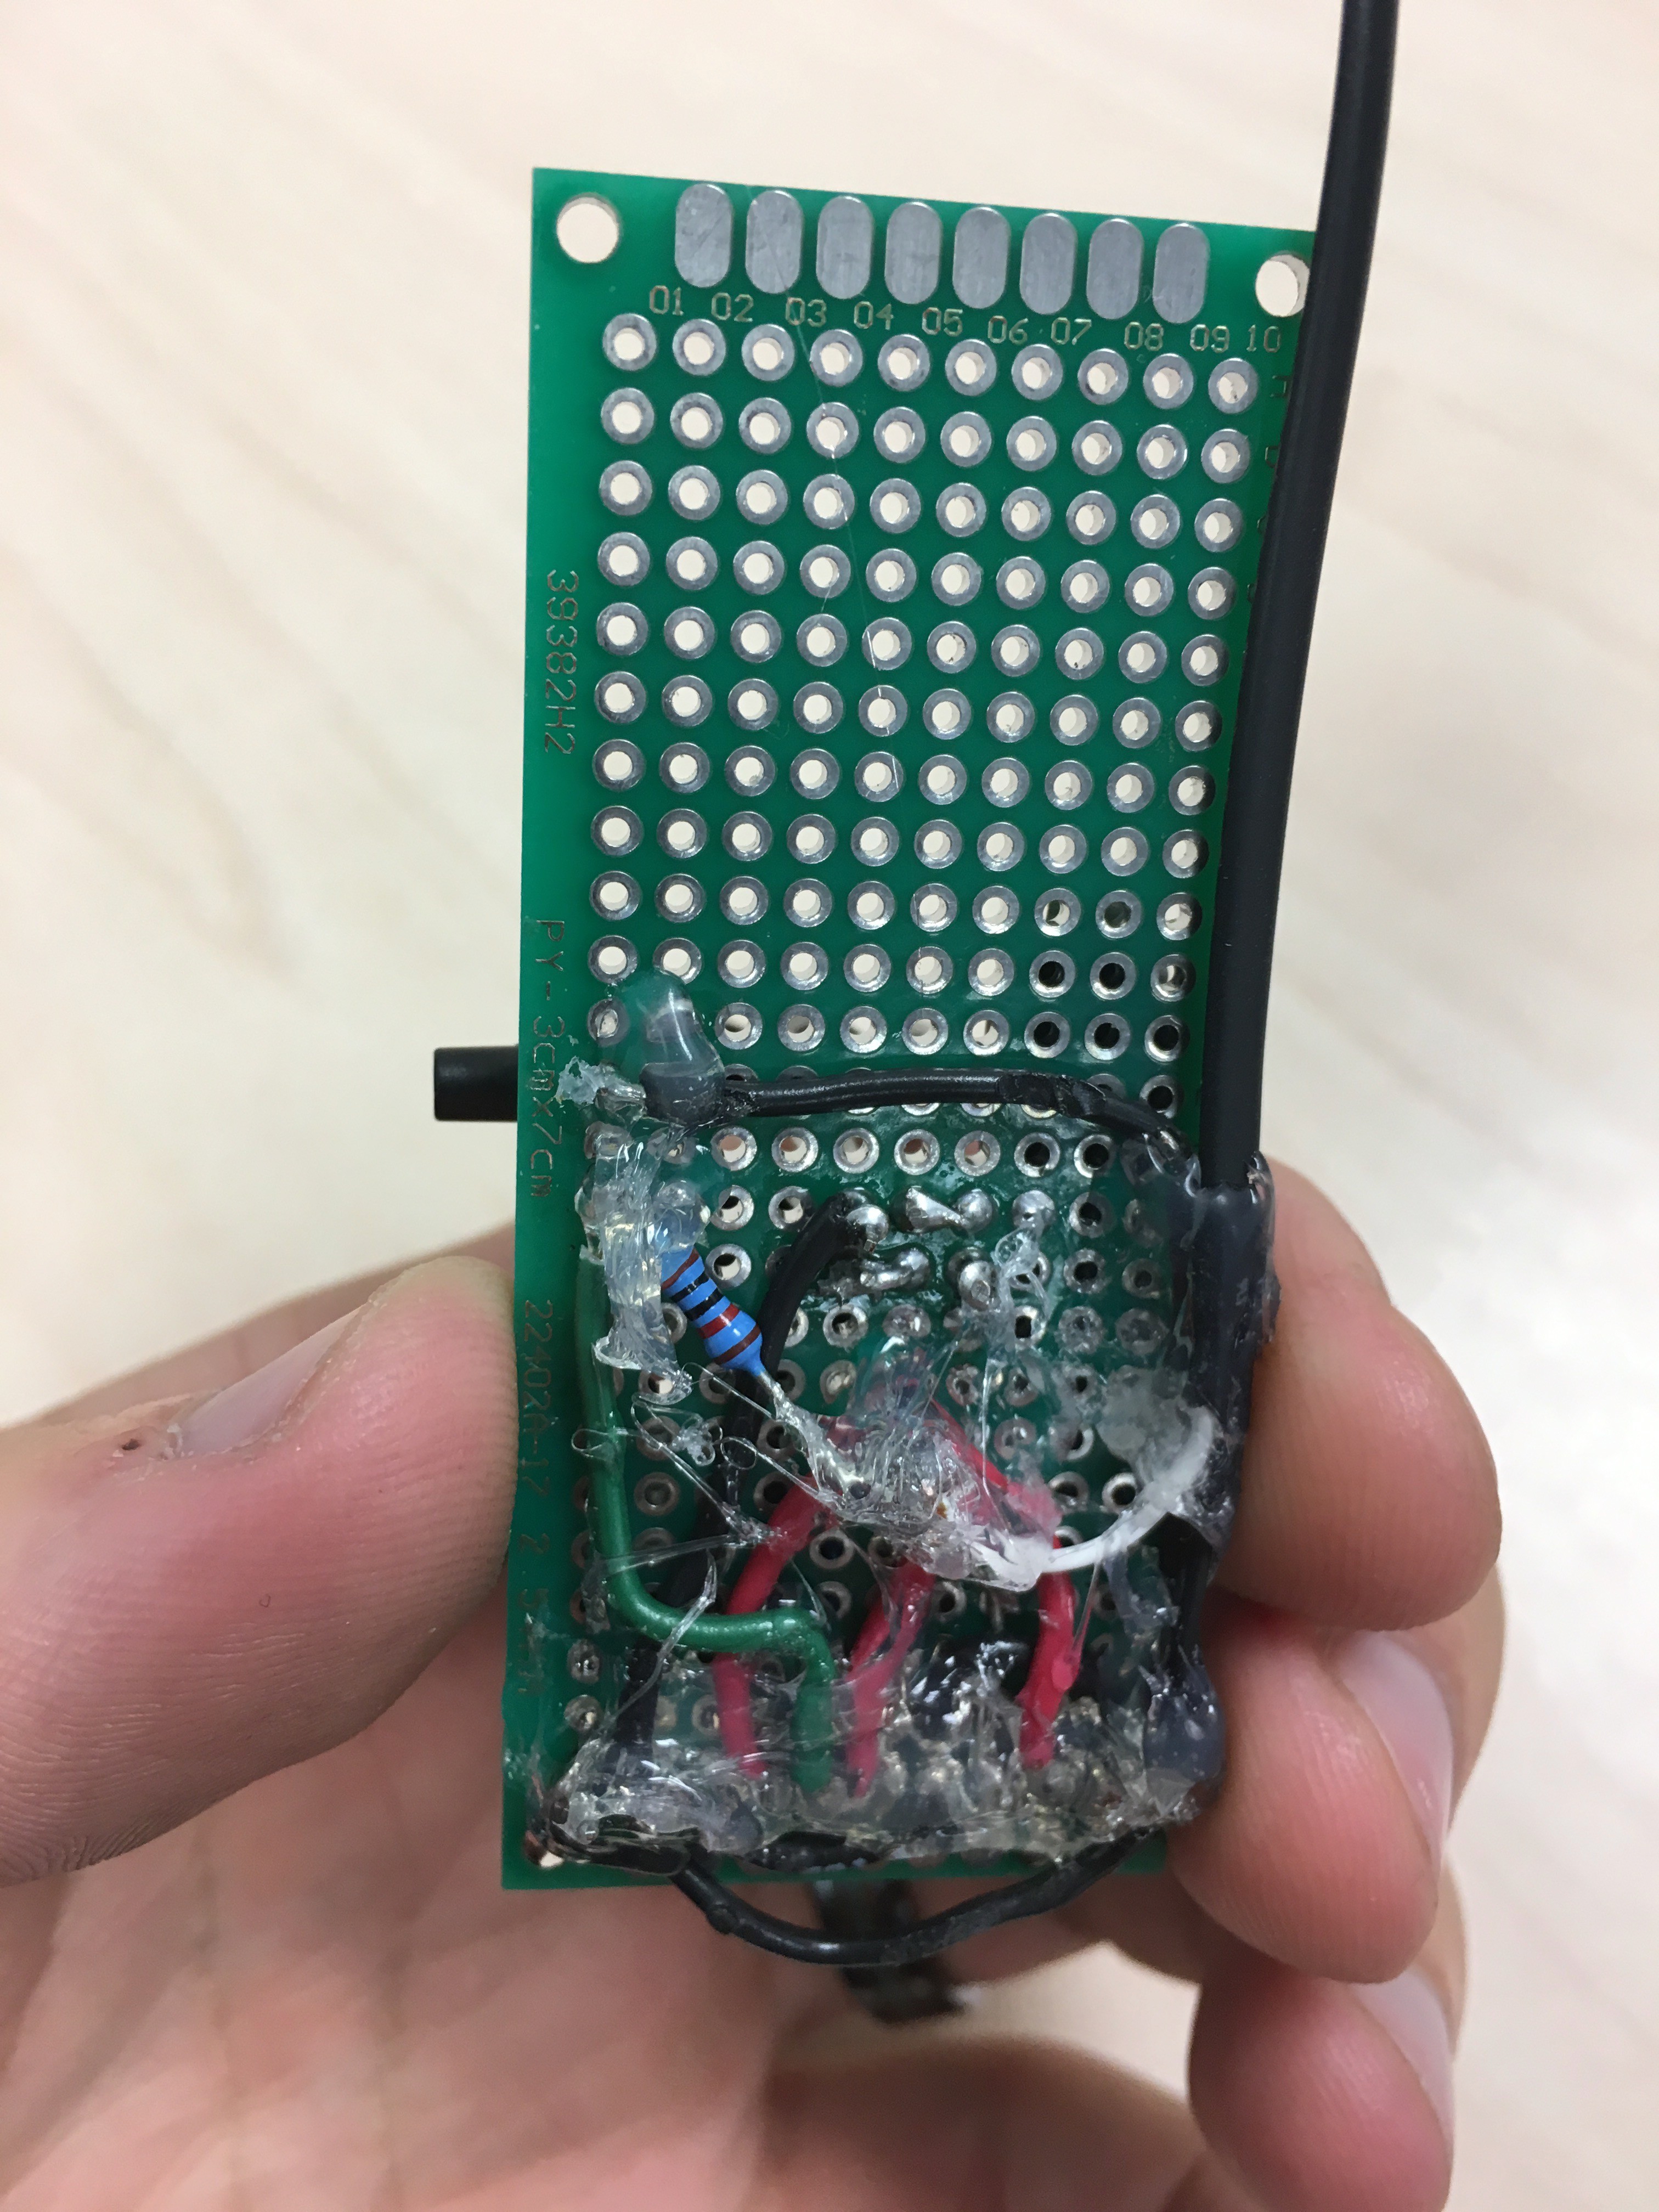

Oh, yeah - I only had a surface-mount 3.3V regulator so I improvised and made it a through-hold component by bodging on some 22-gauge solid core wire, then hot glueing and electrical taping the whole thing together. It's art, I tell you: art. Hard to tell in the pictures, but all the necessary resistors are under the ESP8266, which is, itself, in an 8-pin female header - so it can be removed for reprogramming/replacement.
I'll be trying it out and probably 3d-print a new case for it in the next few days!
Discussions
Become a Hackaday.io Member
Create an account to leave a comment. Already have an account? Log In.