Close
0%
0%

Connecting DHT11 to the cloud using ESP8266 board

How to connect a DHT11 sensor to the cloud with an ESP8266-based board using the Arduino framework.

Similar projects worth following
Learn how to create a simple online weather station using the DHT11 sensor connected to an ESP8266-based board and the Arduino framework.

Introduction

In the previous article, I connected my ESP8266-based NodeMCU board to a Cloud4RPi service. Now, it’s time for a real project!

Hardware requirements

Software and services

Goal: Measure temperature and humidity

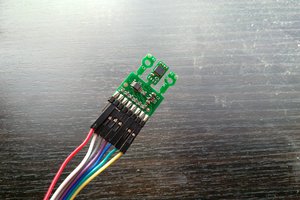
I already had a DHT11 sensor, so I decided to use it for temperature and humidity measurements. Let’s choose an Arduino library to read sensor data.

Arduino registry contains several libraries, from which I selected the most popular one.

According to their GitHub repository, we are also required to add an Adafruit Unified Sensor package.

  • 1 × DHT11 Temperature & Humidity Sensor (3 pins)
  • 1 × NodeMCU ESP8266 Breakout Board

  • 1
    Step 1: Create and configure project

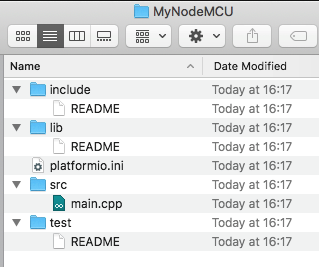
    I already described how to create a PlatformIO project and install libraries in the first part. My project is called “MyNodeMCU”. The structure is shown below:

    This project is a slightly modified Cloud4RPi example.

    I decided to store the device token and Wi-Fi credentials in the configuration file instead of code.

    The platform.ini file looks as follows:

    [platformio]
    default_envs = nodemcuv2
    
    [env:nodemcuv2]
    platform = espressif8266
    framework = arduino
    board = nodemcuv2
  • 2
    Step 2: Install libraries

    Libraries installation is quite simple. You can do it from the IDE’s graphical interface, or by adding required library names to the lib_deps section of the platform.ini file:

    ; ...
    lib_deps =
        cloud4rpi-esp-arduino
        Adafruit Unified Sensor
        DHT sensor library
    build_flags =
        -D MQTT_MAX_PACKET_SIZE=1024
        -D MQTT_MAX_TRANSFER_SIZE=128
        -D CLOUD4RPI_DEBUG=0
        -D SSID_NAME=\"__YOUR_WIFI__\"
        -D SSID_PASSWORD=\"__YOUR_WIFI_PASS__\"
        -D CLOUD4RPI_TOKEN=\"__YOUR_DEVICE_TOKEN__\"

     Added libraries will be automatically installed into a project’s subfolder.

    The main.cpp header looks as follows:

    #include <arduino.h>
    #include <esp8266wifi.h>
    #include <cloud4rpi.h>
    #include "DHT.h"
  • 3
    Step 3: Connect a DHT11 sensor

    Adafruit provides a DHTtester.ino example of a sensor connection.

    This code initializes a sensor and defines a structure to store the measurement result (in case it was successful):

    #define DHTPIN 2      // Digital pin connected to the DHT sensor
    #define DHTTYPE DHT11 // DHT 11
    // ...
    DHT dht(DHTPIN, DHTTYPE);
    dht.begin();
    // ...
    struct DHT_Result {
        float h;
        float t;
    };
    DHT_Result dhtResult;

View all 8 instructions

Enjoy this project?

Share

Discussions

Similar Projects

Does this project spark your interest?

Become a member to follow this project and never miss any updates