So I put together a simple project using the *.ioc file that I created for the Feather board, CubeMX and the driver I just put together and the results are good.
First up is to get rid of the FreeRTOS calls:
//buf = pvPortMalloc((size_t)(ByteCount + 1));
buf = malloc((size_t)(ByteCount + 1));

//vPortFree(buf);
free(buf);
and replace them with the standard library calls.
Also, of course the I2C handle changes too:
halRet = HAL_I2C_Master_Transmit(&hi2c3, STC3100_SLAVE_ADDRESS_8BIT, buf, ByteCount+1, HAL_MAX_DELAY);
becomes
halRet = HAL_I2C_Master_Transmit(&hi2c1, STC3100_SLAVE_ADDRESS_8BIT, buf, ByteCount+1, HAL_MAX_DELAY);
Here's the relavent portions from main.c
/* USER CODE BEGIN 2 */
  printf("MCU Init Complete\r\n");
  assert_param( STC3100_Startup() == STC3100_OK );
  printf("Fuel Gauge Init Complete\r\n");
  /* USER CODE END 2 */
and
while (1)
  {
    /* USER CODE END WHILE */

    /* USER CODE BEGIN 3 */
	  HAL_GPIO_TogglePin(USER_LED_GPIO_Port, USER_LED_Pin);

	  assert_param(ReadBatteryData() == STC3100_OK);

	  printf("Battery Data (%d):\r\n", s16_BattCounter);
	  printf("\tVoltage(mV)\t%d\r\n", s16_BattVoltage);
	  printf("\tCurrent(mA)\t%d\r\n", s16_BattCurrent);
	  printf("\tTemp(0.1degC)\t%d\r\n", s16_BattTemperature);
	  printf("\tCapacity(mAh)\t%d\r\n", s16_BattChargeCount);

	  HAL_Delay(1000);
  }
Again, pretty simple. I wrap the STC3100 library calls in assert statements for debugging purposes. That way if there is an error, it ends up in the assert failed handler and I have some basic debugging clues left behind.
Anyway the result runs (capture from PuTTY):
Battery Data (29691):
        Voltage(mV)     4186
        Current(mA)     -1
        Temp(0.1degC)   213
        Capacity(mAh)   401
Battery Data (29693):
        Voltage(mV)     4186
        Current(mA)     -1
        Temp(0.1degC)   213
        Capacity(mAh)   401
Battery Data (29695):
        Voltage(mV)     4186
        Current(mA)     -1
        Temp(0.1degC)   213
        Capacity(mAh)   401
Battery Data (29697):
        Voltage(mV)     4186
        Current(mA)     -1
        Temp(0.1degC)   213
        Capacity(mAh)   401
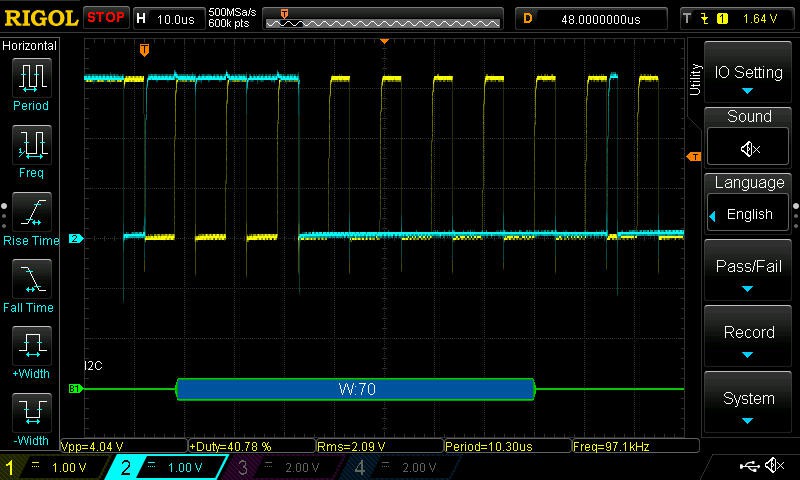
and the I2C waveforms look good on the scope:


So I'm happy about the hardware and software around the fuel gauge IC. I don't plan at the moment to look at the crypto chip. Instead, I'll switch now testing the radio or getting a whole LoRaWAN project up and going on it.
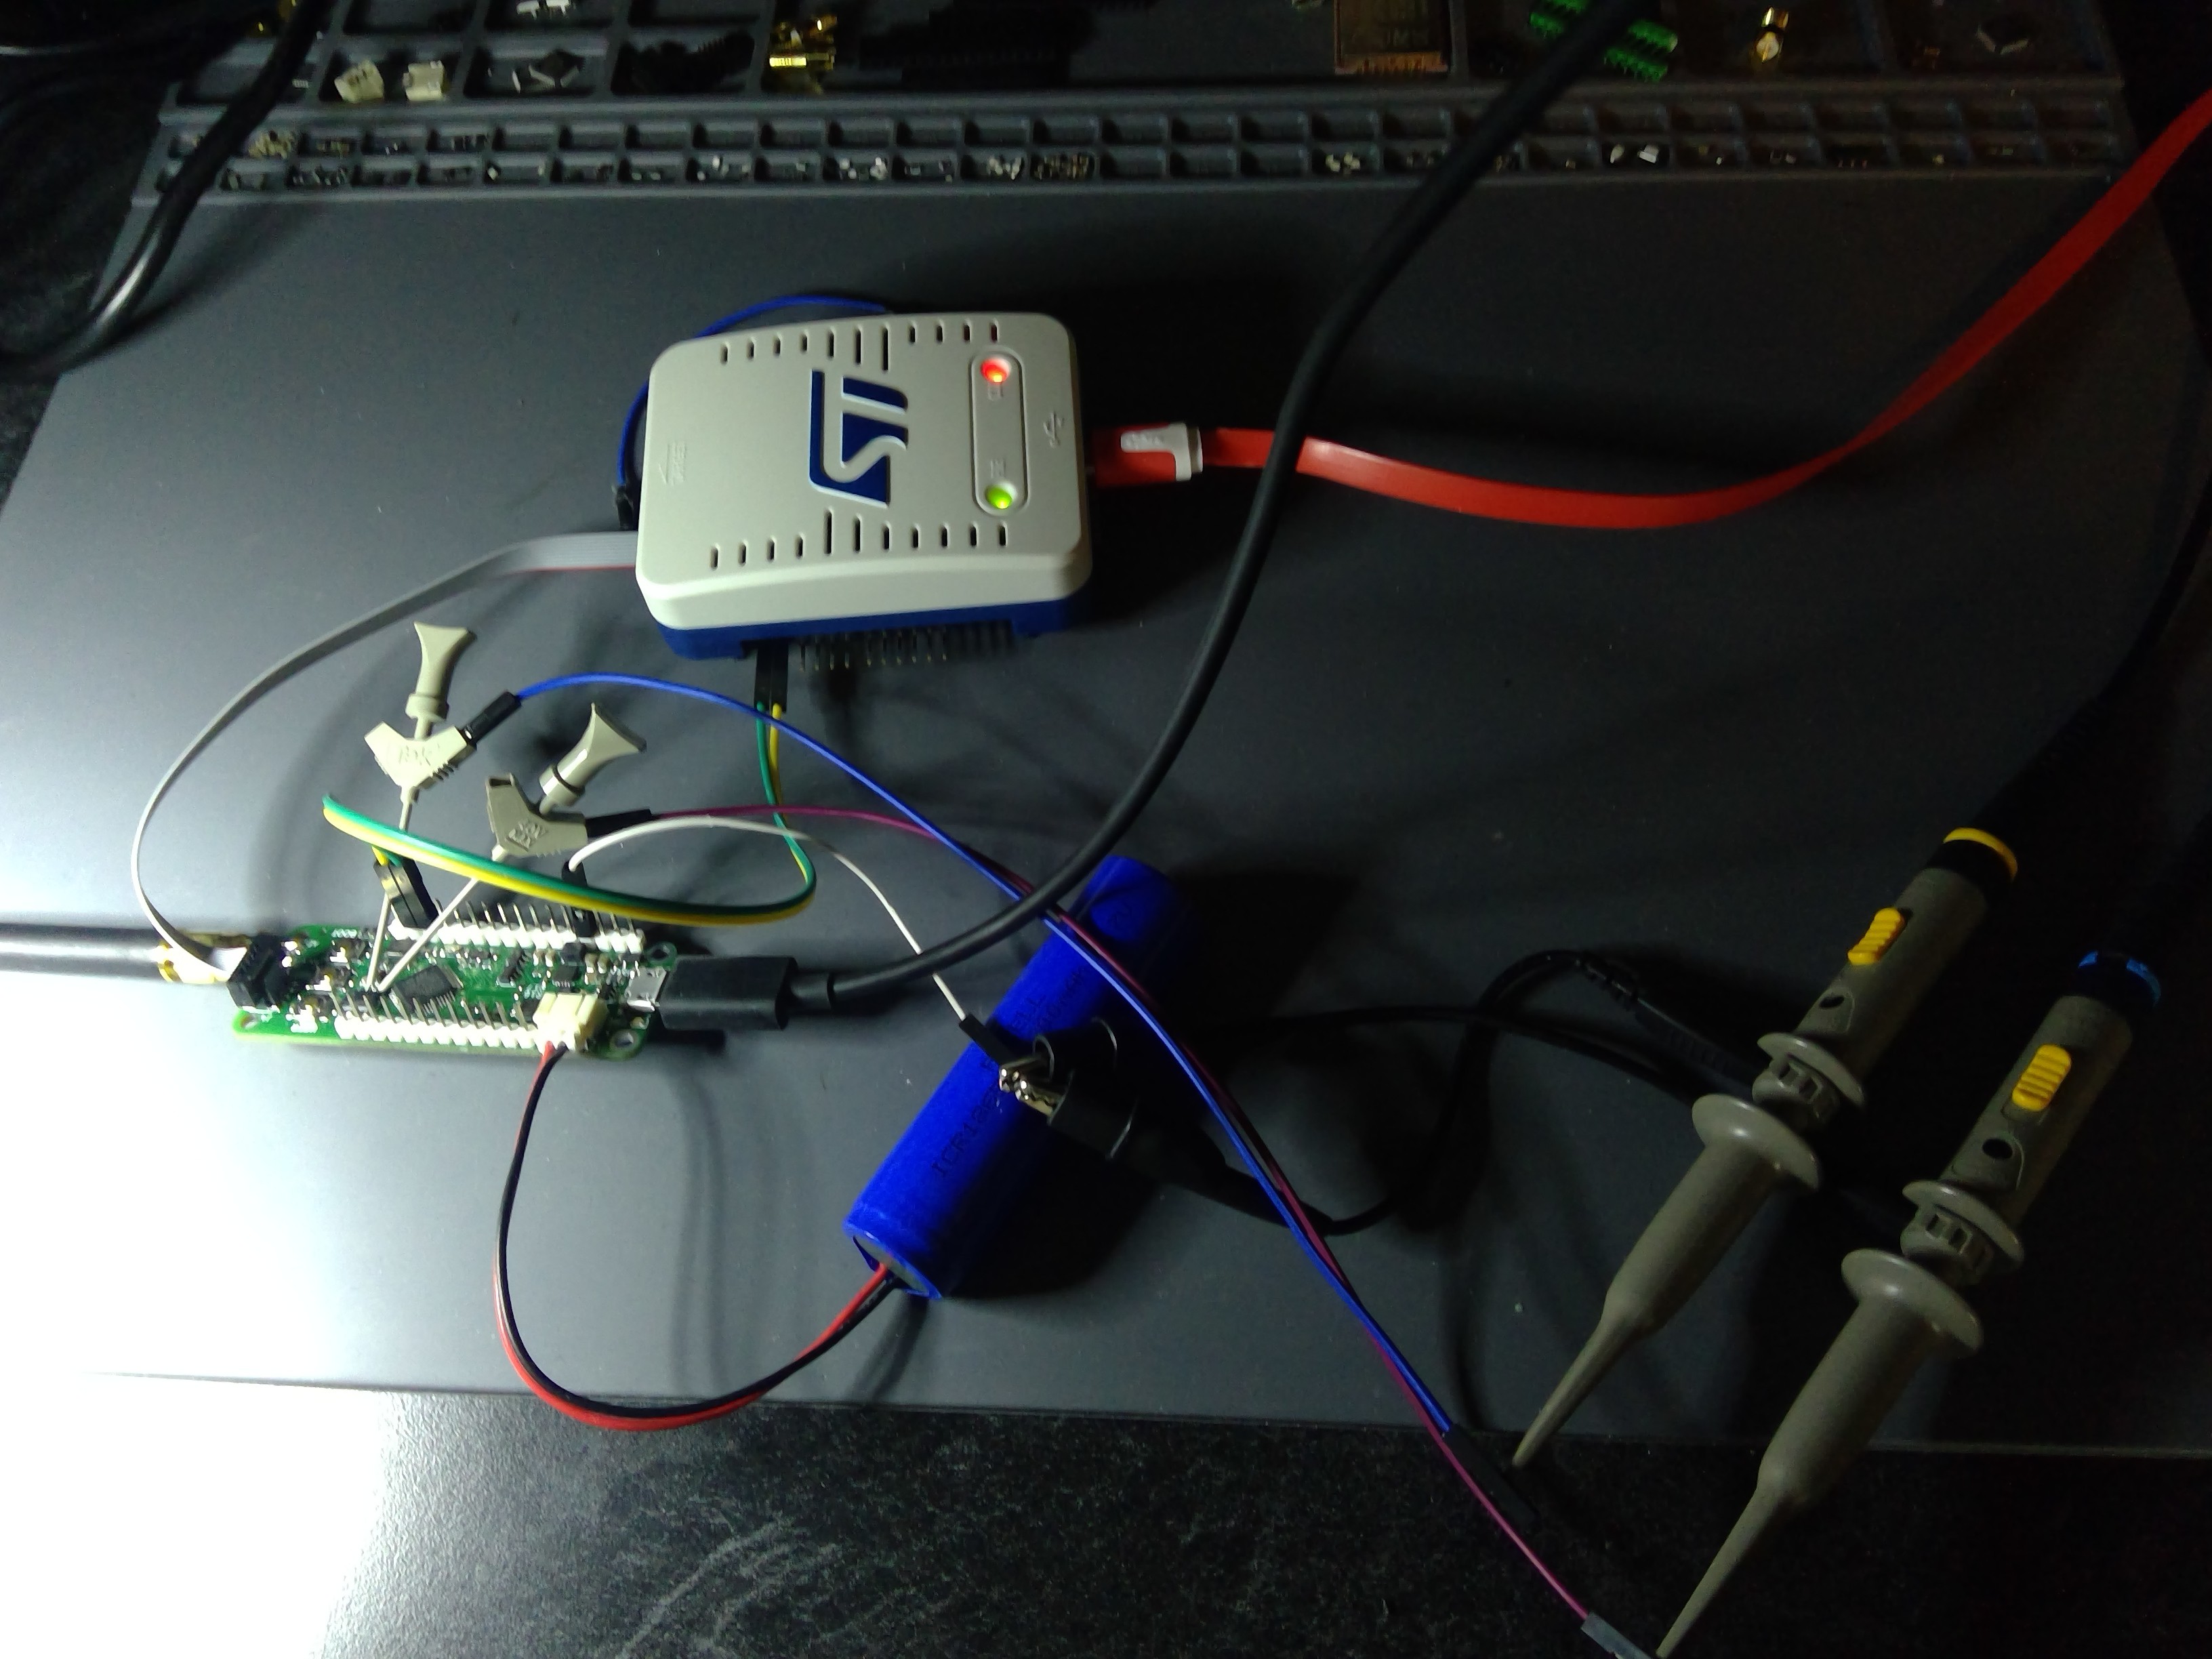
For reference, here's my debug setup:

I've got the Feather board with the Tek probes grabbing on to the I2C pins of the crypto chip (the only place I can easily grab the I2C bus), the ST-LINKV3, a battery and the scope probes off to the side. The yellow and green wires are the LPUART connected back to the VCP pins that give me a Virtual COM Port from the ST-LINKV3. The black USB cable was charging the battery
 Andy
Andy
Discussions
Become a Hackaday.io Member
Create an account to leave a comment. Already have an account? Log In.