 Michael Gardi
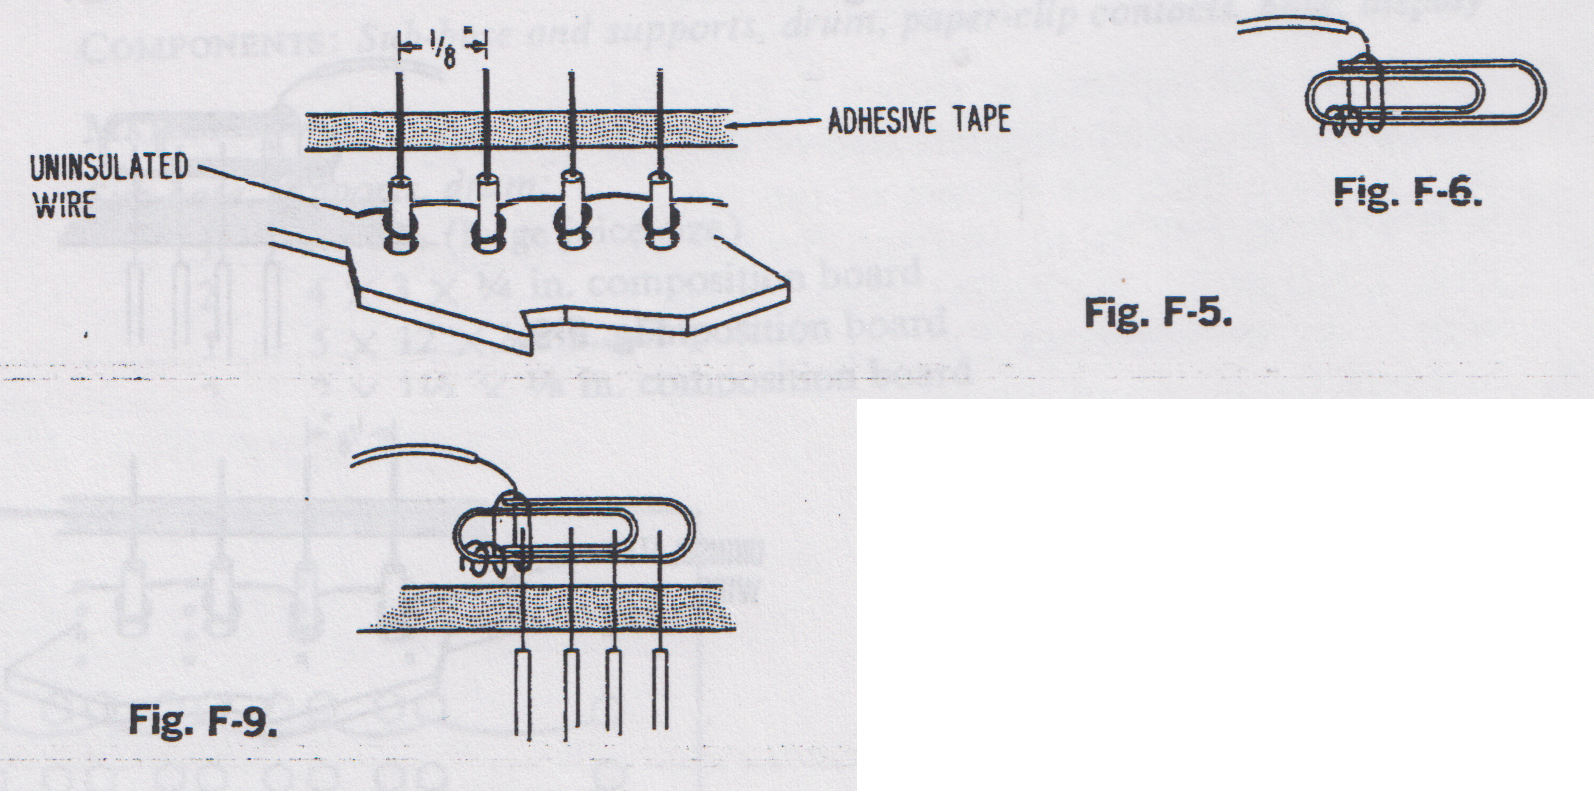
Most sizeable projects involve a number of side trips, and this one is no exception. From the Core Memory section of the book: "To read [core] memory, use the clip lead to simultaneously connect all four exposed wires for the address desired. See Fig. F-9."
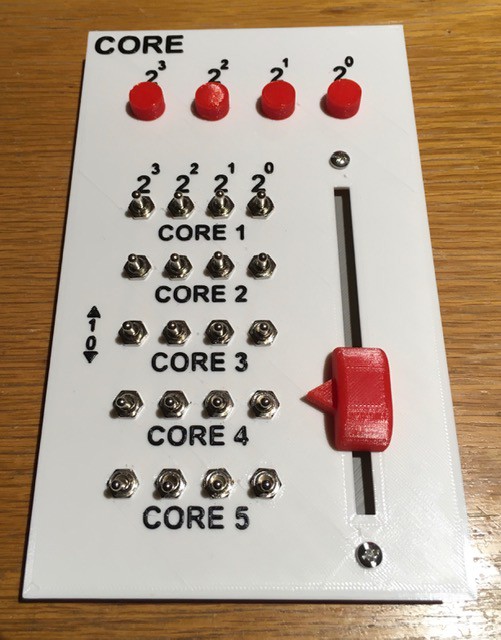
In adherence to my no paperclip policy for this project I had to come up with an alternate method of selecting one of the five core memory "words". Looking closely at the CT-650 image below it looks like they used a rotary selector switch.

Cool, I could use a variant of my Mostly 3D Printed Rotary Switch, but when I started laying out the Panel it felt more like a slider switch would be a better fit. So I took a little side trip and designed one (based on my rotary switch).
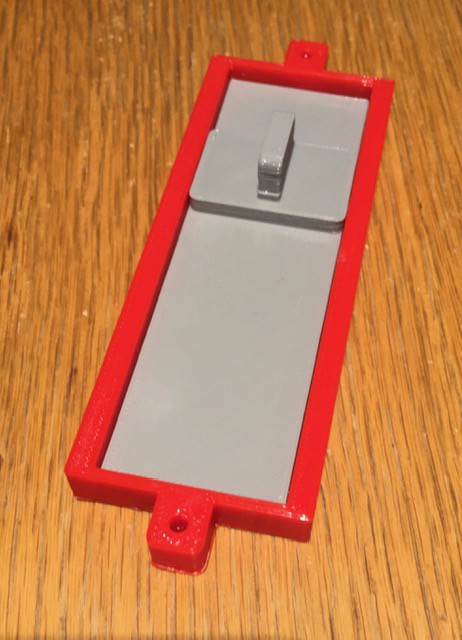
The STL files and and construction details can be found in my Instructable: Mostly 3D Printed Slider Switch.
Here is a sneak peek at the Core Panel with the switch installed and a "fancy" knob. The Panel still needs to be wired.
Discussions
Become a Hackaday.io Member
Create an account to leave a comment. Already have an account? Log In.