Step 1: Testing the motor
Before assembling, we test the DC motor by connecting it with 12V 2A DC Charger and check whether it is moving at our desired speed or not.
Step 2: Making 3D Models for the components
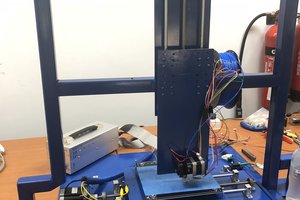
In order to attach DC motor to the printer on the place of the extruder, we need to make a 3D model that will hold the motor for our CNC machine. For 3D Modeling, we used TinkerCAD, basic online software for 3D modeling and designing
Step 3: Calibrating the Bed
After attaching the motor with the printer, we calibrated the bed of the printer using DoraWare software which is only compatible with IdeaWerk 3D Printer (the one we have used).
We moved the Z-axis by clicking on the Z+ icon and take the bed upwards till the tip of the bit touches the plate placed on the bed.
We get the total height that needs to be set while generating GCode for the models.
(It is important to calibrate the bed otherwise the result appear at the end won’t be the desired one)
Step 4: Generating GCode for Engraving
In order to start engraving our required design, we need to import STL file in DoraWare because it only accepts STL file. So, for STL file you can either use TinkerCAD, AutoCAD, SolidWorks for creating 3D models and saved it as STL file.
If you want to use any image or 2D drawing, then you have to use Inkscape software, which will be saving SVG files which then needs to be imported on any 3D Designing software (TinkerCAD, AutoCAD and SolidWorks) for generating its 3D model and save it as STL format file.
While generating GCode, we set the parameters as following
- Unchecked the Raft Box.
- Height: What was measured in the Setting
- Extruder Temp (℃): 0
- Platform Temp (℃): 0


 hello3dprintingworld
 Mateo Miličević
 Swaleh Owais
In the realm of manufacturing, there are three major areas that are CNC compatible: machining, laser cutting and welding. It's through these processes that you're able to create unique products. We are giving you CNC Machining Service information.