 Grant Stankaitis
In this log, I switched back to uPyCraft IDE and (spoiler) everything functions perfectly! I'll be wrapping up the code in this log. My finalized code can be found in my GitHub repository.
Switching back to uPyCraft IDE
Returning to uPyCraft IDE, I revisited the MicroPython examples posted in an earlier log (link found here). When I went through these examples, I discovered that they implemented the Nordic UART Service! I wanted to implement this BLE service from the beginning, and was unable to with Zerynth, so I am very happy that I can properly implement it within MiroPython using uPyCraft IDE.
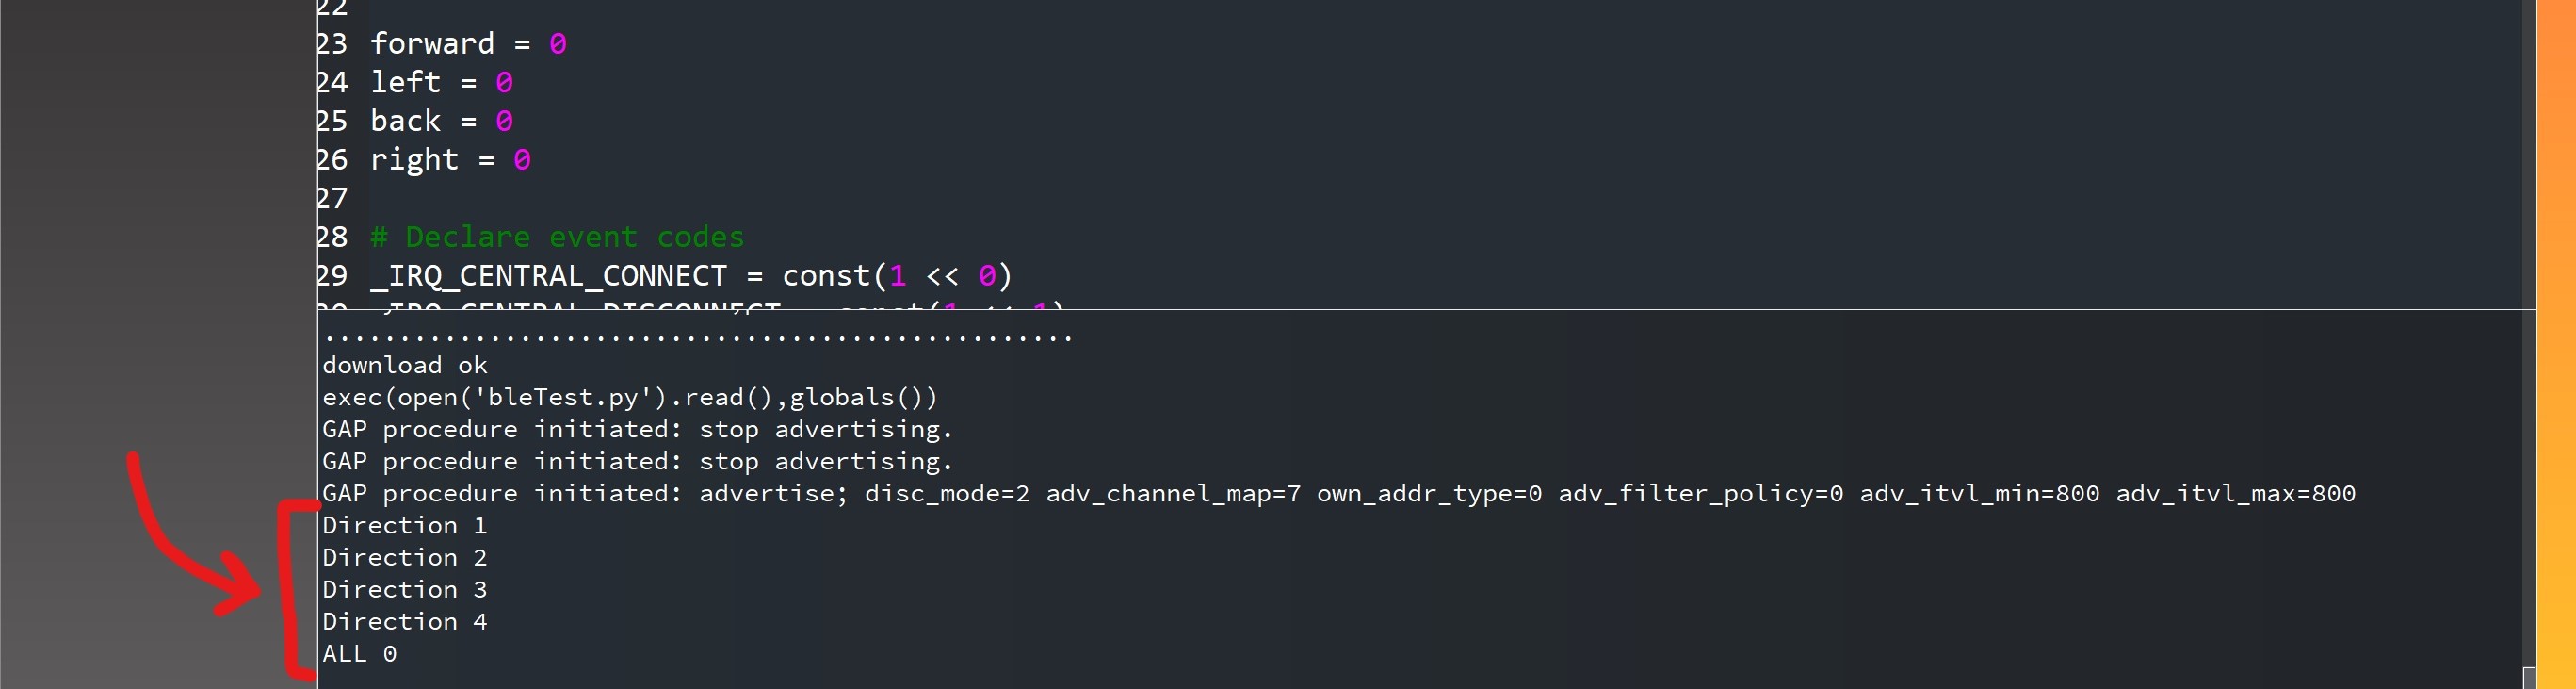
As you can see in the pictures below, there is proper connectivity between the nRF UART app and the ESP32 with my initial tests. The values being sent via the nRF UART app are being printed instantly to the ESP32 console. This is fantastic because it means we can have a constant stream of data going to the ESP32 (and/or send data back, like battery status).
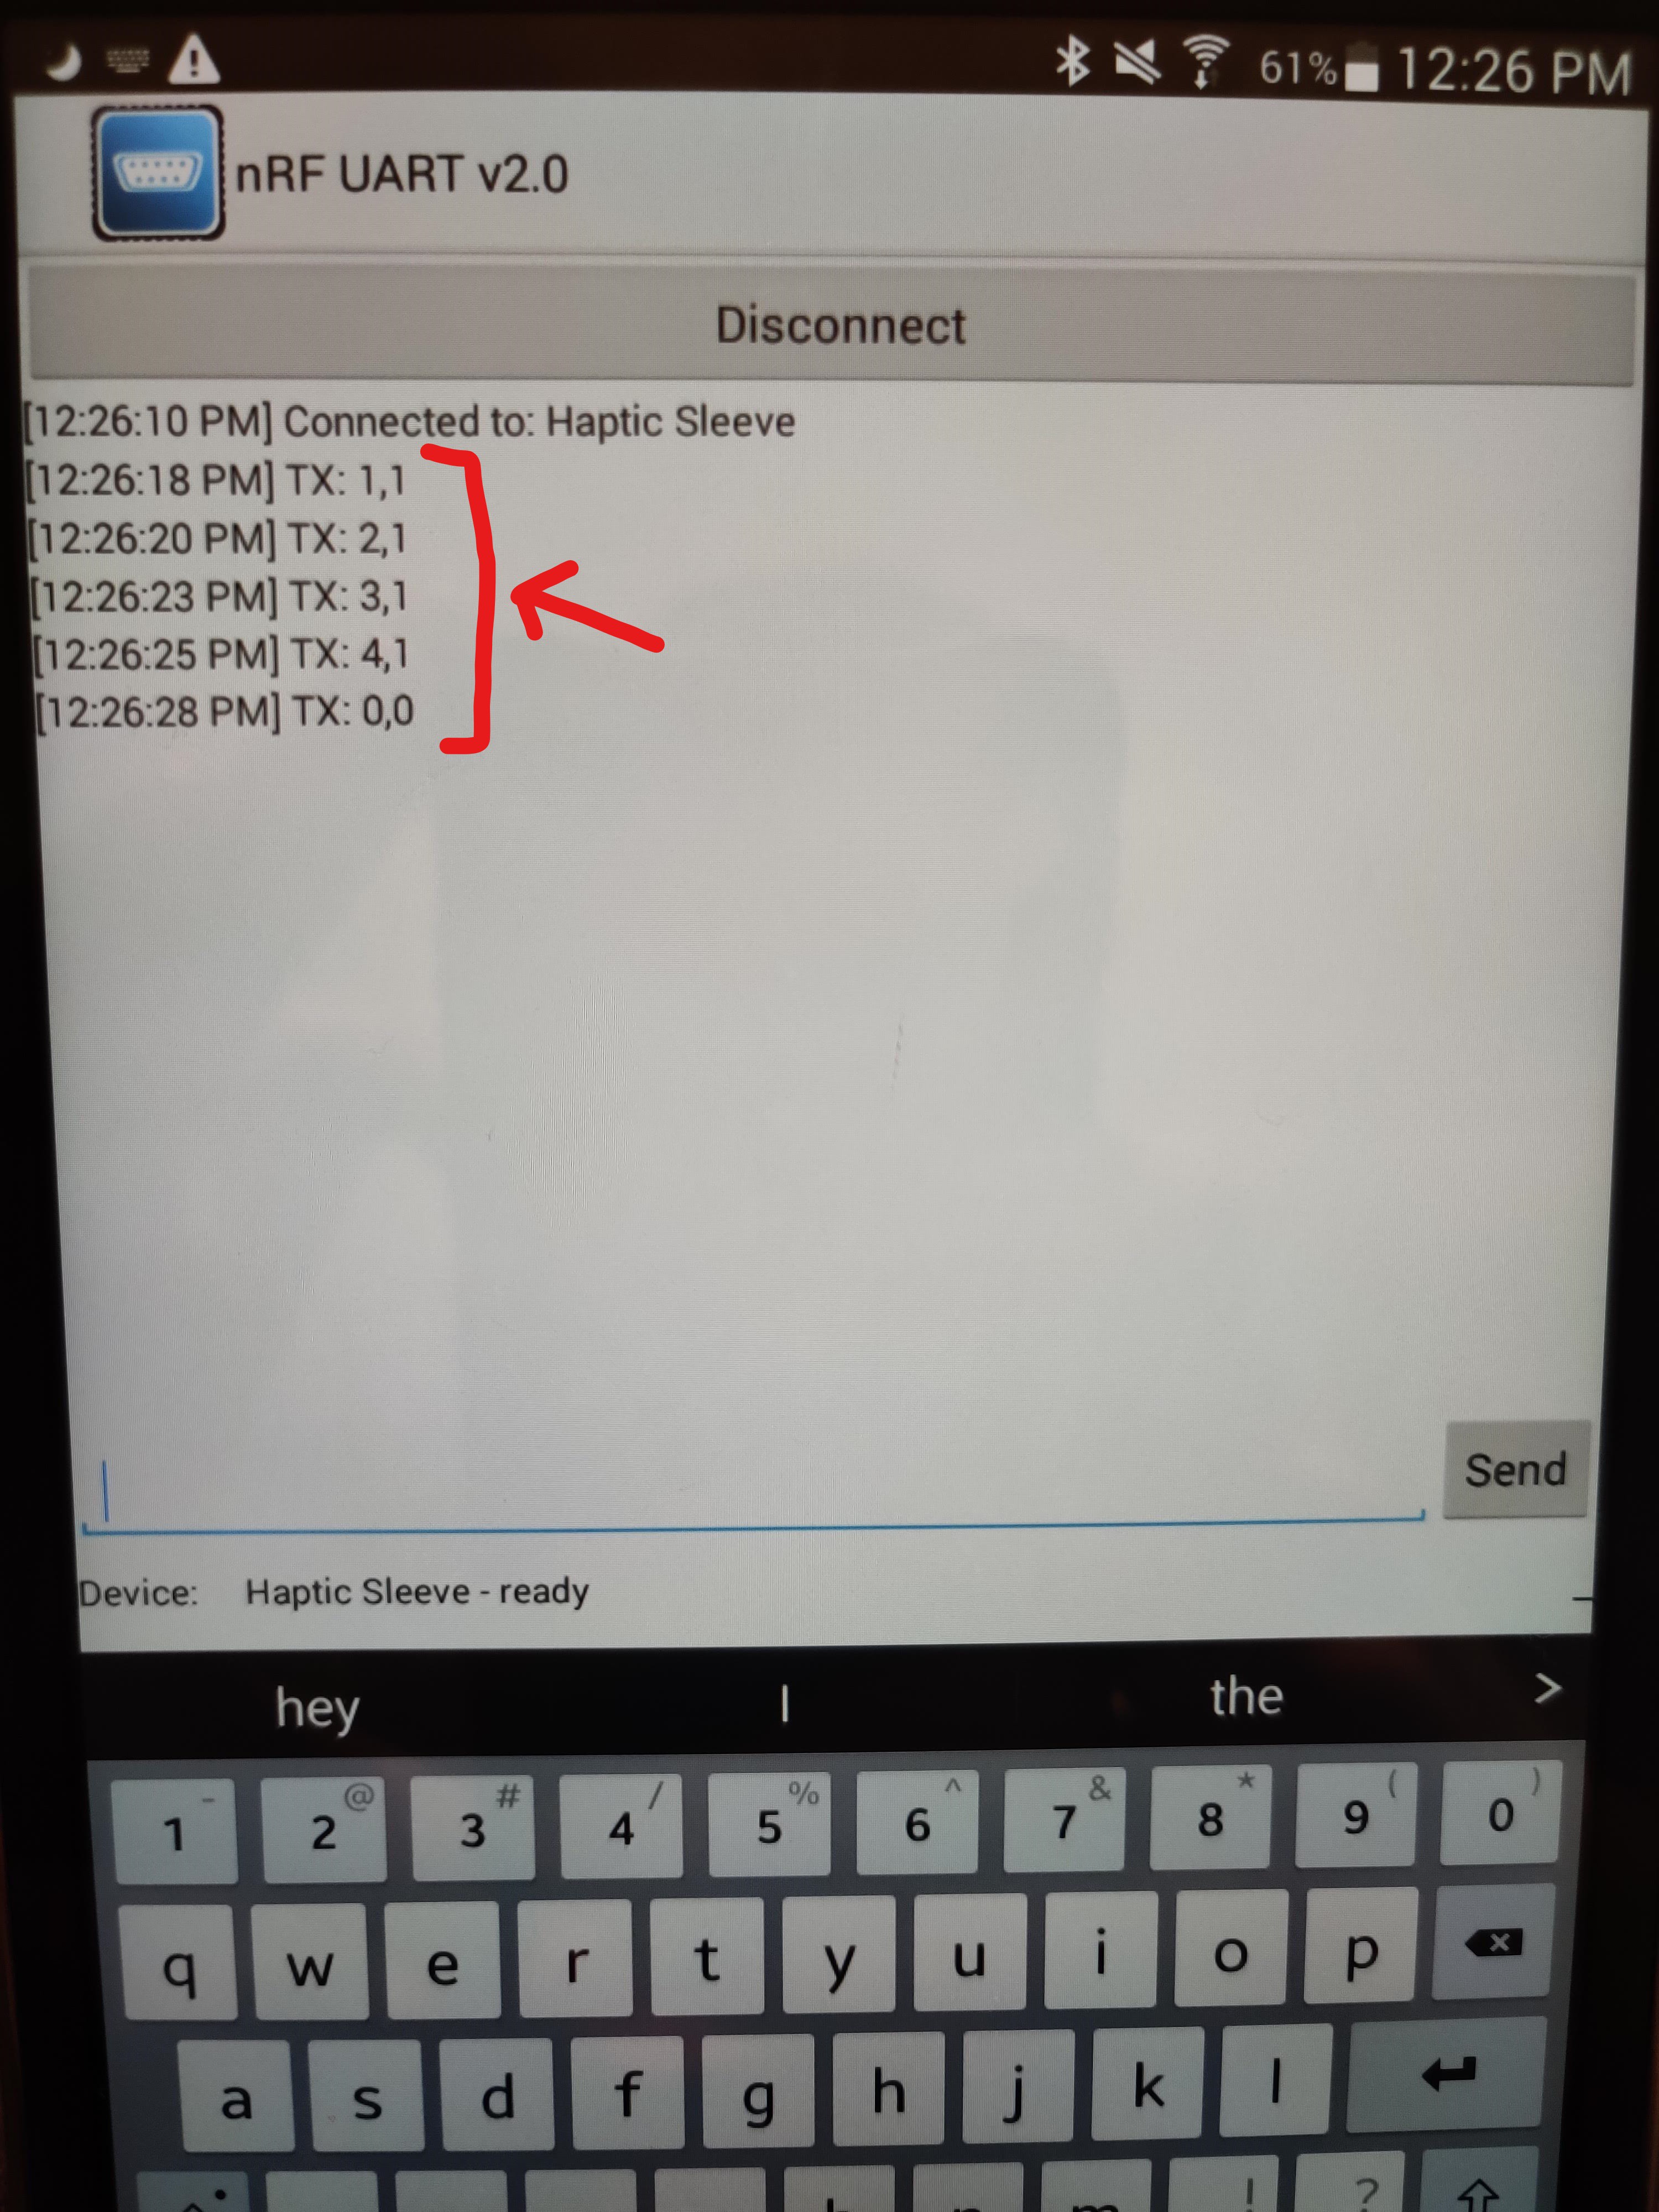
The nRF UART app can be found here: nRF UART app (Android). There is a version for iOS devices, but I was unable to find the link at this time.
Finalizing code
Now that everything is fully functional (BLE, PWM motor activation, etc.), I spent time cleaning up my code. I split the code into two separate files. One file is bleuart.py. This file contains all of the BLE advertising, event handling, UART setup, etc. The contents of this file are pulled from the MicroPython example link found above. There were a few things that I changed, like setting the Bluetooth name of the ESP32 to "Haptic Sleeve" in the init method for the BLE UART class:
...
def __init__(self, ble, name="Haptic Sleeve", rxbuf=100):
...
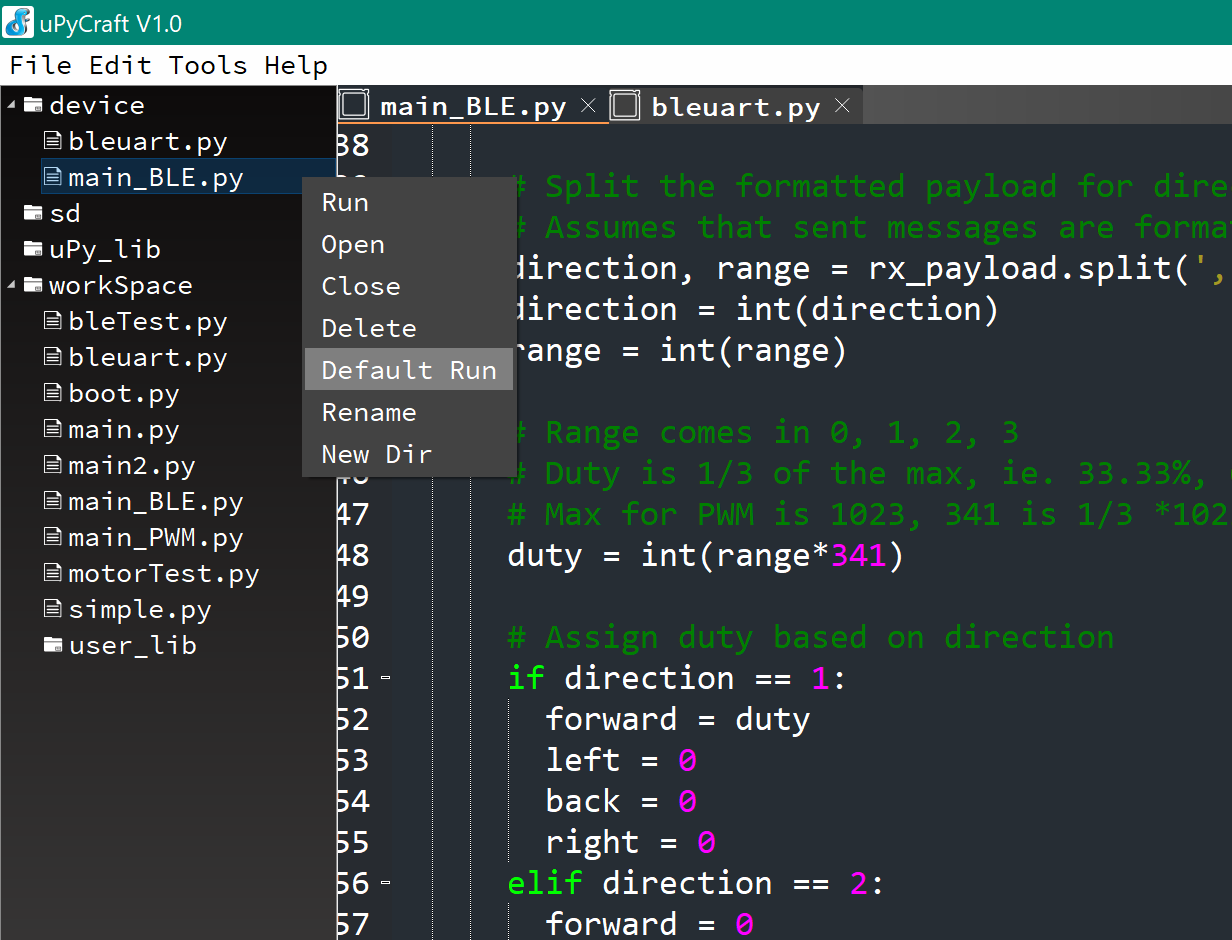
Then, the rest of the code is contained in the main_BLE.py file. This is the main file that is executed when the ESP32 boots, and contains the BLE implementation, PWM motor activation, etc. The main_BLE.py file imports the bleuart.py file (seen in the import statements at the top of the file) so that BLE can be implemented. I keep the BLEUART class separate to maintain a more object-oriented approach.
To ensure that main_BLE.py runs by default, right-click main_BLE.py and select "Default run."
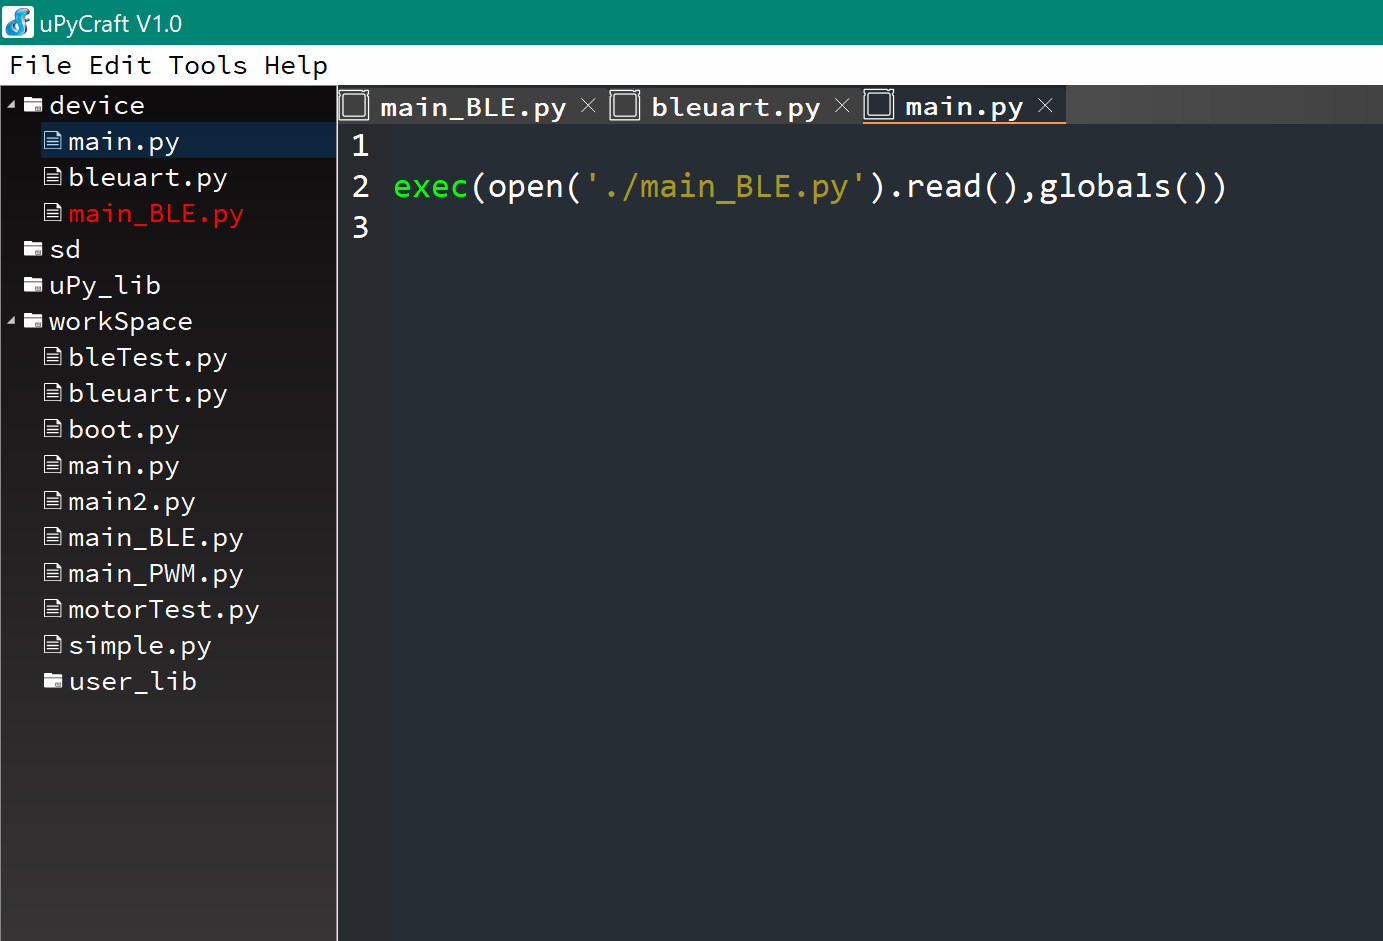
After selecting this, another file will be created called main.py, and main_BLE.py will be highlighted in red. This means that setting the "default run" worked. If you open main.py, you can see a command to open and execute the main_BLE.py file. So, main.py is the main file that runs, but since there is a call to execute main_BLE.py within this, it effectively runs main_BLE.py every time the ESP32 is set to execute the main code (like from power up).
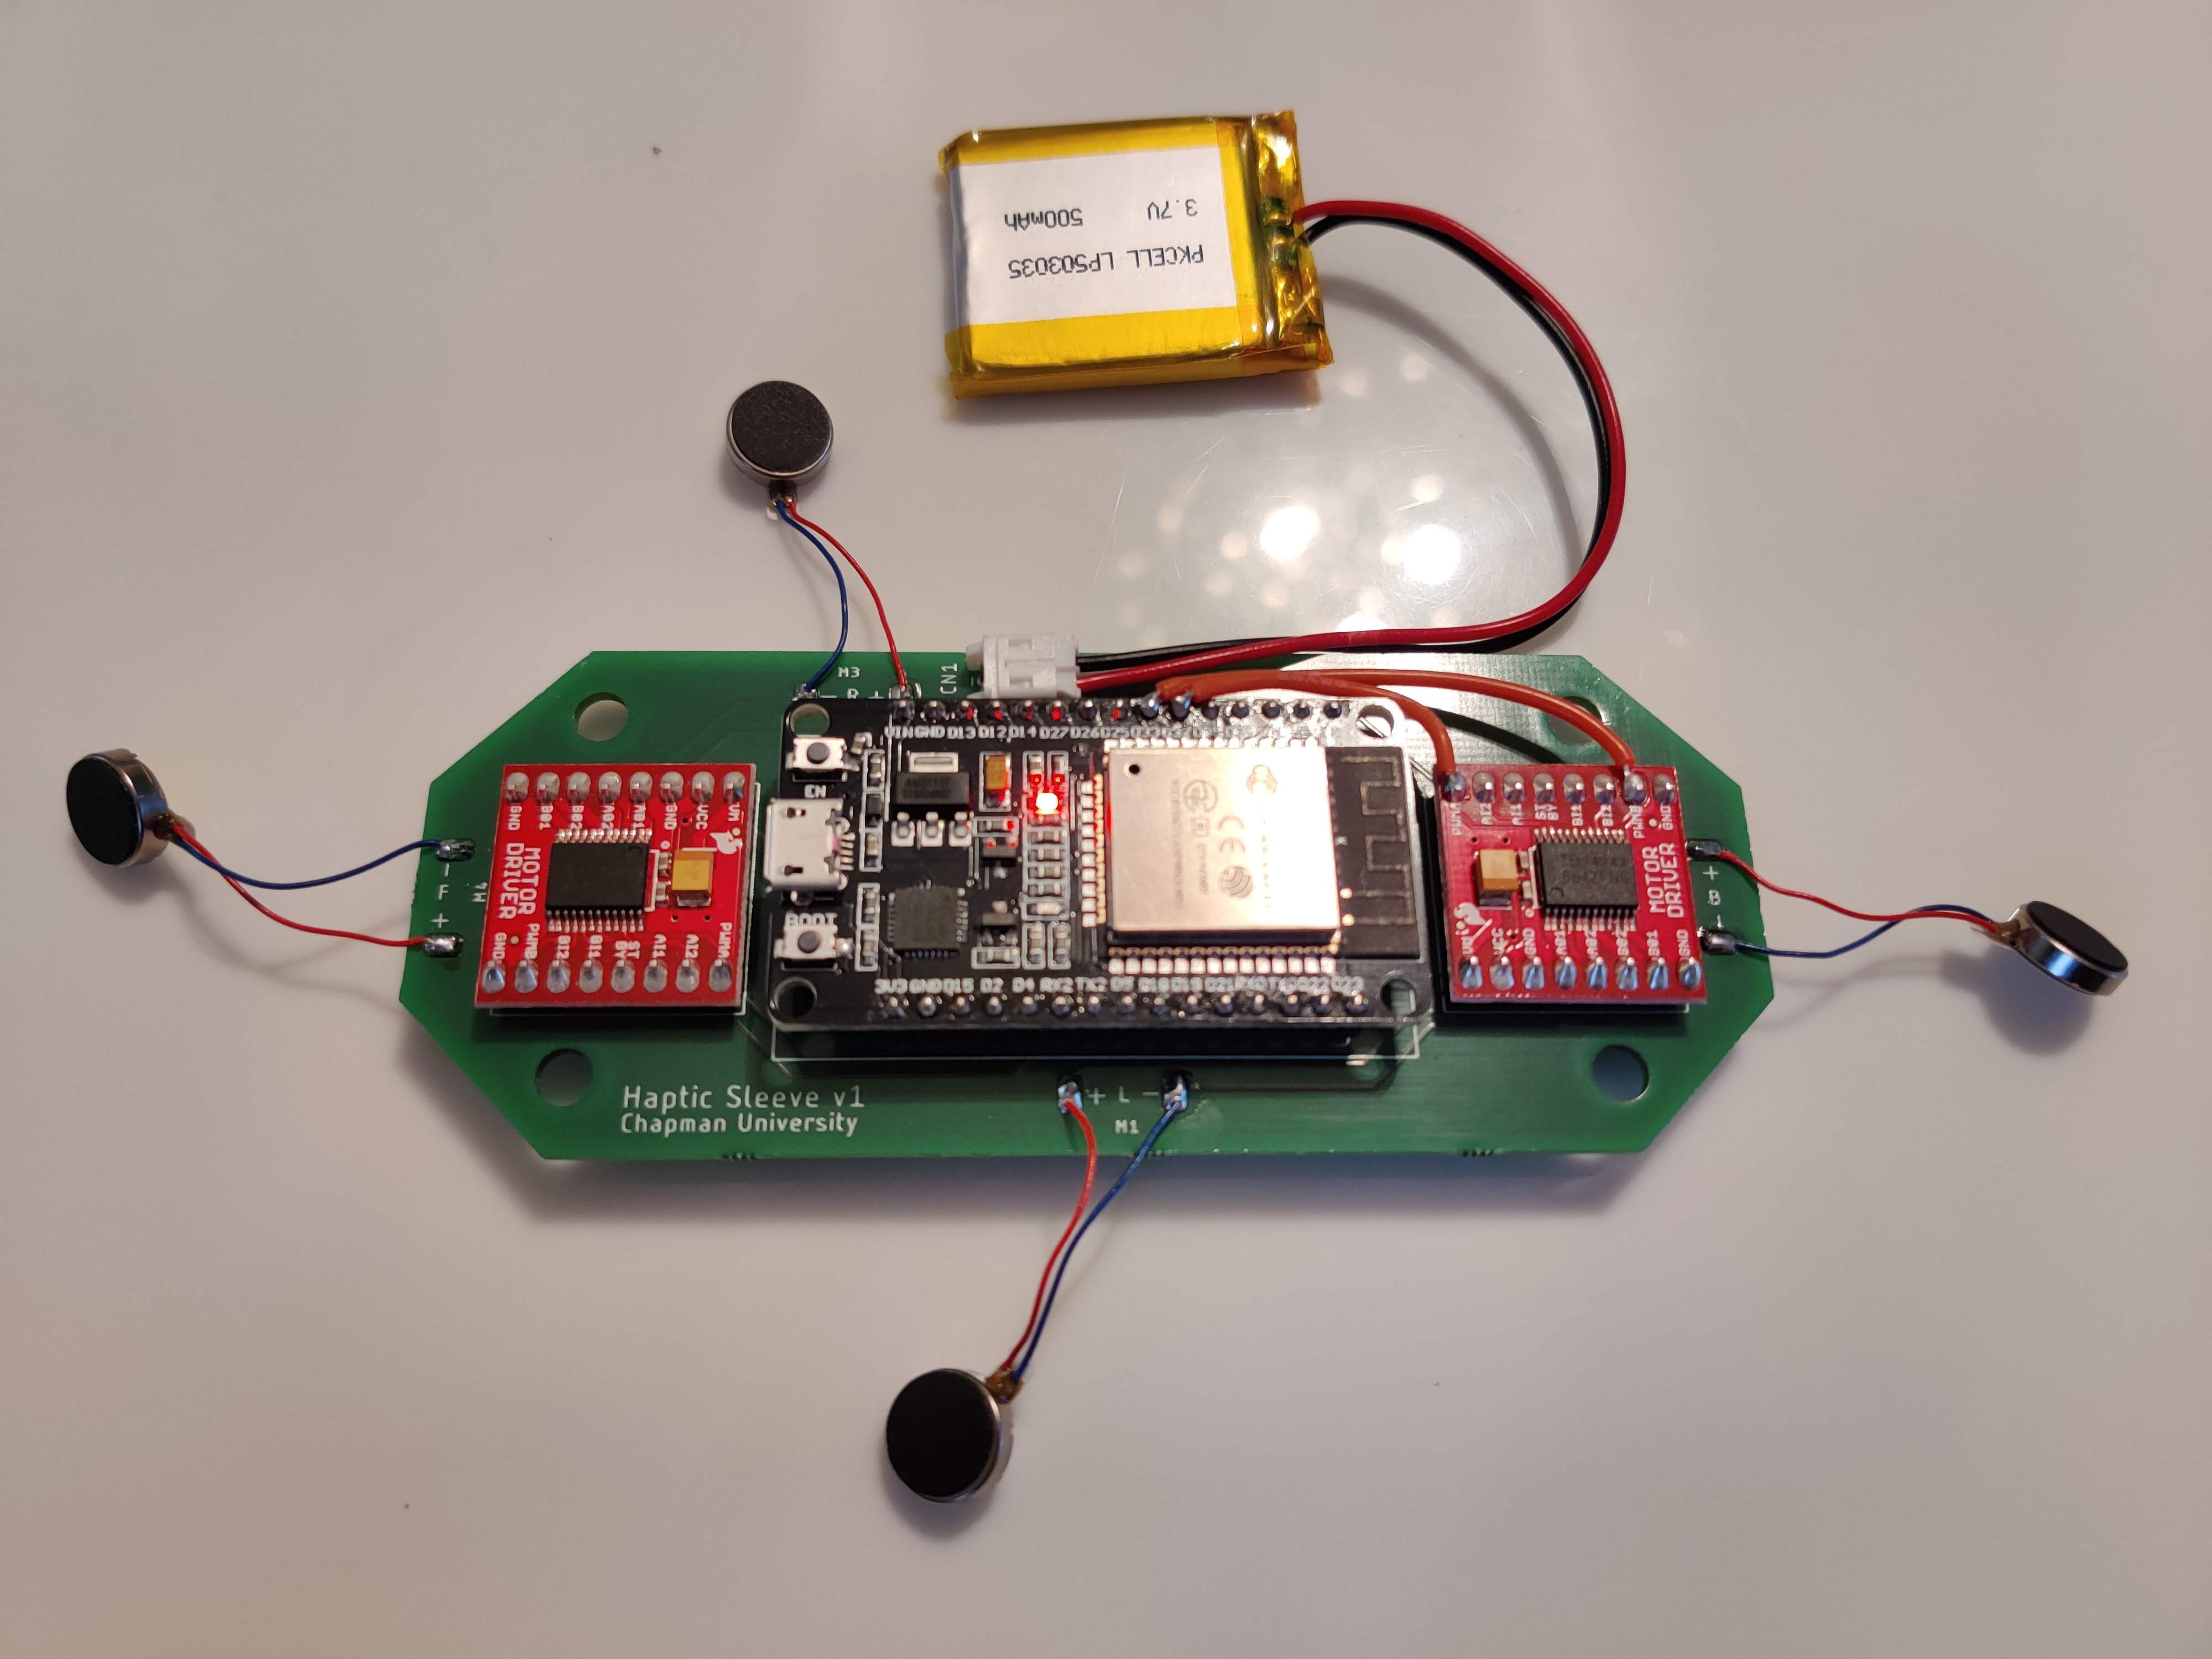
PCB assembly
Now that the code is buttoned up and uploaded to the ESP32, I moved everything over to the PCB! I soldered the ESP32 and motor drivers in the proper orientation according to the layout, and added the JST connector for battery connections. The only issue was that I incorrectly wired the PWM pins for the second motor driver. Zerynth's implementation allows PWM on all digital pins, but MicroPython does not allow PWM generation from GPIO pins 34-39, and I routed my pins to GPIOs 34 & 35. So I had to cut the traces and externally route the wires to acceptable pins (hence the extra red wires running from the motor driver on the ride side of the picture). The jumper wires are now running to pins 32 and 33. After these slight modifications, I plugged the battery in and the ESP32 powered up! I verified that I was able to connect via Bluetooth to the ESP32 and send a full range of commands to activate the motors. So, the only part left to do is test it on humans!
Discussions
Become a Hackaday.io Member
Create an account to leave a comment. Already have an account? Log In.