Close
0%
0%

Measure water Flow Rate using Arduino & Sensor

Flow sensor helps you to calculate the flow rate and volume of liquid that has passed through the pipe.

Similar projects worth following
The project outlines how to measure the flow rate as well as the volume of liquid with the help of the flow sensor.

About the Project

YFS201 Water Flow Sensor

The Water Flow sensor has 3 different wires RED, YELLOW, and BLACK as shown in the figure below. The red wire is generally utilized for supply voltage which ranges from 5V to 18V and the black wire is attached to GND. The yellow wire is utilized for the output, which can be read by an MCU.
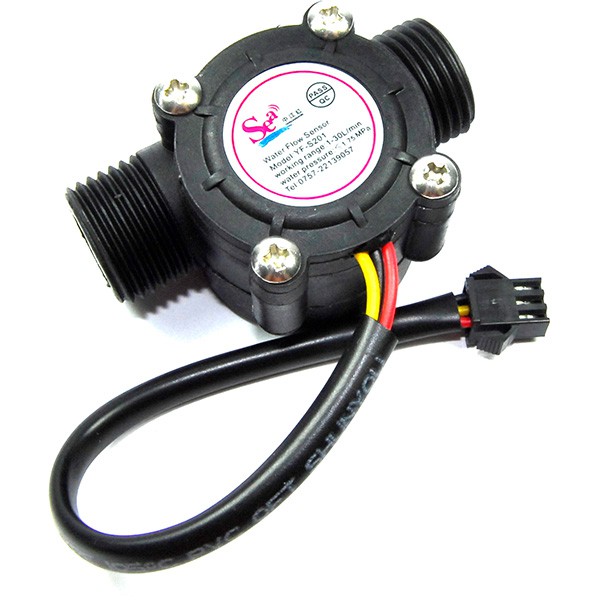
The water flow sensor contains a pinwheel sensor that estimates the quantity of liquid that has passed through it.

The water flow sensor basically operates on the principle of hall effect. The water flow sensor is combined with a magnetic hall effect sensor, which produces an electric pulse with every strike.

Working of Project:

In this project, we attached the water flow sensor to a pipe. If the output valve of the pipe is terminated, the output of the water flow sensor is zero that means no pulses. And If the output valve of the pipe is opened. The water runs via the sensor, which in turn revolves around the wheel inside the sensor. In this situation, we can see pulses, which are produced from the sensor.

These pulses basically will work as an interrupt signal to the Arduino UNO.

The current time and loop time variable assure that for every one second the value of the flow_frequency is utilized for calculation of flow rate and volume. Once the calculation is completed, the flow_frequency variable is set to zero and the complete procedure is originated from the beginning.
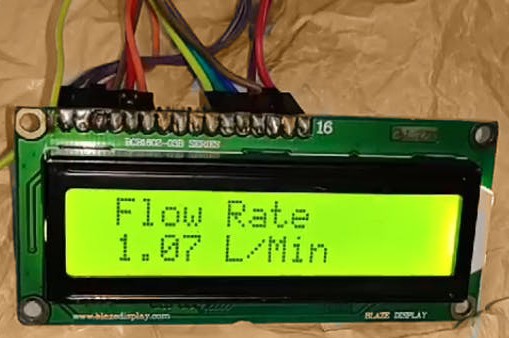
  • 1 × Arduino Uno
  • 1 × Water flow sensor
  • 1 × LCD 16X2
  • 1 × Connecting wires

  • 1
    Run a Program

    volatile int flow_frequency; // Measures flow sensor pulses
    // Calculated litres/hour
    float vol = 0.0,l_minute;
    unsigned char flowsensor = 2; // Sensor Input
    unsigned long currentTime;
    unsigned long cloopTime;
    #include
    LiquidCrystal lcd(12, 11, 5, 4, 3, 9);
    void flow () // Interrupt function
    {
    flow_frequency++;
    }
    void setup()
    {
    pinMode(flowsensor, INPUT);
    digitalWrite(flowsensor, HIGH); // Optional Internal Pull-Up
    Serial.begin(9600);
    lcd.begin(16, 2);
    attachInterrupt(digitalPinToInterrupt(flowsensor), flow, RISING); // Setup Interrupt
    lcd.clear();
    lcd.setCursor(0,0);
    lcd.print("Water Flow Meter");
    lcd.setCursor(0,1);
    lcd.print("Circuit Digest");
    currentTime = millis();
    cloopTime = currentTime;
    }
    void loop ()
    {
    currentTime = millis();
    // Every second, calculate and print litres/hour
    if(currentTime >= (cloopTime + 1000))
    {
    cloopTime = currentTime; // Updates cloopTime
    if(flow_frequency != 0){
    // Pulse frequency (Hz) = 7.5Q, Q is flow rate in L/min.
    l_minute = (flow_frequency / 7.5); // (Pulse frequency x 60 min) / 7.5Q = flowrate in L/hour
    lcd.clear();
    lcd.setCursor(0,0);
    lcd.print("Rate: ");
    lcd.print(l_minute);
    lcd.print(" L/M");
    l_minute = l_minute/60;
    lcd.setCursor(0,1);
    vol = vol +l_minute;
    lcd.print("Vol:");
    lcd.print(vol);
    lcd.print(" L");
    flow_frequency = 0; // Reset Counter
    Serial.print(l_minute, DEC); // Print litres/hour
    Serial.println(" L/Sec");
    }
    else {
    Serial.println(" flow rate = 0 ");
    lcd.clear();
    lcd.setCursor(0,0);
    lcd.print("Rate: ");
    lcd.print( flow_frequency );
    lcd.print(" L/M");
    lcd.setCursor(0,1);
    lcd.print("Vol:");
    lcd.print(vol);
    lcd.print(" L");
    }
    }
    }

View all instructions

Enjoy this project?

Share

Discussions

Similar Projects

Does this project spark your interest?

Become a member to follow this project and never miss any updates