Close
0%
0%

Speedy

Making a 4 year olds version of Speedy from BBC's Caties Amazing Machines

Similar projects worth following
Recently the BBC's Caties Amazing Machines began airing in Australia and my 3 boys were instantly hooked. The Show features a "robot" character "Speedy" that delivers the days theme for the show to the presenter, Catie Munnings. My oldest boy, Otto, had been at me to help him make his own Speedy so we set to work over the weekend to see what we could come up with.

The basis of this project is to attempt to replicate Speedy in a form a 4 year old can manage.

The main construction medium is cardboard ( a box of beer was just the right weight easy to cut and stiff enough to be durable)

Hot melt glue to hold it all together

Blue, yellow and white poster paint

motive power provided by an old kids RC car.

  • 1 × Corugated Cardboard Light weight Corrugated cardbord form a beer box
  • 1 × Hot Melt glue
  • 1 × Poster paint Blue, White, Yellow and Black
  • 1 × Chasis Discarded Kids RC Car

  • Opening hatch

    Saabman04/28/2020 at 02:10 0 comments

    one of speedy’s features is a hatch in the top which holds the card for Catie. 

    We will need to add that to our version and attempt  to make it open remotely as well. Our rc car only has 2 channels so the current thinking is to use a second rc car for components to provide the radio link and actuators to open the hatch. 

  • Screen shots

    Saabman04/28/2020 at 01:45 0 comments

    As I couldn’t find any images of speedy on the net to try and copy I played the video and paused it at various points to get different angles of him. All the images I got are just cropped screen shots. This gave us something to work towards . 


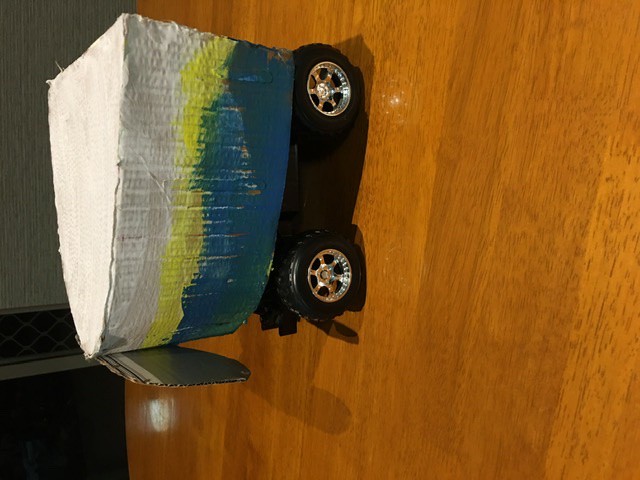
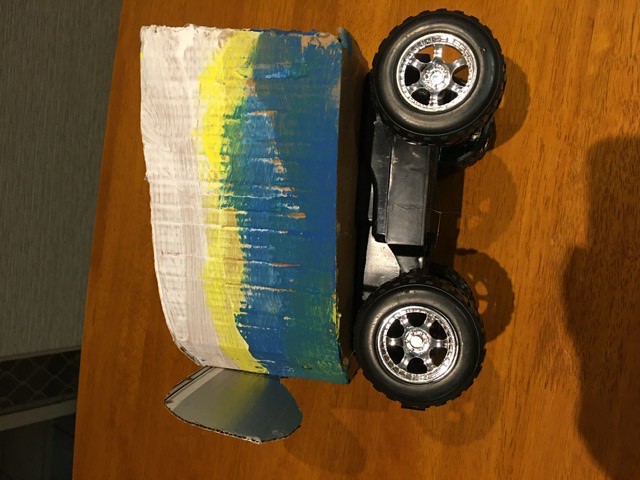
    Using a beer box constrained our dimensions to about 20cm width.  From a quick measure of the image on the screen with a ruler we worked out the width to length proportion to be roughly square . Close enough for our purpose. So 20cmlong 20cm wide. 

    We’re not aiming for perfection here so a quick fire hand sketch on the card to get the approximate shape for the top and bottom. 

    We cut one piece then used that as a template to make the other side.  Sorry no pics of the construction..

    While the original has some nice curves that’s a bit tricky to do in corrugated cardboard so we kept it simple flat top and bottom but we were able to get a curve in the sides by cutting  the card so the corrugations were vertically allowing the card to curve around the front.


    the sides are glued to the top with hot melt and then it was up to Otto to paint. White on top yellow stripe and blue on the bottom half.


    the “eyes” just cut out of some more card painted and glued on. 

    The resulting cardboard creation was glued to the top of a partially disassembled Rc car for motive power

View all 2 project logs

Enjoy this project?

Share

Discussions

Similar Projects

Does this project spark your interest?

Become a member to follow this project and never miss any updates