 David Cain
So I've put together a perfboard to remove the wire mess included with the breadboard. There will also now be a document in the files of the project that compiles the perfboard schematic. I've tested and everything seems to be functional which is great! It took roughly two days but in my opinion I think it was worth the effort. :)
Here's some pictures of the board being assembled then finished...
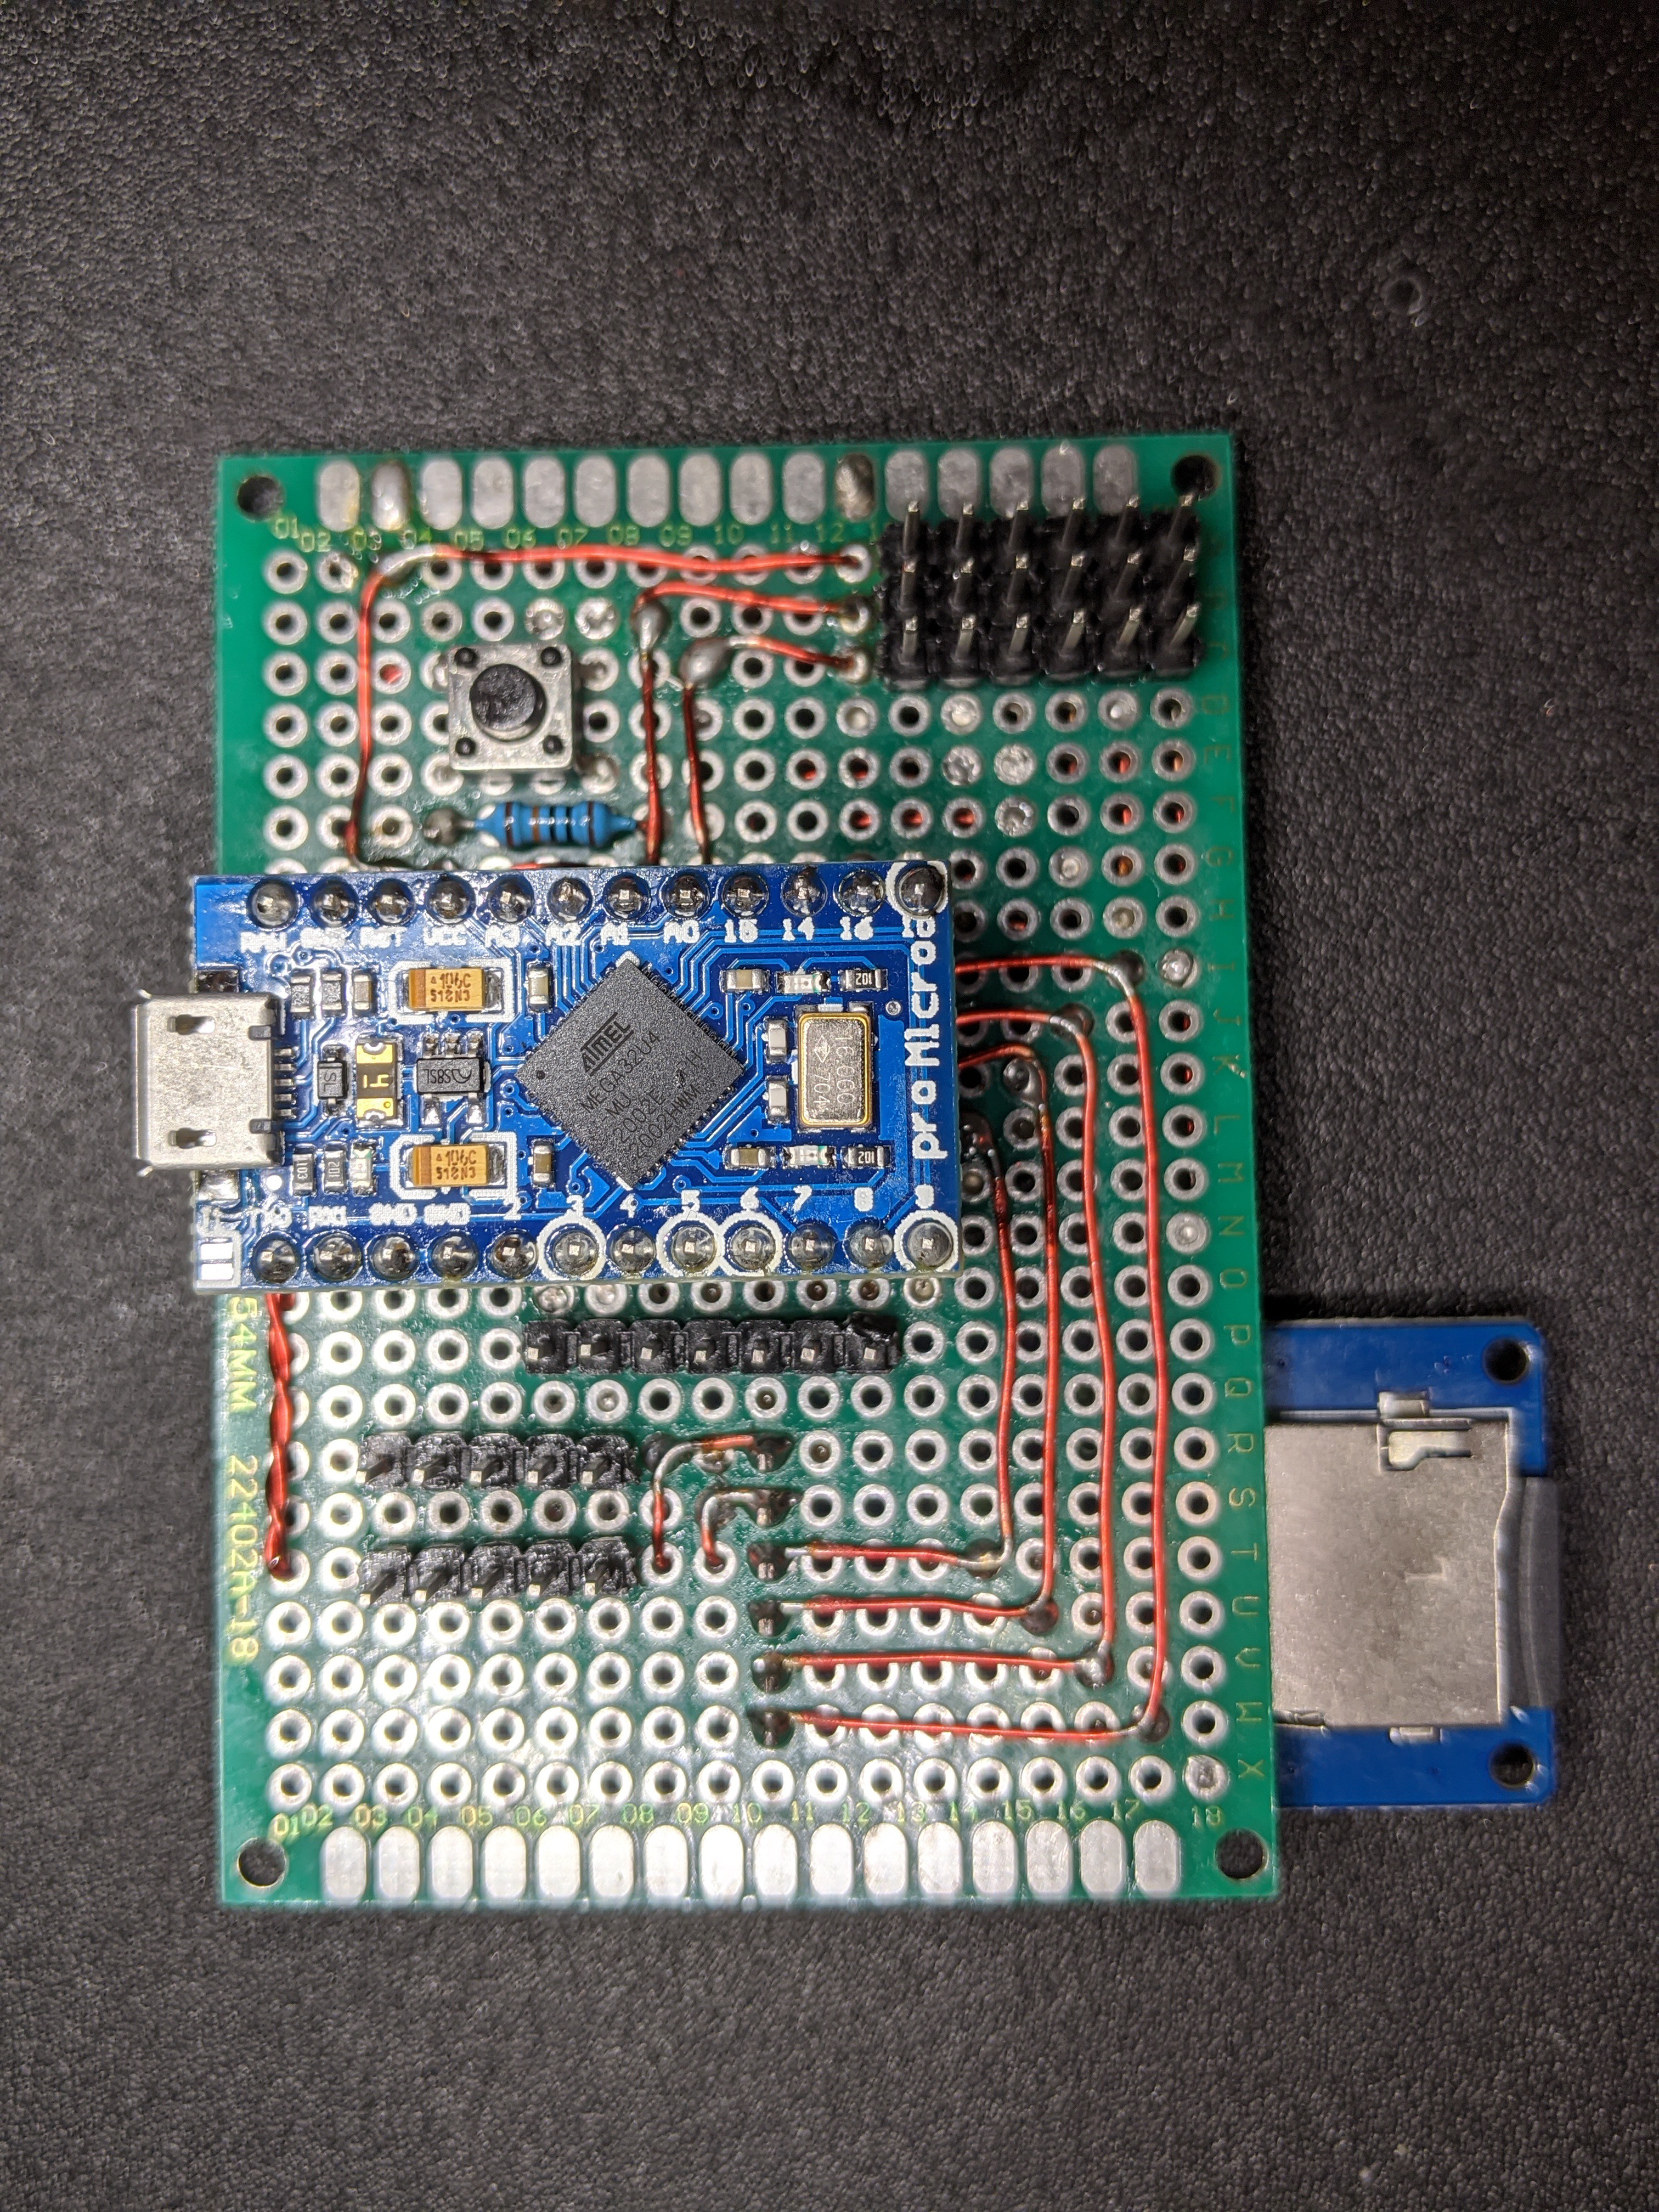
Finished Product w/ Micro-controller:
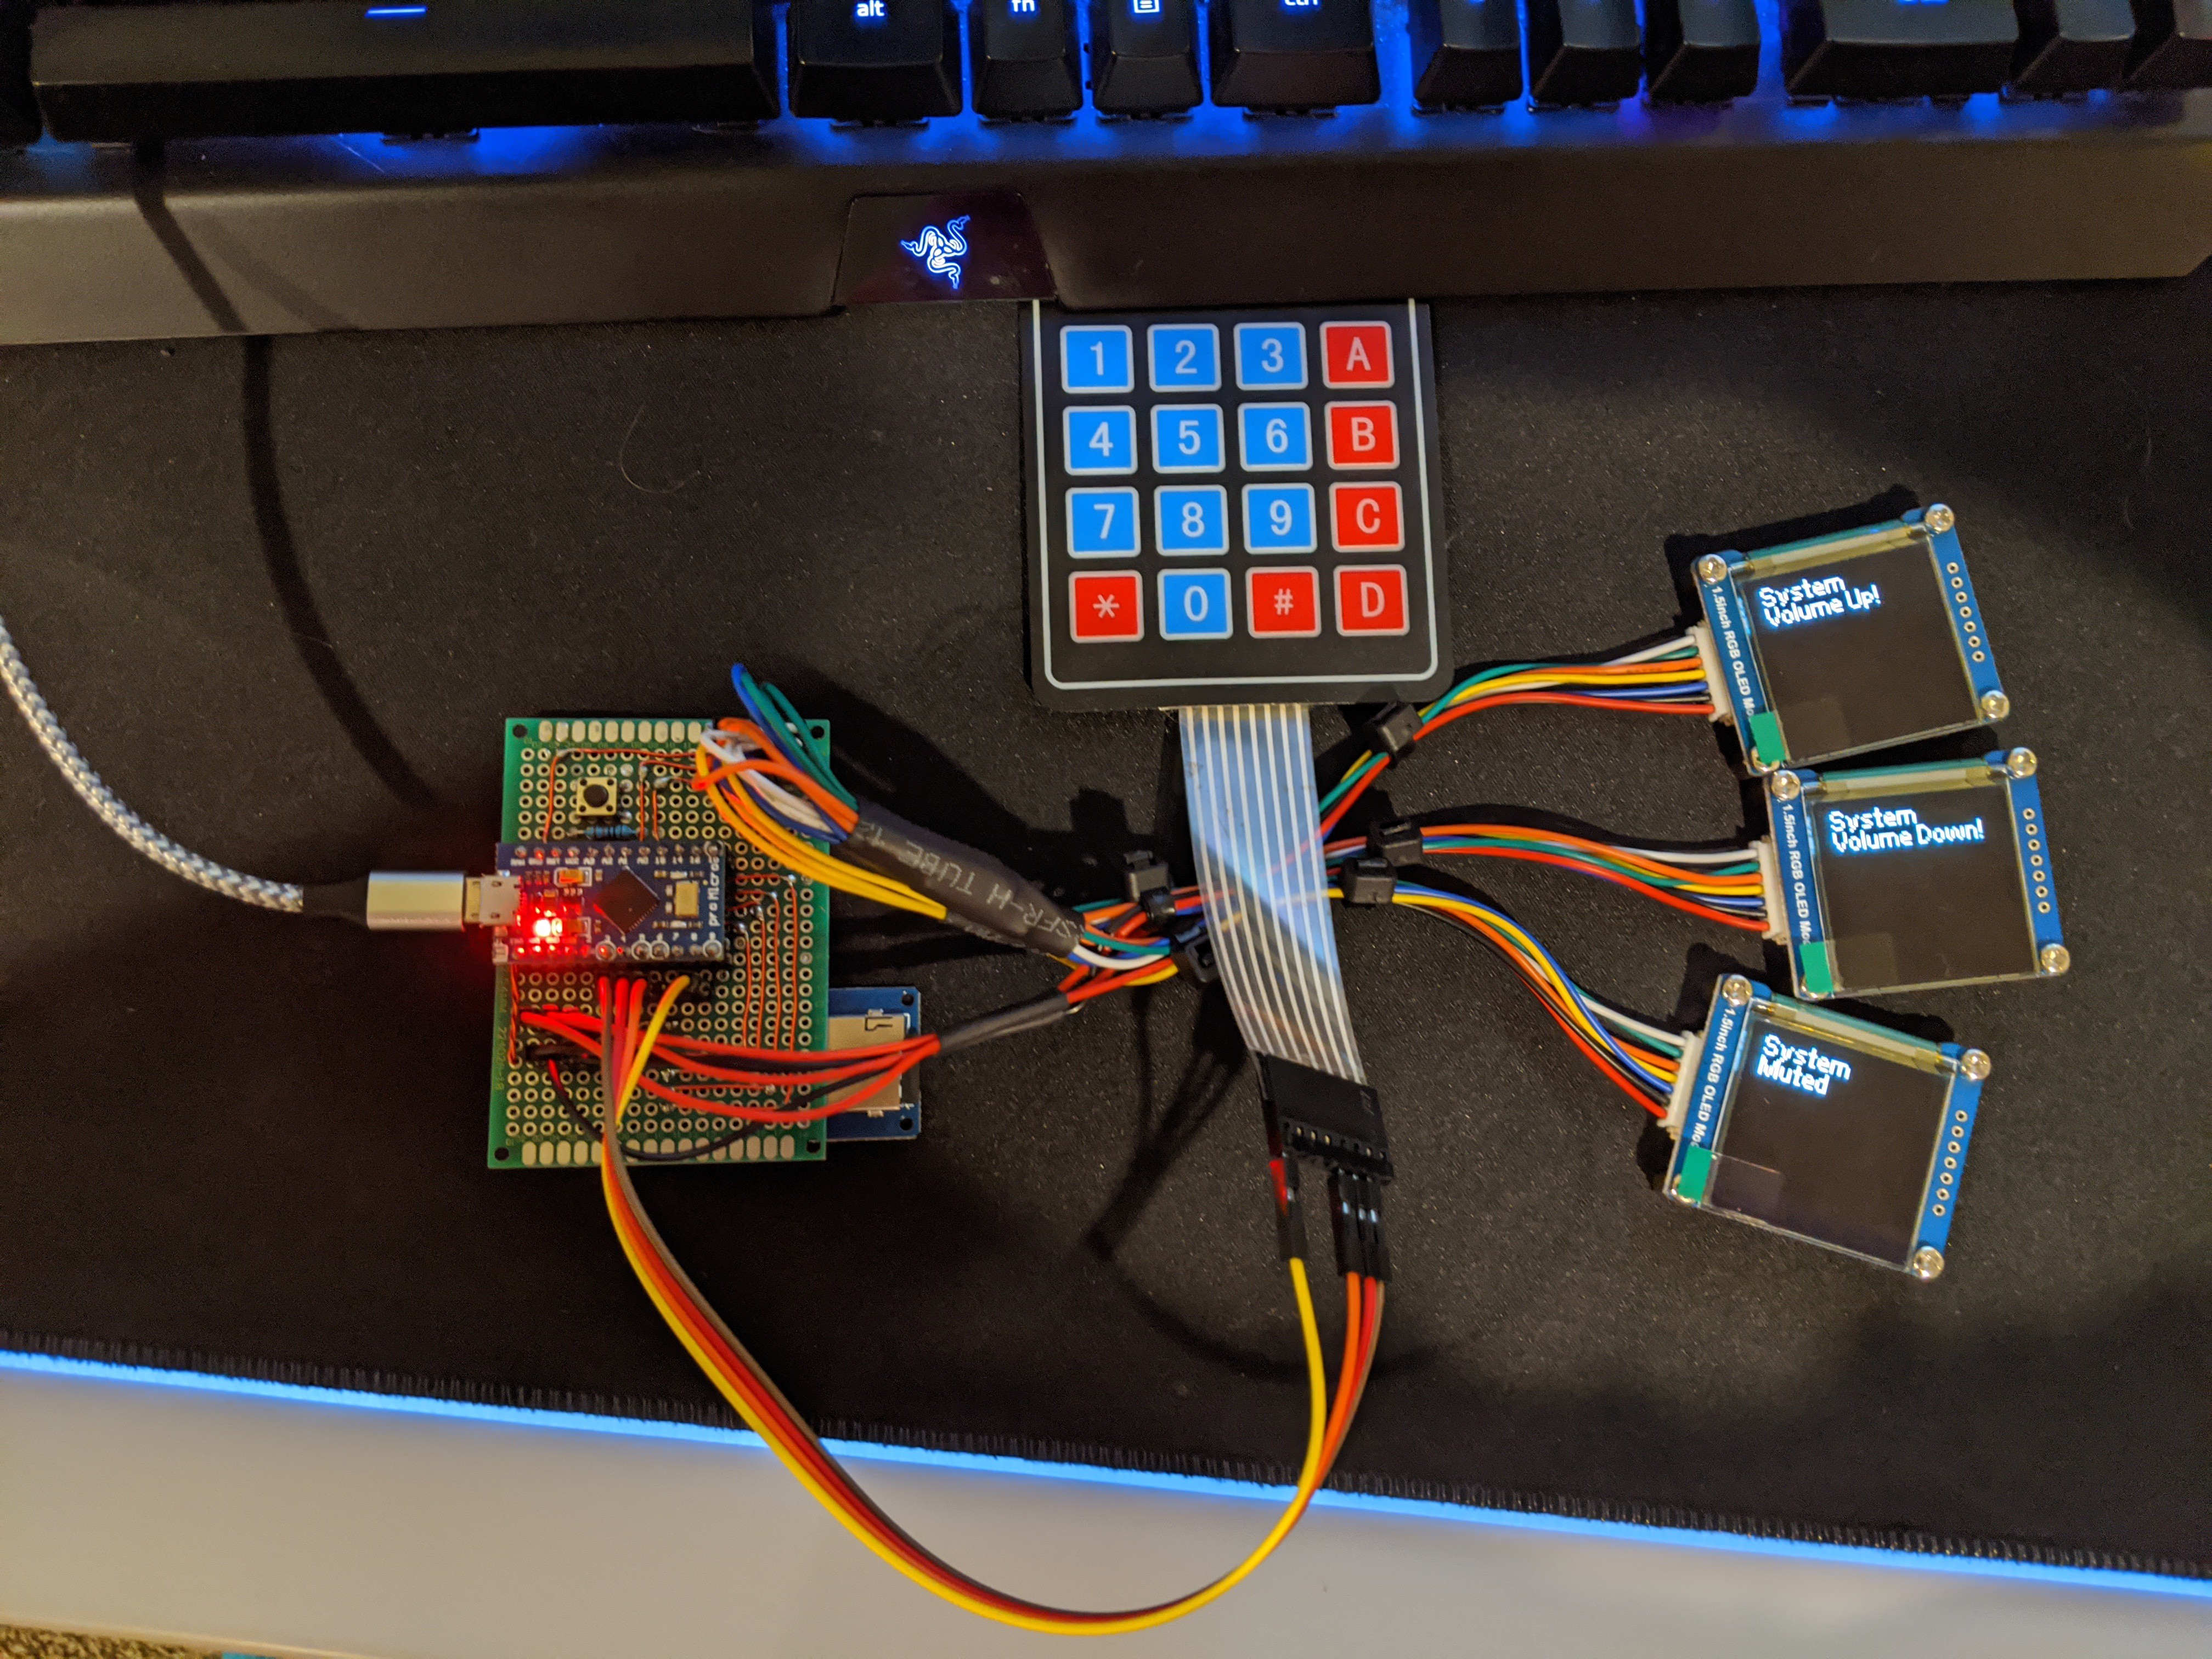
Finished Product w/ Screens and Temporary Buttons:
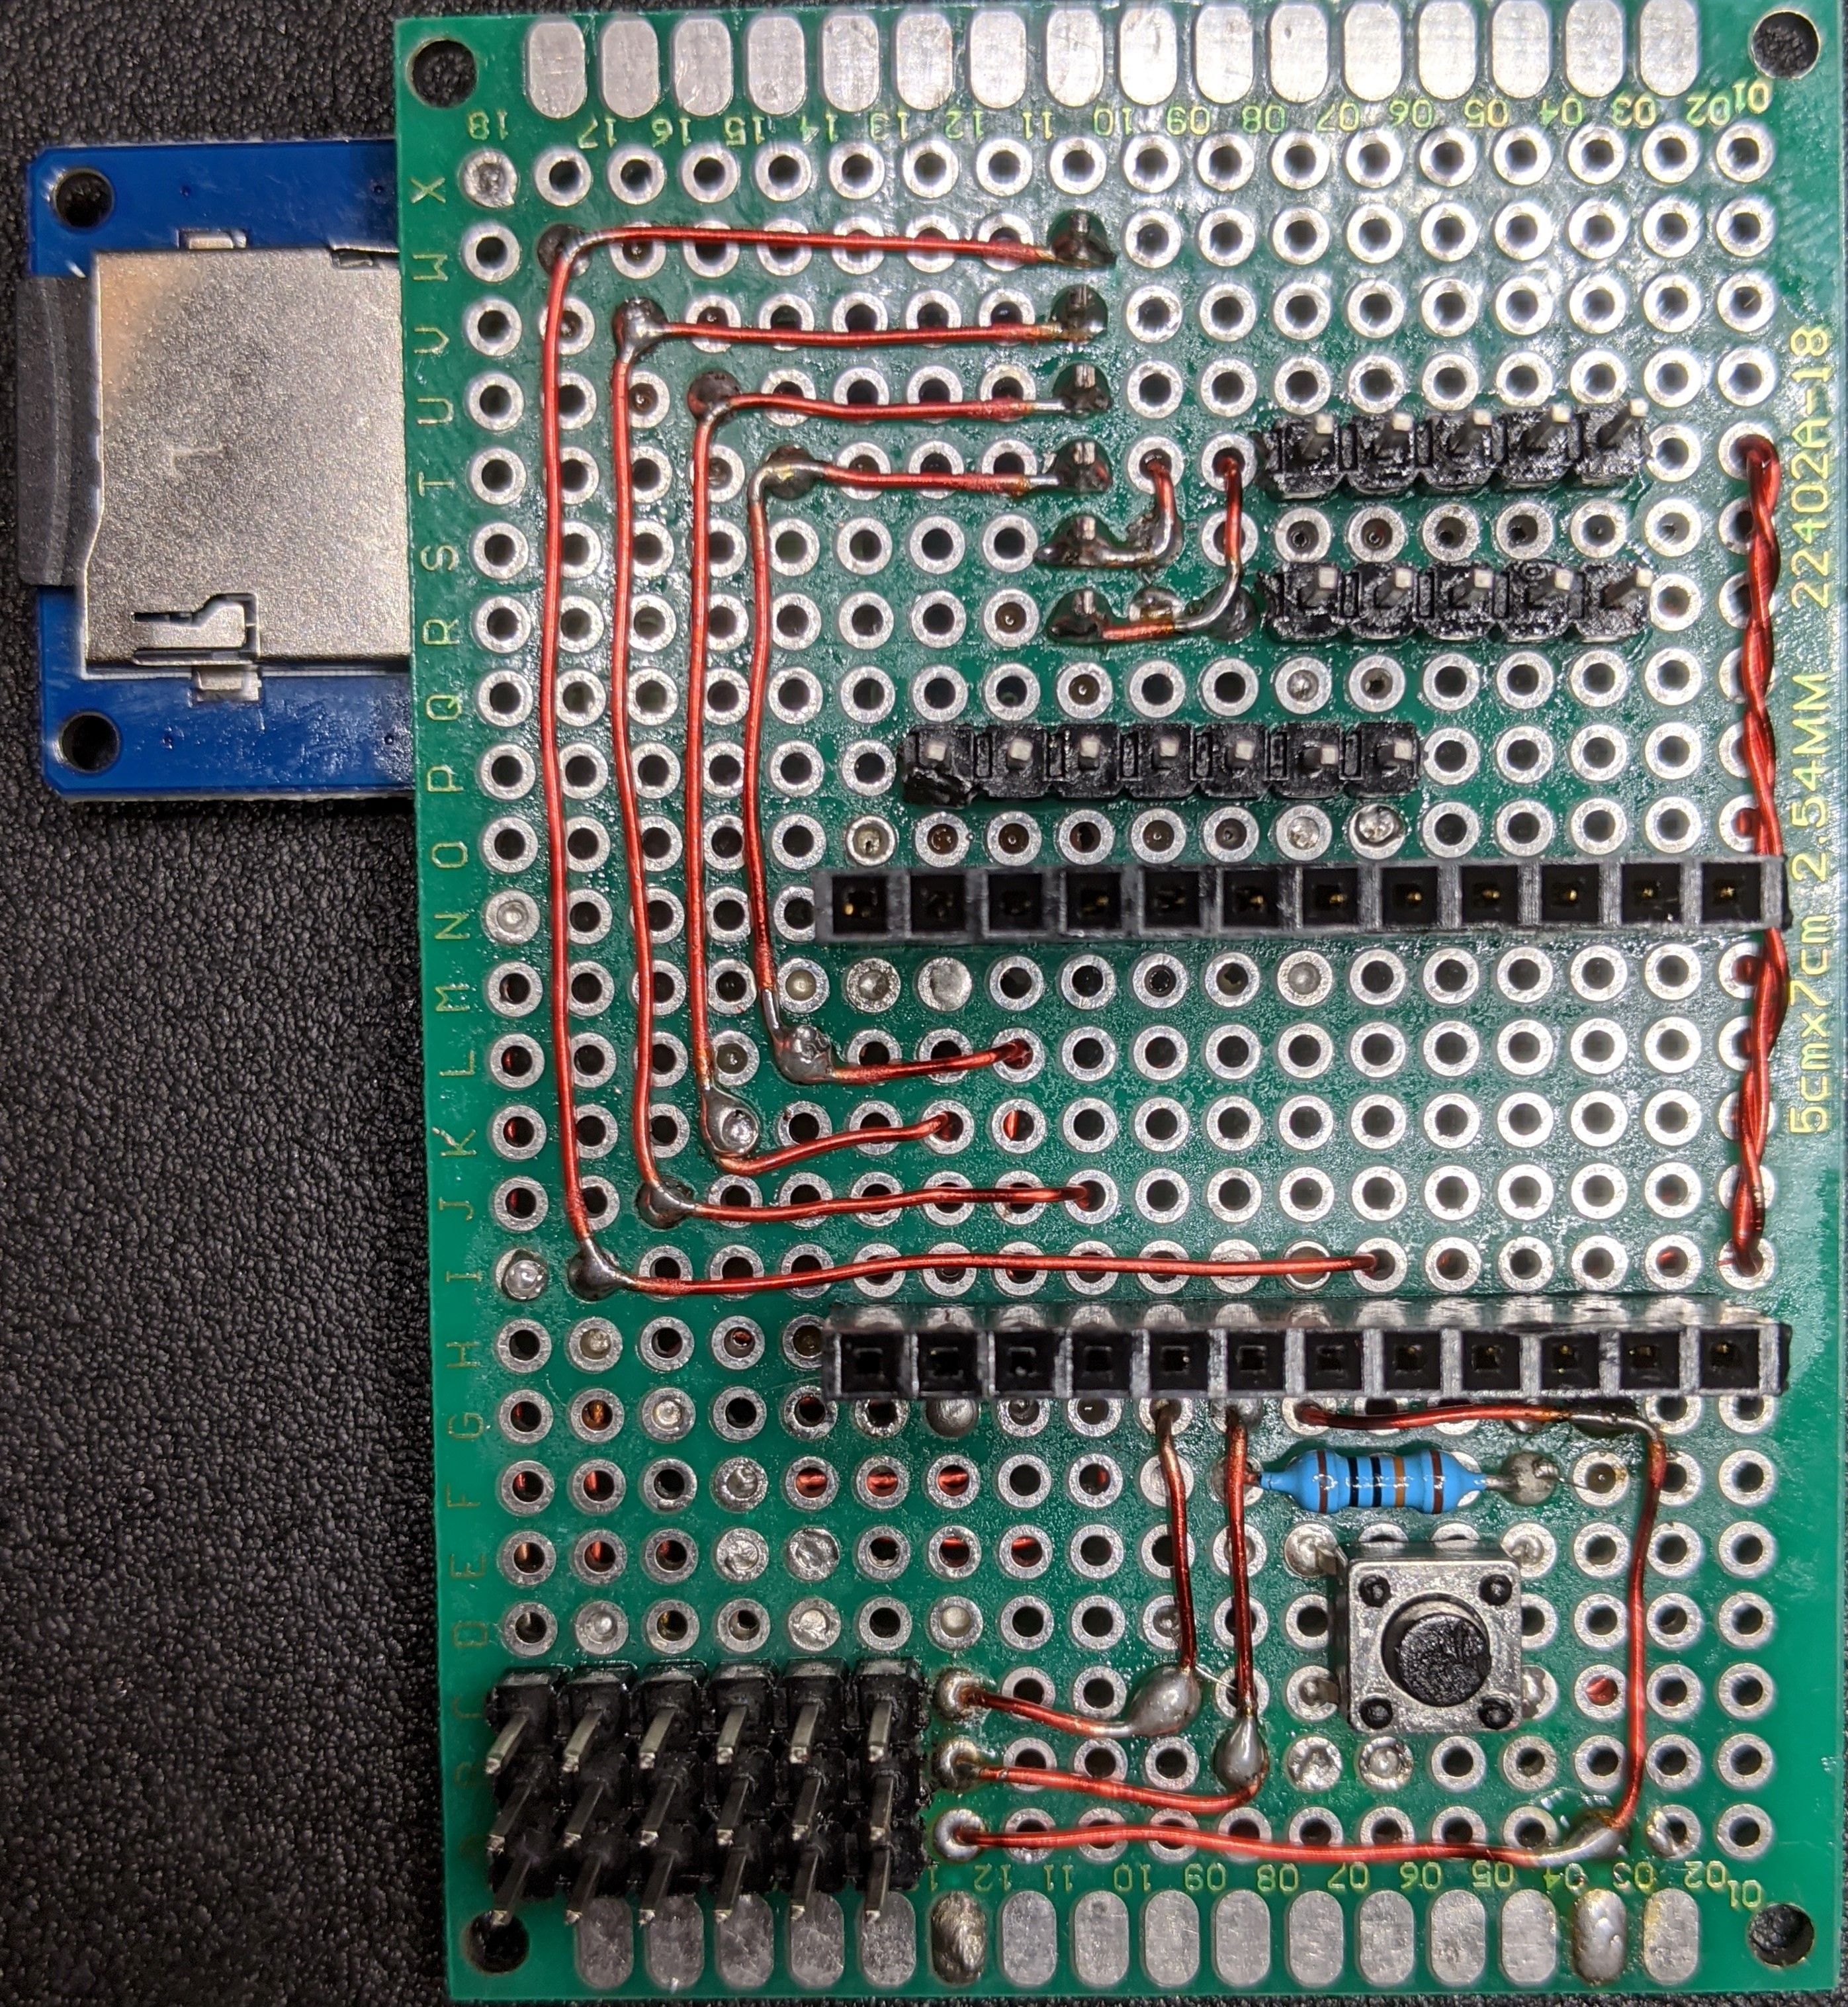
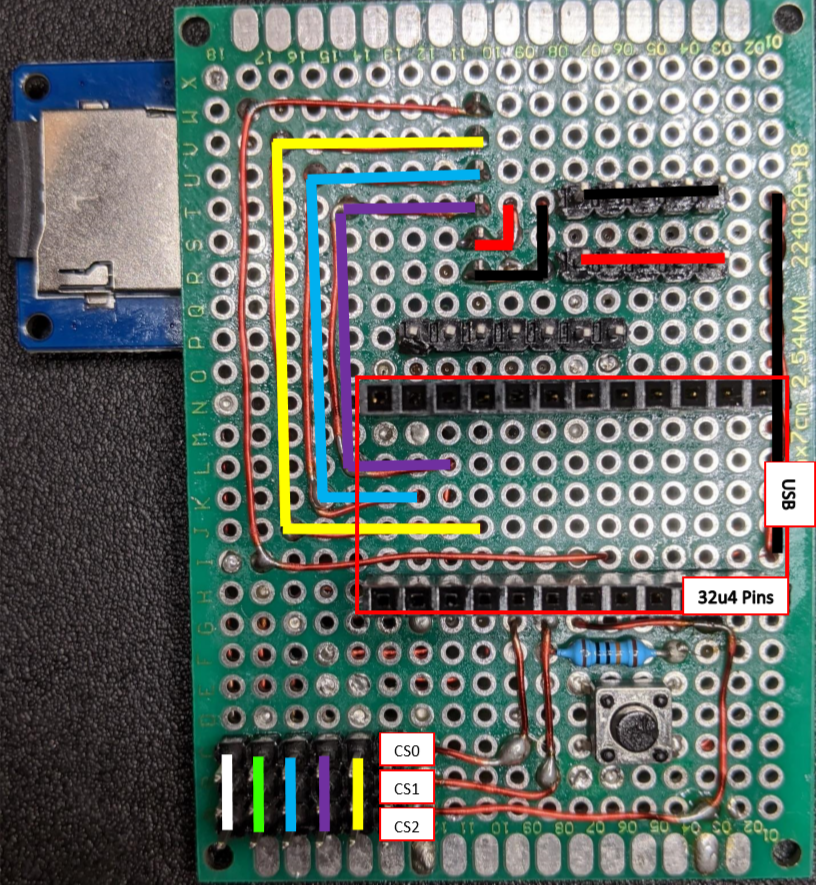
Finished Front:
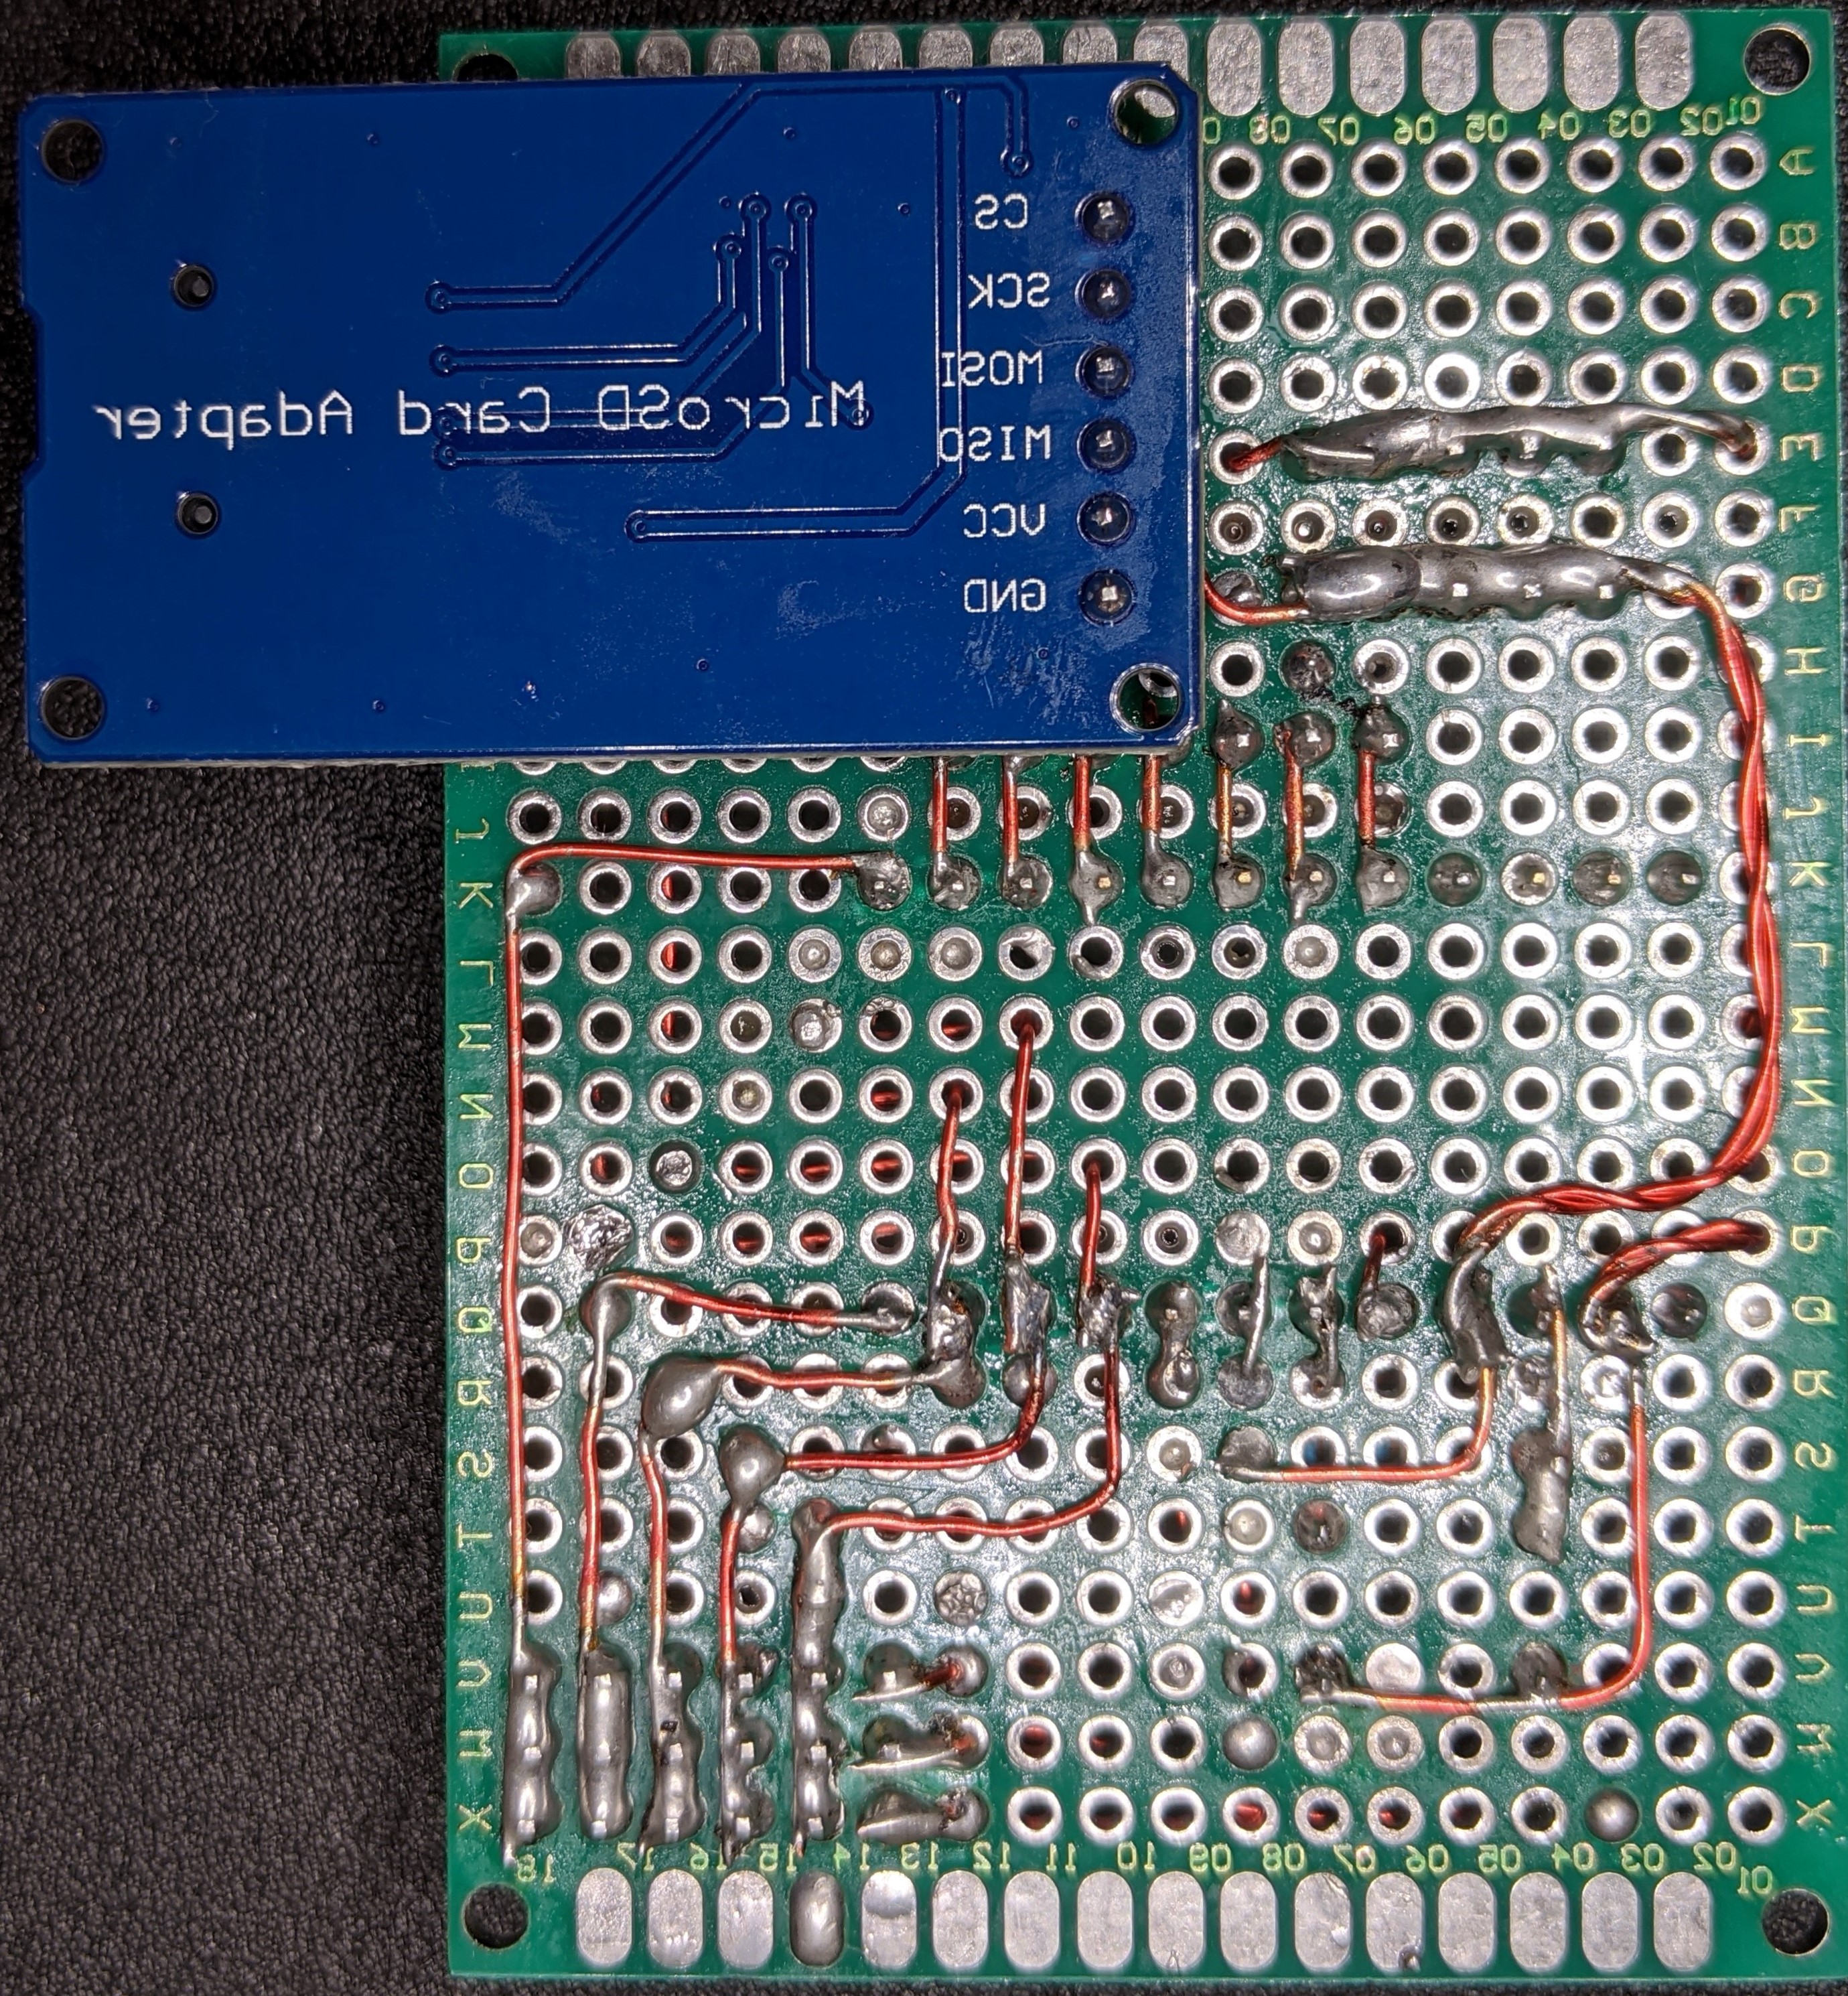
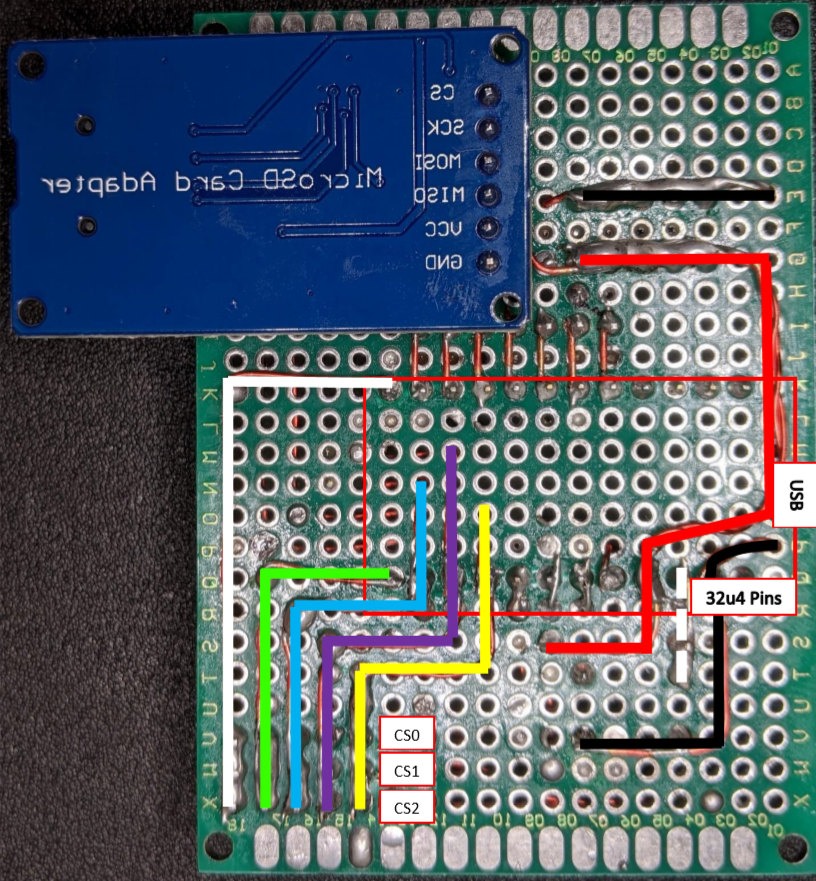
Finished Back (Flipped):
Legend
| Signal | Color |
| 5V | Red |
| Ground | Black |
| Atmega 32u4 Reset | Dotted White |
| OLED Reset | White |
| OLED DC | Green |
| MOSI | Blue |
| MISO | Purple |
| SCK | Yellow |
Schematic Diagrams Front:Schematic Diagrams Front:
If you've made it this far, just wanted to thank you for reading! This is a fun project but I get even more fun from trying to make this presentable and digestible! I'll probably switch to more software development at this point as my hardware is pretty finalized for the time being. I have begun considering how to add more screens/buttons but will have to look into the best way, I really would prefer to not add another micro-controller and thus far the compute performance of this chip has been acceptable.
Discussions
Become a Hackaday.io Member
Create an account to leave a comment. Already have an account? Log In.