So, if you have followed along so far, you hopefully have a oven that has basic functionality. But that's not where it ends, we can do much more with some additional features and tuning.
For that, we need to take an aside and talk about octoprint a bit. Some basic configuration. In the GCODE section of octoprint settings, enter TURN_OFF_HEATERS in each of the three boxes as shown. This will turn off the heaters in the event of a cancellation, or if you forget to do so in your gcode.
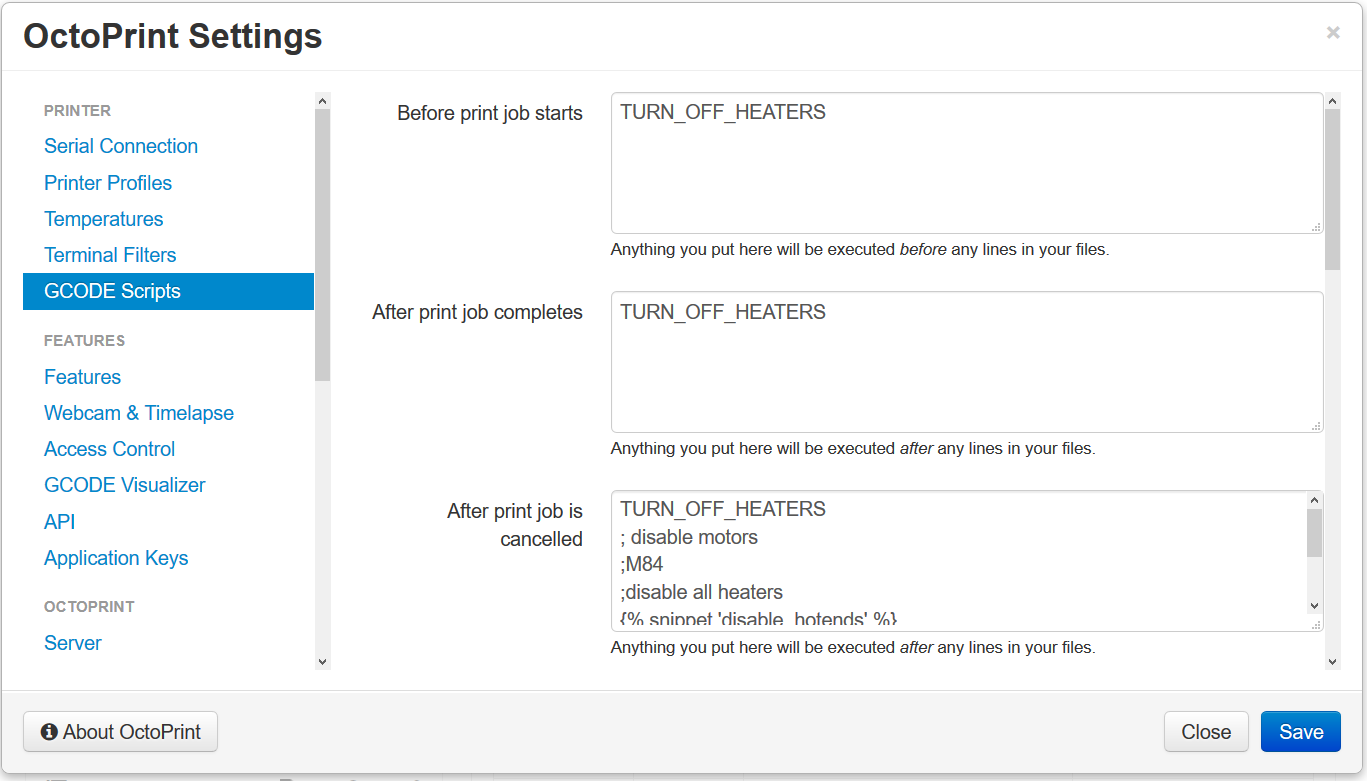
I also turn off the GCODE Visualizer, it's not needed for oven use.
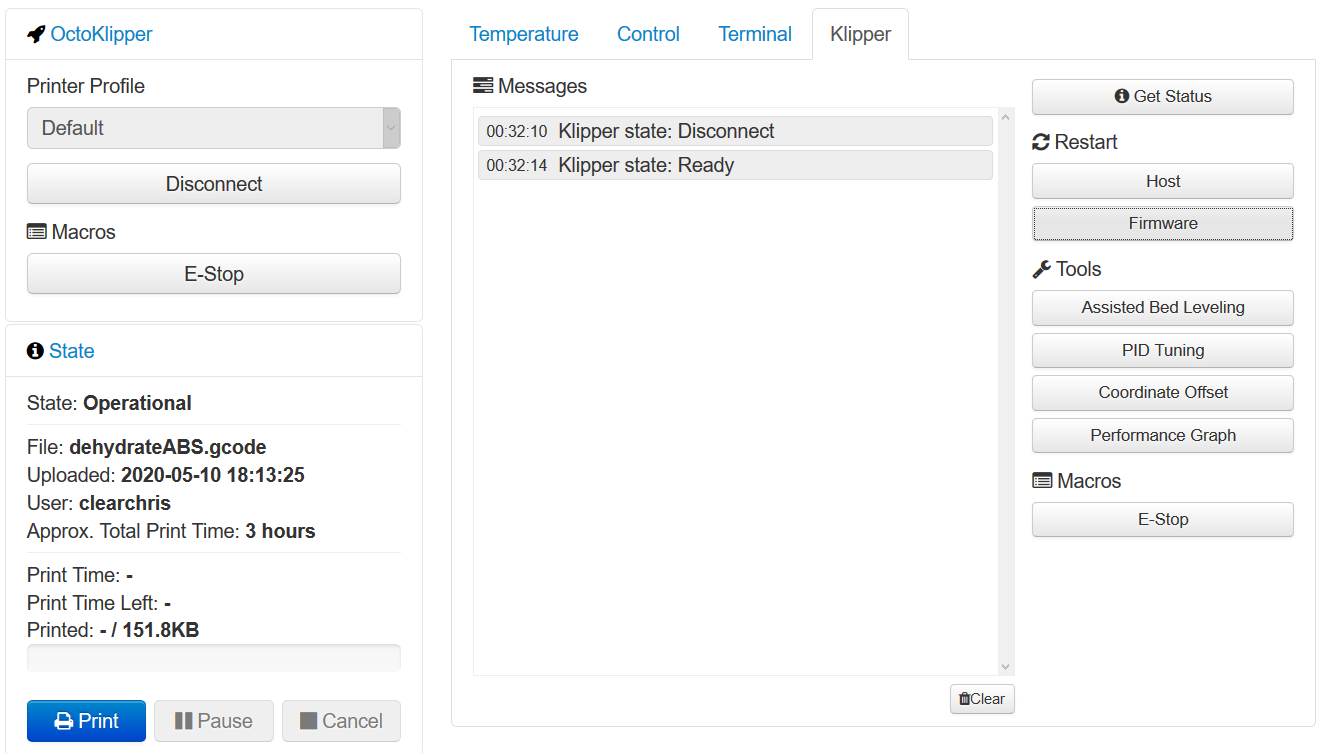
Next, let's install the OctoKlipper plugin. It's very handy when using klipper and has some buttons for codes you would otherwise have to remember or type. It is available in the "Plugin Manager" section of the OctoPrint Settings screen. Here's a screenshot of the OctoKlipper tab.
I also really like the OctoPrint-Tempsgraph plugin. It allows you to change up the temperature graph on the octoprint main page. You can zoom, pan, save a png, etc. Very useful, especially when PID tuning when normally you would see this:
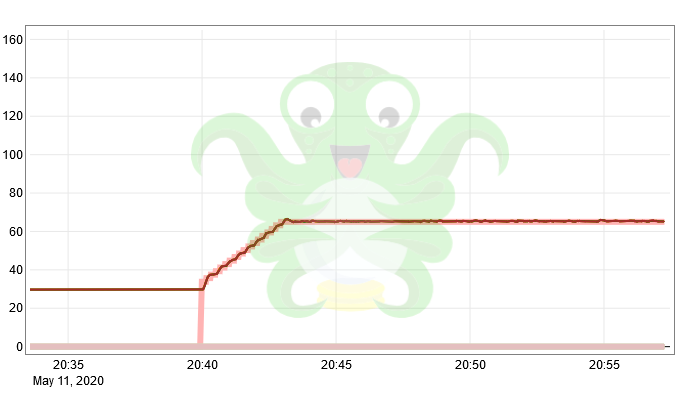
Hey, looks pretty stable there! But you can zoom in and see this instead:
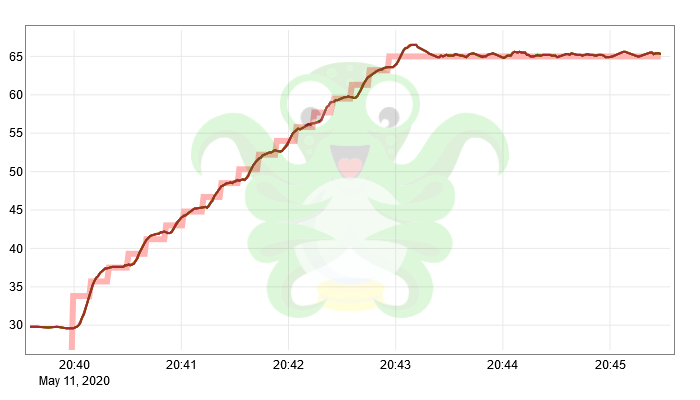
Looks like I could use a smidge more PID tuning! Actually, at this level of oscillation, it's hard to tell if that's really more PID tuning needed, just some noise on the thermocouple or just the thermal mass of the oven in relation to the wattage of the heater. I may or may not PID tune further, this level of accuracy is entirely acceptable for my use. But OctoPrint-Tempsgraph is still a very useful plugin.
Speaking of which, let's PID tune our heater!
If we go into the main klipper tab, we see a handy screen that prompts us for the heater name and target temperature.
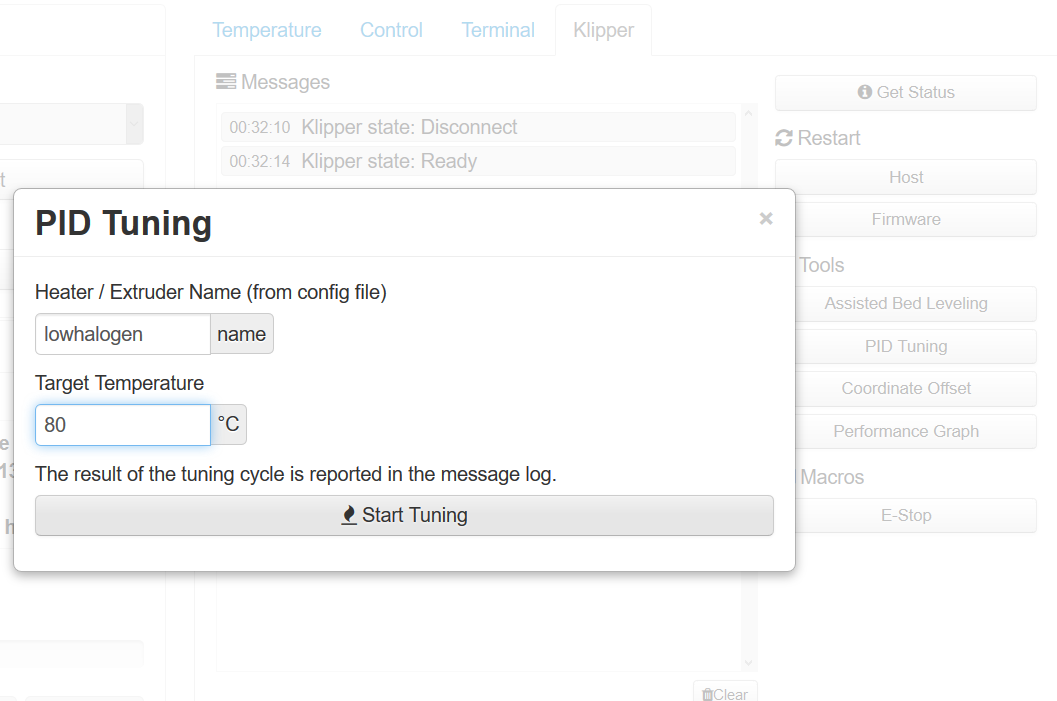
I have set it up for a low target and run the test. Hopping over to the temperature tab, when the test completes, we see something like this.
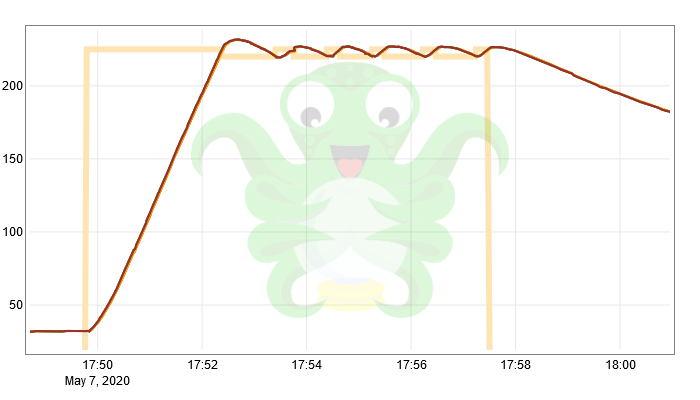
Klipper reaches the setpoint, adjusts the temperatures, measures the reactions and suggests some PID parameters. You can see them in the Klipper tab. You can try them out by pasting them into the heater_generic section of the printer.cfg file we edited earlier. It should look something like this:
control = pid
pid_Kp=62.338
pid_Ki=3.033
pid_Kd=320.260
You will need to restart klipper to see the effects. If you are lucky, you can run a heater test (shown earlier) and you will get an output like this:
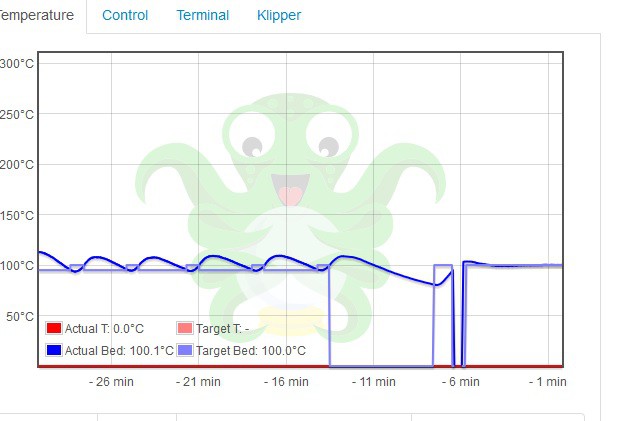
Hey, that overshot just a smidge and leveled out quickly. I'm not sure I'd want to mess with that. If you aren't as fortunate, and the temperature floats above or below the set point, or oscillates unacceptably, let me be the first to welcome you to PID hell. You will have to manually tune the PID parameters. There are many documents that describe this arcane process, one I have found helpful was this: https://797ib1mbyf481ftl3rimdn3x-wpengine.netdna-ssl.com/wp-content/uploads/2012/09/How-to-Tune-PID-Loops-Control-Design-08222016.pdf
There's extra points if you find the mistake in the second paragraph of the "Answers" section.
I may write on the process I used to tune my PID parameters, we'll see.
 clearchris
Discussions
Become a Hackaday.io Member
Create an account to leave a comment. Already have an account? Log In.