Close
0%
0%

The BYTE

A hands free universal interface

Similar projects worth following
The BYTE is an extremely affordable, safe and responsive hands free interface.

Since it is controlled with the mouth even those with profound mobility limitations will benefit from this intuitive and accurate pointing solution.

In addition to the obvious computer use cases, I can envision applications including wheelchair or vehicular navigation, prosthetic controls, smart home controls, robotic arms...
Who knows what else - maybe this is the ideal interface for people who hang glide?

Project Log Direct Links:


Overview Video


Sensor Overview

A durable sensor package is encased with food safe silicone rubber. 

The stem portion contains a shunt-mode force sensitive resistor.  It is held between the teeth to stabilize the BYTE while measuring the applied bite force.

Beneath the tongue-operated navigation button is an intertwined array of four thru-mode force sensitive resistors. These are measured 125 times per second to determine the pointer speed and direction.
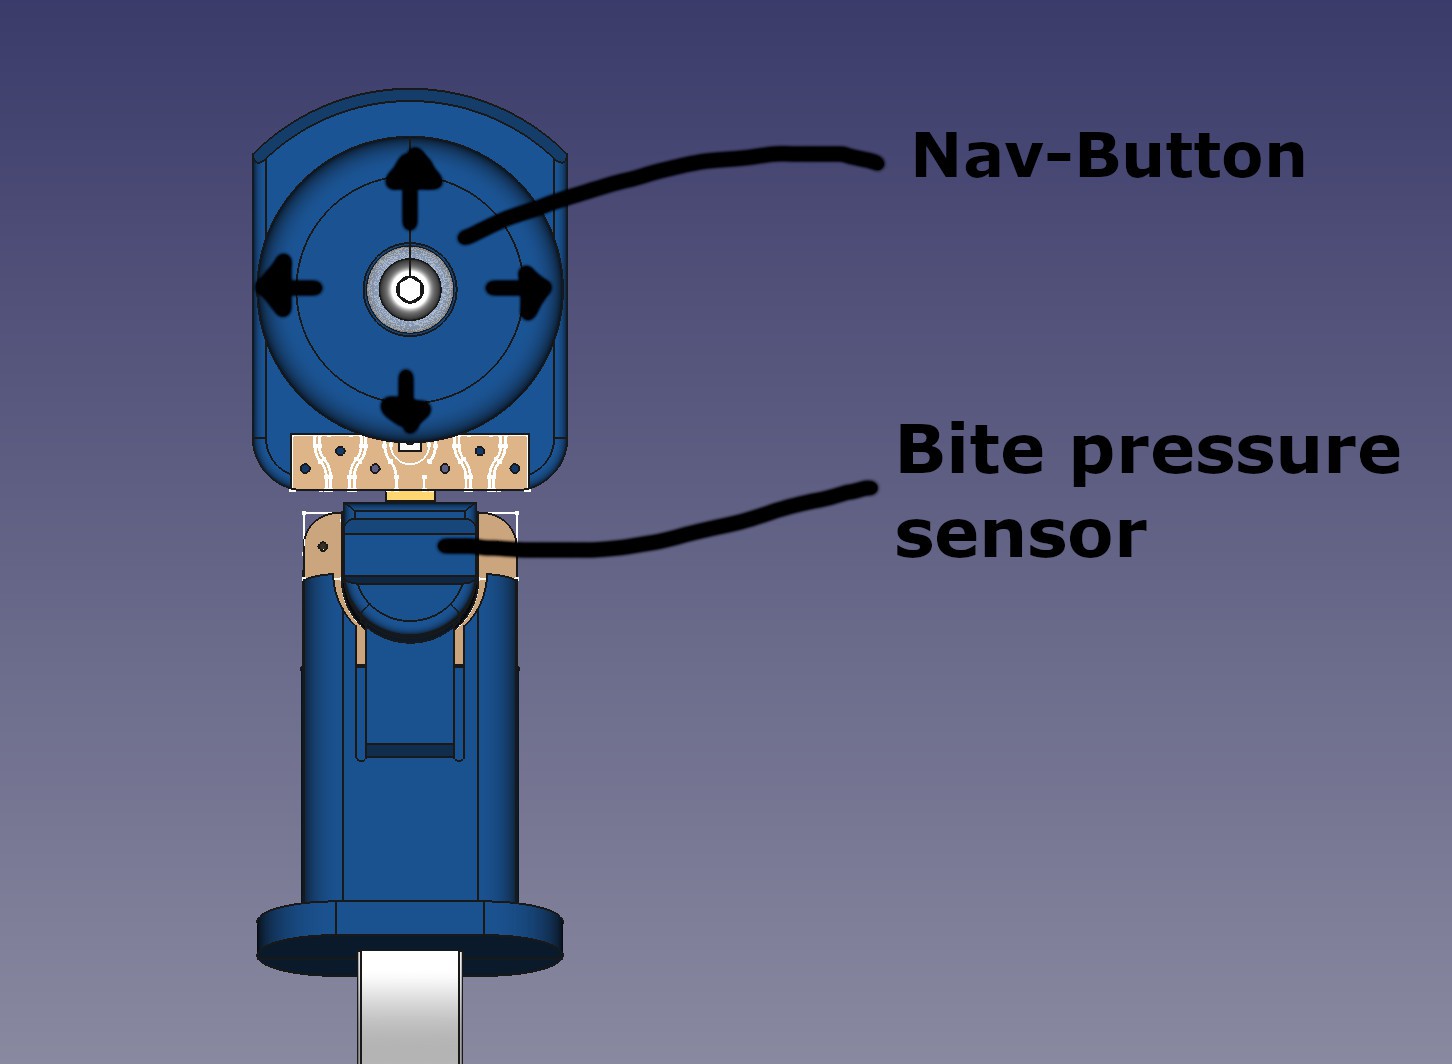
One important change from earlier prototypes is that all of the digital interface electronics have been moved from the sensor pack to a separate controller module. This approach has dramatically reduced the cost and complexity of the sensor assembly, to the point that it can nearly be considered a disposable item. 


Basic Operation

Light bite pressure enables mouse movement and triggers a small haptic vibration.

Firm bite pressure is applied for clicking. Clicks are confirmed with a slightly more intense haptic indication.

Longer clicks are also detected and can trigger any desired function.

Evenly pressing the whole navigation button at once triggers yet another click type, the "press click" and again can be mapped to any desired action. Examples include opening specific programs, running macros, and triggering discrete outputs for control of other devices.

Scrolling is done by pressing forward or back while applying no bite pressure.

Regardless of the default behavior, any particular motion, pressure combination, sequence of actions, etc. may be re-mapped to any desirable output - be it IR for TV controls, or complex WiFi/Bluetooth commands to water plants, activate coffee makers,  or update social media.


Per-User Calibration

On first use, and whenever else it is desired, the BYTE can be re-calibrated to match the user's ability and preference for the minimum and maximum pressure they are comfortable applying to each of the sensors.

The calibration routine takes advantage of the keyboard emulation function of the controller.  It automatically opens a new text document and guides the user through the different calibration steps, typing out the instructions and providing feedback along the way.
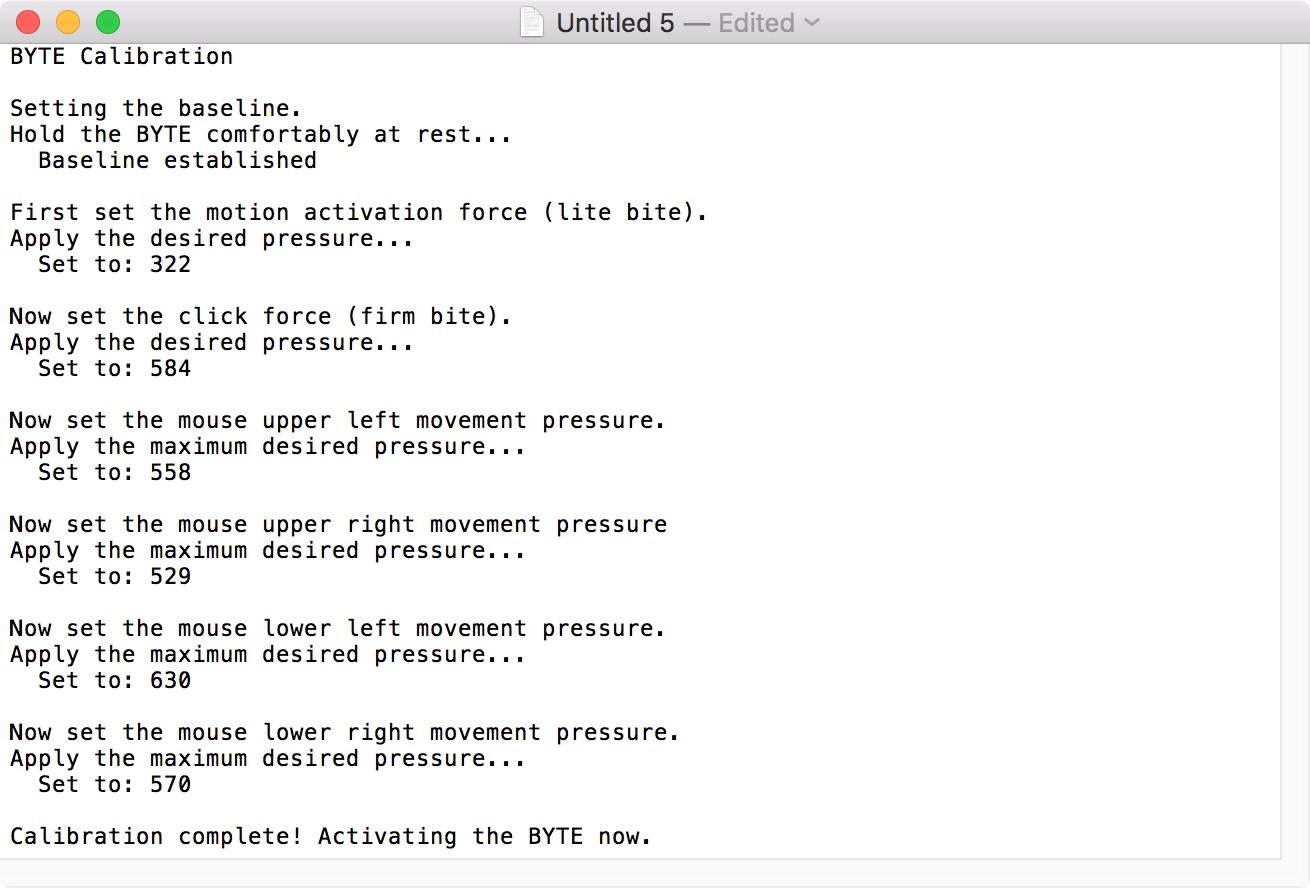
There is no need to install an app or otherwise change settings on the host.


Controller

The controller emulates a regular USB mouse and keyboard, allowing it to work seamlessly with nearly any computer or tablet. A Bluetooth version is in the works for even wider compatibility.

I chose a standard RJ45 jack (or more accurately an 8P8C modular connector) to connect the sensor package to the control board. This provides a reliable, latching attachment and has enough conductors for all of the required functions.


A Fresh Take:

The BYTE supersedes my previous project, The Bit. The BYTE is a complete overhaul and redesign, and re-uses none of the electronics or code. It approaches the same problem in a radically and substantially different way and has undergone many, many revisions - the 3D model is beyond version 100!

BYTE-master-2.zip

Updated Full Design Package (3D Model, PCB Design, Firmware, Schematics, BOM, Testing Procedure...)

Zip Archive - 4.15 MB - 10/05/2020 at 09:58

Download

BYTE-master.zip

Full Design Package (3D Model, PCB Design, Firmware)

Zip Archive - 1.44 MB - 08/31/2020 at 07:45

Download

View all 29 components

  • Slicone Enclosure Molding Progress

    oneohm09/06/2021 at 02:34 0 comments

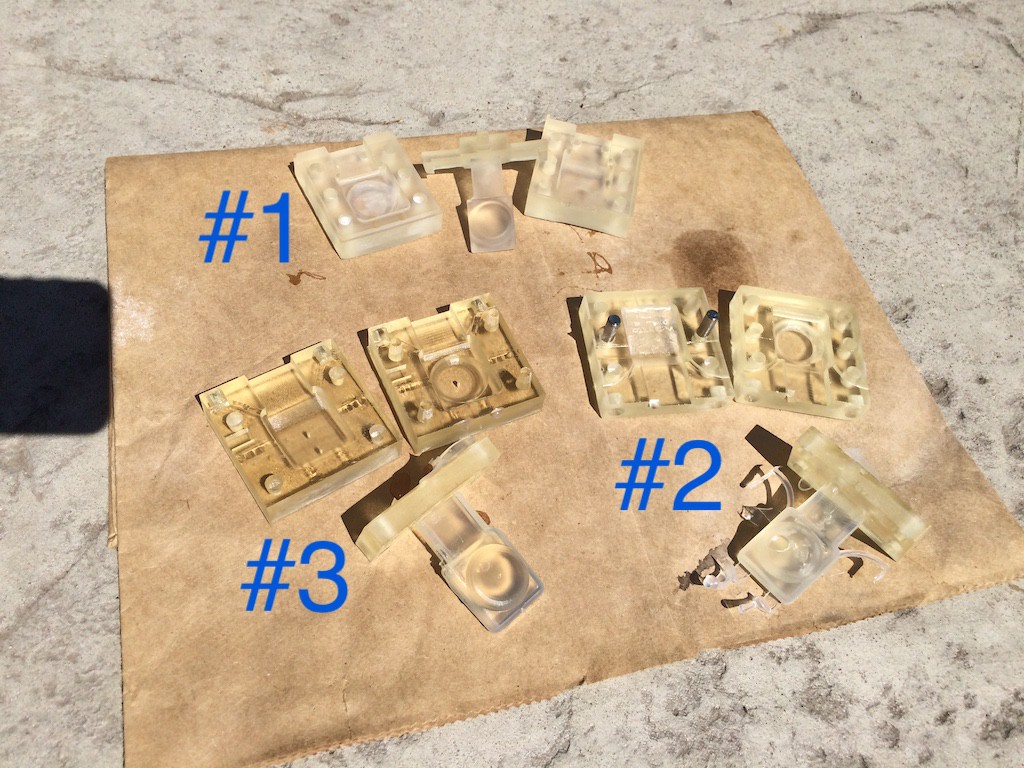
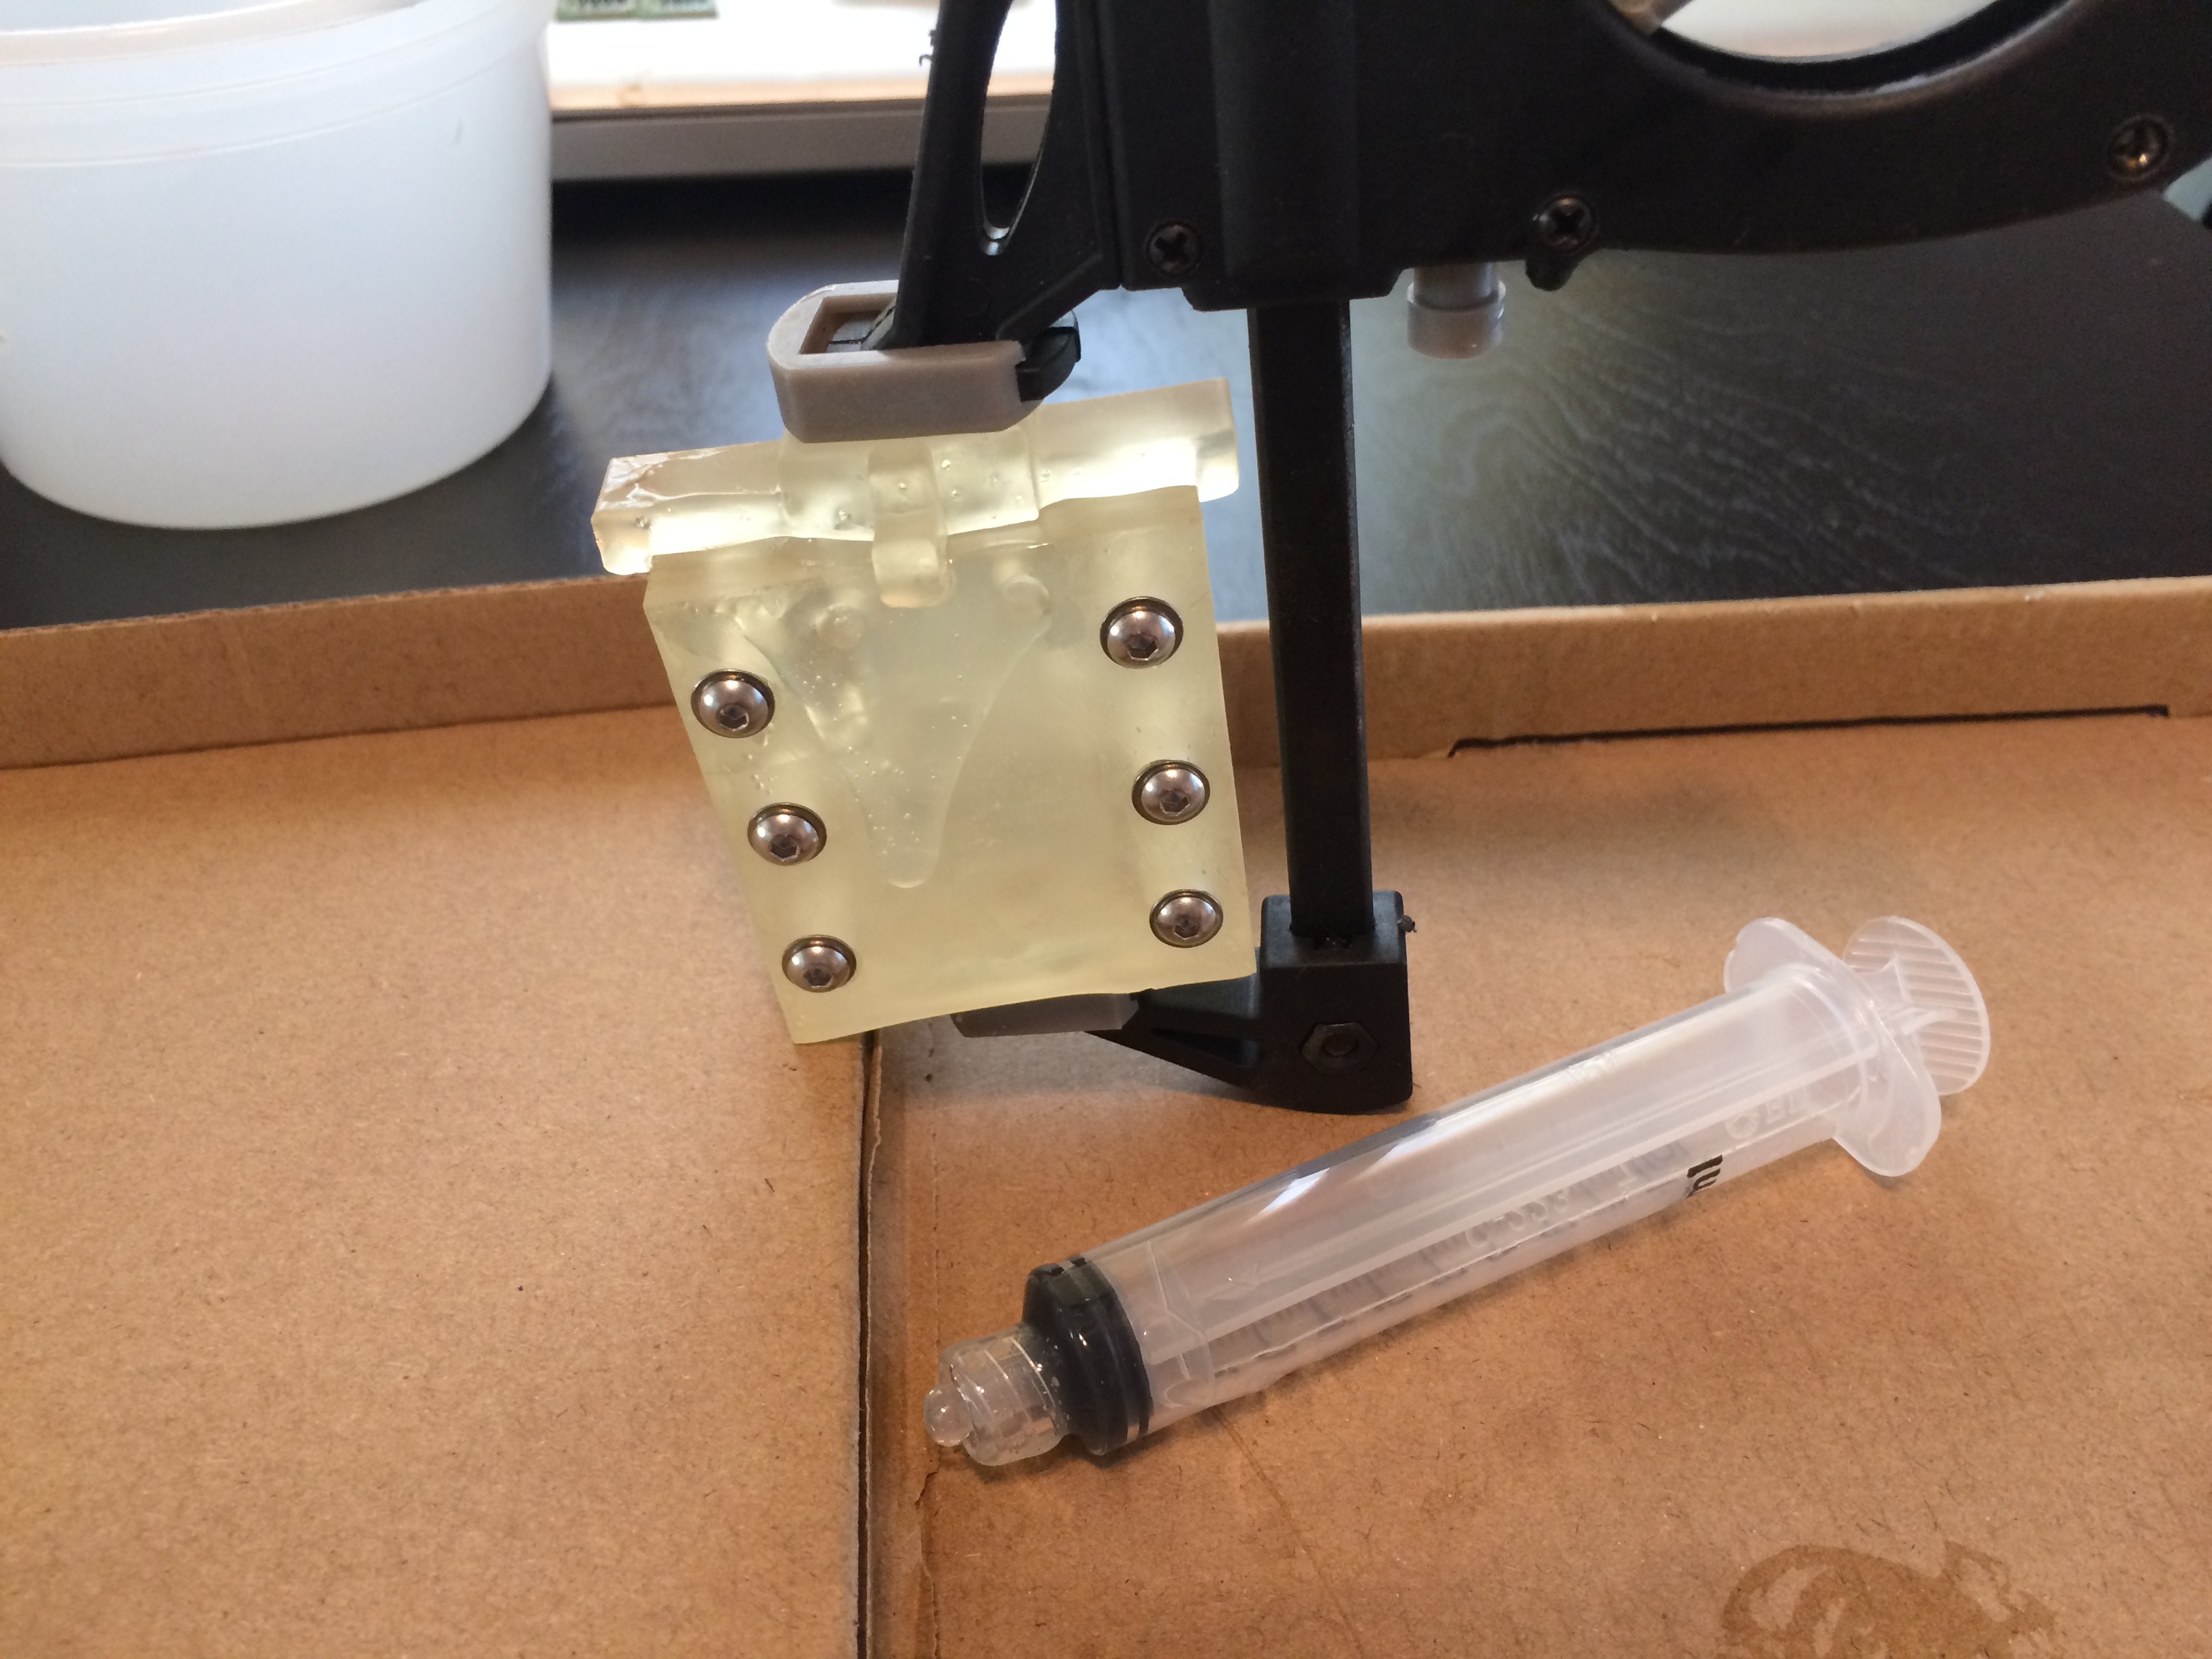
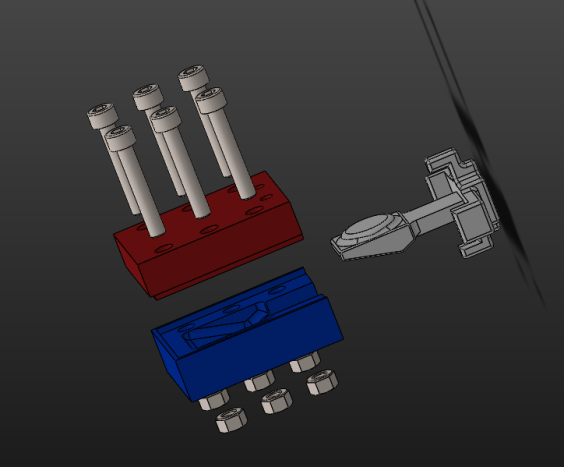
    We are now on the third version of silicone enclosure mold design and the results are quite promising. Alongside improvements in the venting and alignment features of the mold, a lot of effort has gone into the sealing, mixing, degassing, curing and de-molding process.

    In the above photo you can see the three molds produced so far. Molds 2 and 3 have just been opened after curing and the finished enclosures have not yet been removed from the mold core.

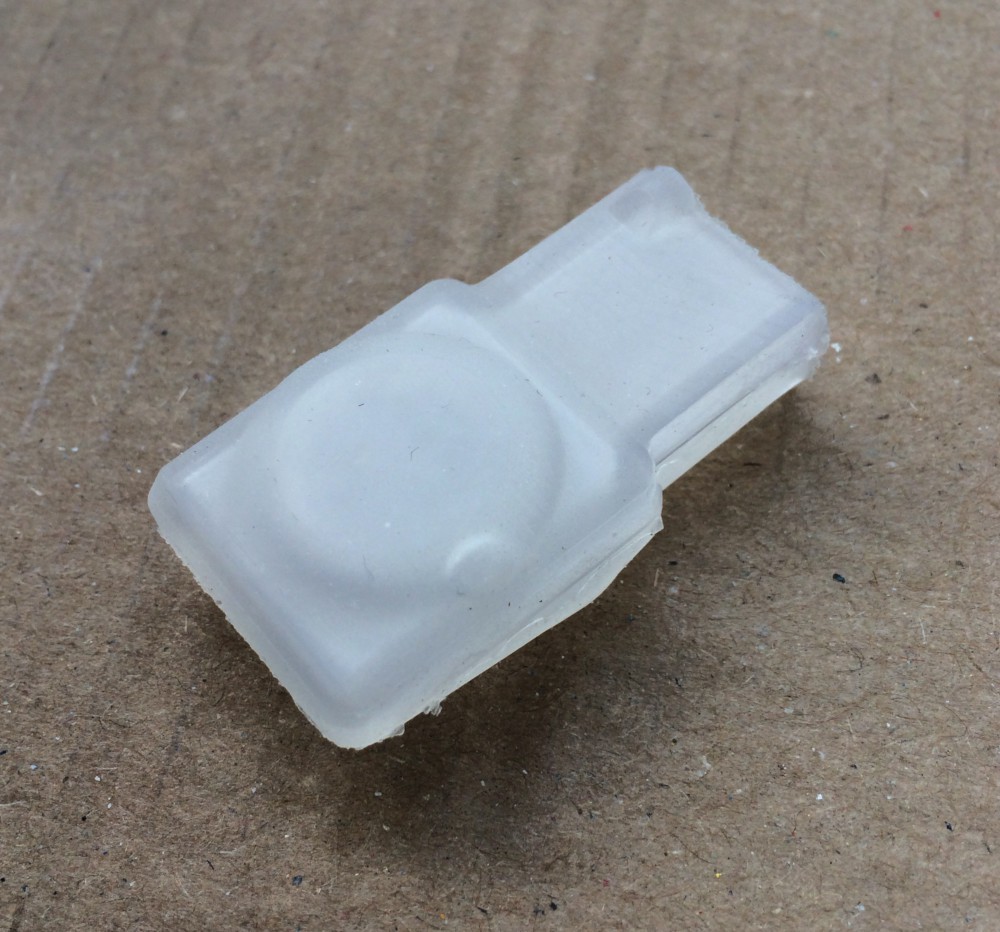
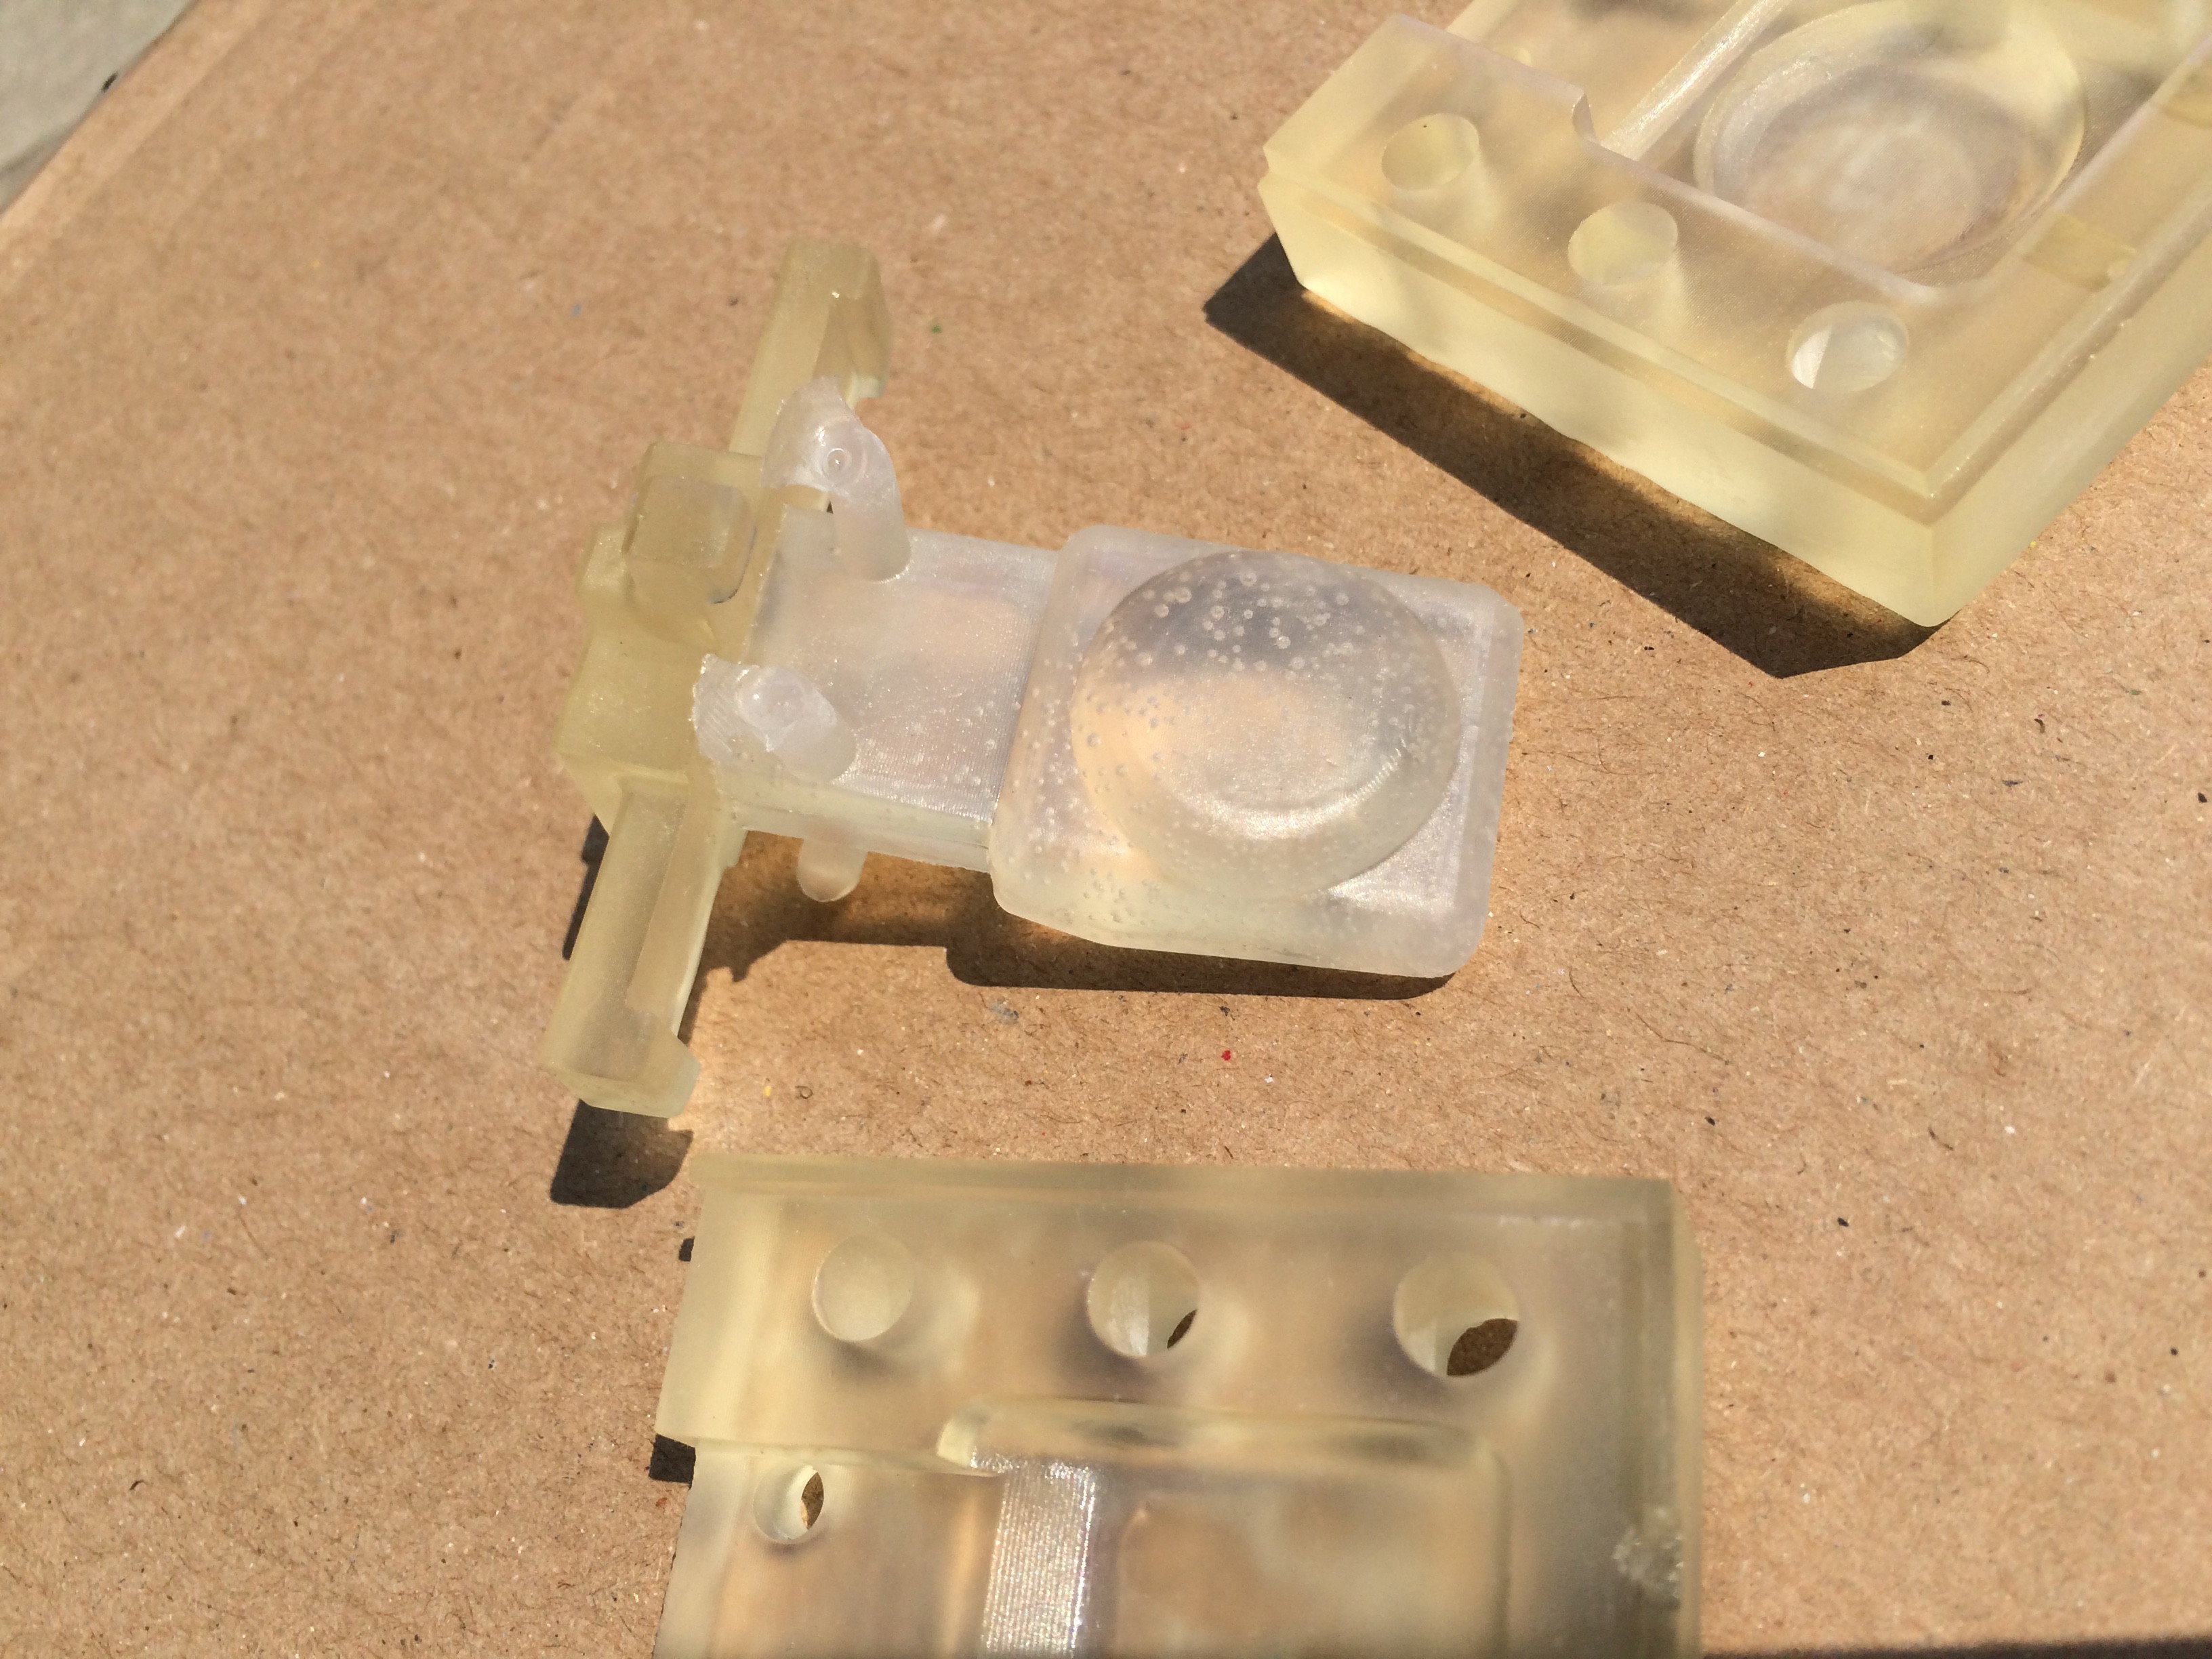
    Here is an example of a finished enclosure: (please ignore the bubble...)


    -oneohm

  • Revised Mold, Figuring out Ergonomics and Designing the Nav Button

    Charitha Jayaweera08/29/2021 at 16:37 0 comments

    Hello Everyone!!

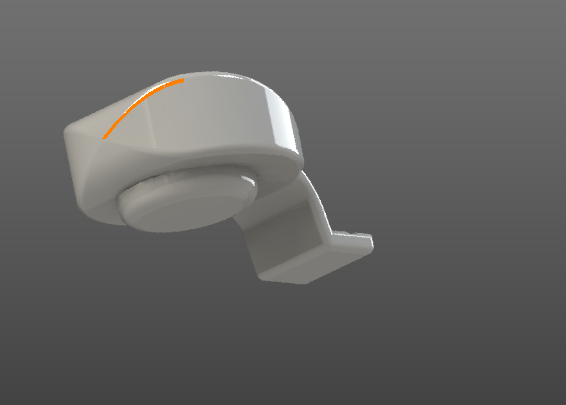
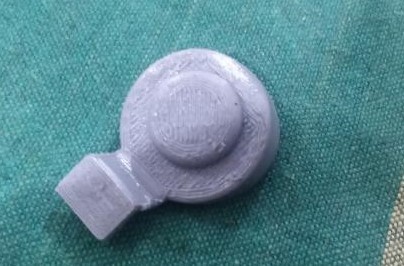
    While the electronics and the sensors are evolving, we need to evolve the mechanical design and define a perfect footprint that could house everything. therefore, After some research into the literature, it seemed like a shape that would retain the device in the hard palate and towards the front of the upper jaw seemed like the best choice. this would reduce choking and gaging. soft palate sometimes induce gagging and moving the tounge towards the soft palate would do that too..  Therefore, as a first revision, a shape like this seemed like a good choice. 

    the wiring+ battery right now would go outside of the mouth, preferably as a collar or a earpiece.. the printed result is as follows

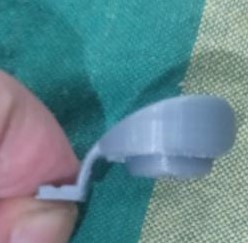
    Its not the best print, but just to test it out, this would suffice. I kept this in the mouth for about 30min to 45 mins, with ease. you obviously have to get past the roughness of the print, but the size and placement seemed good. the notch where i'm holding the dummy is where the teeth would lock it in place, and a firm "byte" would be a click. the curved shape sits well in the roof of the mouth, and with the silicone cover, added, it would be even better, 

    The Nav button would be the center extrusion. the tounge rests below this and a small motion would touch the button and an effortless motion would be required to navigate on the nav button. Another revision would be made to so that the nav button would be a bit tilted towards the tounge to make the motion even effortless. 

    We are currently testing out a joystick configuration with a hall effect sensor array, therefore, a balljoint which can hold a magnet was 3D printed. 

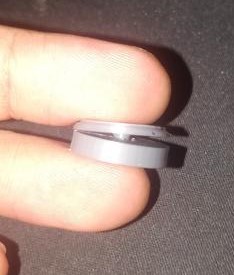
    just a simple concept of how the nav button would work, the printed ball joint seemed to work well, and for the space a silicone pad of 1mm would be used to act as a dampener for the nav button. 

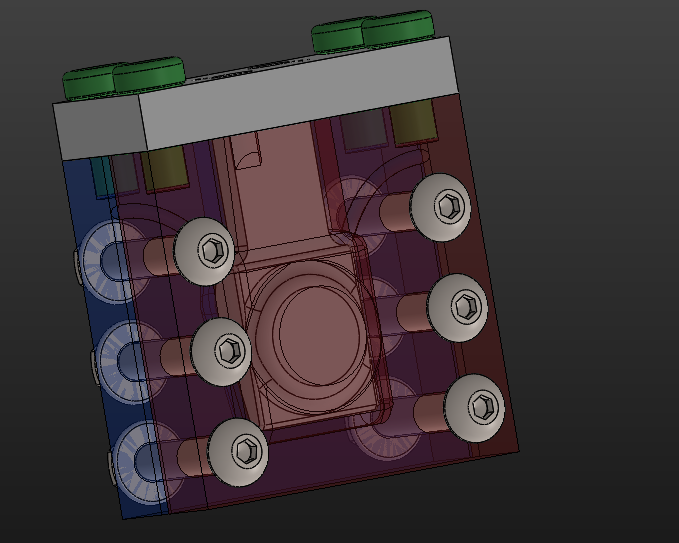
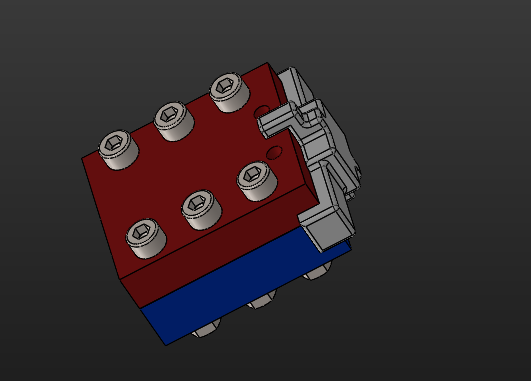
    As for the Mold, a new mold with some small modifications were done, to make it easier to assemble, disassemble and inject. 

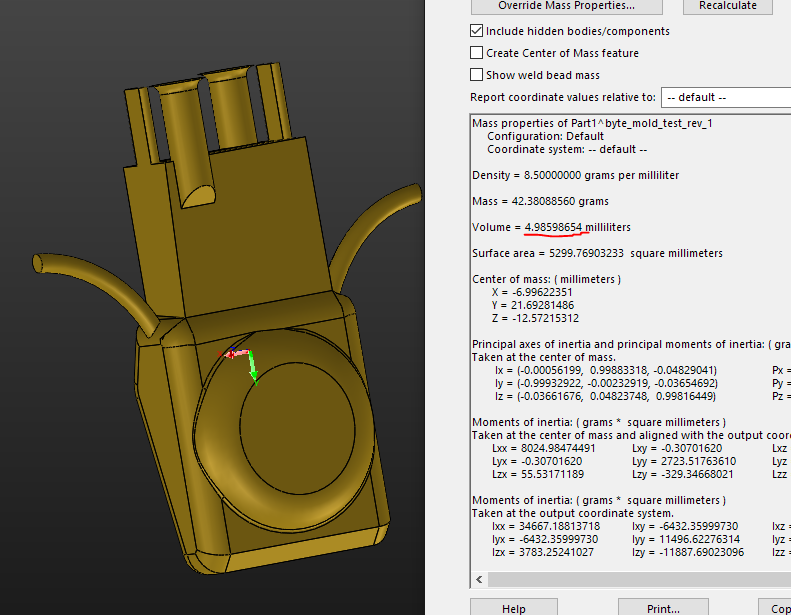
    added venting, moved the injection points to top, which can now be used to inject or pour. added chamfers to easier demolding. the overall end result should look like below. which ideally would only occupy 5ml of silicone

    On to more exciting stuff!!

    -Charitha J.

  • Testing out the silicone enclosure mold

    oneohm08/29/2021 at 00:42 0 comments

    Rather than using an off the shelf silicone enclosure, the new version will feature custom silicone over-molding. The idea is to better seal the sensors and to adapt the shape so it is better suited for the functionality.

    The mold was 3D printed and filled with a food grade clear silicone material. Below is the first test curing.

    Here is the finished part straight out of the mold:

    Other than some bubbles due to inadequate degassing it turned out really well. A new degassing chamber just arrived and will be used for subsequent tests.  

    -oneohm

  • Sensor pack evolving

    Eduardo Wero08/23/2021 at 16:41 0 comments

    Hello Everyone!

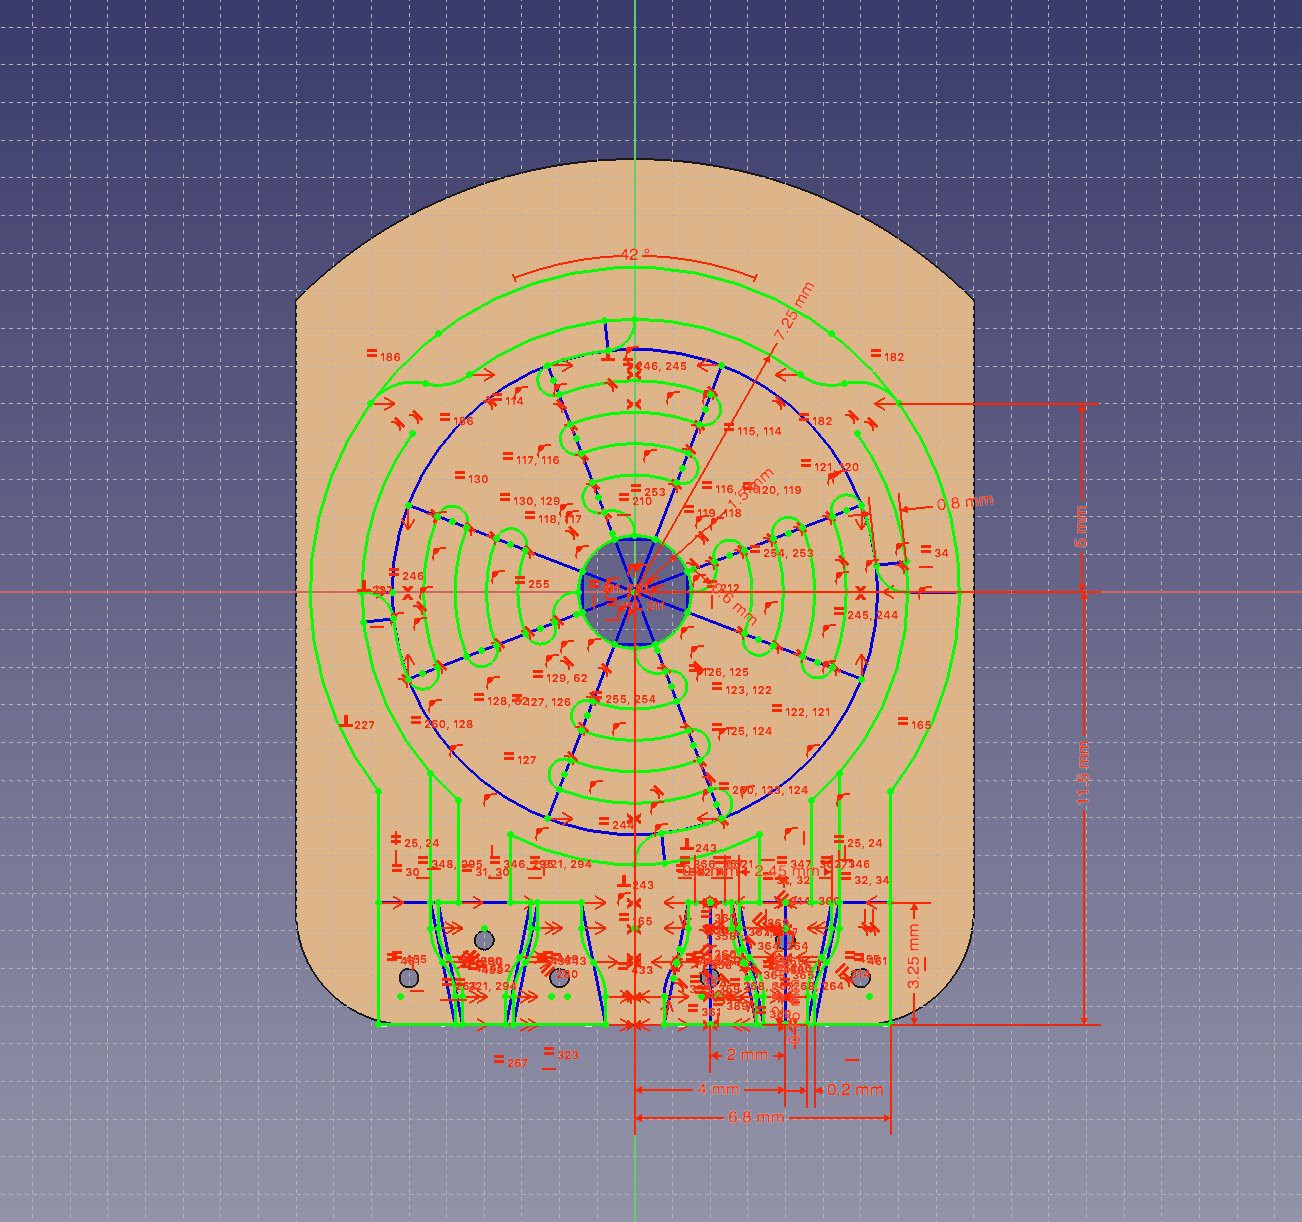
    As you may know the first version of The Byte had inside some FSR sensors, those sensors were designed on FreeCad this caused a difficult path to manufacture as PCBs.

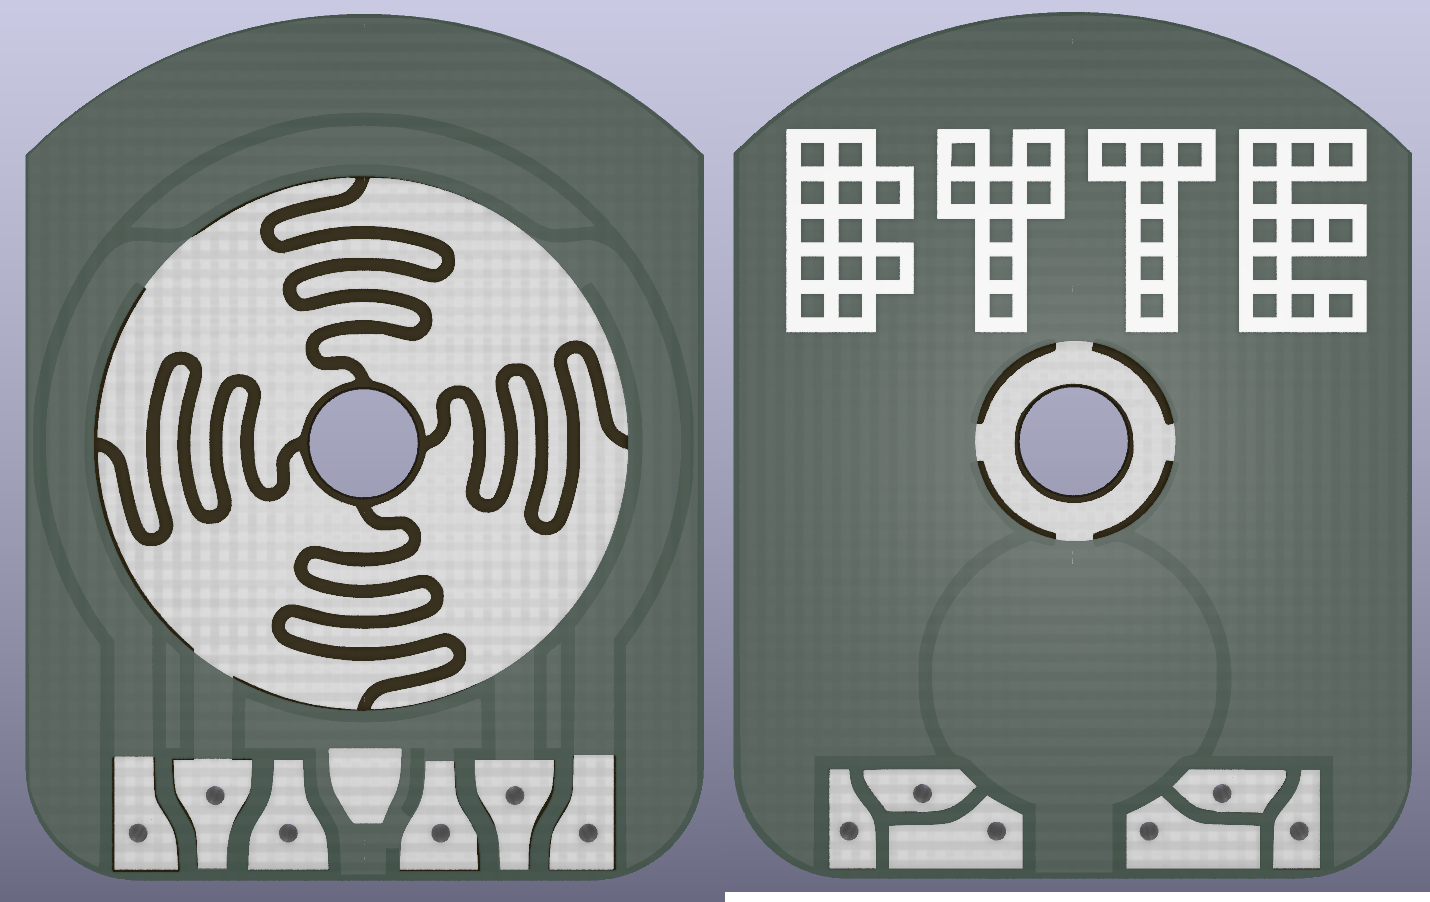
    Now the first sensor pack is available to be modified on KiCad directly so now we can also generate gerbers, and manufacture this PCBs wherever we want.

    Also we are working in different approaches to get a better performance about reading the movement on the tongue with different sensors inside what we call "Sensor Pack".

    All the sensor park work is available in the Github repository

    - Wero1414

  • Casting!

    Charitha Jayaweera08/20/2021 at 06:50 0 comments

    Hello Everyone!

    As for the mechanical work, we are currently trying out silicone casting with a custom mold design to cast the outer casing with food grade + medical grade silicone to accommodate the user in terms of comfortability, safety. 

    Below is just a initial, simple mold, which will be 3D printed.  material will be injected into the mold with the top two holes

    we will use SORTA-Clear™ 18 Product Information | Smooth-On, Inc. as the first material to try out.

    -Charitha J.

  • Upgrades!

    oneohm08/19/2021 at 16:53 0 comments

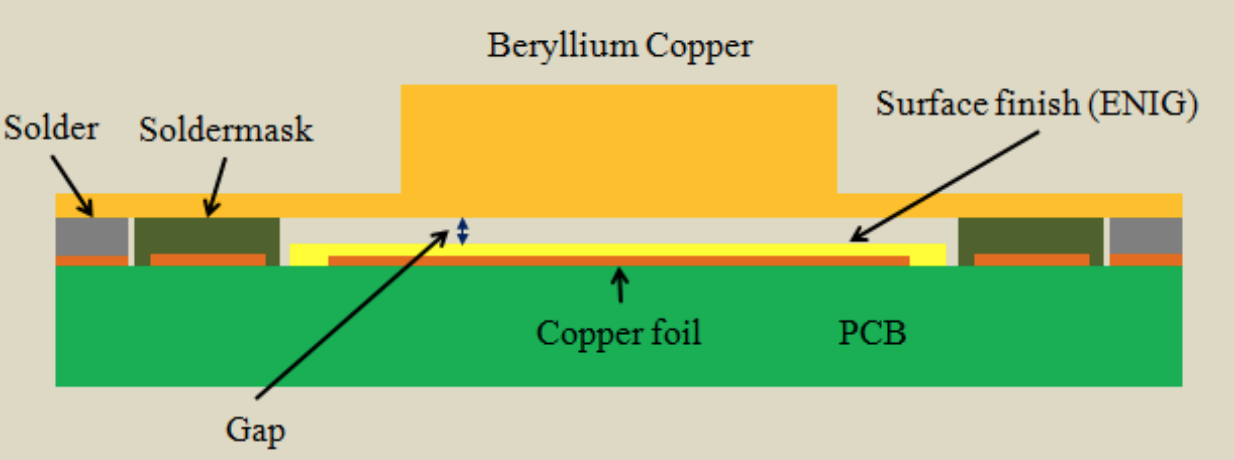
    Among the upgrades under consideration for the BYTE V2 is the addition of capacitive force sensing. Here is a diagram from a research paper showing the proposed construction:
    Here is a link to the paper: https://ieeexplore.ieee.org/document/7028121

    -oneohm

  • Release v1.0

    Eduardo Wero08/19/2021 at 13:57 0 comments

    Hello everyone!

    I'm happy to announce that The Byte v1.0 was release some days ago, this meaning that we're working on v2.0 already.

    First changes you'll notice is the Github repository architecture.

    Wero1414

  • Summary of the Hackaday Prize Criteria

    oneohm10/05/2020 at 08:04 0 comments

    Direct links relating to the required contest criteria:

    Concept-
    Is the project creative, original, functional, and pushing boundaries?
      - To my knowledge there are no similar devices currently available
    Does the project effectively address the selected challenge?
      - The UCPLA challenge seeks "new designs for adaptive tools... like trackballs or joysticks" The BYTE definitely fits the bill.

    Design-
    System design:
      Design Process - Evolution!
      Discussion and diagram of main sensor design
      Controller Design Details
    CAD models:
      Discussion of the sensor CAD model
    Project test methods:
      Testing procedure document
    Functional block diagram:
      System block diagram
    How user-friendly is the design?
      See the overview video for a usage demonstration

    Production-
    Is the project realistically reproducible?
      - With the information provided, the BYTE can easily be replicated
    Are the manufacturing processes detailed?
      Video showing the assembly process
    Are those processes realistic for scalability?
      Path from prototyping -> manufacturing

    Benchmark-
    How well is the project impact and viability demonstrated?
      Discussion of the viability of the design
      Advantages of the pressure sensor approach
    Are estimated costs realistic?
      Discussion of estimated costs
    How well does the project improve upon other currently available solutions?
      Discussion of available solutions

    Communication-
    How thoroughly have the Final Round requirements been completed?
     -Hopefully this summary addresses this point
    How well documented is the project?
      Full design package available on Github
    How “open” is the design?
      - Firmware license:
        GNU General Public License v3.0
      - Hardware license:
        Creative Commons Attribution-NonCommercial-ShareAlike 4.0 International License
        Once the design is finalized the hardware will receive a more permissive license.
        And of course UCPLA is permitted to use the design.


    Additional Final Round Requirements:

    Working prototype ✓
    Video:
    - between two (2) minutes and five (5) minutes in length ✓
    - shows a working prototype ✓
    - describe the challenge it addresses and demonstrate how it facilitates the solution ✓
    High-resolution photos of the project inside and out ✓
    At least ten (10) Project Log updates ✓
    Components list that is complete with a bill of materials for one unit ✓
      Complete Bill of Materials
    Complete schematics ✓
      Full System Schematics
      XIAO Controller Schematics
    Documented input and output requirements and specifications ✓
      Just in case it is not clear, The only IO requirement is a standard USB C cable

  • Testing Procedure

    oneohm10/05/2020 at 05:42 0 comments

    The testing procedure for the sensor pack is now available in the Github repository.

    This procedure should be performed after initial assembly, but before sealing into the enclosure.

    It can be downloaded here: Testing Procedure

  • Full System Schematics

    oneohm10/05/2020 at 03:39 0 comments

    Also available in the Github repository here: Full Schematics
    The schematics for the XIAO board are available here: XIAO Schematics

View all 21 project logs

  • 1
    Sensor Assembly Video

View all instructions

Enjoy this project?

Share

Discussions

Geoffrey Shea wrote 05/31/2023 at 18:40 point

Has any third party successfully built one of these? I'd like to try, but it is a little complicated for me...

  Are you sure? yes | no

oneohm wrote 05/31/2023 at 22:28 point

Not that I am aware of. I've been working on another project recently that is much easier to build, it might be an option for you: https://hackaday.io/project/191229-ohmni-stick 
If the BYTE is better suited for your situation, I still have lots of the parts and pieces left over that I would be glad to share.

  Are you sure? yes | no

Geoffrey Shea wrote 05/31/2023 at 22:44 point

I'm trying to help a quadriplegic user. So far created  a mouthguard-mounted pair of IR sensors so he has two buttons he can control with his tongue. But a mouse/joystick model would be a hundred times better!  I've worked with Arduino and silicone and epoxy, but not 3D printing. If you are able to help with a run at re-creating Byte that would be great!

  Are you sure? yes | no

Phil Malone wrote 06/25/2021 at 02:59 point

Hi.  Are you any closer to having "production" sensor modules available?

  Are you sure? yes | no

Adalberto Caldeira Brant Filho wrote 11/16/2020 at 18:27 point

That is a great project. I woud like to propose a new assembly for a wireless version, as a dentist I think I could help. Did you try to use the tongue and put the device in a more confortable place inside de mouth , so the guy could speak and at the same time use it?

  Are you sure? yes | no

Phil Malone wrote 11/15/2020 at 18:05 point

Congratulations.  I'm glad you've opened the discussion board up.  I've been trying to message you for months.  I'm eager to try adapting your device to my https://hackaday.io/project/170932-hoverboards-for-assistive-devices project.  When you are ready to make your device available, I'd love to purchase just the sensor.  I'd adapt the interface to my own HUGS protocol.

  Are you sure? yes | no

unardia wrote 11/12/2020 at 06:46 point

Help me to buy one. I have a person who need it. Thanks!

  Are you sure? yes | no

Ammar wrote 11/11/2020 at 19:57 point

this is amazing. Where can someone buy one?

  Are you sure? yes | no

Rik wrote 11/11/2020 at 18:05 point

My first reaction was: 'Fuuuuuuuuuu! mind blown!

This is amazingly clever! I And it has a lot of other applications... Could be used by divers too with a bit of tinkering?

You deserved the prize for sure!

  Are you sure? yes | no

Similar Projects

Does this project spark your interest?

Become a member to follow this project and never miss any updates