CNC 1419 Upgrade
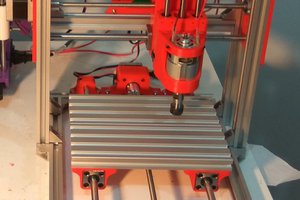
Useful upgrades for the cheap Chinese CNC 1419
Useful upgrades for the cheap Chinese CNC 1419
To make the experience fit your profile, pick a username and tell us what interests you.
We found and based on your interests.
The spindle motor supplied with the machine is not great, the control electronics is installed directly on top of it and its randomly failing (due false contact I believe), for this reason I decided to change it.
First I was planning to buy a more pro spindle motor such as the Kress 800. However such motors are (in my opinion) way to big for the size of such small machine.
For this reason I finally choose for a small and cheap upgrade: the Brushless Motor Spindle Kit 24V 12000rpm (link, note that I bought on aliexpress for around 65 eur link)
This is a drop in replacement for 44mm spindle motor such as the one on the CNC1419.
The motor has a much neater finishing, it has bearing to decrease the run-out and it comes with its control board and a nice metal enclosure.
The cabling is straight forward:
The motor so far seems good, is much more silent and it seems reliable, it worked straight away with the board firmware (without requiring any change).
The only negative is the impossibility to change the rotation direction of the spindle via gcode (there is a switch on the back of the control board)..
Limit switches are not included in the 1419 kit, and you probably can live without it.
However as I am a very beginner with CNC and I am kind messy I already crashed the axis several times...
So I decided to buy some random limit switches from amazon (I chose the HiLetgo V-156-1C25 mostly due the fast shipping option).
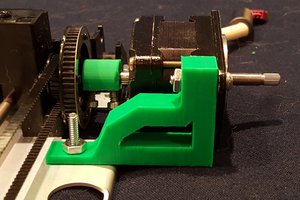
The 1419 GRBL control board already support limit switches for X, Y and Z axis so for the electronics and software side it is quite simple, however the CNC itself does not have (at least I did not found) any placement for the limit switches and I do not want to use some hot glue and glue it permanently to the frame...
So I made few 3D printer adaptors that I mounted to the frame:
The design is not final and in particular for the axis Y I will make a new design in the future and I would like to make a new design for the Z axis with the two switches on the same adaptor.
You can find the original design on onshape (I created different version for each axis).
I will upload the final design in the next days in thingiverse (and here as well)!
For the wiring I choose the normally closed configuration and follow the GRBL wiki that explain very well how to do it.
However I am not happy with this configuration as the accuracy is low and I also misused the micro-switch that should have been paired with a slope. So I will probably end up to replace the set-up in the following days...
The machine I bought came with a mini-usb GRBL controller (version 0.9 something) and it has 3 replaceable generic stepper drivers and different inputs and outputs (for limit switches, stop button, laser engraver, fan etc..).
Overall the control board is not that bad for the price and my needs, however it is not enclosed so I will design a small 3d printed box in the near future.
After assembling the machine the first thing I did was to run bCNC and Candle on my linux laptop to test the movement of the machine. It worked just fine, the usb device it is seen like a serial device (`/dev/ttyUSB0` in my case) and the two software worked correctly.
However due to the placement of the CNC in my flat it is not very convenient to connect my laptop to the CNC so I chose to use my Raspberry PI 4 to control it remotely.
I am very happy with this solution. The software I chose to use is cncjs, I used their official guide to install it on my raspberry pi and now it look like this:
I can use the console to communicate directly with the machine (for example for setting the correct axis directions) and it stream the pi webcam to monitor the status of the machine remotely. So far I am very happy! :)
Create an account to leave a comment. Already have an account? Log In.
I did one better. The diameter of the spindle shaft is 10mm, no more flex. The original setup had 5 or 6mm motor shaft onto which the collet holder is attached, and I could see it flex while machining wood. This is how my cnc bridgeport cnc mill is: motor and spindle have separate bearings.
I use an SSR (solid state relay) and PWM to control the 885 spindle motor. The SSR is activated with the spindle port on the controller, paying attention to polarity. There are both 5 and 12V sources on the controller board for the LED and little fan.
https://www.flickr.com/photos/89900722@N05/53211442621/in/dateposted-public/
Hello Martino,
I just ordered one of these little guys to work side by side with my home built. Unfortunately it wont be delivered until march, its on a boat from china. Thanks for the link to the limit switches, I have already ordered them, not really sure why they wouldn't add them, they are cheap enough. I will be making pool cue butt sleeves on it and would like to prebuild some fixturing on my 3D printer. Would you be able to provide me with some dimensions & information on the table? What size T nuts does the table use? What is the slot width (going to use the slot to align a manual rotary table) and what is the center to center dimensions for the slots?
Thanks Carlton
Hi Carlton,
Sorry for the delay, I was not active last year...
Do you received the machine? How you installed the limit switches?
Cheers,
Martino
I used 2x2x1 cm pieces cut from a rubber isolation mat under the corners of the paving stone plus slightly larger ones under the table legs.
The CNC 1419 seems like a good compromise for sturdiness and size, since I would like to use it occasionally for metal. I'll probably wait until the 1419 can be shipped from Europe, would rather let someone else deal with Duty and Customs.
I am still thinking about getting this machine. I should have acted sooner, at the moment, it seems there aren't any AliExpress sellers shipping from Europe anymore.
As with a 3D printer, I am sure an appropriately sized paving stone underneath will reduce the noise significantly.
Hi Mike,
My CNC arrived from China as well as I did not find either any European sellers...
I was thinking in a setup similar to the one presented here: https://hackaday.com/2020/05/20/bricking-your-3d-printer-in-a-good-way/
In particular as the building I live is very old and the floor is very uneven!
Become a member to follow this project and never miss any updates

 Sam Griffen
 Bharbour

 Rocketburns
Hello Martino,
I was wondering how you connected your Rpi 4 to the mini-usb GRBL controller.
You just used the USB ?
Thanks for this article in all cases :)