 EK
EKNote: The content in this update was on August 25th.
Test #01 is upon us! Time to see what doesn’t work, and maybe there will be one or two things that do work.

Objective of the test
Test the functionality of the DIY Buoy B and understand the intricacies of getting it to work outside of the lab.
Read on for results of the test!
Here is the preparation before the test. The designs for the two jigs for cutting in a previous update were used as end caps. These would have the ropes and feet attached to it. A single layer of duct tape was added to provide some grip. In the future, perhaps a rubber sheet can be used. As well, hot gluing the upper stage onto the underside of the lid!

Added the magnets to the external wiper, setting up the GoPro, glued Neopixels to the edge, and unsure at the moment what to do with the round circle piece. It will probably be cut in a future test. Rest assured there are no small fish in this testing location that can be caught by it.

At the test site, the preparation is to switch the device on, then fasten the lid. Fastening the lid is challenging because of the twisting that the wires internally undergo. Next is to tie the rope to the end cap.
This probably sounds obvious, the enclosure is buoyant. The majority of the time during the test was spent on trying to pile rocks onto the feet to keep it down.
Eventually, this worked a few times. What does the LED look like underwater? It’s still quite bright from the outside!
From underwater, the results were interesting too. The illumination showed the organic material suspended in the water. It is interesting, as from eyesight without light this wasn’t noticeable.


It was already plenty dark, so time to conclude this test.

Hooray! Test #1 complete. Here are the key learnings from this test:
What worked
- 3W RGB LED lit up
- Neopixels lit up
- Buoy is buoyant
- Enclosure remained watertight
- Lid piece remained attached
- GoPro captured test footage
What didn’t work
- End cap fell off
- Servo movement stopped
- Angle of GoPro changed
- Wires getting tangled during the fastening of the lid process
- Trying to hold the buoy steady underwater
- Figuring out where to put the wet equipment and dry equipment for transportation back to lab
What needs to change for future version
DIY Board and Electronics
- Move Arduino Pro Mini closer to edge
- Neopixel and servo headers at 90 degrees OR more secure connection (hot glue)
- Move capacitor in front of Neopixel header
- Check the attachment of the board? Looks like it was on a small angle
- Open notches on the upper stage piece to allow the wires to come through
- Figure out how to do wire management on the servo wire
- Future: Eventually additional sensors
- Future: Magnet sensor on top lid to activate program
Enclosure
- End cap needs to hold stronger
- Add teflon tape to the threads of the Nalgene bottle
- End legs need corner trimmed for enclosure to go through (new end cap)
- Holder needs space for enclosure to go through (new end cap)
Operations
- Have one bag for wet, one bag for dry, and bring a towel
- Test before sundown
Here’s a look at some of the pieces that did not work. Keep in mind, the enclosure was dropped from ~15cm onto a rough surface. Some of the damage may have been caused by this. The servo horn broke, the super bright lights board jumped off the connector. There was evidence of moisture on the threads, and one drop on the switch (the drop on the switch is undetermined if it was during the opening process).
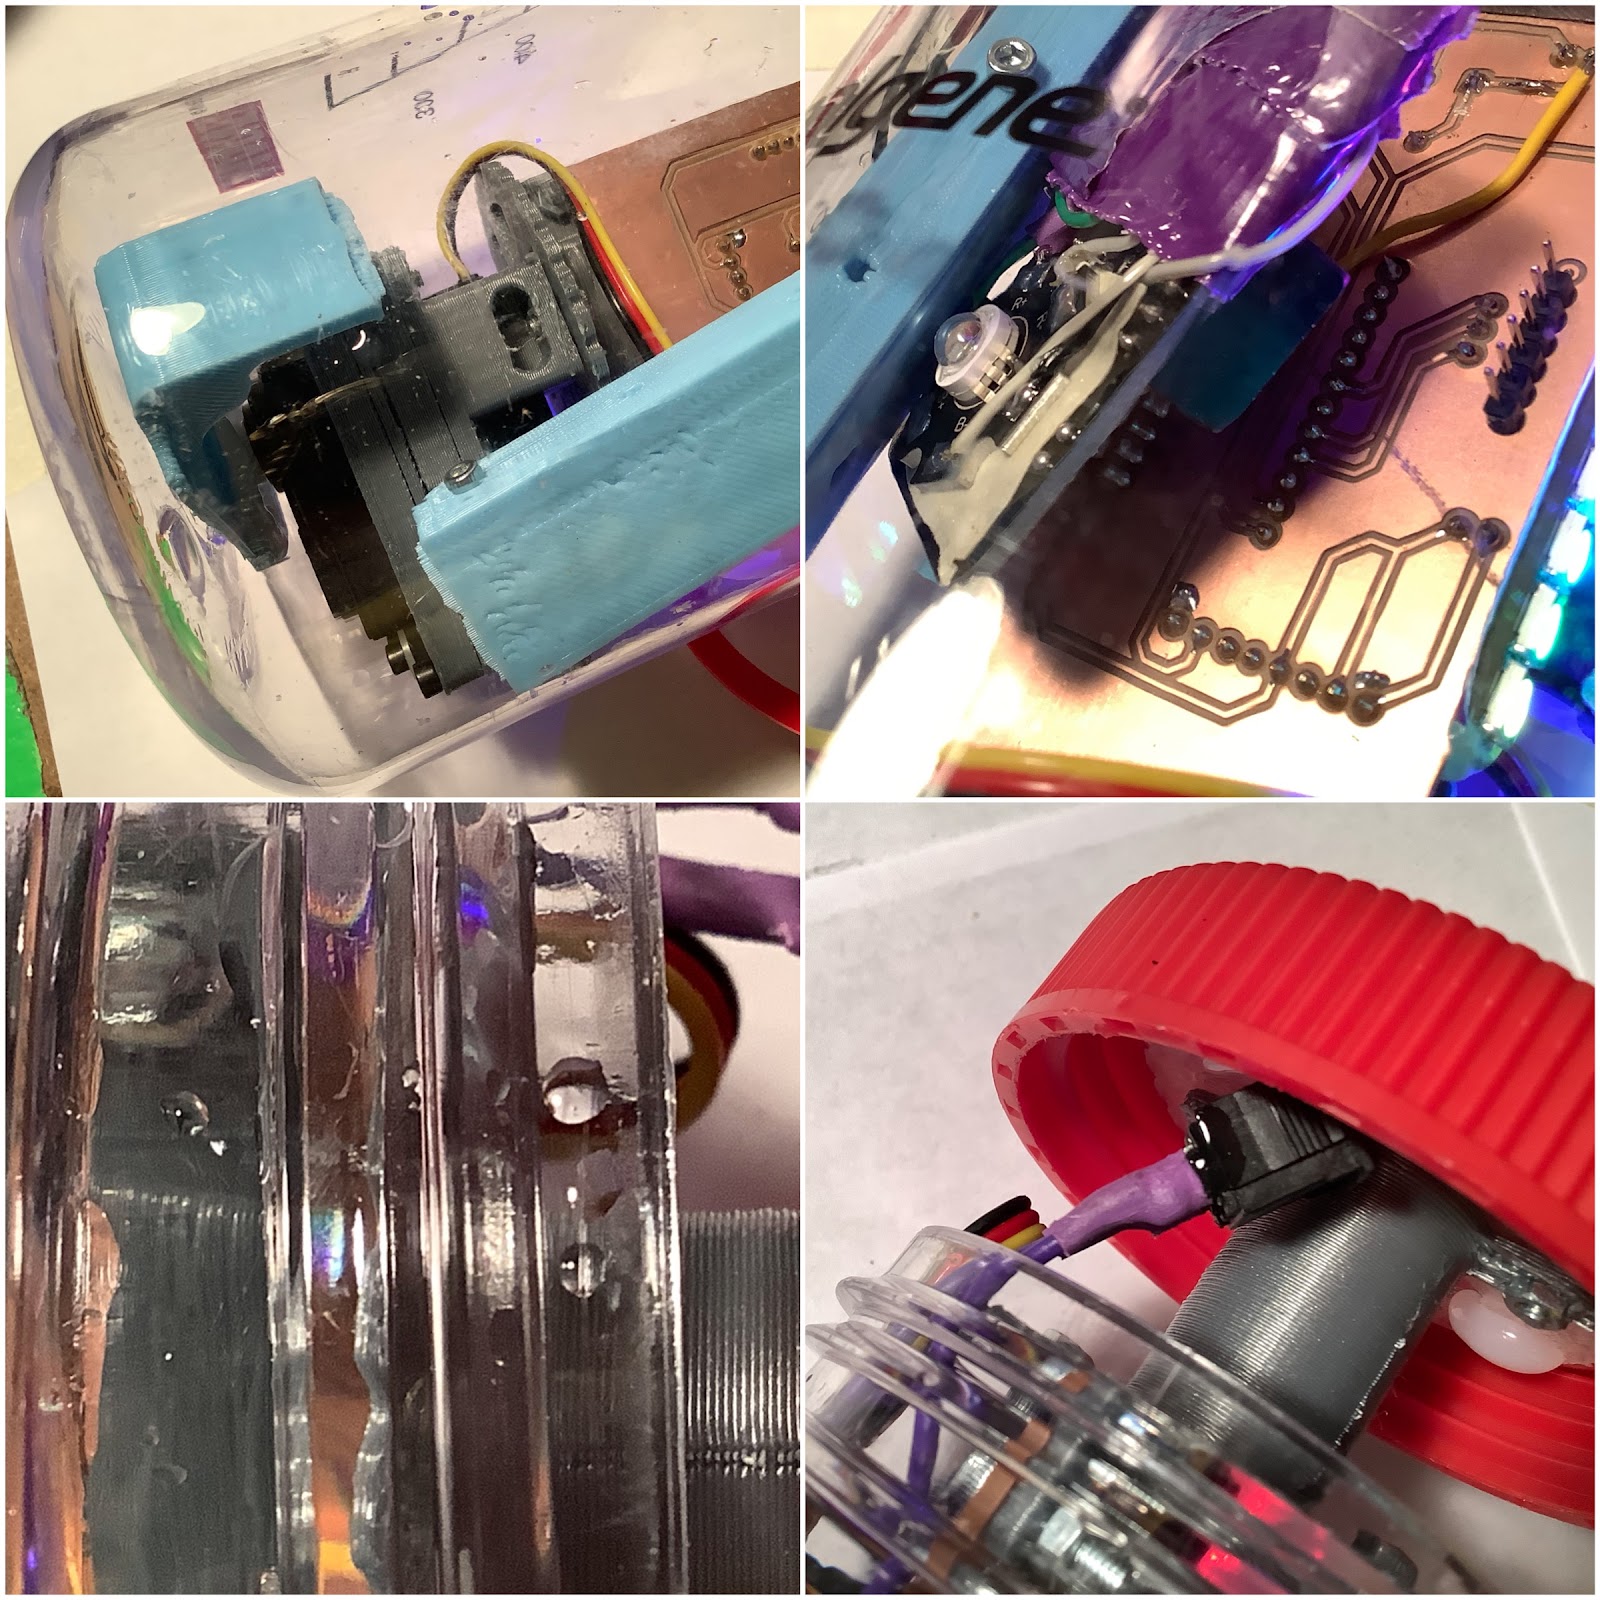
As for the servo not working, the cause was that the traces were ripped from the board. This was likely caused during the setup process of twisting the lid and the wires snagging on each other, causing tension.

It is interesting as I haven't seen this error before, but it makes sense as to why it can happen.
Discussions
Become a Hackaday.io Member
Create an account to leave a comment. Already have an account? Log In.