 Ted
TedEach element of the belt is 4 layers of 3mm (1/8") wood - conveniently equal to the ~12mm width of the 144 LEDs/m strips I had. The infinity mirror is a "first surface" mirror finish on 3mm acrylic on the hidden side and a two-way mirror on 3mm acrylic on the visible side.
I designed the belt elements in OnShape, and cut mock-ups using random scrap materials (I think all from the trash bin) to get the size right. The ring needs to just fir the LED strip with enough space for the wires at the end, but not so much space the gap is obvious. And the mirrors need to fit just inside there. It's a deliberately snug fit - everything hold just with friction. (A nice plus for laser cutting over 3D printing - it's just a couple minutes to cut a new shape when tweaking the size so I can iterate quickly.)
I expected soldering the edges of the tight 144 LED/m strips would be difficult. It was tricky first, but after getting a feel for it, it's not bad at all. The most important part in tinning both the LED strip and wire first - then the connection is easy to make (at first I only tinned the strips, which didn't work as well). Recently a good tutorial on LED soldering was added on Adafruit.
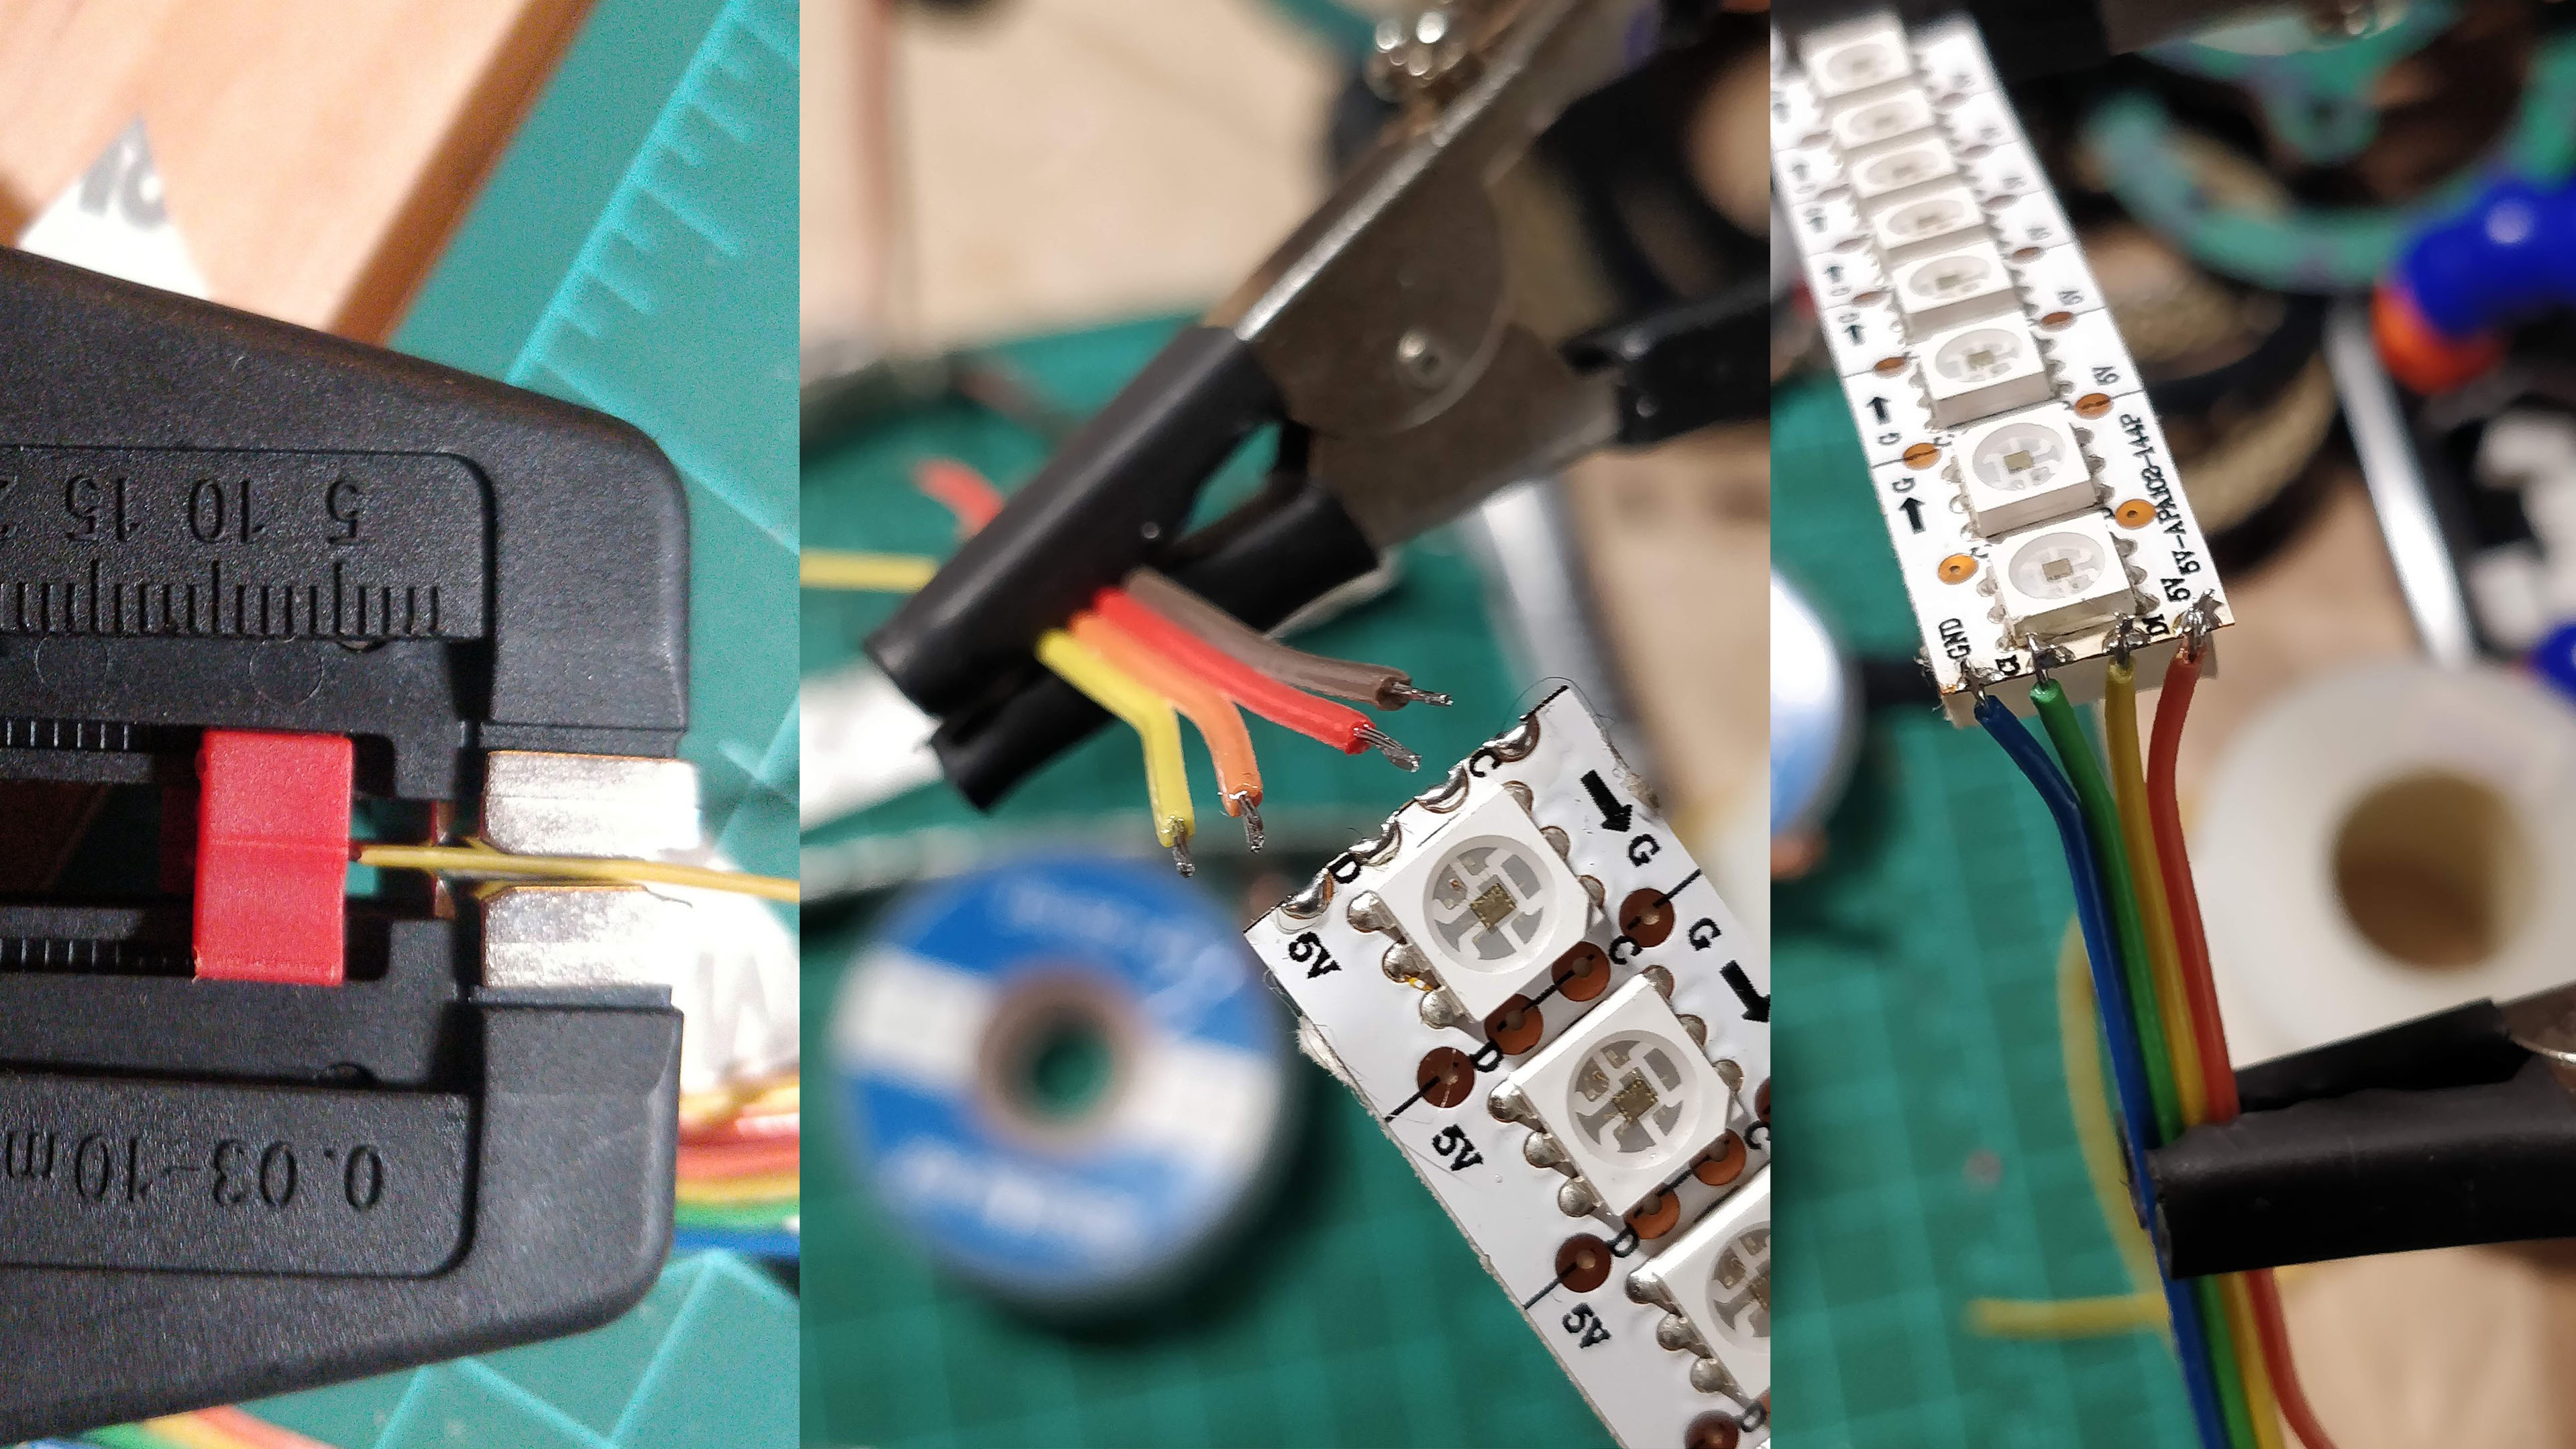
I had chosen to use crimped connectors for one side. For those after a few failure crimping wires already inserted in the rings, and needing to cut the wires shorter, I learned to crimp as one of the first steps instead of one of the last.
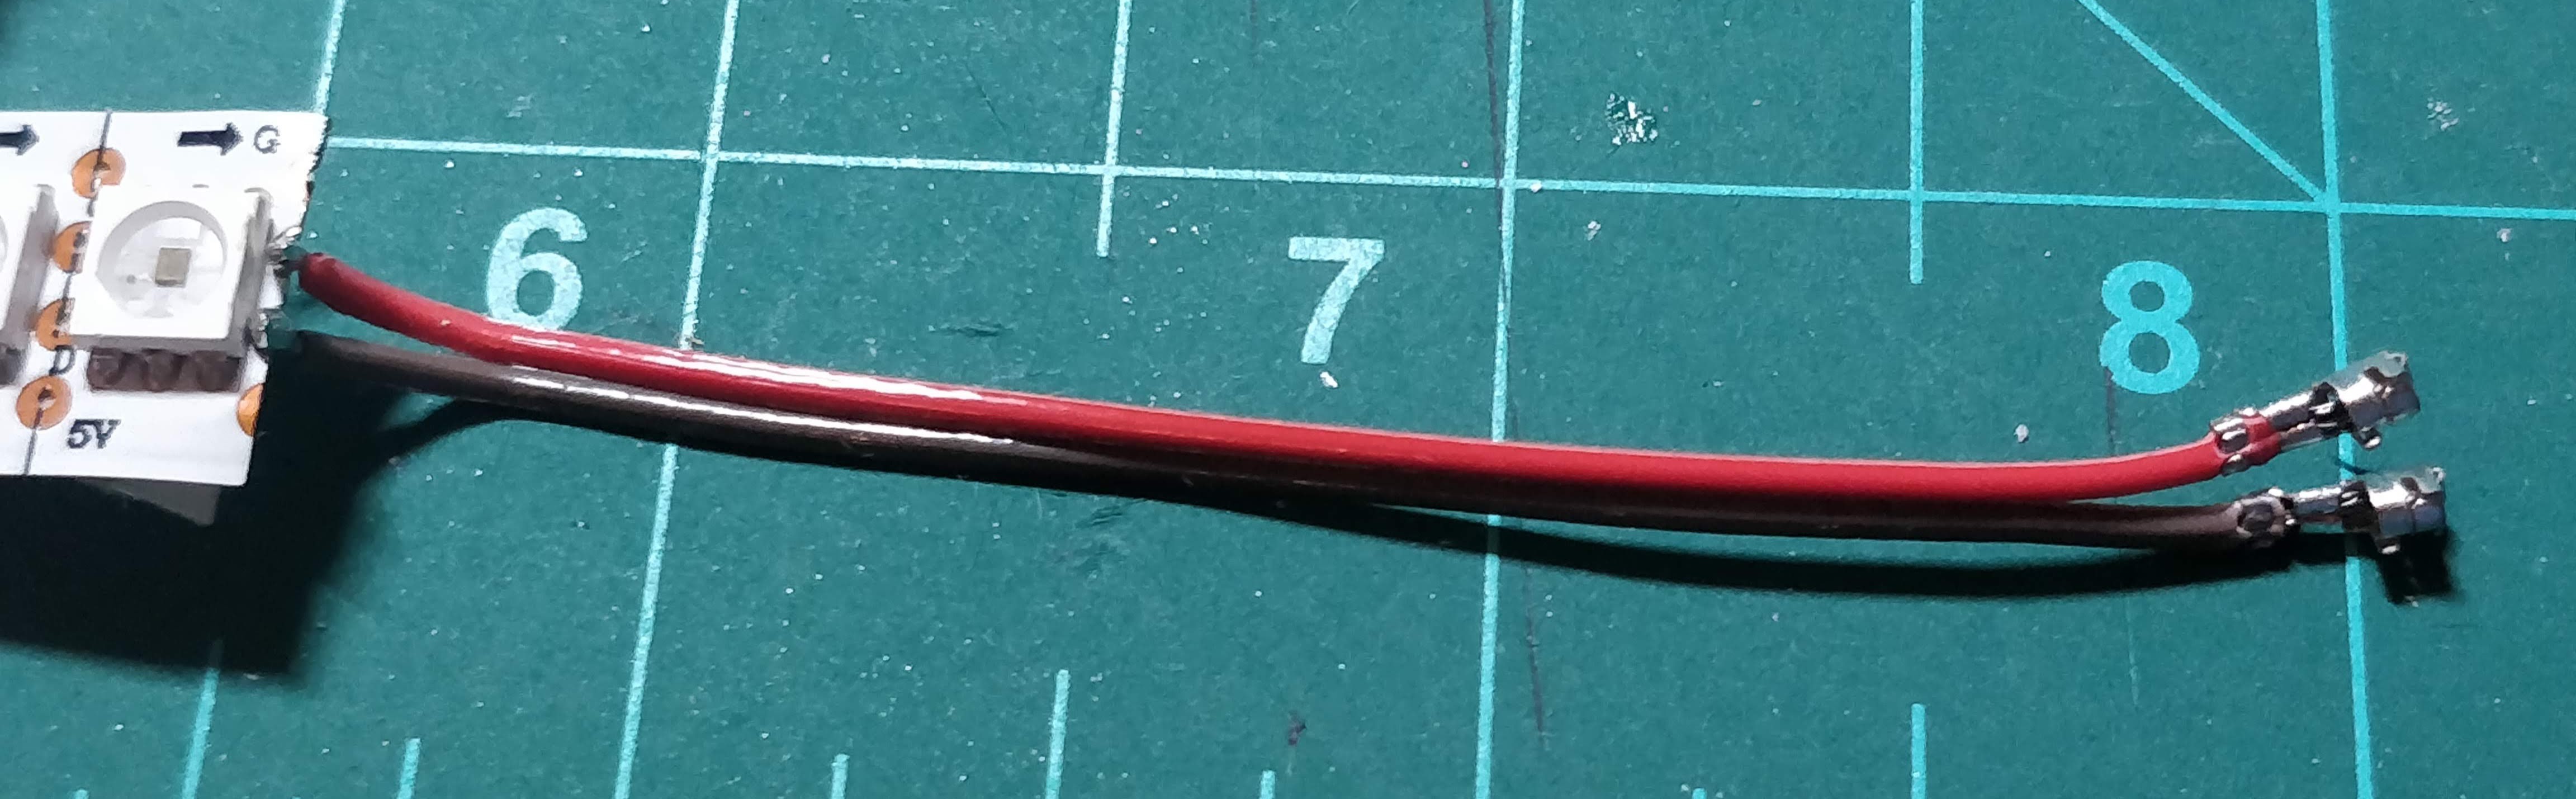
(I ran the power in separate wires, so on the output side of the strip I only connect clock & data)
To avoid shorting where the ends meet, I added a small bit of cut up plastic bag for insulation. (This has failed me, to I need test the output before gluing the front cover on) I also noticed that sometime pressure on the mirrors would cause the strip to glitch - I'm not sure if it was shorting it, or lifting the LEDs off the strip, but the solution was adding a small bead of hot glue along the pins of the LEDs. (unfortunately I didn't discover that until at Burning Man, so I had to take things apart to implement the fix later)
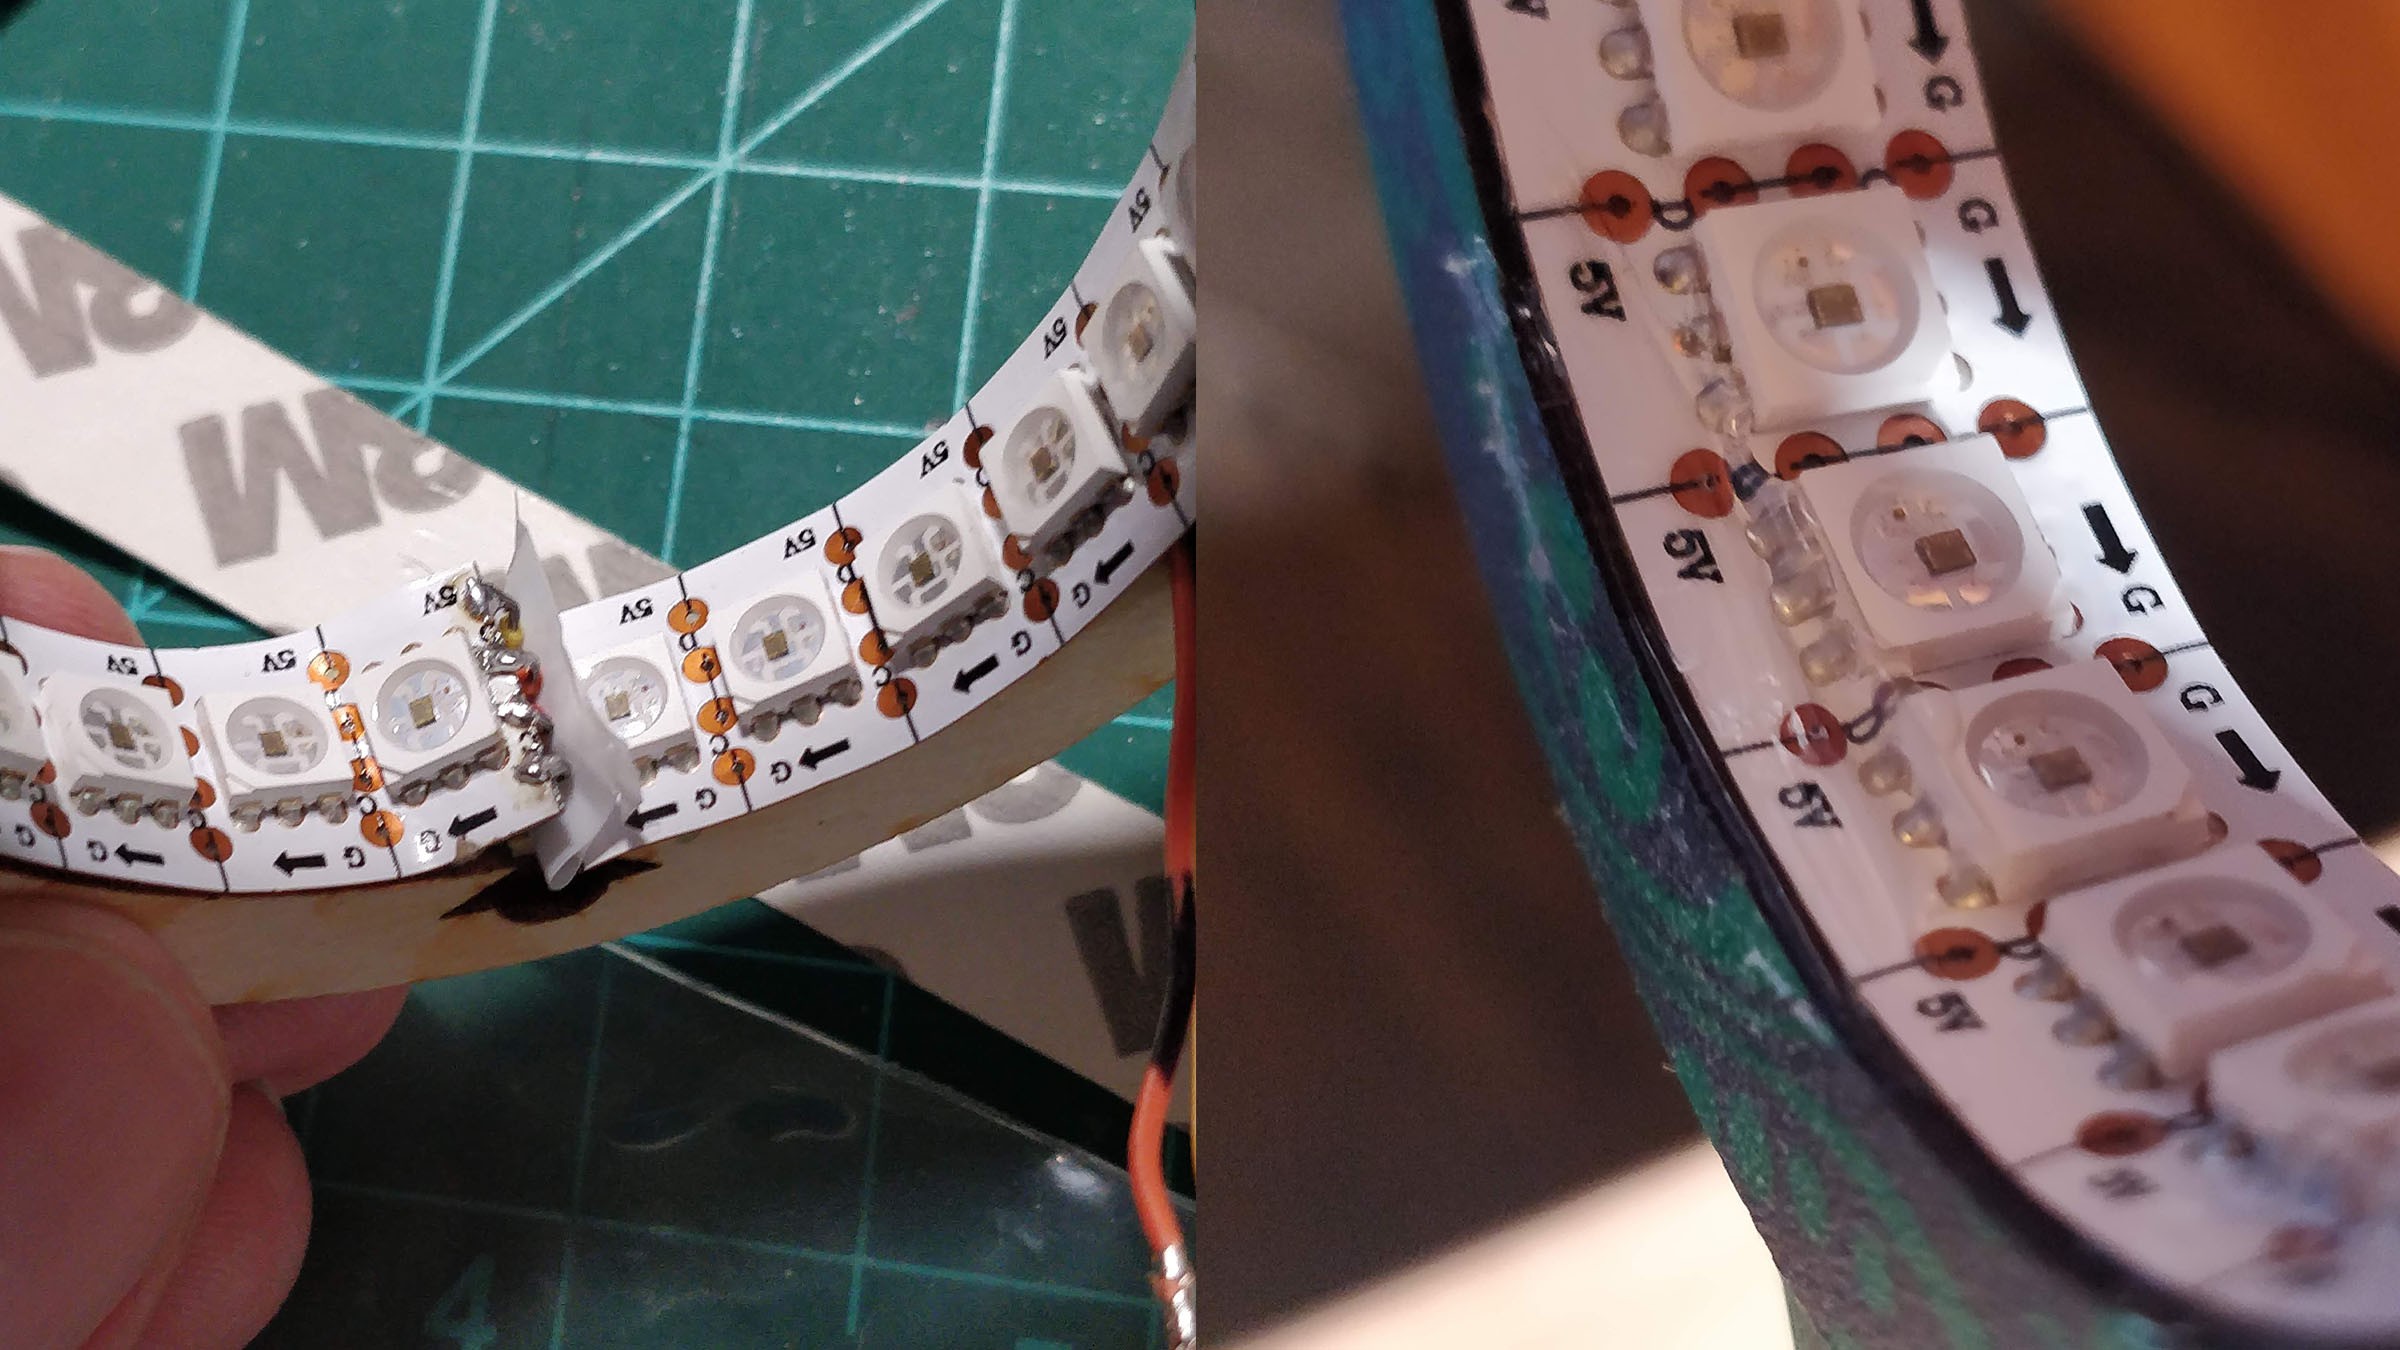
Here are a few in various stages of production / testing / repair:

The biggest reliability issue I had was the connections between the discs. I used hot glue for insulation on one side where I soldered connections, but not on the side with crimped connections. Some of the crimped connections did not survive the night. In the image above, you can see both side with hot glue as stress relief.
These APA102s sometimes glitch into an all-white state (I suspect working clock + bad data line), which gets quite warm. (enough that I know one behind me glitched and I need to disconnect it)
Discussions
Become a Hackaday.io Member
Create an account to leave a comment. Already have an account? Log In.