Close
0%
0%

Interfacing Joystick with Arduino

As Joystick is the game controller it is used in applications like DIY electronics

Similar projects worth following
The project describes how to interface joystick with Arduino.

About Project

The joystick is an integration of two potentiometers for the X and Y plane respectively. It shows the voltage via the potentiometer and provides analog value to the Arduino and the analog value modifies as we move the joystick shaft.

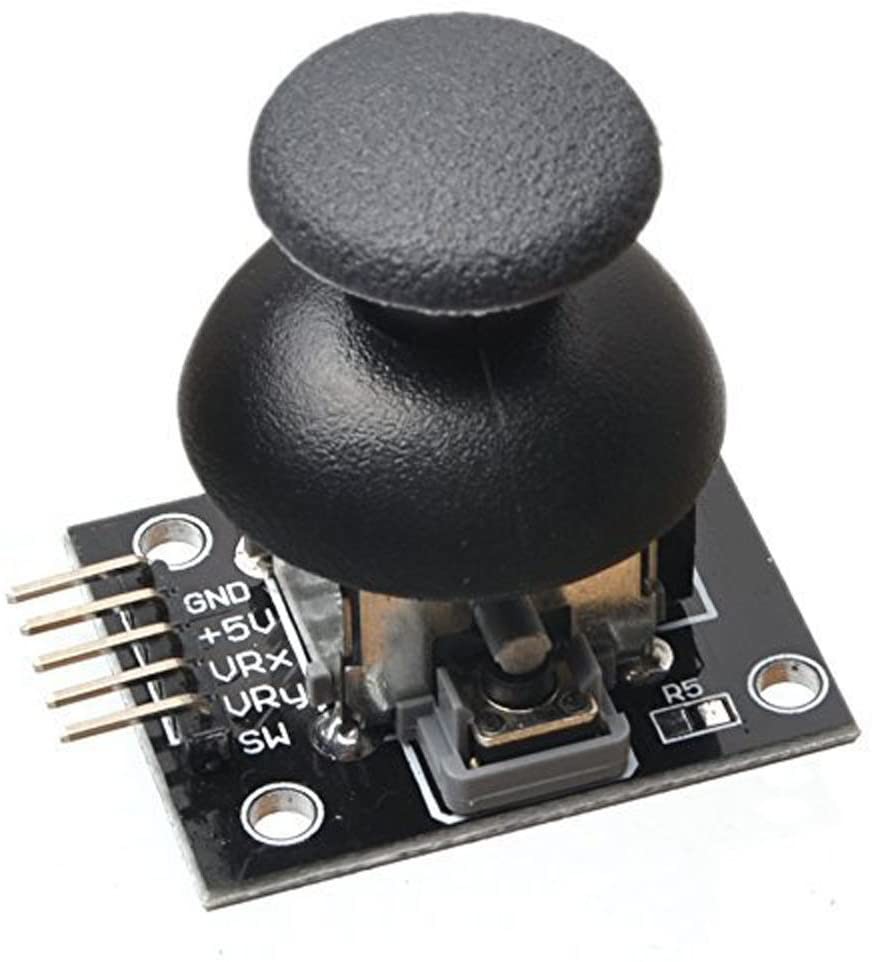
Joysticks are accessible in various shapes and sizes. The joystick module is as follows. This Joystick module generally gives Analog Outputs and the output voltages given by this module have changed as per the direction in which we drive it. And we can get the direction of evolution by understanding these voltage changes utilizing some microcontroller.

This joystick module has two axes. X-axis as well as Y-axis. Each axis of JOYSTICK is installed to a potentiometer or pot. The midpoints of these pots are turned out as Rx and Ry. So these two axes are variable points to these pots.
  • 1 × Arduino Uno
  • 1 × Joystick Module
  • 5 × LED Fiber Optics / Emitters
  • 3 × Resistor 100ohm

  • 1
    Run a Program

    #define joyX A0
    #define joyY A1

    int button=2;
    int buttonState = 0;
    int buttonState1 = 0;

    void setup() {
    pinMode(7,OUTPUT);
    pinMode(button,INPUT);
    digitalWrite(button, HIGH);
    Serial.begin(9600);
    }

    void loop() {
    int xValue = analogRead(joyX);
    int yValue = analogRead(joyY);

    Serial.print(xValue);
    Serial.print("\t");
    Serial.println(yValue);

    buttonState = digitalRead(button);
    Serial.println(buttonState);
    if (xValue>=0 && yValue<=10) {="" digitalwrite(10,="" high);="" }="" else{digitalwrite(10,="" low);}="" if="" (xvalue<="10" &&="" yvalue="">=500)
    {
    digitalWrite(11, HIGH);
    }
    else{digitalWrite(11, LOW);}

    if (xValue>=1020 && yValue>=500)
    {
    digitalWrite(9, HIGH);
    }
    else{digitalWrite(9, LOW);}

    if (xValue>=500 && yValue>=1020)
    {
    digitalWrite(8, HIGH);
    }
    else{digitalWrite(8, LOW);}

    if (xValue>=1020 && yValue>=1020)
    {
    digitalWrite(9, LOW);
    digitalWrite(8, LOW);
    }

    if (buttonState == LOW)
    {
    Serial.println("Switch = High");
    digitalWrite(7, HIGH);
    }
    else{digitalWrite(7, LOW);}
    buttonState1 = digitalRead(7);
    Serial.println(buttonState1);
    delay(50);
    }</=10)>

View all instructions

Enjoy this project?

Share

Discussions

Similar Projects

Does this project spark your interest?

Become a member to follow this project and never miss any updates