Warning
It appears that the connectors for the controllers are installed in different orientations depending on the manufacturer. Your adaptor board must match your controller (see Connectors below). It is HIGHLY recommended you either:
- Do extensive research ahead of time to ensure they are paired correctly.
- Get an adaptor board that is a kit and solder it together yourself so you can orientate the connectors according to your controller configuration.
Introduction
The Smoothieboard is capable of using a RepRapDiscount Full Graphic Smart Controller (https://reprap.org/wiki/RepRapDiscount_Full_Graphic_Smart_Controller). To connect a smart controller an adaptor card for the Smoothieboard is required (http://smoothieware.org/rrdglcdadapter).
The controller displays information and allows commands to be sent to the board. For a 3D printer or laser cutter, the smart controller also lets a job run without having a computer connected to the machine. A pick-and-place machine requires a connected computer to run, so there is less of a benefit.
Connectors
Background
My controller did not match my adaptor card so when I plugged it in, nothing happened. Fortunately for me, the team at Fox.Build (https://hackaday.io/project/165743-foxbuild-pnp) had the same problem and noted the issue for them was reversed connectors. I had the potential cause a few minutes after the problem arose. However, their solution (and way of confirming the reversed connectors) was to force the connectors in backwards and see if it worked. I didn't care for this solution for a few reasons:
- My connectors were pretty stiff and I wasn't sure if I could force them in without breaking something.
- I wanted to be able to remove and reinsert the cables in the future. Repeating this brute force method magnified the opportunities for something to go wrong.
- I wanted to find a way for others to tell ahead of time that their controllers and adaptor cards match.
While there is a standard orientation of the connectors, it appears many manufacturers of both the Smart Controller and the adaptor card have ignored it. The page for the Smoothieboard adaptor makes note of this and states that you have to orientate your connectors according to how your controller is configured. They show pictures of connectors in both orientations but don't tell you how to determine which way to place your connectors. The RepRapDiscount Smart Controller page defines the pin out, but then shows a picture of the connectors on backwards. On the disorganization scale, I classify this as a C Level Cluster Bleep.
Determining the Orientation
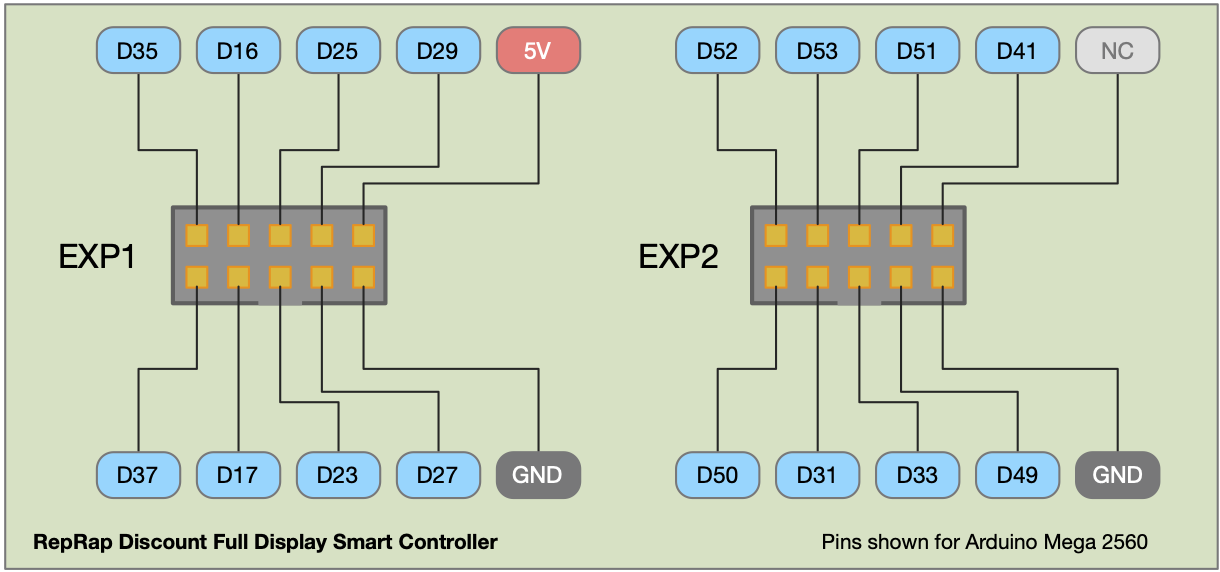
On the wiki page for the Smart Controller, you can find both the schematics for the controller and a diagram of the connector pin out. Since these were from a reliable source and both agreed I declared this as the "correct" orientation. Rather, this is the intended orientation. Everything will work so long as the connectors are self-consistent between the adaptor card and the Smart Controller. In other words, correct is somewhat relative here. What's important is that things function correctly not that the connectors are in the designed orientation. Therefore, I will refer to the intended orientation as the standard orientation and the other as the reversed orientation.


We can now see that pin 1 is on the lower left when looking at the side of the connector with the orientation key. The key is just below the pins marked D23 and D33 in the above image.
On the Smart Controller I had, I could just make out markings on the silk screen which seemed to locate the position of the orientation key. I dug into the source files from the Reprap site. The source files are in Altium, which I don't have access to. I opened the Gerber files and could determine the standard orientation. In the image below, note that you are viewing from the front so it looks reversed from what you would see looking at the back of a controller. You can make out where the two ground pins (pin 9) of EXP1 and EXP2 are connected. You can also see where 5V is connected to the Vin of U2 and this is enough to orientate the connectors. An easy way to remember is that PIN 1 of the connectors is AWAY from the SD card. Therefore, the orientation key should be down to be in the standard position. It is interesting to note that the picture of the controller card on the Reprap site has the connectors in the reversed orientation.

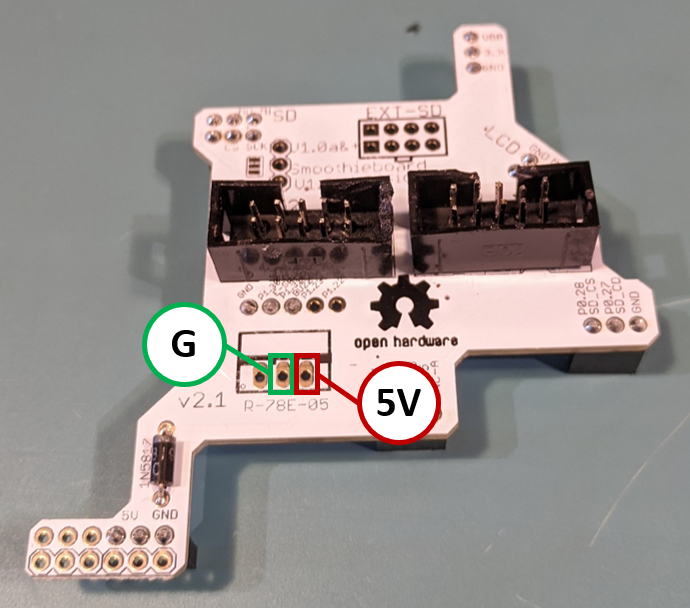
On the adaptor card, I came up with a simple check. By looking at the reference material for the card, you can note there is a location to add on an additional (optional) voltage regular. From the datasheet of the voltage regulator, you can locate the ground and 5v out pins. You can then use a multimeter on the continuity setting to see if the adaptor's connectors are orientated according to the standard above or if they are reversed.

Standard Orientation

Reversed Orientation

Installation
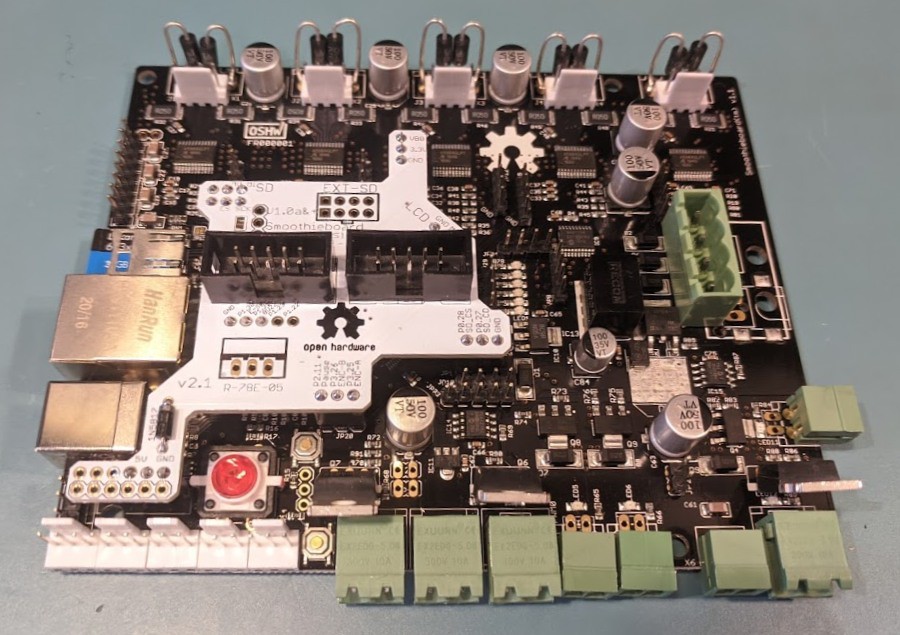
Below you can see how the graphics card (white) is orientated on the Smoothieboard (black). To say the least, it is a bit of an awkward fit with connector pins spread out across a large area of the Smoothieboard. Be careful to line up all the pins and then slowly press the card on. When pressing down on the pins, alternate between groups so the graphics card remains more or less parallel to the Smoothieboard. That way you do not bend pins as you press down.

 Lance
Lance
Discussions
Become a Hackaday.io Member
Create an account to leave a comment. Already have an account? Log In.