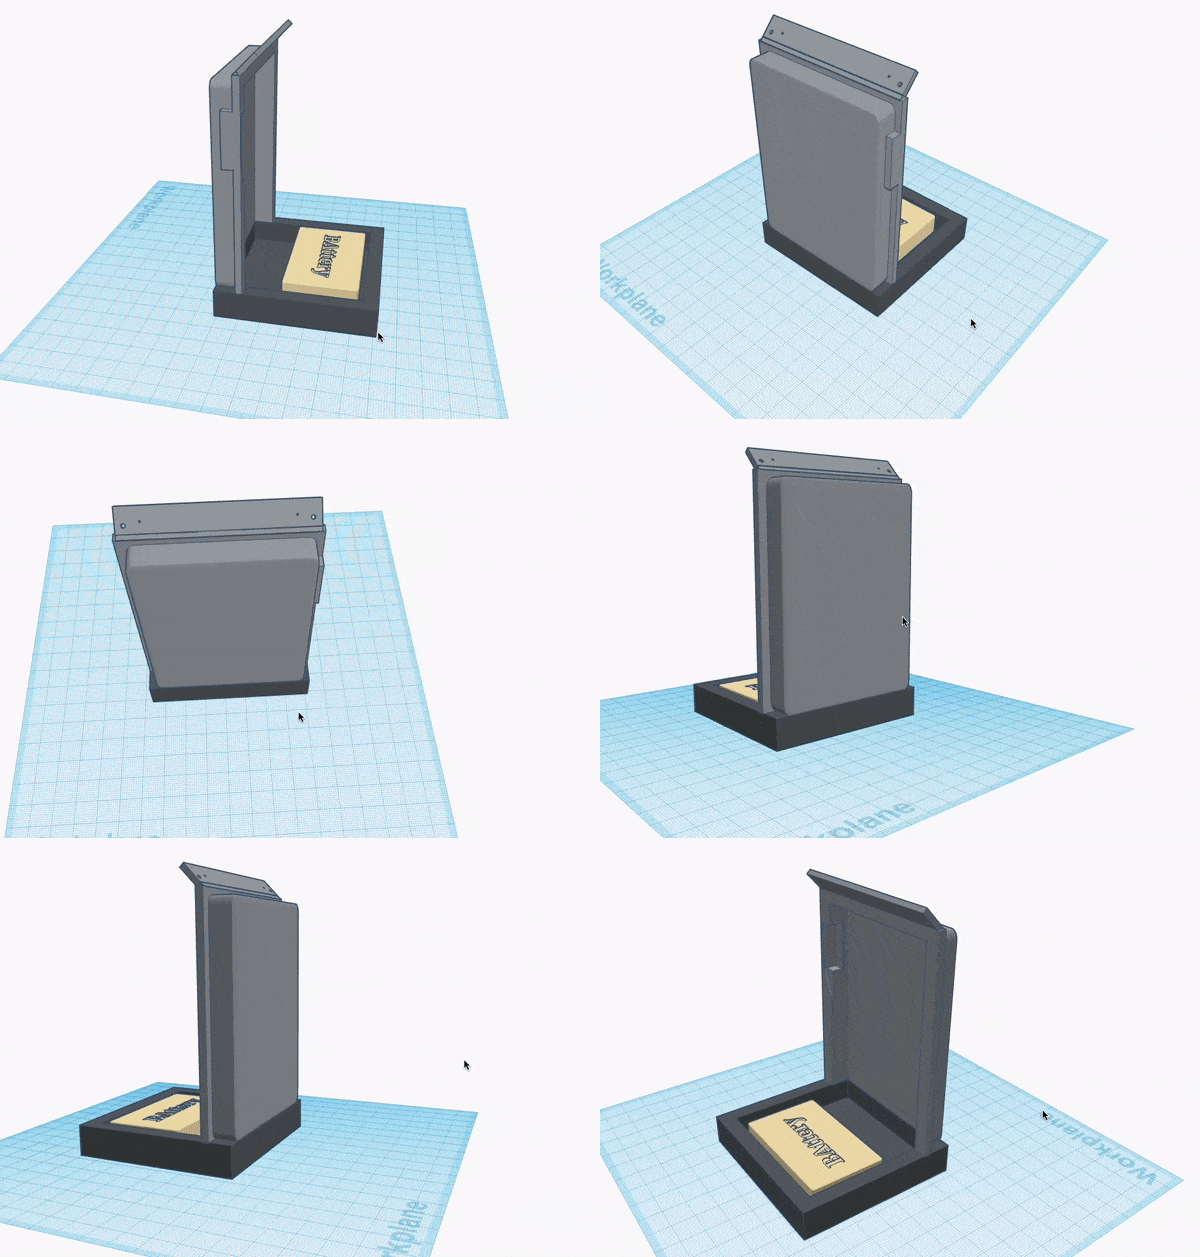
My black printing resin has been delayed by the Italian Post (story of my life). In the mean time, I'm still working on the back panel and battery holder design.
This is the general idea so far - it definitely needs some more work, and Tinkercad is just too limiting for really polishing off a design (edges/surfaces). If anyone can recommend a better free CAD software similar to how Google Sketchup used to be, I would be eternally grateful.

The back plate (if I measured correctly) should be almost there though, and I'll be importing an SVG I found that is close to the pattern of the original LOMO plastic for some texture, although it might be too complex as the import seems to be timing out.
I have a cut out - which I hope it big enough - for the micro USB that will run from the RPi to the battery/power management chip, once I've figured out how I want to incorporate that next to the battery. The good news is that I should be able to get a 2000mah battery in there at least without it being too cramped.
The bottom is primitive for now - there's a lot of harmonization that needs to be done and as I mentioned before, edge work that is a PITA in Tinkercad in my experience. Perhaps I'm using it wrongly?
Using ChatGPT4 to write the code
I decided I wanted to revisit the code and simplify things. After refining my prompt (and borrowing my brother's ChatGPT4 account) I'm actually optimistic this might work! I'm saving it here so I can easily access it from my Rpi directly - I'll report back on whether it works or not!
I've gone for a simple set-up and single button - I didn't want to have to drill unnecessarily into the LOMO body. <2 second press will take a raw image, >2 seconds will take a video until released - LED will either be solid until image has finished saving, or blink during video until the same.
import time
import RPi.GPIO as GPIO
from datetime import datetime
from libcamera import CameraManager

# Set up GPIO pins
GPIO.setmode(GPIO.BCM)
GPIO.setup(8, GPIO.IN, pull_up_down=GPIO.PUD_UP)
GPIO.setup(14, GPIO.OUT)

# Initialize camera
cm = CameraManager()
camera = cm.get_device("raspberrypi").get_control()

while True:
    # Wait for button press
    GPIO.wait_for_edge(8, GPIO.FALLING)

    # Get start time for timestamp
    start_time = time.time()

    # Check button hold time for photo or video capture
    while GPIO.input(8) == GPIO.LOW:
        # Button held for less than 2 seconds, take photo
        if time.time() - start_time < 2:
            # Turn on LED
            GPIO.output(14, GPIO.HIGH)

            # Capture photo
            timestamp = datetime.now().strftime('%Y-%m-%d_%H-%M-%S')
            filename = f'Lomopi_TLR_{timestamp}.raw'
            with camera.capture(filename, format='raw') as buffer:
                buffer.save(f'/media/images/{filename}')

            # Turn off LED
            GPIO.output(14, GPIO.LOW)

            print(f'Photo {filename} saved successfully')

        # Button held for more than 2 seconds, start video recording
        else:
            # Turn on LED flashing
            while GPIO.input(8) == GPIO.LOW:
                GPIO.output(14, GPIO.HIGH)
                time.sleep(0.5)
                GPIO.output(14, GPIO.LOW)
                time.sleep(0.25)

            # Capture video
            timestamp = datetime.now().strftime('%Y-%m-%d_%H-%M-%S')
            filename = f'Lomopi_TLR_{timestamp}.mp4'
            with camera.create(filename, format='mp4') as recording:
                recording.start()
                while GPIO.input(8) == GPIO.LOW:
                    time.sleep(0.1)
                recording.stop()

            print(f'Video {filename} saved successfully')

# Clean up GPIO pins
GPIO.cleanup()
Here's the prompt I used:
Write me python code for the Raspberry pi and Rpi camera, using libcamera and GPIO with the following parameters:
LED on GPIO 14, Button on GPIO 8
When the button is pressed for less than two seconds, a 4056x3040 pixel image in RAW filetype should be saved to root/media/images. The file name will be "Lomopi_TLR_{date}-{time}" where {date} and {time} are retrieved. During this time, the LED should turn on until the image has finished saving, and a message should be printed that the image was saved successfully.
When the button is pressed for more than two seconds, a 1920x1080 pixel video in MP4 format should be continuously recorded until the button is released, and the video should be saved to root/media/videos. The file name will be "Lomopi_TLR_{date}-{time}" where {date} and {time} are retrieved. During this time, the LED should flash repeatedly for 0.5s on and 0.25s off until the video has finished saving, and a message should be printed that the video was saved successfully.
I made some changes based on pin layout, and asked ChatGPT to include a new LED that comes on after the camera has been initialized and is waiting for button press (basically camera on/camera ready LED).
Looking good so far:
import time
import RPi.GPIO as GPIO
from datetime import datetime
from libcamera import CameraManager

# Set up GPIO pins
GPIO.setmode(GPIO.BCM)
GPIO.setup(25, GPIO.IN, pull_up_down=GPIO.PUD_UP)
GPIO.setup(18, GPIO.OUT)
GPIO.setup(23, GPIO.OUT)

# Initialize camera
cm = CameraManager()
camera = cm.get_device("raspberrypi").get_control()

# Turn on LED to indicate camera is initialized
GPIO.output(23, GPIO.HIGH)

while True:
    # Wait for button press
    GPIO.wait_for_edge(25, GPIO.FALLING)

    # Get start time for timestamp
    start_time = time.time()

    # Check button hold time for photo or video capture
    while GPIO.input(25) == GPIO.LOW:
        # Button held for less than 2 seconds, take photo
        if time.time() - start_time < 2:
            # Turn on LED
            GPIO.output(18, GPIO.HIGH)

            # Capture photo
            timestamp = datetime.now().strftime('%Y-%m-%d_%H-%M-%S')
            filename = f'Lomopi_TLR_{timestamp}.raw'
            with camera.capture(filename, format='raw') as buffer:
                buffer.save(f'/media/images/{filename}')

            # Turn off LED
            GPIO.output(18, GPIO.LOW)

            print(f'Photo {filename} saved successfully')

        # Button held for more than 2 seconds, start video recording
        else:
            # Turn on LED flashing
            while GPIO.input(25) == GPIO.LOW:
                GPIO.output(18, GPIO.HIGH)
                time.sleep(0.5)
                GPIO.output(18, GPIO.LOW)
                time.sleep(0.25)

            # Capture video
            timestamp = datetime.now().strftime('%Y-%m-%d_%H-%M-%S')
            filename = f'Lomopi_TLR_{timestamp}.mp4'
            with camera.create(filename, format='mp4') as recording:
                recording.start()
                while GPIO.input(25) == GPIO.LOW:
                    time.sleep(0.1)
                recording.stop()

            print(f'Video {filename} saved successfully')

# Clean up GPIO pins
GPIO.cleanup()
 Gradivis
Discussions
Become a Hackaday.io Member
Create an account to leave a comment. Already have an account? Log In.