 Startec Innovations
-
1Gather materials
First things first, get your hands on what we need for this project. Project Components are listed in the components section, but if you're based in the Philippines, a Bill of Materials of our purchases for this project is provided in the files section.
The total estimated cost for a minimum viable product is around ₱7,100, which will be kind of a hefty price tag for some of you. We're currently looking for alternative parts, but in the meantime, feel free to find cheaper ones on your own. However, do take our advice on the Raspberry Pi board, adapter and SD card to avoid any trouble with the software.
To summarize, here is what we need:- A 2D (or QR) Barcode Scanner with keypress-event-fired input
- A Raspberry Pi 3 Model B+ (a Raspberry Pi 4 or Zero W will also work)
- A 3A AC/DC 5V Power Supply for the Raspberry Pi
- An HDMI LCD for the Raspberry Pi with touch capabilities
- A 32 GB Micro SD Card (preferably Class 10 for fast file transfer speeds)
To proceed with the next steps, you'll need:
- A good internet connection (with at least 5 GB download cap) via WiFi. Mobile Hotspot will also work.
- A computer running Windows (this tutorial was done on a Windows Machine)
- A Keyboard
- A Micro SD Card reader (USB or SD Card slot adapter)
- A smartphone with access to the internet for testing (and use)
-
2Download a Raspberry Pi Image
Think of the Raspberry Pi as a tiny computer. We'll need to install an Operating System to be able to use it. To do so, we'll need to download an operating system.
To do so, first download the Raspberry Pi OS Imager here. Install the software after it finishes.
Then, you can follow the instructions in this video. The computer in the video may look weird for some of you because its a Macbook. The instructions in the video will also work for Windows.
NOTE: This software will try to download the image (which is approximately 2.4 GB in size). Writing to your SD card will also take time depending on your computer's processor speed and memory (RAM) size.
-
3Connect Peripherals and Connect to Wifi
If you saw "Write Successful," it means you've successfully installed the OS!
To be able to access and type into your Raspberry Pi, we'll need to add a screen and a keyboard. If you ordered the LCD we have, you can follow the steps below:
1. Eject and reinsert your SD card to your computer. Then, go to This PC > boot
2. Find a file inside called config.txt. Open it with Notepad or another text-editing software
3. Copy-paste the following at the end:
max_usb_current=1
hdmi_group=2
hdmi_mode=87
hdmi_cvt 800 480 60 6 0 0 0
hdmi_drive=1
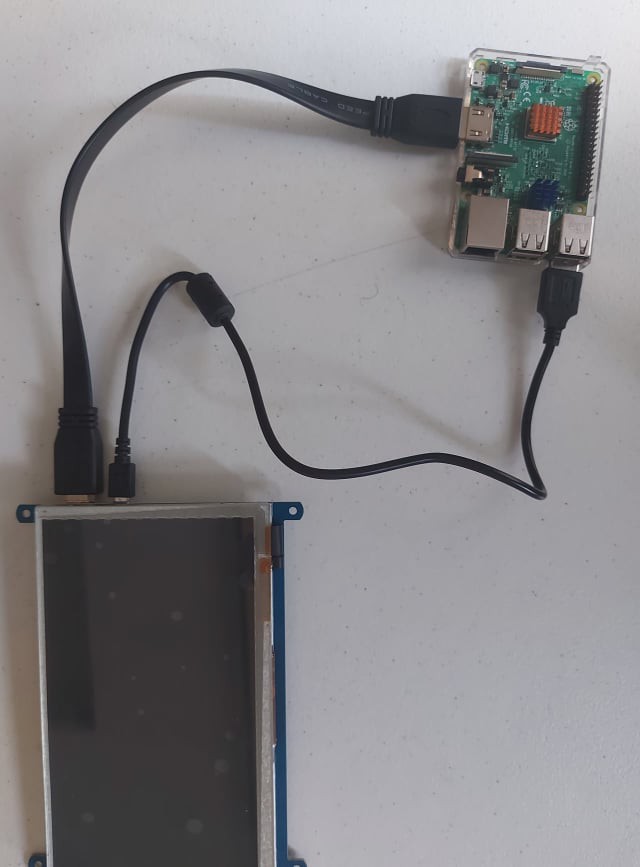
4. After saving, eject your card, and place the Micro SD into the Raspberry Pi. The slot for the Raspberry Pi 3 and 4 should be at the back.
5. Turn on the back light switch at the back of your LCD. Then connect the touch port to any USB port on your Raspberry Pi. Also connect the HDMI port to your Pi.
6. Now plug in your Raspberry Pi to power it on!
-
4Power up the Pi and Connect to Wifi
You will now be able to see the Raspberry Pi power on. The screen will show you a loading splash just like windows. If everything went well, you'll be able to see the following screen.

Source : The Raspberry Pi Foundation Connect your keyboard through the USB port then tap on Next.
Fill up the next few forms with accurate information for language and timezone. Note we will be using English for the rest of the tutorial so set the language to English if you want to follow along. That goes the same for the keyboard. Simply choose the option English (US) if asked about it.

Source: The Raspberry Pi Foundation The next thing the Pi will ask you to do is to change your password. THIS IS VERY IMPORTANT. CHANGE YOUR PASSWORD TO A SECURE ONE.

Source: The Raspberry Pi Foundation After that, you'll be shown a screen to choose to connect to WIFI. Just tap on one and input the password to connect.

Source: The Raspberry Pi Foundation The next screen will tell you about updates. We will be doing this in the next step. Just skip it for now

Source: The Raspberry Pi Foundation -
5Update the Pi
Once your connected to the internet, Congratulations! You've officially setup a Raspberry Pi! This is a very powerful device, and you've gone a long way once you reach this point.
The next few steps however will be a little bit tricky, and frankly will take the most amount of time. Don't worry though, we'll guide you through all of the steps.
First off, tap on the terminal icon at the top. If its hard to tap, you can connect a mouse to make navigation easier.
Next, type in the following command and hit enter. This will update the OS.
sudo apt updateNote: Whenever asked to confirm, simply type 'y' and hit enter
-
6Installing Nodejs
The program we wrote for this system requires two things: a webpage and a server. A server is basically a device that serves us content for the webpage. Before we can setup the server, we need Node.js, a powerful server-side programming engine. Installing it is as simple as follows:
First, enter the following command:
wget https://nodejs.org/dist/v14.15.1/node-v14.15.1-linux-armv7l.tar.xz
Then, enter this one:
tar -xvf node-v14.15.1-linux-armv7l.tar.xzOnce that is done, enter the following commands:
cd node-v14.15.1-linux-armv7l/
sudo cp -R * /usr/local/
To check if you've installed it correctly, enter the following and you should that the terminal returns a version:node -v -
7Install Apache Web Server
To be able to host a webpage on our device, we need to install a web server. To do that enter the following command to install Apache2:
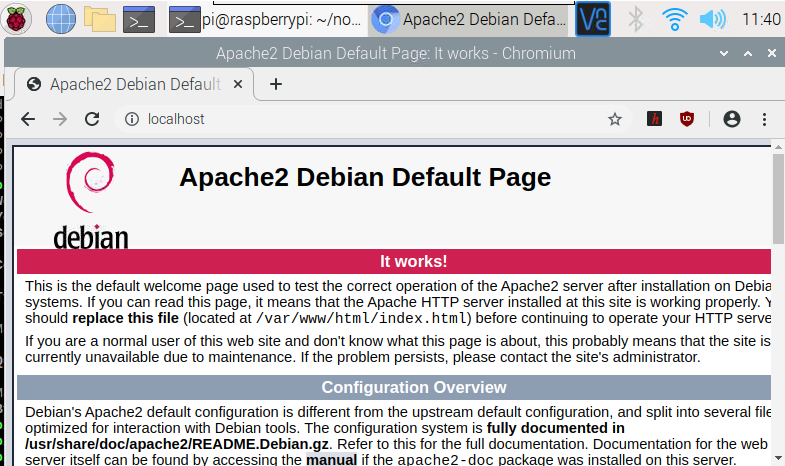
sudo apt install apache2 -yThen, to make prepare the computer for installing the database, enter the command below:
sudo apt install php libapache2-mod-php -yTo test if this worked, open up the browser (the globe icon) and enter 'localhost' in the address bar. You should be able to see something like below:
-
8Installing mySQL and PHPMYADMIN
This is probably the trickiest part as it requires a bit more tech-savvy than the rest of the steps. To motivate you though, this step is needed to store the data in a database.
Without further ado, start with entering the following command:
sudo apt install mariadb-server
After that, you've managed to install mySQL! However, managing this database will make you use the terminal instead of a clean GUI. The next steps will guide you into installing PHPMYADMIN, a very handy tool for managing databases with an interface.
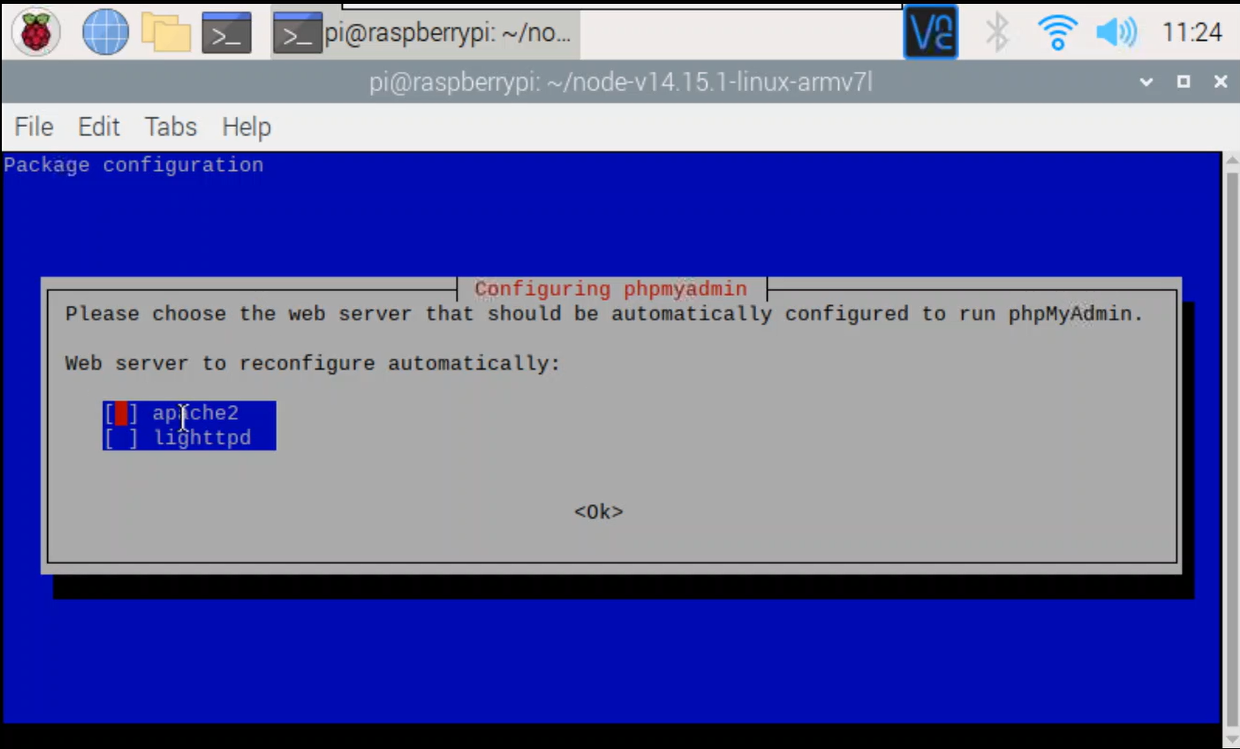
To proceed, enter this command:
sudo apt install phpmyadminYou'll get to see a blue screen that asking for the type of web server. Make sure to choose "Apache2" using your arrow keys and press enter.
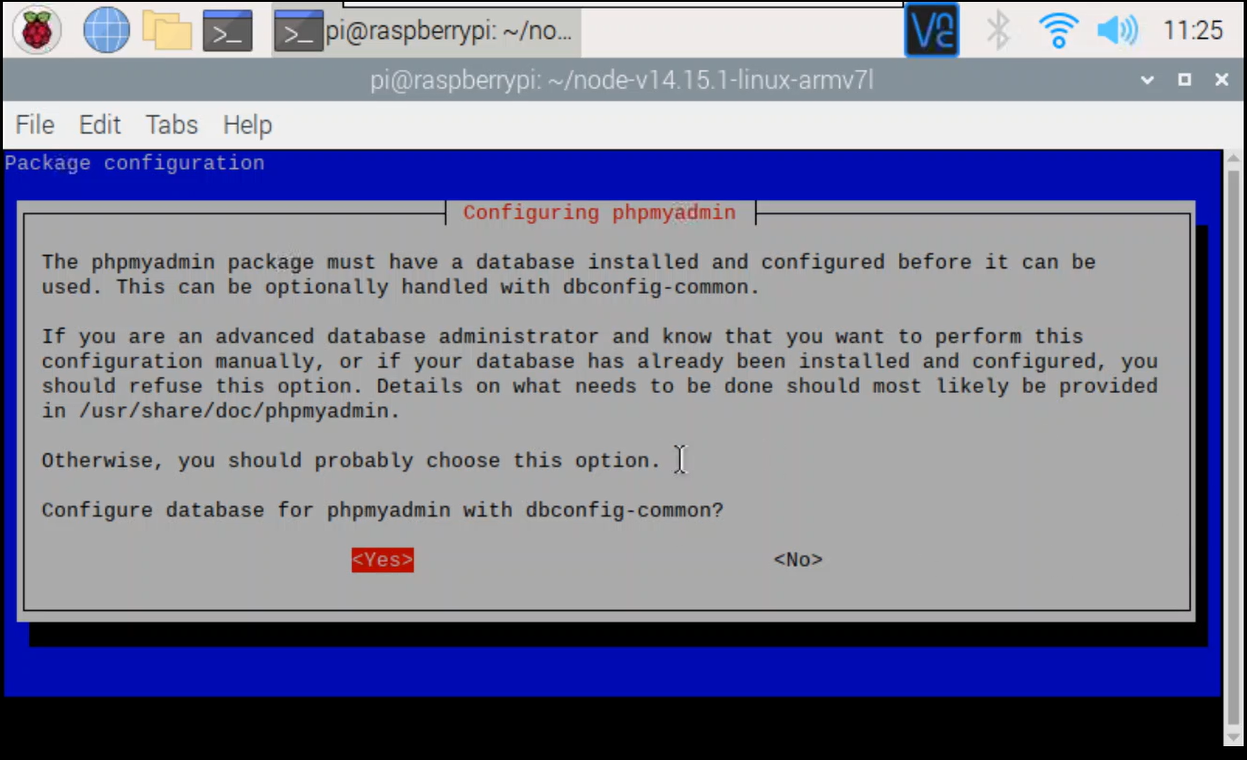
The next screen will ask you to Configure PHPMYADMIN. This process connects PHPMYADMIN to mySQL. Choose 'Yes' to confirm this.The next page will now ask you to enter a SECURE password.
It's not advisable to login to PHPMYADMIN with the default user 'root'. To fix this, we have to create a new user. Start by entering the following command:
sudo mysql -u rootThen enter the following. Be sure to replace password with your own. Be sure to make it secure to prevent people from snooping into your database.
GRANT ALL PRIVILEGES ON *.* TO 'user'@'localhost' IDENTIFIED BY 'password' WITH GRANT OPTION;
Afterwards enter the following to exit
exit
We then need to configure our web server to listen to PHPMYADMIN. Otherwise it's just gonna ignore the app. To do that, enter the next line:sudo nano /etc/apache2/apache2.confThis will open a text editor inside the terminal. Keep pressing the down key on your keyboard until you get to end. There, insert the following line:
Include /etc/phpmyadmin/apache.conf
Press Ctrl+X to and enter 'y' to save your changes.
The last thing we need to do for this step is to restart apache2. To do that all you need is to enter this command:sudo service apache2 restartAnd you're done! You've managed to install mySQL and PHPMYADMIN. We can finally install STARTEC REGISTRO!
-
9Installing the REGISTRO Webpage
We've finally come to the near end of our journey, and the first time we'll get to work with the actual program you'll be using. Tap yourself on the back my friend, you did a good job so far.
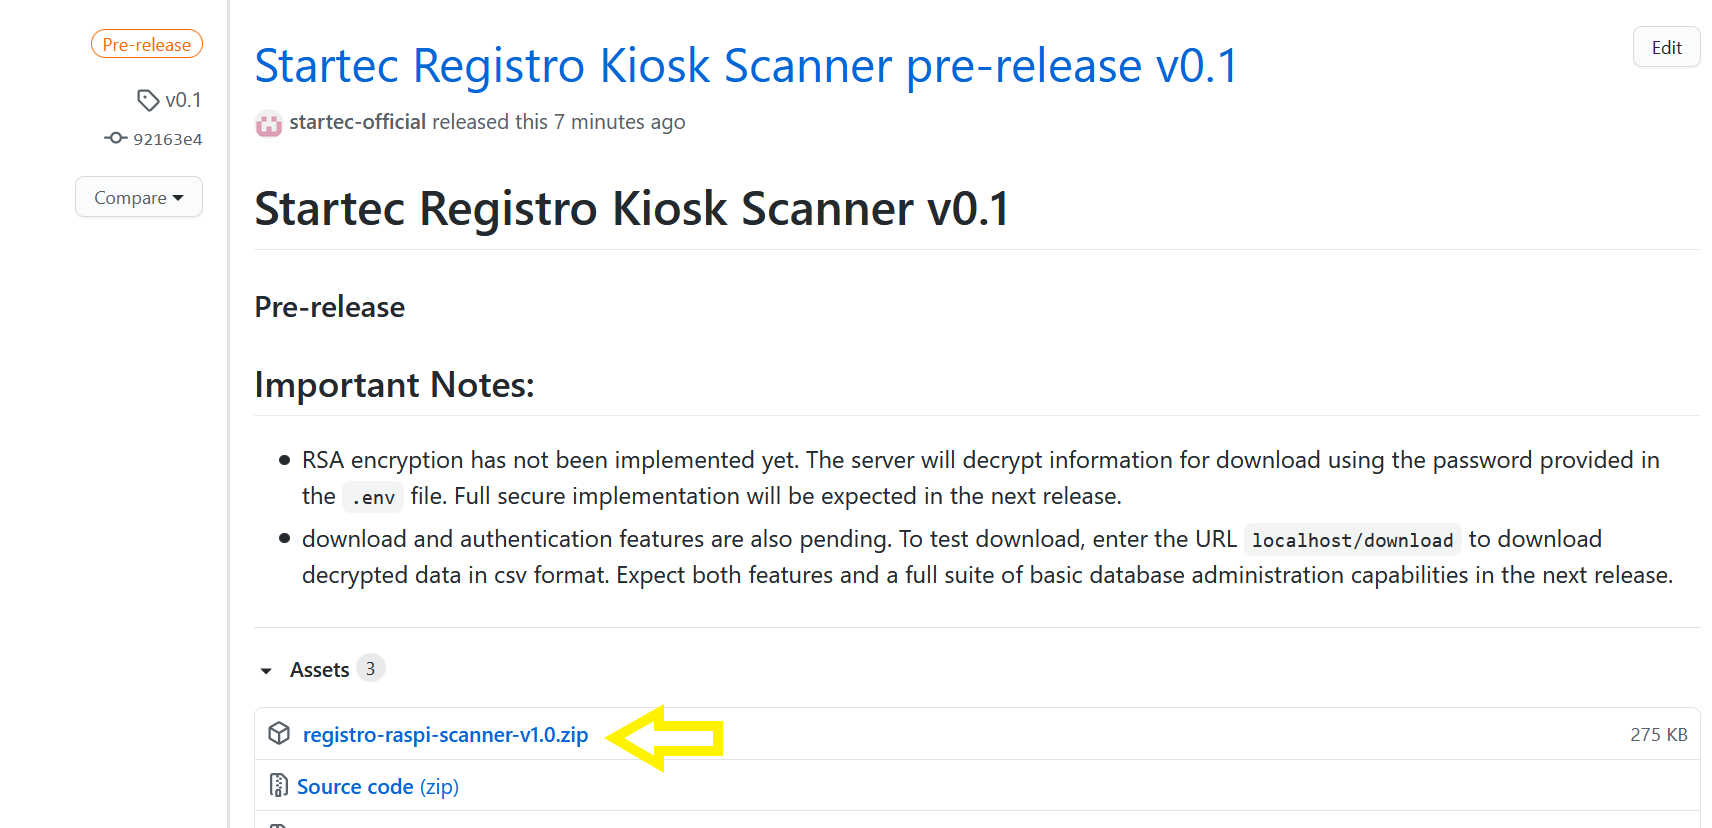
Start by downloading the latest release here.
Click on assets, then registro-raspi-scanner-v1.0.zip to download the file
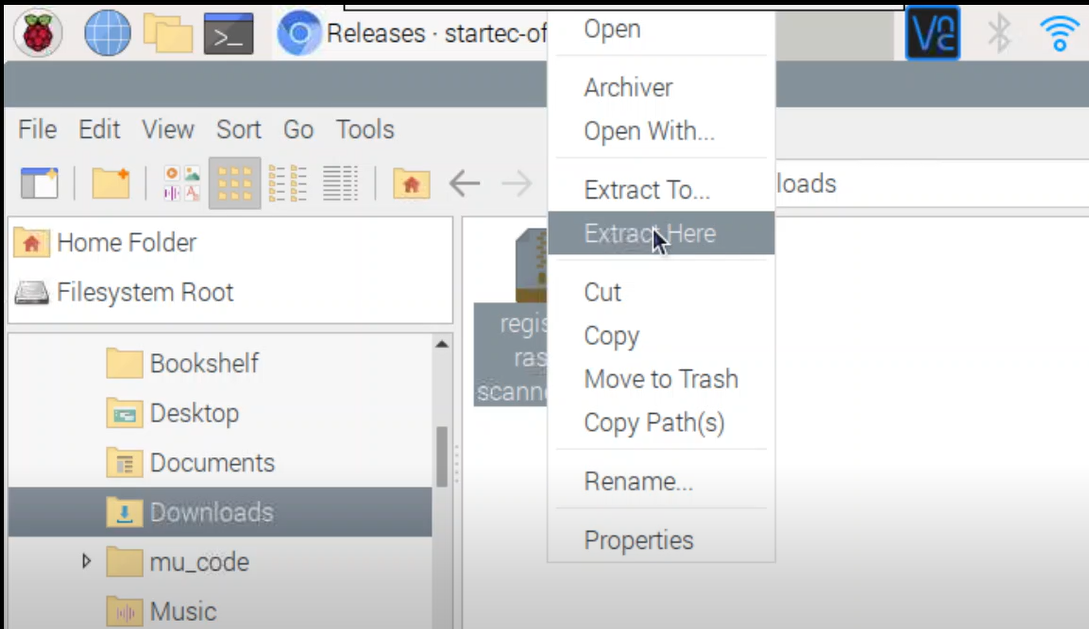
After downloading the file, open the File Explorer and go to downloads. You'll find the package there.
Right click and select unzip to extract the content of your .zip archive.Open up terminal and enter the following commands:
cd /var/www/html
sudo rm -r * /var/www/html
cd ~/Downloads/secure-scan-raspi-scanner
sudo cp -r * /var/www/html
sudo service apache2 restart
What this script does is simply to delete the sample page for Apache 2 that you saw earlier while testing the web server, and downloading and copying the code for the page in its place.
-
10Installing the REGISTRO Server
For the web page to be able to talk to the database, it'll first need to go through a server. To install the REGISTRO server, we'll need to enter another set of commands:
cd ~
mkdir server
cd server
git clone https://github.com/startec-official/registro-raspi-server
cd registro-raspi-server
This will make a folder called server and it will download and navigate you into the source code folder.
The next step is to install the necessary software for this server to run. Since we're already inside the folder, simply enter:
npm installThe next is to configure the server for your settings.
create a new file inside the folder by entering:
sudo nano .envType the following inside the file to enter settings:
HOST_NAME = 'localhost'
DB_USER = 'user'
password = 'enter your password here'
database = registro
PORT = 3000
APP_NAME = 'registro'
Be sure to replace enter your password here with the password you set for PHPMYADMIN (Step 8).
Hit Ctrl+X and enter 'y' once you're done to save changes.
That's it! You've managed to install all of the software and programs! What's simply left to do is to run and test it!
STARTEC REGISTRO
An open-source system for COVID-19 contact tracing


 The next page will now ask you to enter a SECURE password.
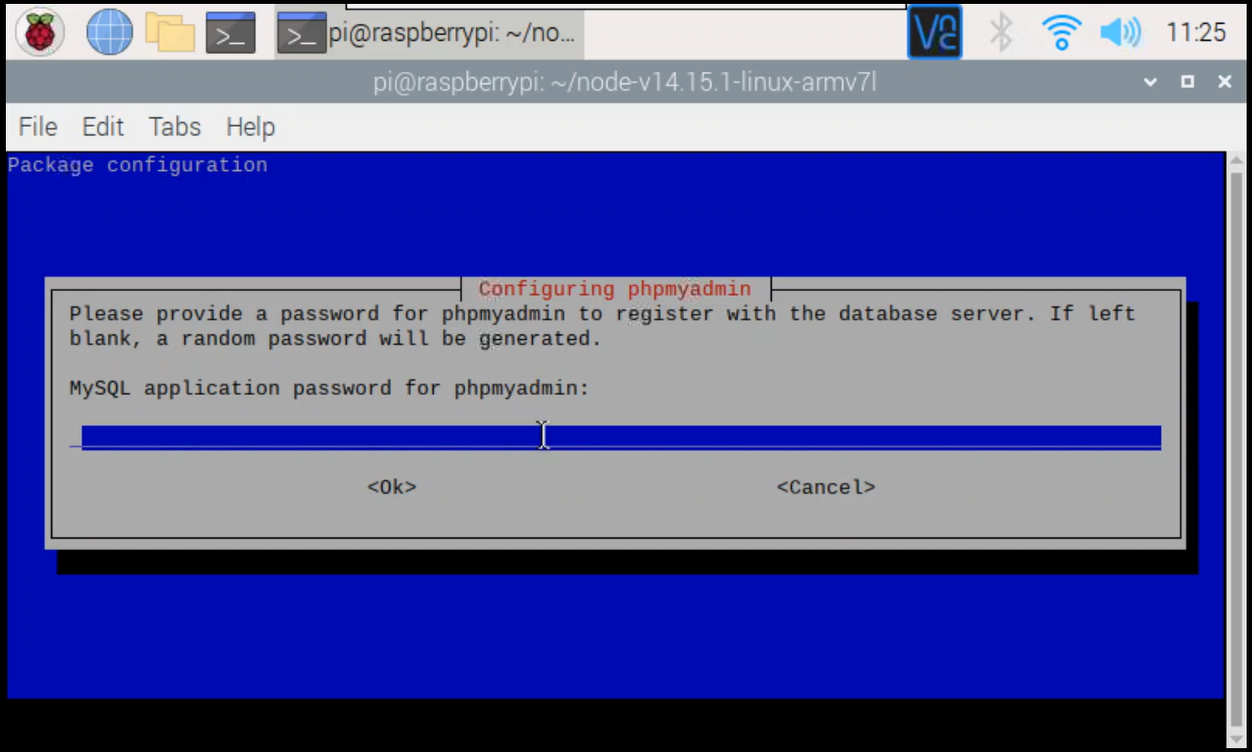 It's not advisable to login to PHPMYADMIN with the default user 'root'. To fix this, we have to create a new user. Start by entering the following command:
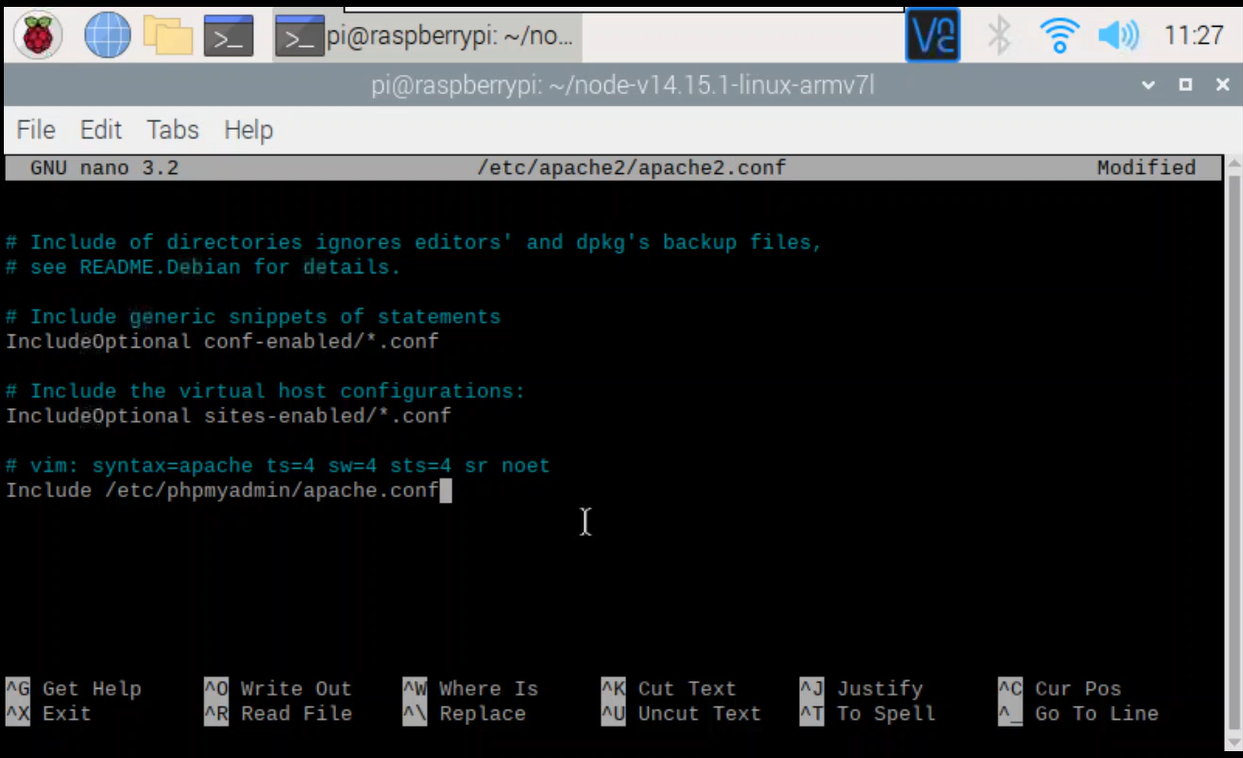
 Open up terminal and enter the following commands:
Discussions
Become a Hackaday.io Member
Create an account to leave a comment. Already have an account? Log In.