Daniel Nikolajsen
-
Harder than it looks
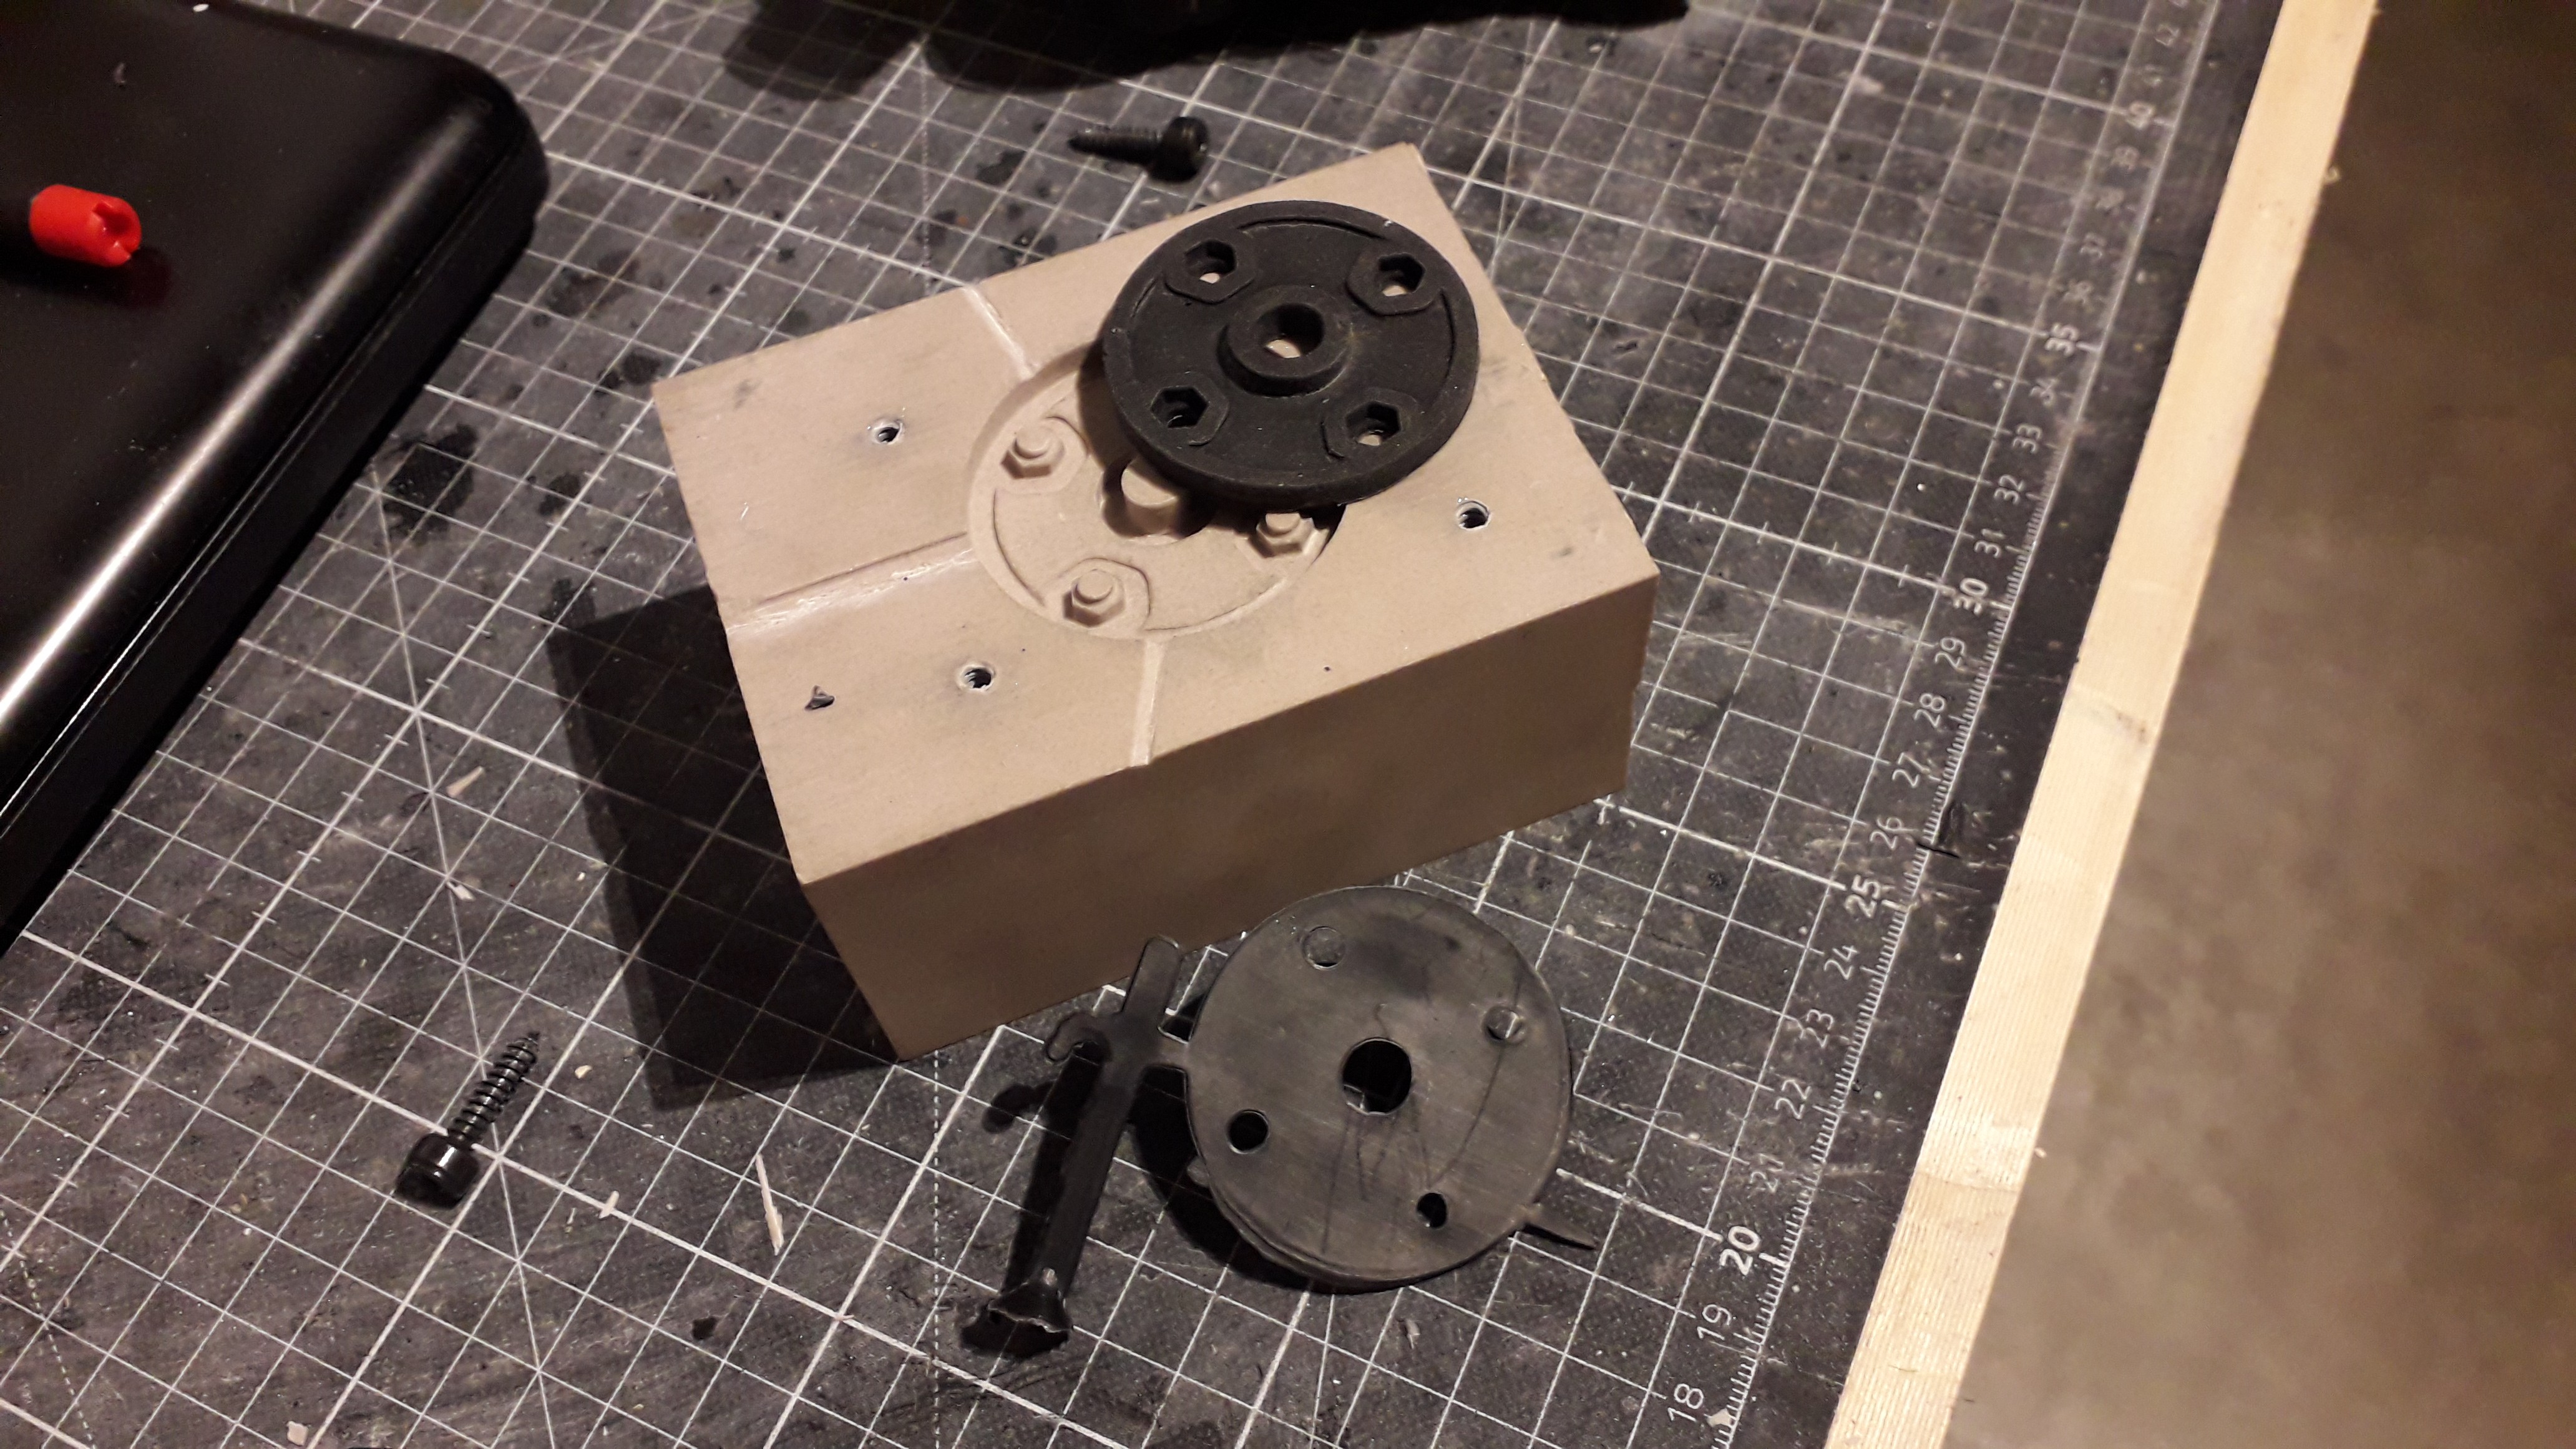
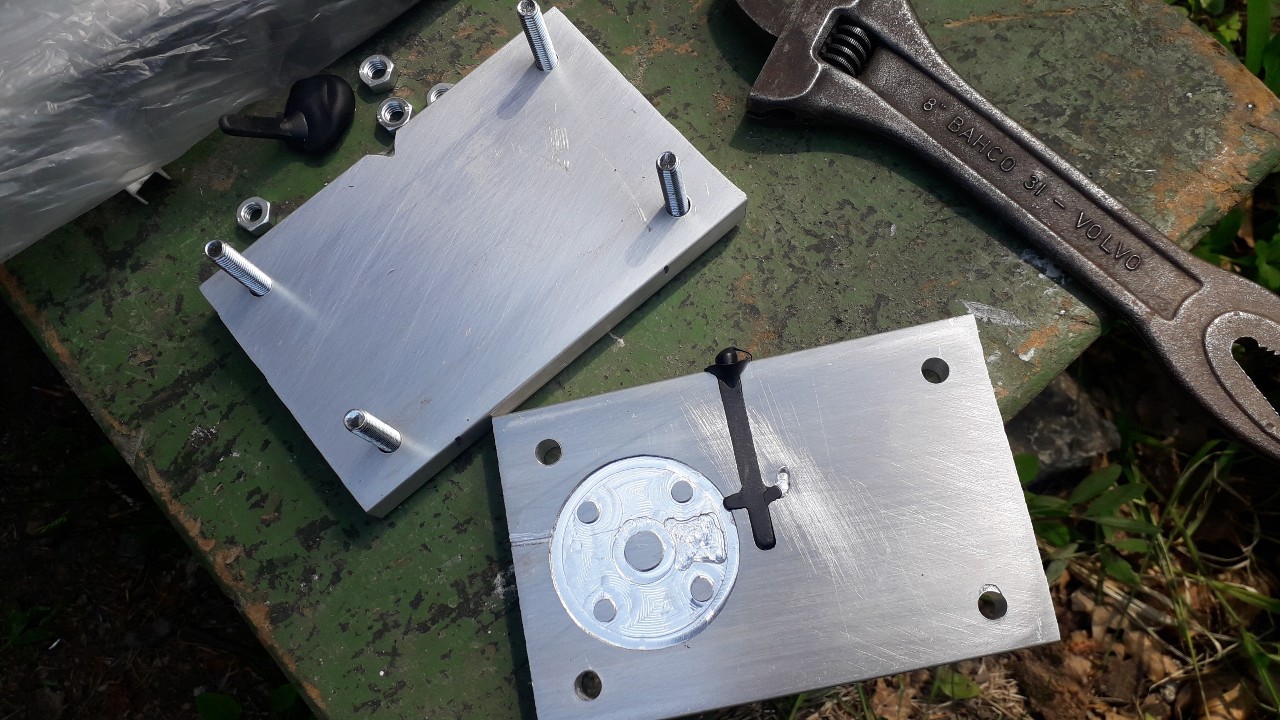
12/16/2021 at 14:21 • 0 commentsSo, now the very first mold is ready to be filled with plastic. Two CNC machined halves out of "Renshape" (polyurethane tooling board), clamped together by aluminum plates.
![]()
The mold is for a 35mm pipe mount, but is mostly an experiment since I will try to make the product in cast aluminum instead. But I might perhaps make a cheaper plastic version for those who sometimes just wants to play around with an inexpensive antenna rotator and don't need one mounted outside.
I deliberately made parts of the negative mold quite thick, up to around 6mm. This is to see how both the mold behaves (will it get filled completely?) and will the plastic retain its form or will it sink together when it cools off. Time will tell.
At the moment I have treated the parts with a spray-on wax release agent that needs to dry before I can fire up the injection molding machine.
-
All the new features
12/14/2021 at 07:05 • 0 commentsI have gotten a lot of questions lately about what updates the Satran MK2 azimuth/elevation antenna rotator will have, compared to the first version. So I'll try to answer it here, but the list is long so lets hope I don't forget anything...
1. Stronger motors. It will have geared DC motors instead of steppers.
2. Less power consumption. The motors will only draw current when in motion.
3. Durable. I hope to make the entire housing in cast aluminum.
4. Smoother operation. MK2 will use real ball bearings on both axles.
5. Quieter. Regular motors do not make vibrating noises like stepper motors.
6. Less prone to interference. The control unit is externally located and the power and control cables are shielded to minimize EMI.
7. Weatherproof. Silicone sealed for permanent outdoor use.
8. Better positioning, potentiometers that instantly read the position.
9. Power regulator. It will run on any DC source 11-15 volts, or car battery.![]()
The price will probably be a little higher (closer to 500 EUR), but you will get a lot more bang for your buck. Time to start saving your weekly allowance =)
-
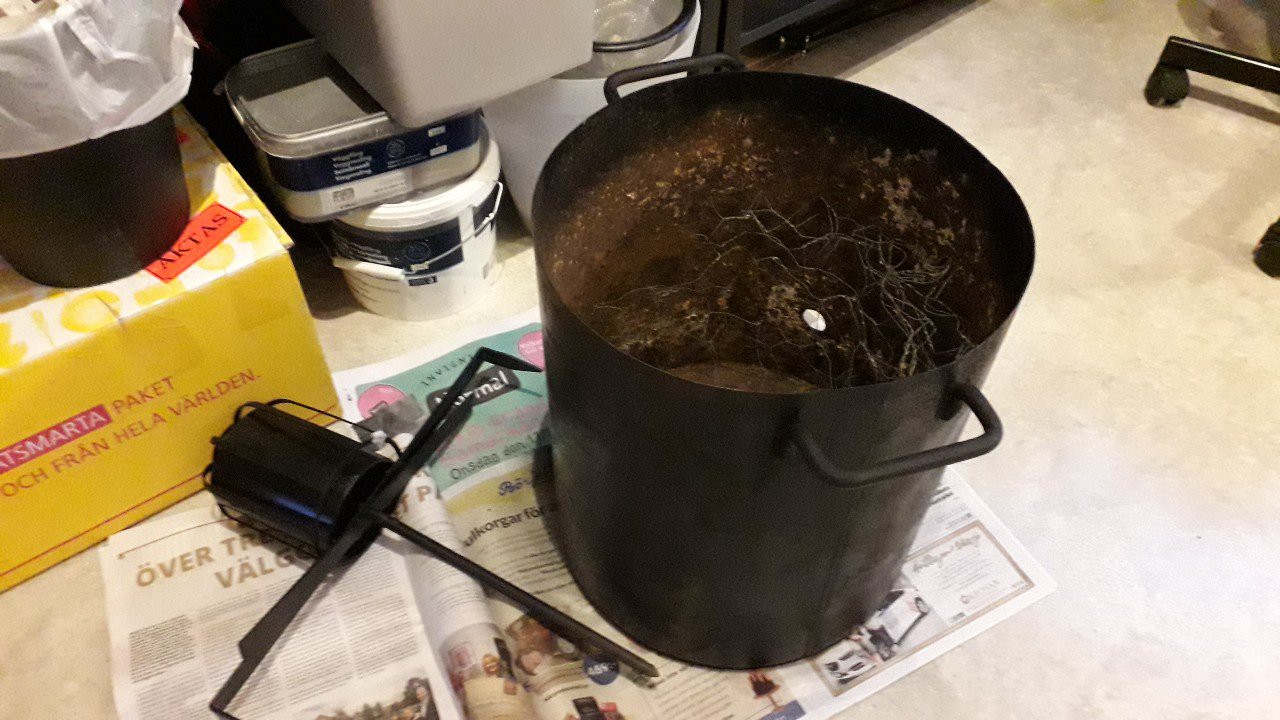
Post mortar
12/10/2021 at 07:59 • 0 commentsAn early start to the morning, but I just couldnt wait to finish the aluminum foundry that I will use to make cast aluminum. Today I put on the last layer of my secret sauce; perlite mortar. Now it needs to sit for a few weeks and dry completely before I add charcoal and fire it up. If there is too much moisture in the concrete it will probably create steam and crack when fired upp to around 500 degrees or more (900 fahrenheit).
![]()
For the first outer layer I used chicken wire filled with cement, sand and leca balls (expanded clay balls). On top of that there's a skin of 1 part cement to 3 parts perlite. The surface will endure raging heat, and normal silica sand would melt into glass or expand and crack, destroying my beautiful work. There are special firepoof mortar that you can buy, but since my wife has me on an extremely tight budget, regular portland cement had to suffice =)
The furnace is a lot larger than the pic foretells, and heavy. I would estimate almost 25kg. But go big or go home, right?
-
I figure its time to try aluminum casting
12/08/2021 at 13:31 • 0 commentsPlastic injection molding is great. But since I am putting in the effort to design a brand new version of the antenna rotator, I cant dismiss the demand for a more sturdy product out of metal.
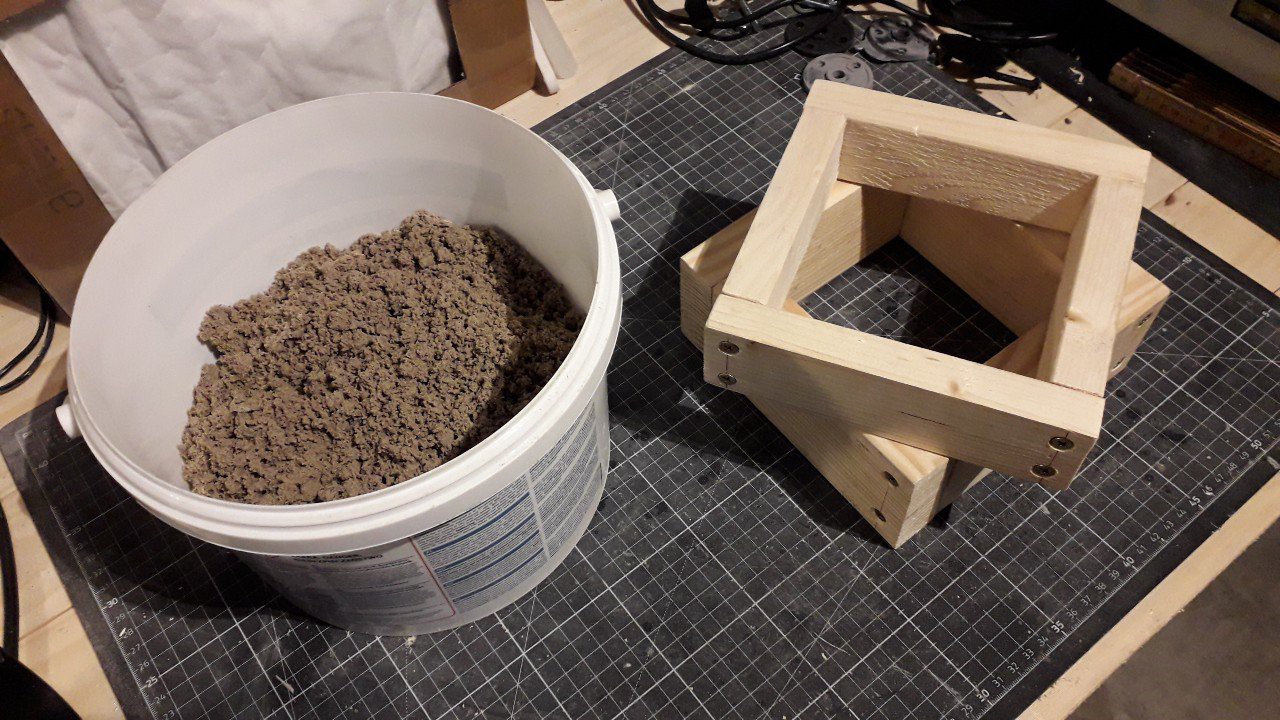
So a few days ago I started building a furnace to melt aluminum. A big and rusty iron bucket will be the housing, with a fireproof mortar coating inside that will then be filled up with charcoal briquettes. An air fan will pump oxygen into the foundry and rise the temperature enough to melt aluminum. In theory.
![]()
Also I have made a batch of "green sand" out of cat litter sand (bentonite clay) and regular fine grain sand, which is now out in the open to dry into a perfect consistency. You can see some of the finished sand in the bucket below. I have also made simple wooden frames that you fill up with the sand and compress to make a one-time-use mold. No matter how this will work out, it will be a very fun experiment.
![]()
-
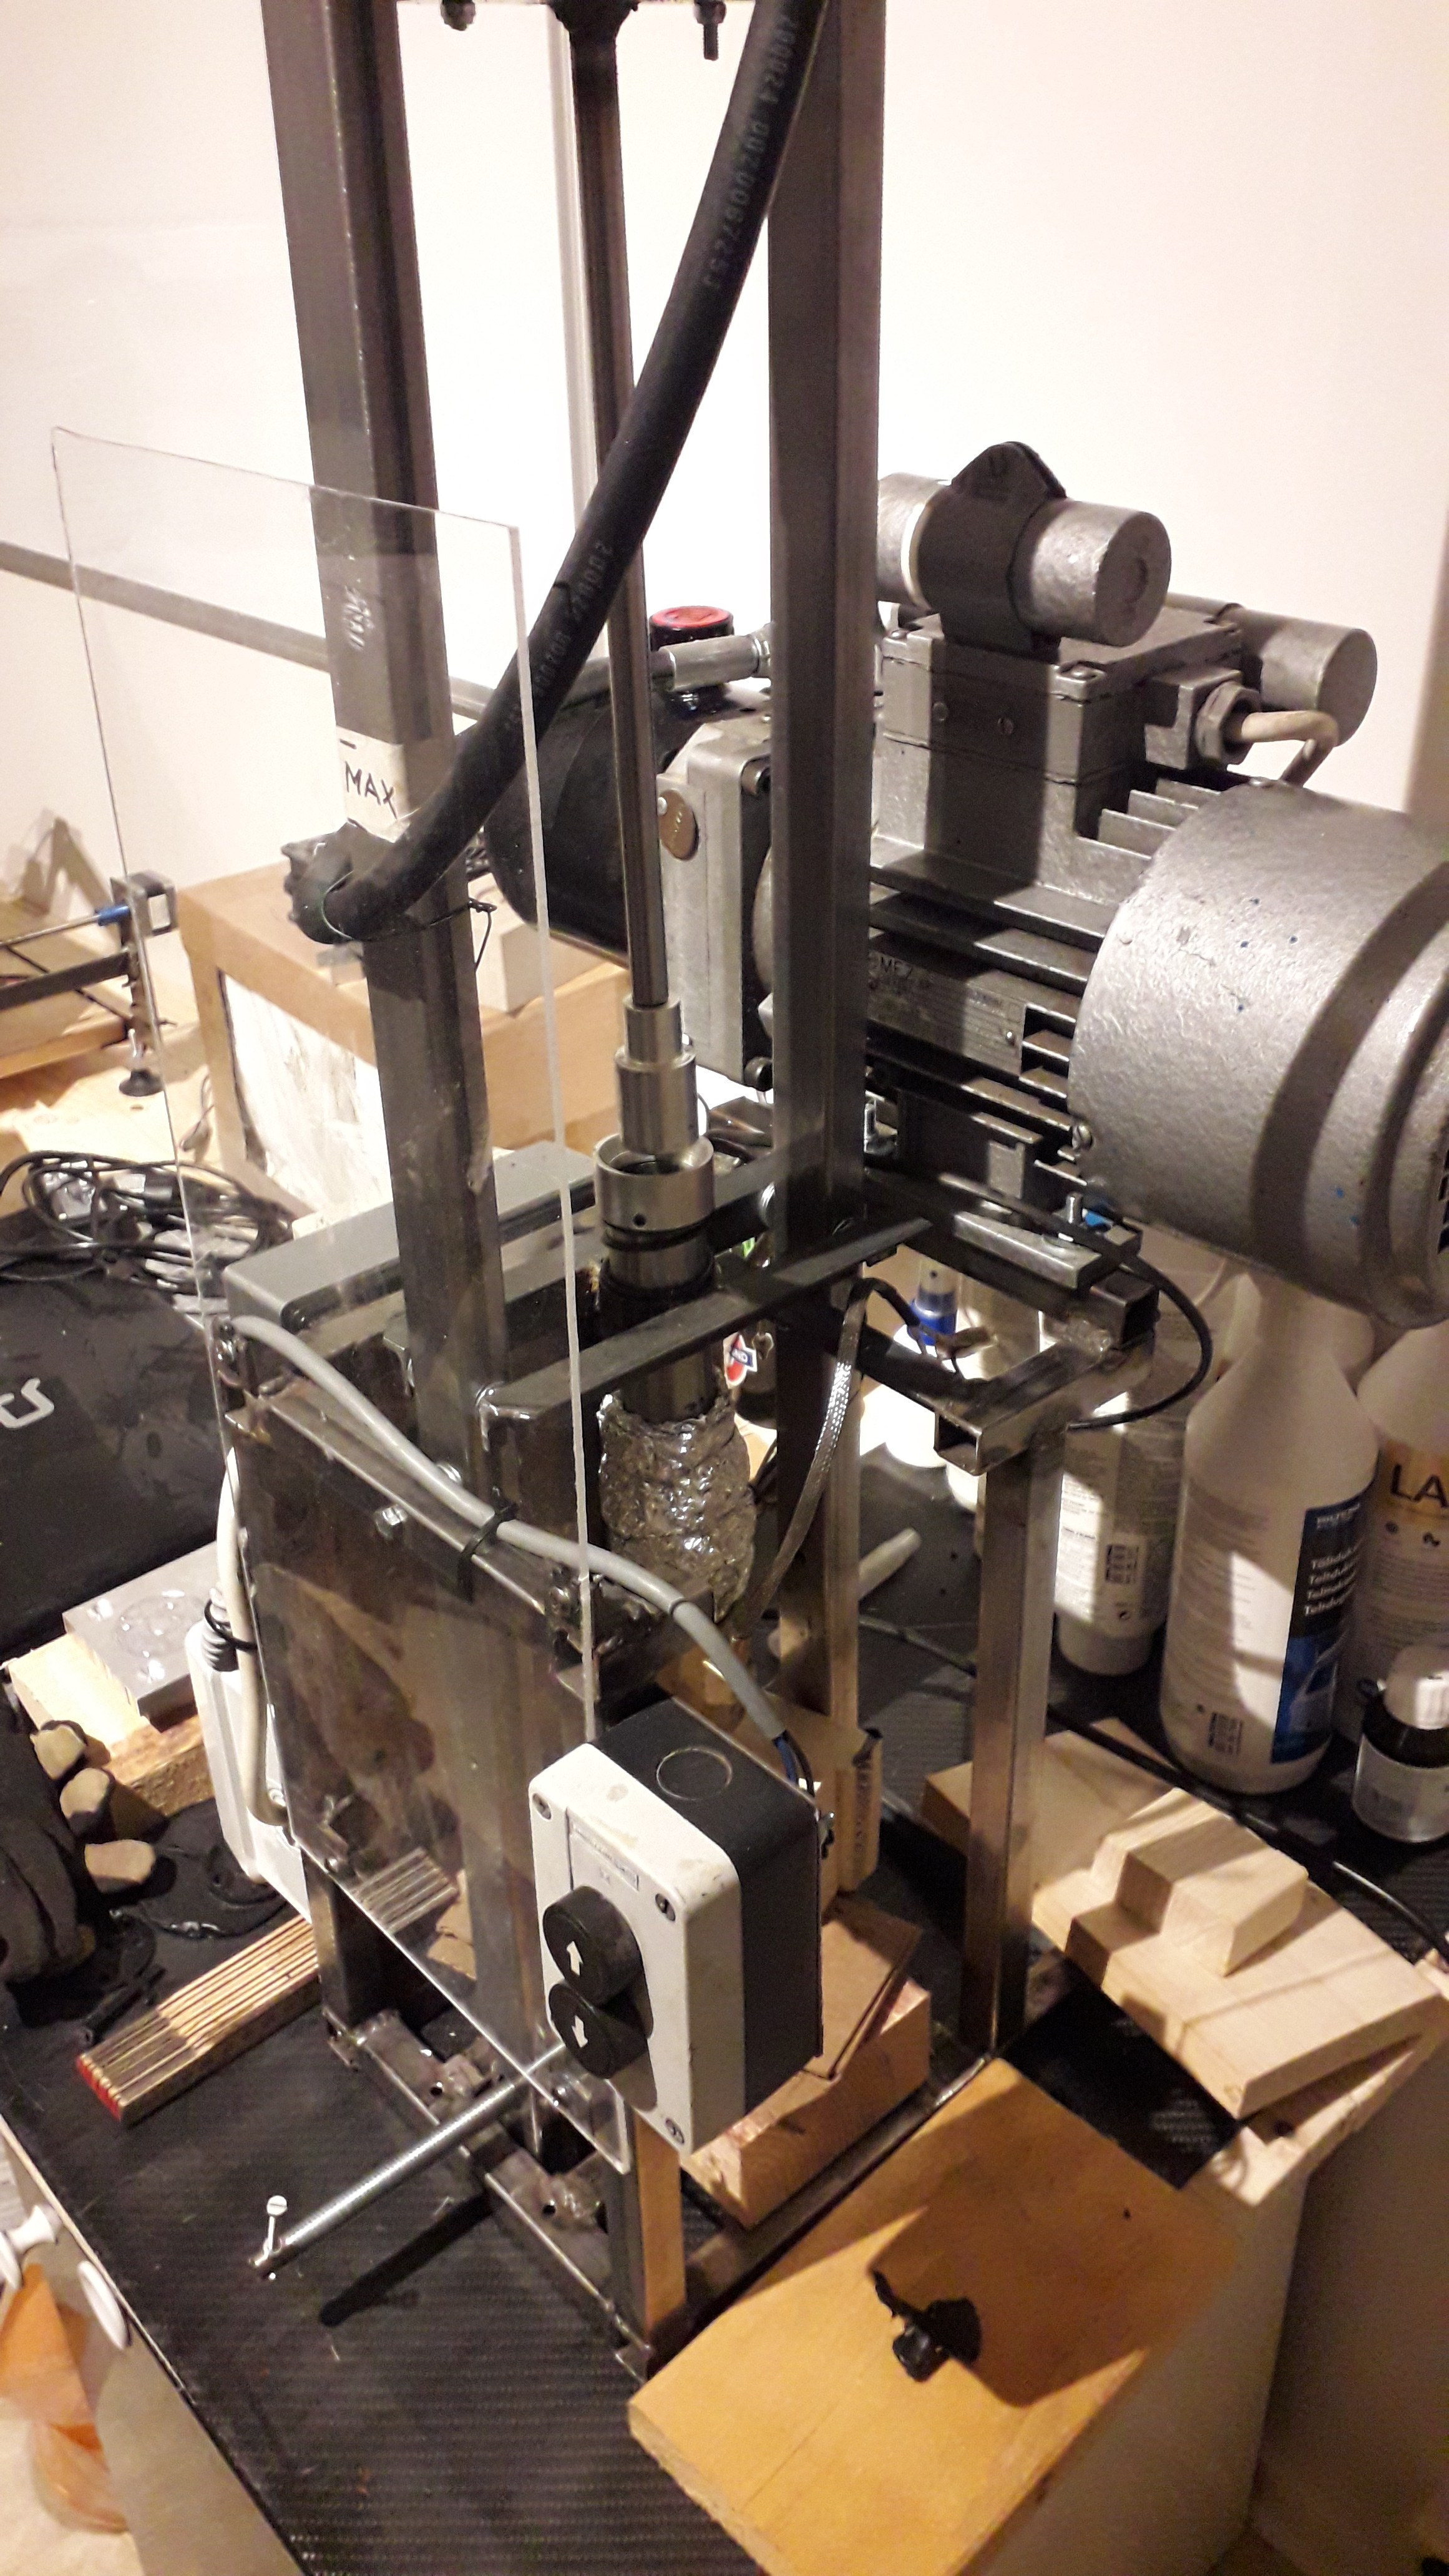
Injection molding, check!
11/29/2021 at 06:42 • 0 commentsAfter propably ten rebuilds I finally got the injection molding machine working properly. It's a lot harder than it might look. Temperatures, dimensions, nozzle design etc etc.
![]()
There are still some improvements to be made to make it even more reliable, but it works as supposed. What I really would want is a hydraulic flow regulator. Because the pressure is immense! Smaller molds will fill upp in less than a second and the overflow has such high pressure that it can easily break or bend the mold if you're not careful.
The next hurdle towards the MK2 is making the injection molds. Aluminum works by far the best, but is too hard on my old CNC router. I have two options; either strengthen my CNC or perfect my mold making skills with tooling board (you can see my first attempt in the photo below). I could let someone else make the aluminum molds for me, but the quotes I have gotten would be a total of approx $4000 for the three different molds I need to make the Satran MK2 rotator. Waaay above my budget. One mold out of tooling board ("renshape") would cost less than $100, but would only last perhaps 50 cycles. Good enough to get me started at least.
![]()
-
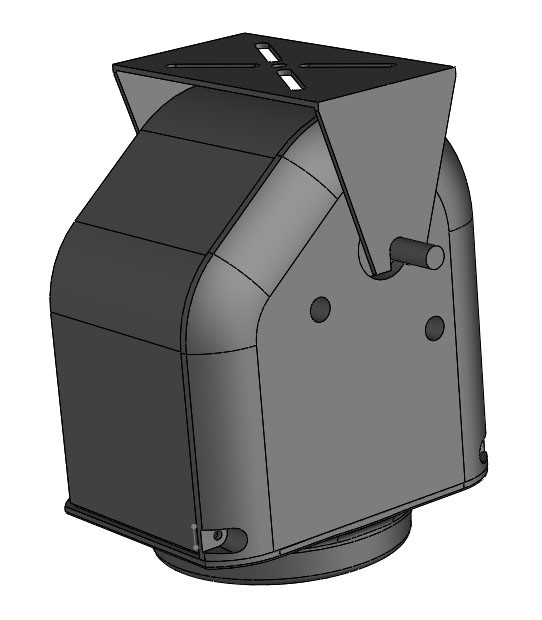
Designing the MK2
07/31/2021 at 12:00 • 0 commentsI figure its about time I tell you about the new upgraded version I am designing. The MK1 is very affordable and works for occasional mobile setups, but perhaps not when you want a permanent setup on a rooftop. Thats why I've started thinking about a new version, but it is still not sure if it will reach market or not. Its such a niche product and it costs a lot both to develop and produce, but hopefully I can figure something out.
![]()
To be able to focus entirely on the new design, I am soon gonna have a final sale in the shop to sell out the stock of "old" MK1s, so subscribe to the newsletter at www.satran.io so you dont miss out!
Here are some of the improvements I am planning for MK2:
- Digital compass, so it automatically finds north
- Shielded power cable
- Waterproof housing
- Stronger injection molded plastic parts instead of 3D-prints
- Faster, accelerated motion and simultaneous az/el rotation
- Quality needle bearings instead of cheap metal pellets
- Better gear ratio, for heavier antennas up to 1 kg (2lbs)
- Stronger antenna bracket out of powder coated metalLets hope I can find a decent design, without breaking the bank...
-
Tooling board is awesome!
06/18/2021 at 17:53 • 0 commentsToday I tried to machine my tooling board for the first time. Absolutely amazing. Its so hard but machines like butter, and the surface texture is out of this world. Perfect for my plastic molds. The only question is if its durable enough to last for a hundred cycles or more. Time will tell.
![]()
![]()
Next its time to finish the injection molding machine and fill the mould with some plastic. But I probably need some release agent, and dont know if I should go with clear laquer or a special silicone oil I bought a few years ago for another project. Probably need to test them both on some scrap piece.
-
If at first you don't succeed
06/17/2021 at 05:45 • 0 commentsTry again!
Well, the plastic injection molding machine didnt work as planned. The heat from the heater element didnt transfer where it needed to go; into the nozzle. Therefore the pressure inside got too big for the piston since the plastic didnt melt enough.
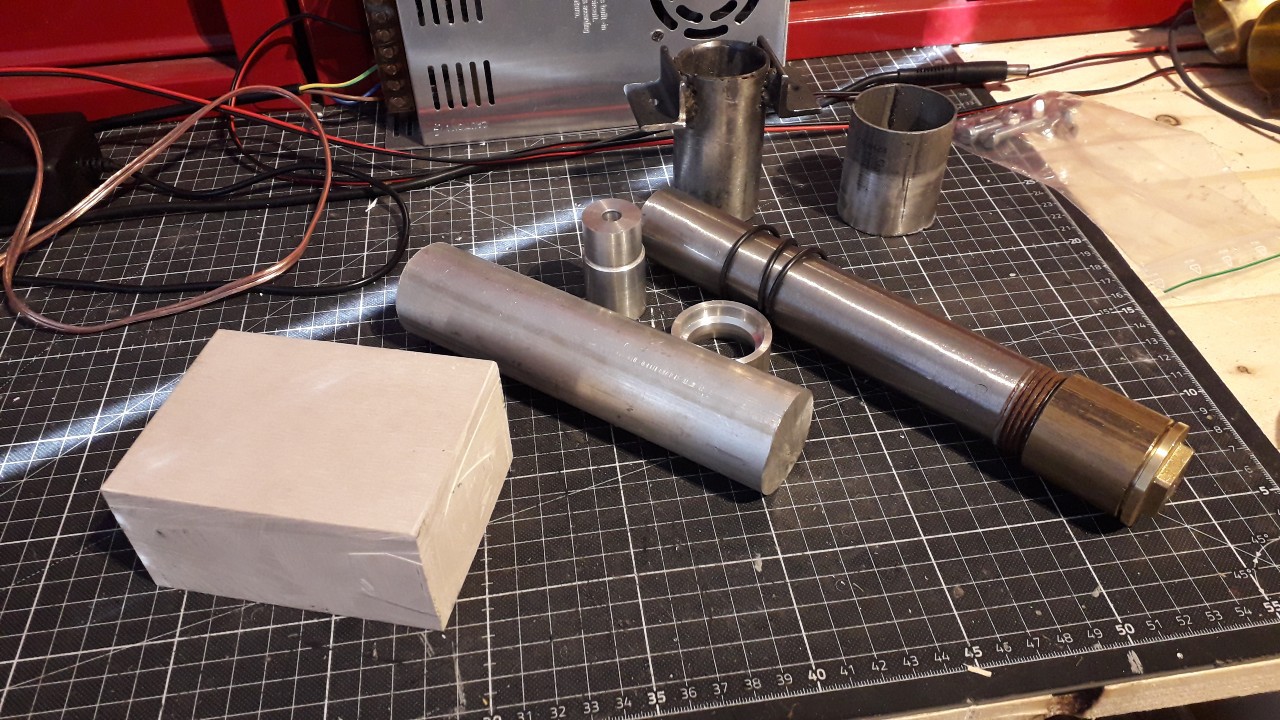
To make a long story short; I'm now rebuilding the heat cylinder from scratch. A smaller inner diameter (27mm) so the hydraulic piston can handle it, and mounting the heater directly to the nozzle. Plus some other small adjustments, like a spring around the cylinder instead of two small on the sides which made the cylinder wiggle all over the place.
![]()
(The block on the left in the photo is something called "tooling board" of the brand Renshape. Its a sample I got of a ceramic-filled polyurethane block that you can easily CNC-machine to make molds from, a lot faster and cheaper than aluminium. It will be interesting to see how it works.)
The plan for this machine, is to produce parts for the Satran MK2 that I am now planning. The next generation rotator will be a lot more professional looking, faster, more durable and weatherproof plus include an antenna. Hopefully it will have both a digital compass and absolute encoder to read its position instead of simple limit switches. But it will also cost twice as much as the MK1, and most probably not finished until next year.
I have a few MK1 kits available in stock, but interest seems to have cooled off a bit for the first version. But MK1 is not at all abandoned, it will continue to get updates both in hardware and software. Also, soon I hope to offer the MK1 as a preassembled version if that's the case why people are not overloading my checkout page, or maybe everyone is busy sunbathing and barbecuing right now =)
-
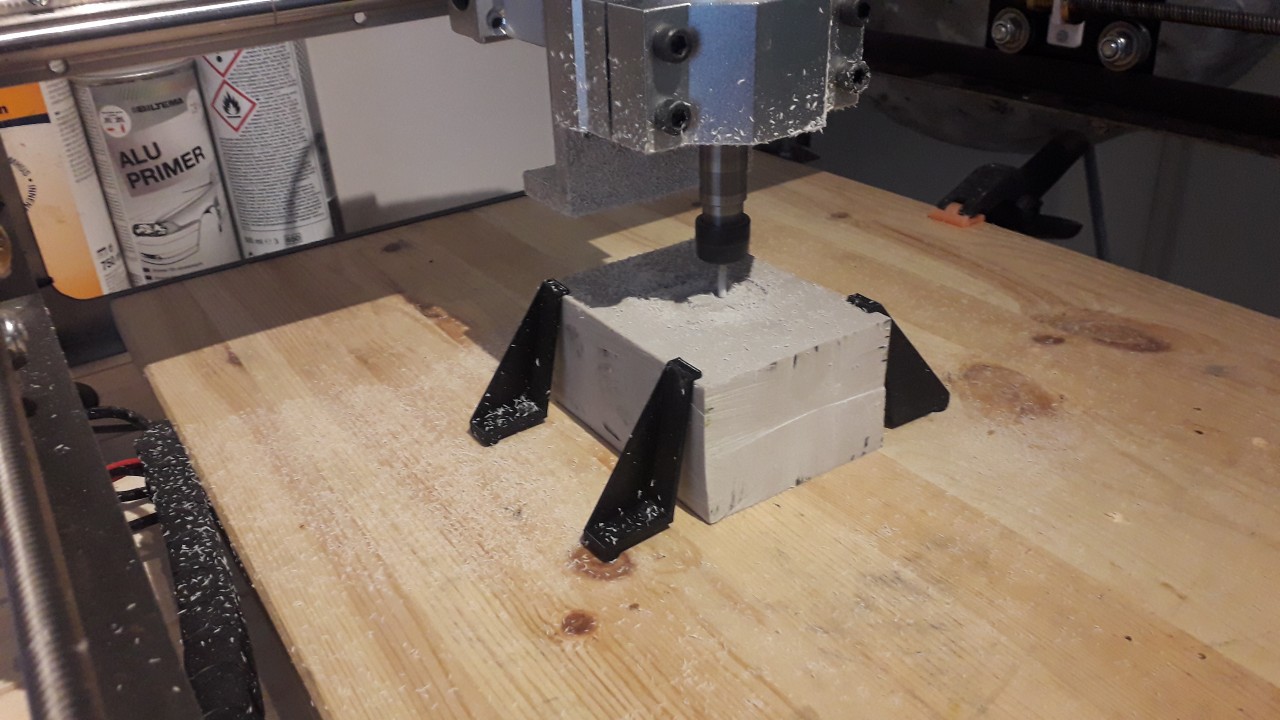
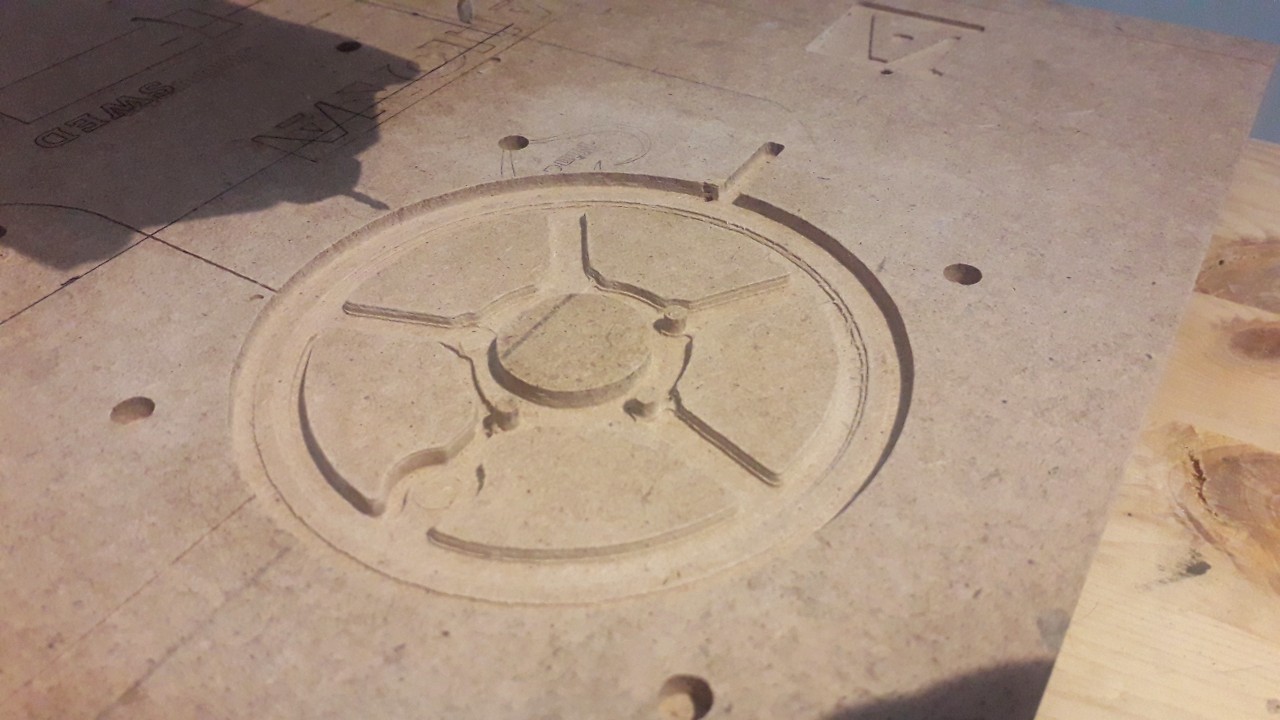
Milling some MDF
06/08/2021 at 12:07 • 0 commentsYup, aluminum was a bit too tough for my benchtop CNC. So I found a supplier of tooling board that I hope to try out soon, they promised to send me some samples. Tooling board is a high density polyurethane block that you can easily machine and hopefully use to make injection molds.
But, it is quite expensive.
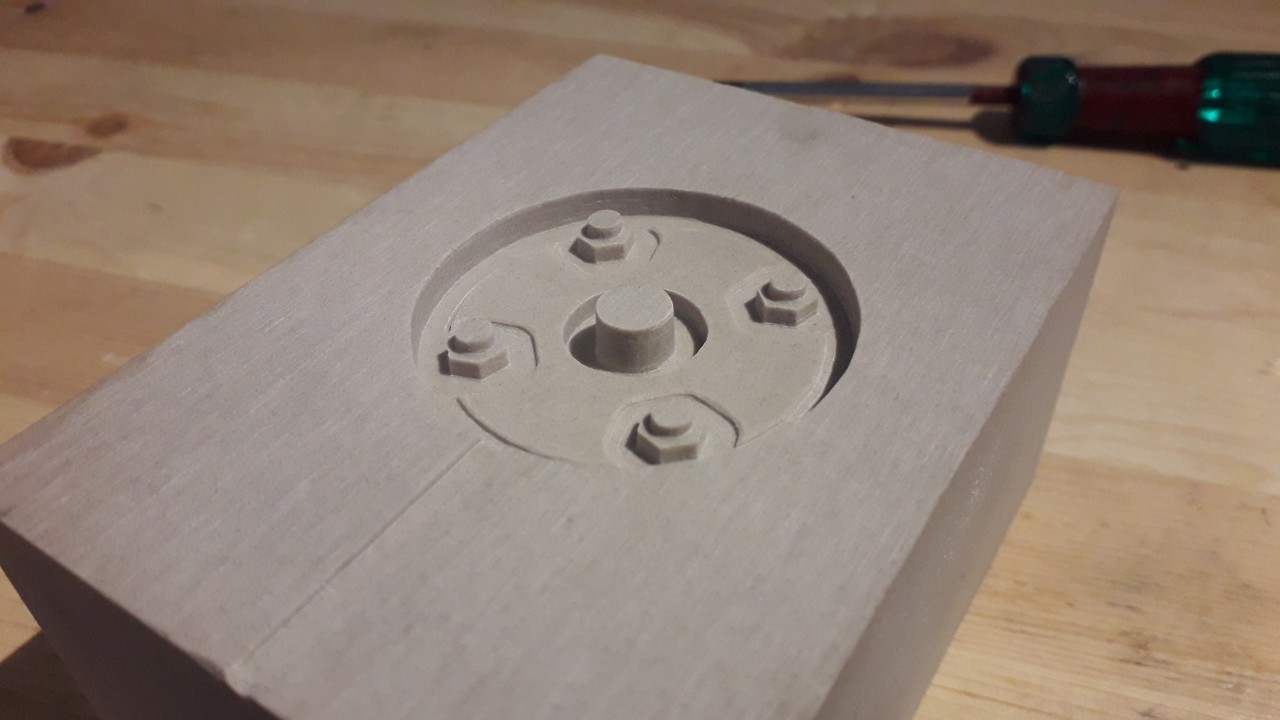
Thats why today, I tested out the CNC gcode with a piece of MDF wood board. It worked quite good in the beginning, but when I got to some depth the thinner details snapped right off. Hopefully tooling board wont have this issue, or I will need to replace all the smaller details with metal pins which would be very time consuming.
![]()
But in total, I'm quite happy with the experiment. Slab some sealer on the mold and I can use it to try the injection molding machine. If it works and the entire mold gets filled up with plastic, I will know if I can use some sort of polymer molds instead of aluminum. If not, I probably need to spend a few thousand dollars on contracting someone to make the molds.
-
Plastic fantastic
06/06/2021 at 15:05 • 0 commentsFor the second attempt with the injection molding machine I went to our old farmhouse in the woods. No neighbors to disturb if the contraption starts bellowing out smoke like the last time.
![]()
But it didnt! It actually worked quite good this time, even if some improvements are needed for it to be truly usable. All in all, not too bad for a machine that only cost me around 400 USD.
It will probably suffice to insulate the nozzle, preheat the aluminium mold plus redesign it with a slightly bigger inlet. Because the melted plastic solidified way to quick and didnt get very far into the mold as you can see...
![]()
And of course this is not one of the final molds, but just an early attempt at milling aluminium in my benchtop CNC.
Slow but steady. Build, measure, learn!
SATRAN - Satellite Tracking Antenna
Wifi-controlled, azimuth/elevation antenna rotator.