 Kutluhan Aktar
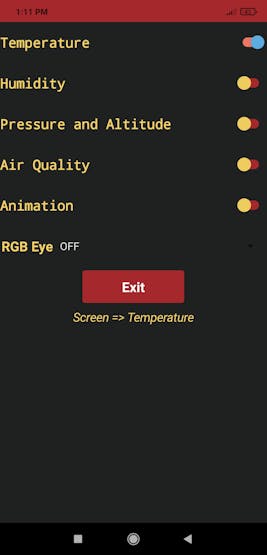
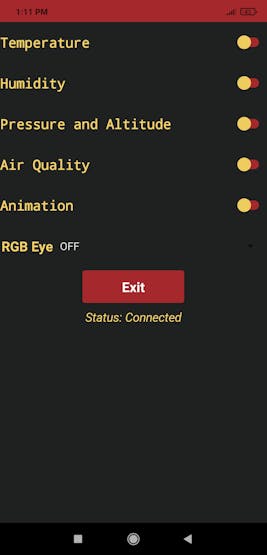
- Temperature
- Humidity
- Pressure and Altitude
- Air Quality
- Animation
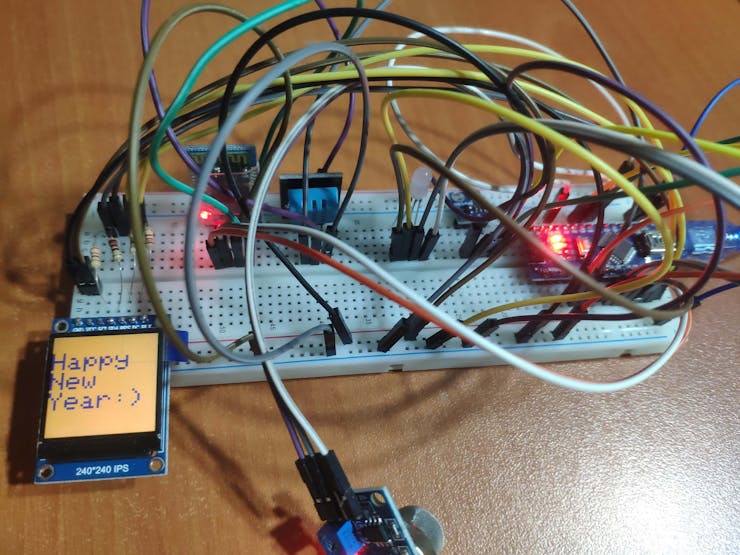
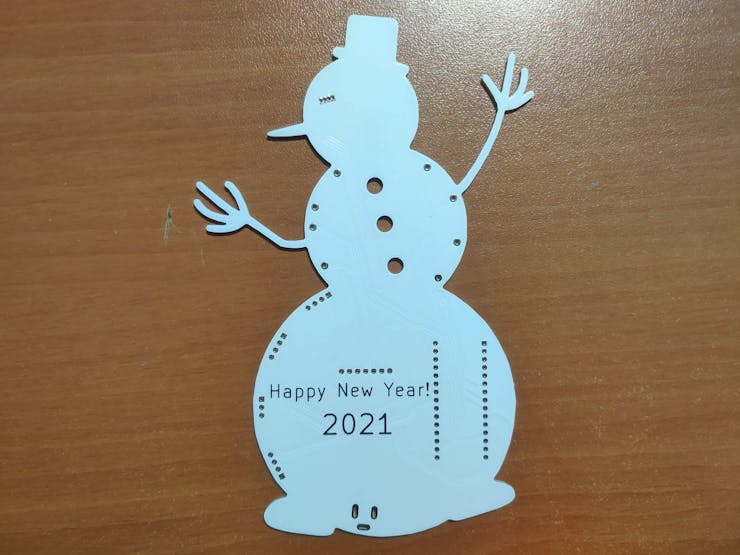
- Home Screen (Happy New Year)
First of all, I developed an Android application named Gift Card to control the gift card's modes and features via Bluetooth. And, therefore, I added an HC-06 Bluetooth Module to the gift card.
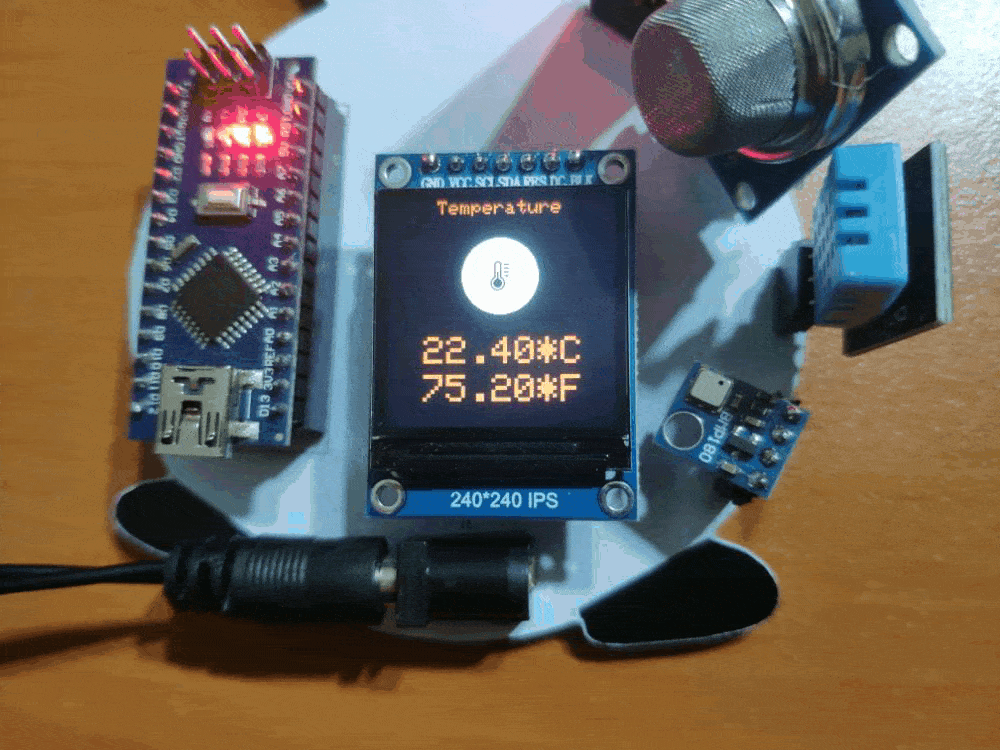
To be able to obtain weather information accurately, I used a BMP180 Barometric Pressure/Temperature/Altitude Sensor and a DHT11 Temperature/Humidity Sensor.
Then, to detect the air quality, I used an MQ-135 Air Quality Sensor with large-scale detecting scope and high sensitivity - NH3, NOx, alcohol, Benzene, smoke, CO2, etc.
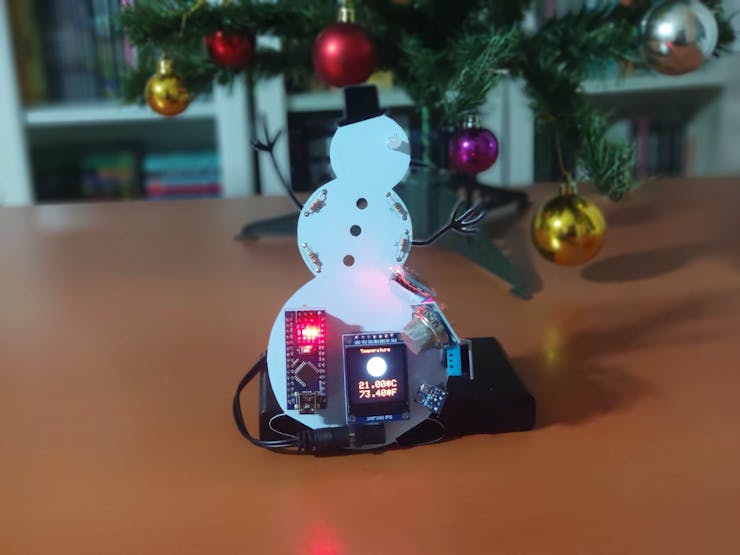
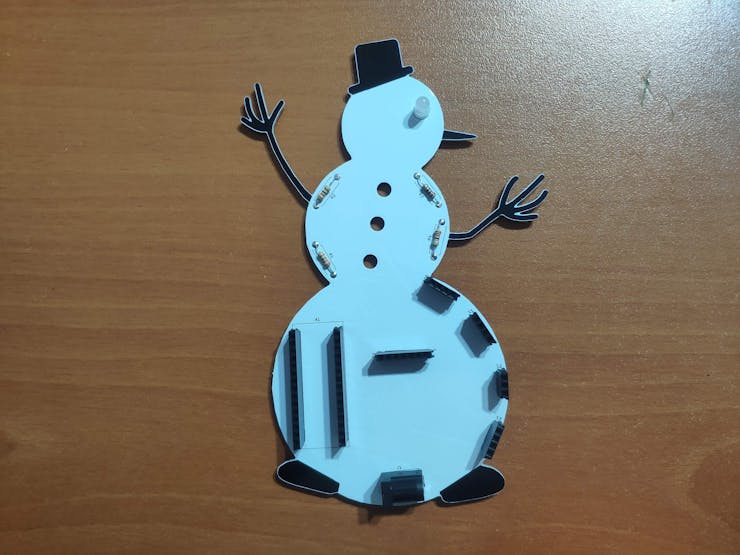
Finally, I included an ST7789 240x240 IPS Screen to display each screen (mode) with colorful images and texts. Also, I added an RGB LED to the gift card as the eye of the snowman.
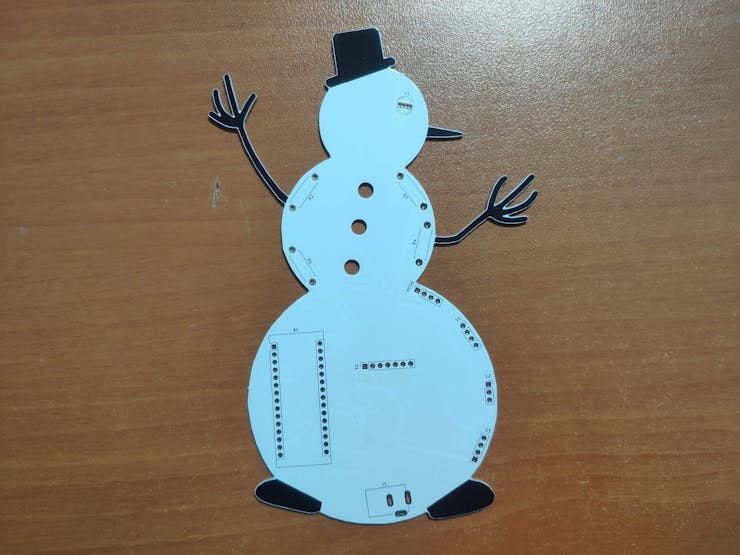
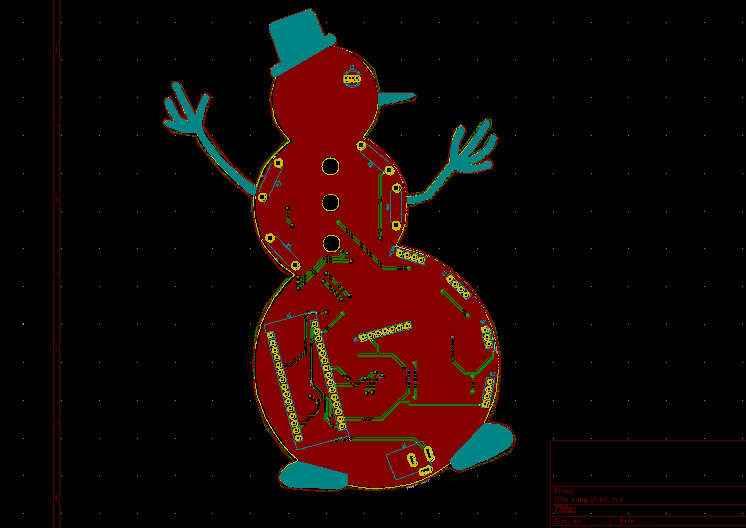
After completing my design on a breadboard and testing the code with the Android application, I designed a PCB (Snowman Gift Card) with a unique snowman shape to create an intriguing and apt gift card design for Christmas :)
I tried to keep components as simple as possible to integrate into the board to make this gift card easy-to-use even for novices and beginners who receive it as a gift for Christmas :)
Huge thanks to PCBWay for sponsoring this project.
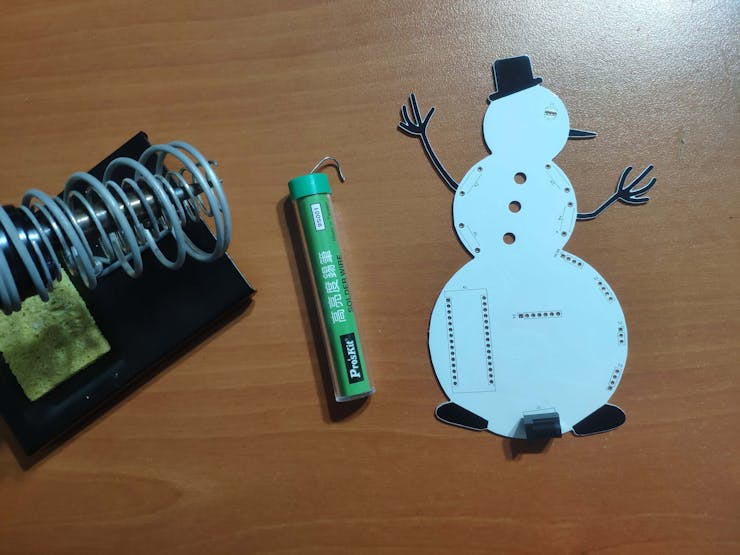
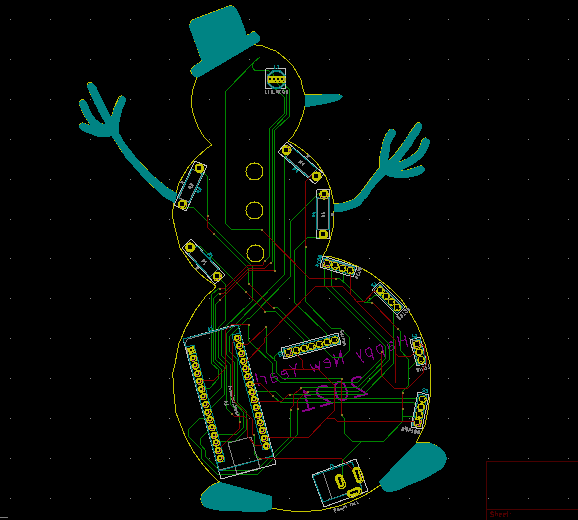
Step 1: Designing and Soldering the Snowman Gift Card PCB
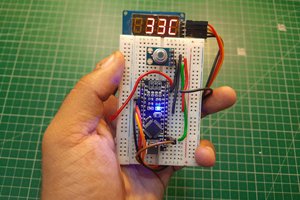
Primarily, I tested all connections and modules with the Arduino Nano on the breadboard.
Then, I designed the Snowman Gift Card PCB by using KiCad. I attached the Gerber file of the PCB below, so if you want, you can order this PCB from PCBWay to create a stylish snowman gift card to give your friends and family who can utilize its features as a home automation interface even to the next Christmas :)
Click here to inspect and order this PCB directly on PCBWay.
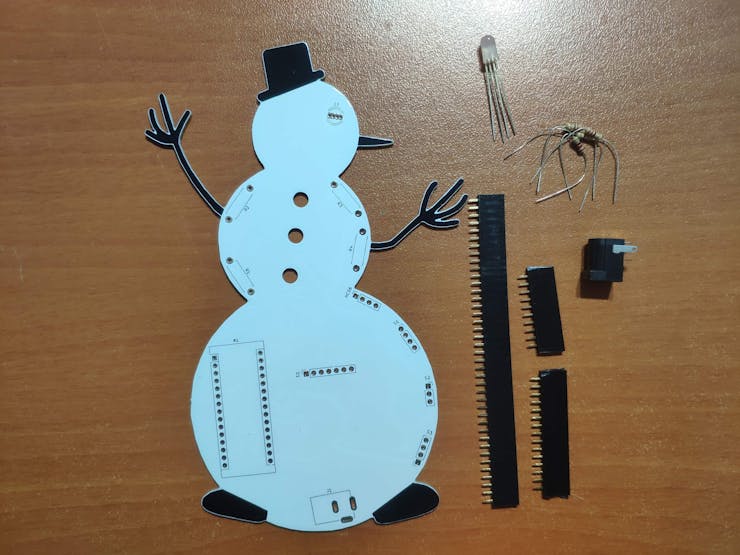
First of all, by using a soldering iron, I attached headers (female), 5mm RGB common cathode LED, 220Ω resistors, and the power jack.
Component list on the PCB:
A1 (Headers for Arduino Nano)
D1 (Headers for ST7789 240x240 IPS)
HC06 (Headers for HC-06 Bluetooth Module)
S1 (Headers for MQ-135 Air Quality Sensor)
S2 (Headers for DHT11 Temperature/Humidity Sensor)
S3 (Headers for BMP180 Barometric Pressure/Temperature/Altitude Sensor)
R1, R2, R3, R4 (220Ω Resistor)
L1 (RGB Common Cathode)
J1 (Power Jack)
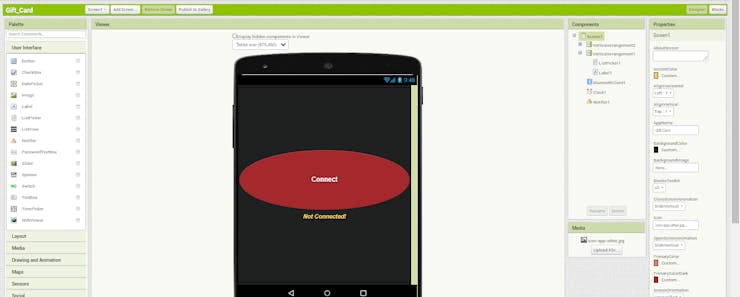
Step 2: Developing the Gift Card Android application on the MIT APP Inventor 2
I chose to use the MIT APP Inventor 2 to create the Gift Card Android application due to its easy-to-use designer interface with drag and drop editor for simple functions. MIT App Inventor is a web application integrated development environment provided by Google and now maintained by the Massachusetts Institute of Technology.
You can download the apk file (Gift_Card.apk) of the Gift Card Android application from the Downloads below to install it on your phone or send it to people you want to present this gift card.
I also published the application on Google Play:
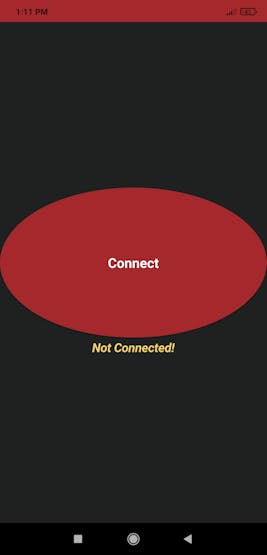
⭐ When installed, click the Connect button to view all paired Bluetooth devices.
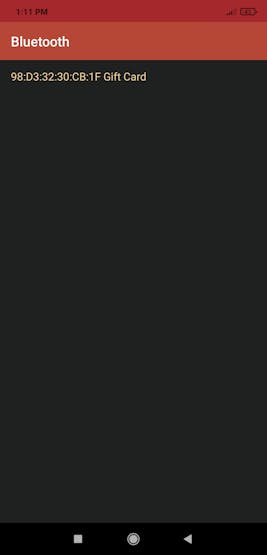
⭐ Then, select the one named Gift Card (HC-06 Bluetooth Module) if not named differently by the user.
⭐ If the connection with the Snowman Gift Card PCB is successful after entering the given password (1234), the application prints Status: Connected. Otherwise, it prints Status: Error.
If you want to change the design of the application or view the source code to add new functions, follow the steps below:
⭐ Go to the home page of the MIT App Inventor 2 and click the Create Apps! button.
⭐ Then, import the aia file (Gift_Card.aia) of the application to the MIT App Inventor 2 to view the application settings and code.
⭐ The application has two screens, five switch buttons, one spinner, and one notification box. You can change their functions by using the Blocks editor.


 Lithium ION
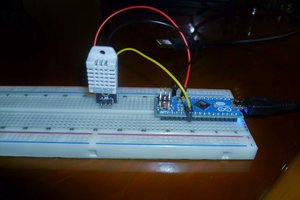
 icstation
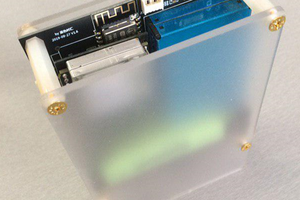
 SaberOnGo
will this project will work for such like application android apps and game.https://mksapk.com/subway-surfers-mod-apk/