Open Source Minimalist Phone
A modern, minimalist device that doesn't break the bank.
A modern, minimalist device that doesn't break the bank.
To make the experience fit your profile, pick a username and tell us what interests you.
We found and based on your interests.
I've spent the past few days working on getting the OS to be completely interactive and getting a basic UI down. I now have a usable UI toolkit (documentation coming soon™) with a launcher and a few apps already working. The OS is still a ways away from being complete, I still have a ~20 page to-do list of things that need to be made and fixed.
Hello!
I have just remembered that I have a Hackaday page, so I figured I'd write a bit of an update. I finished making my first true "handheld" prototype, complete with an OS demo. It had lots of problems - I fried all of my custom boards and couldn't get new parts in time, so I ended up cramming an old prototype into the case instead - only the keypad remained from the custom boards. I intended on improving the prototype a bit more before showing it off, but I sent a small video to someone, and it ended up getting shared with others. It ended up being to my advantage, as I got a few recommendations from others about improvements I could make. Among these was the idea to make a QWERTY-style phone with an E-ink display rather than my Candybar phone with an LCD display. Originally, I didn't think it was possible, but I found out the parts needed were much cheaper than I thought.
With the new redesign, the phone has a much more powerful ARM CPU coupled with more RAM and a MicroSD card slot for storage. Software changes are of course needed to be able to take advantage of the more powerful hardware, so I've decided to switch from a dual-threaded RTOS to using the full Linux kernel. With these changes comes more features - there's now enough spare CPU cycles that I can have some nice features like a music player, and possibly even GPS navigation.
For the new screen, I've decided to use Waveshare's 2.7" E-ink panels because of their low cost and their super fast (for an E-ink) 2-3 second response times. The panels are also very easy to obtain, so sourcing replacements if your phone gets damaged shouldn't be a problem. I've thrown together a basic development kit with an old Raspberry Pi 2 and the HAT version of the E-ink panels, so I can work on the OS while I get the new boards designed and fabricated. The new screen also allows for much easier modularity - with the LCDs, a custom board would be needed to make them user-serviceable, and that would have made sourcing replacements basically impossible from anyone except for me.
I hope to get screenshots of the new OS out soon, along with pictures of mockup phones showcasing what the final design could look like. I'll also be launching a Kickstarter campaign and announcing the phone's final name in the coming months, so stay tuned.
Originally, I wanted the phone to be as modifiable as possible. As part of this, I wanted to have a system where the screen could be replaced with any type whatsoever. I had set up a system where you could have two completely different types of screen, and you'd be able to swap them while maintaining 100% compatibility without needing to recompile firmware. Unfortunately, the benefits just don't justify the cost of having this system. It slows down the display by quite a bit, and it adds unnecessary complexity to the phone, which makes it harder to repair and makes repairs cost more ($30 screen replacements vs $10, things like that) so I've just decided to scrap it.
TL;DR: Old system of interfacing with screens was slow and expensive. Getting rid of it.
I've been working on the later stages of the design, and have been trying to make the phone as repairable as possible. First, the major components are all modular - the screen, battery, CPU, and cellular modem are all on separate daughterboards that connect to the board with the keypad. This makes it so that repairs can be done in a matter of minutes with no soldering whatsoever. This also helps improve longevity because it lets you upgrade the phone down the line if you feel it no longer suits your needs. This doesn't mean much if it's hard to take apart, so I'm trying to find a design that's super straightforward to disassemble and reassemble.
Also, I've been thinking of a tamper-evident boot process that's as painless for the user as possible, while making sure none of the data on the phone can be accessed if someone installs a malicious firmware. Essentially, the user can pick a picture to be displayed on boot. It is added to the firmware image, and can't be read back from the phone. If the image is different from one boot to the next, then the user knows something has been tampered with. I'm not sure if this will be helpful at all, or if I should try to make something a bit better, but that's something I'll have to think about before the final product is done.
I finally got everything I need for my first few devkits. I've learned a few things from making these, that will hopefully make the final product much better.
1. Have a way of flashing the stock firmware onto the chips
This seems like a no-brainer, but unfortunately I made the stupid mistake of not including an ICSP header for writing the bootloader to the CPU, so that has to be done with some thin wire on these ones. Oops.
2. The easiest method may also be the cheapest
The buttons I used LOOKED like they'd be the cheapest option to go with (they had a minimum amount of 1) but were WAY too much money in hindsight. I took a look at the buttons the software I'm using, and they would have saved me a dollar per devkit. Doesn't seem like a whole lot, but when I'm trying to build (and turn a profit on) a $75 device, every penny counts.
3. Breaking things down into smaller pieces is actually really good advice
I wasn't thinking a whole lot about what a phone really *needs* when I built these devkits. They can't charge batteries, they don't have actual cellular (but that one wasn't my fault!) and overall, they're basically what I already had, but in a nicer package. If I had sat down and thought about what every single part of a phone was for, I think I would've ended up with a better set of devkits.
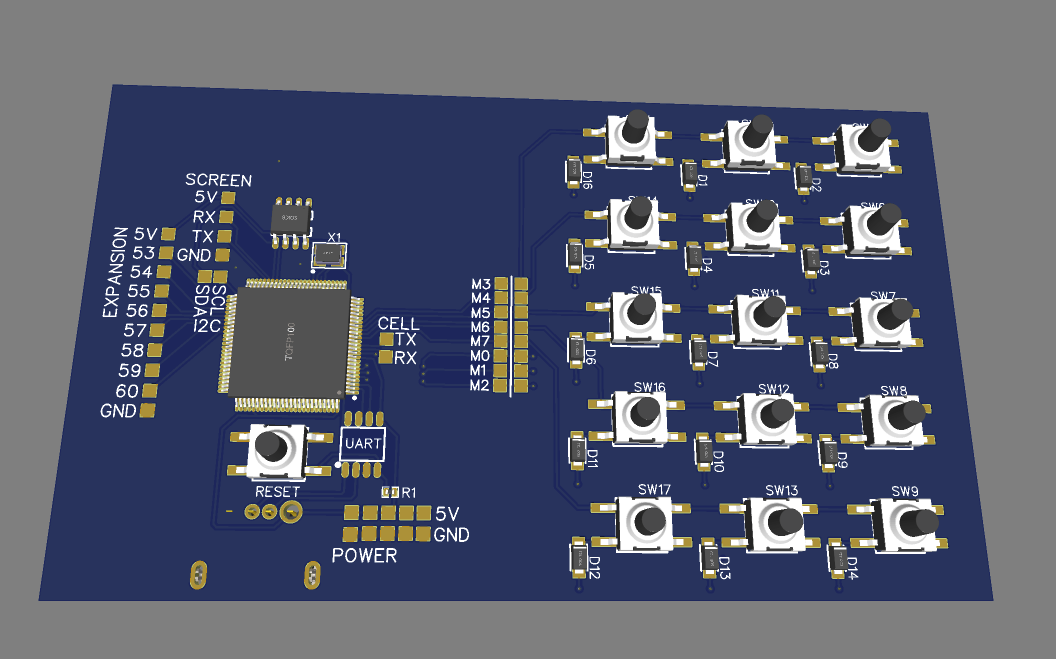
I've finished designing the first revision of the PCBs for the development units. This version doesn't have a cellular modem (since the DAC/ADC I'll be using isn't available as an EasyEDA library yet) but it does have a place to add one.
Of course, the files are available at https://github.com/jhonnystene/PhonePCBs.
One issue I'm having with designing the user interface is that testing it on-device and using a standard photo editor take too long. My solution: Another custom tool!
This one's called UIDesigner, and does exactly what it says on the tin - creates minimalistic user interfaces in seconds.
Currently, it's quite limited. You can't "snap" objects in place, so you just have to guess. You can't save your work unless you take a screenshot. On Linux, this isn't a huge issue since our screenshot tools are actually good, unlike SOME operating systems. Luckily for users of those, I'll be adding a proper export feature soon. It can also only do text, which is *almost* everything you need. I'm also going to be adding in lines, for designing menus.
It's very easy to use. Click which text size you want, type in what you want it to say, and click where it goes. Made a mistake? Click the X in the lower left and then click the text object you want to delete.
Of course, this is also FOSS - you can download it here.
I was having a bit of trouble with the process of actually making fonts. I have to draw them out (which, as an artistically challenged person, is already pretty hard) and then manually, bit by bit, translate them into the format that arcticOS uses. So, I spent a couple of hours writing FontDesigner - a new development tool specifically for designing fonts that work with arcticOS.
It's admittedly pretty basic, and doesn't look very good. Luckily, a dev tool doesn't have to look good! It's pretty simple to use. In the top left hand corner, you have the current character in the font you're working on. Next to that is a button to save the font in the FontDesigner format, and a button to export it into the arcticOS format. Below that are two drawing spaces - one for the larger, 32x32 font, and one for the smaller, 16x16 font. The red ring around them should ideally be left blank as that's where the spacing between the letters is. You can hit the left and right arrow keys to move through the various characters in the font.
It's written in Python, and is completely free and open source! You can download it on GitHub (here) and you'll need to download Python 3.7 and Pygame (how you do this depends on your OS, but it isn't difficult) before you can run it.

I decided that instead of a "generalist" OS and kernel, I want arcticOS to be specific to mobile devices. As such, I rewrote most of the UI code. I also got custom fonts working! The clock font is pretty hefty though, at 7 bytes per character - I'll shrink it soon(TM).
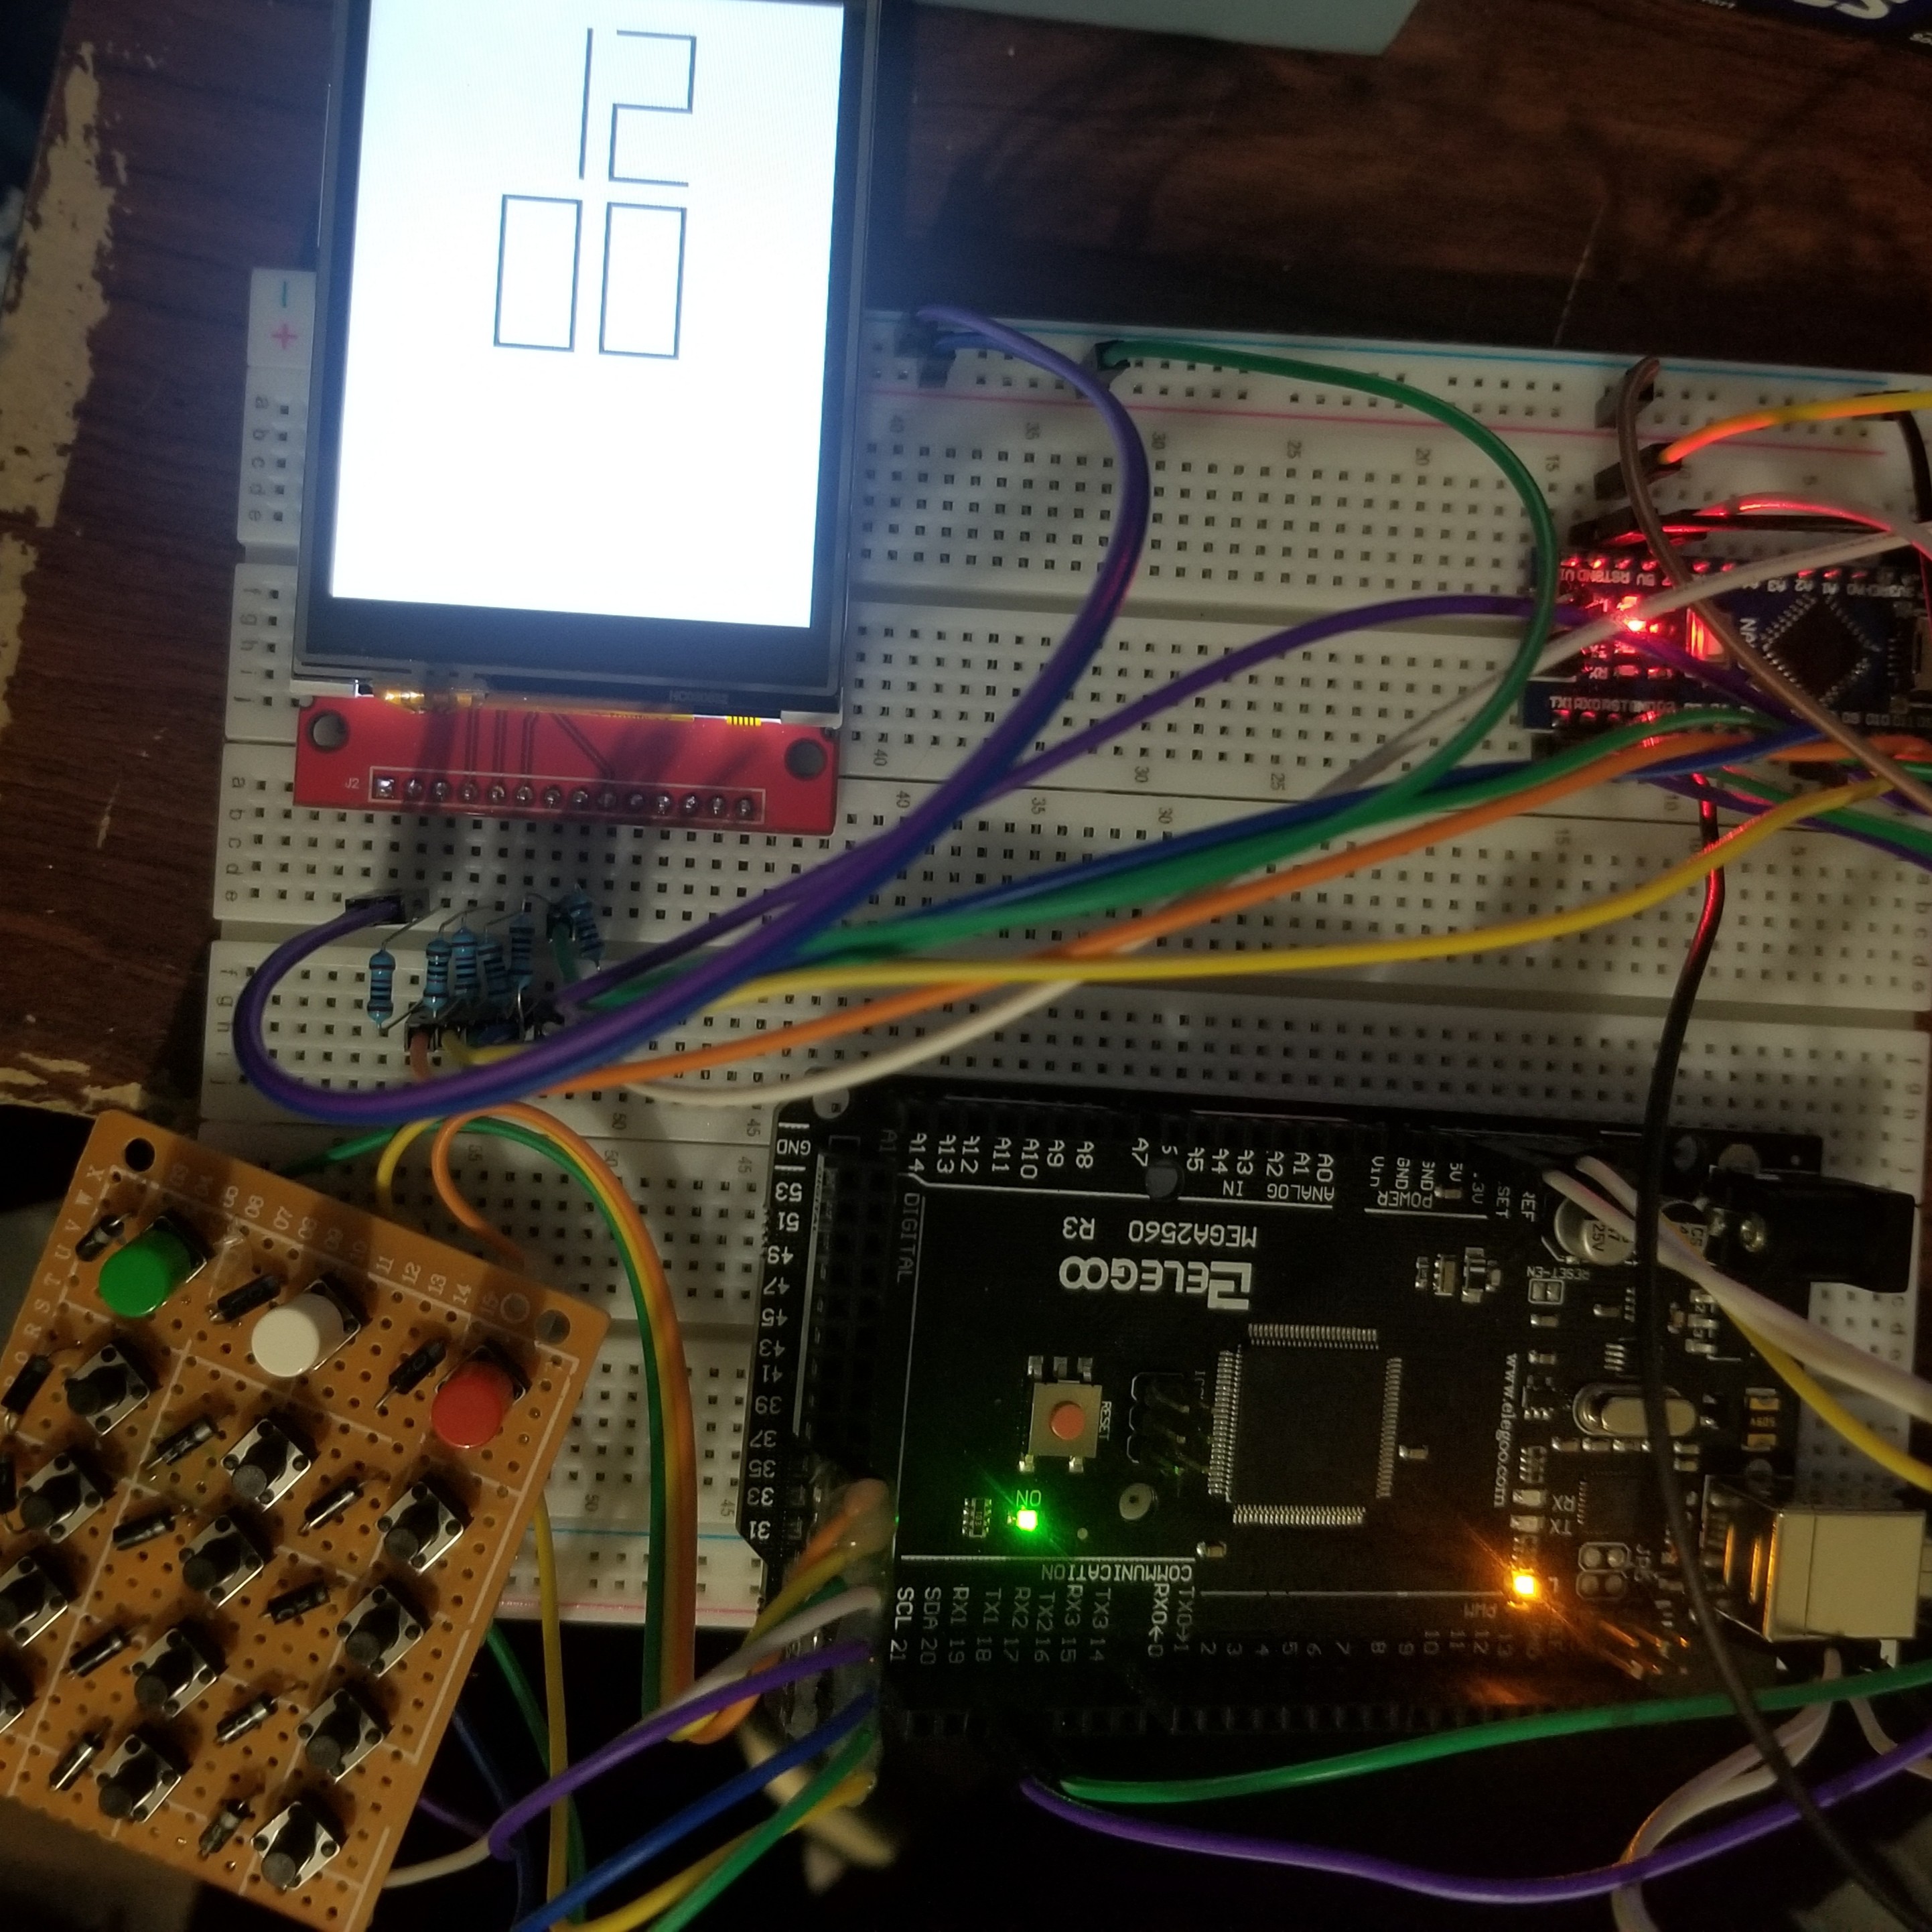
I finally have a proper prototype running the same (mostly) hardware that the final phone will be running on! The prototype doesn't have a cellular modem thanks to the lack of properly priced SIM7600 breakout boards, but the devkit will have a modem. This version does have a screen, a keypad, and both CPUs - one for processing and one for interfacing with the display. Sorry I had to post a video, Hackaday just throws errors when I try to upload pictures.
Create an account to leave a comment. Already have an account? Log In.
I second the motion. It's been a few years now. Any updates?
Thanks
The prototype runs on an Arduino Nano and an Arduino Mega, but I'm working on making custom boards to use as a devkit instead.
But which 2G/3G/4G/etc interface do you use for the voice and data connections?
Become a member to follow this project and never miss any updates
@Johnny Stene are you still working on this would be cool to see an update? Enjoyed interview on youtube somewhere.
Thinking of making an even simpler build myself. Calling only.