Close
0%
0%

RO Monitor

Monitor the filters and status of an RO unit.

Similar projects worth following
An RO unit has several critical values that tell you when filters need to be replaced or it's not working properly. I bet I can monitor one with an ESP32 and Home Assistant.

I recently had an RO/DI unit fail, which caused problems in my aquarium.  I realized that unless I check it daily, I have no idea what is going on in there.  This is completely unacceptable.  We can automate this.

Gerber_PCB_2021-01-03_11-38-18_2021-01-03.zip

PCB

Zip Archive - 14.24 kB - 01/16/2021 at 21:51

Download

  • 3 × KeyStudio TDS Breakout
  • 1 × ESP32
  • 1 × 0-100 PSI 5v pressure transducer
  • 1 × 0.3-10L/m Flow sensor (digiten)
  • 1 × ADS1115 Evaluation, Demonstration Kits, Boards and Modules / Evaluation Kits, Boards and Modules

View all 11 components

  • PCB's are in!

    Tim Rightnour01/13/2021 at 14:12 0 comments

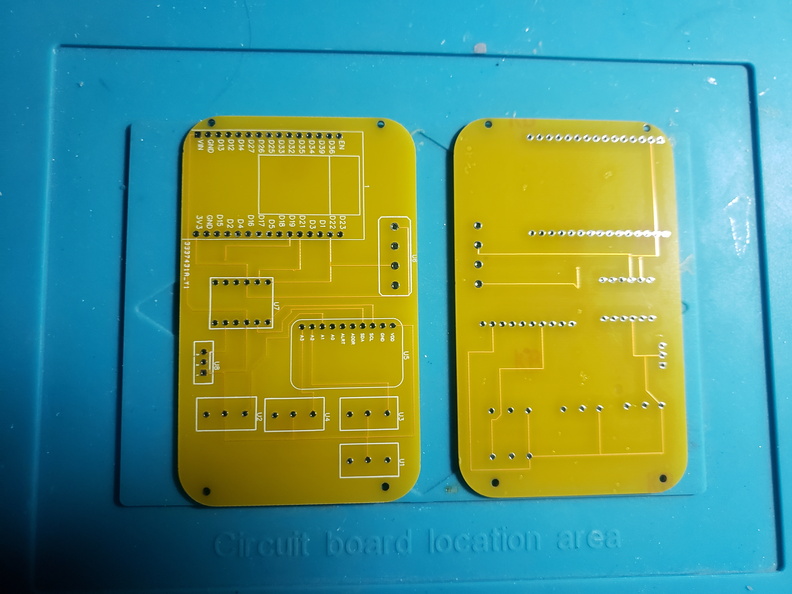
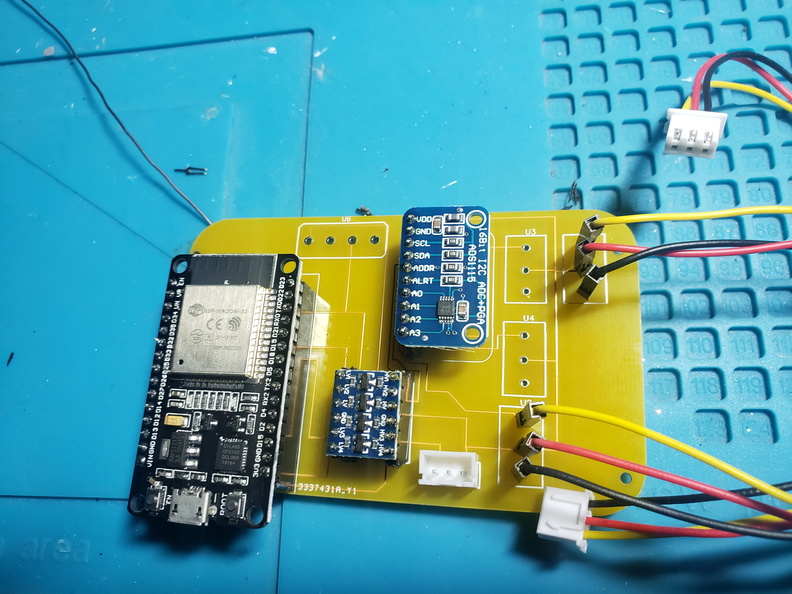
    I got the PCB's in the mail the other day, and finally had a chance to test them out.

    20210112_052607
    They turned out pretty good for my first try.  I was kinda unsure how to do the routing, so I left myself alot of space, and consequently wasted a ton of space, and the boards ended up pretty big.  I also didn't quite understand the silkscreen, and so none of the terminals are labelled!

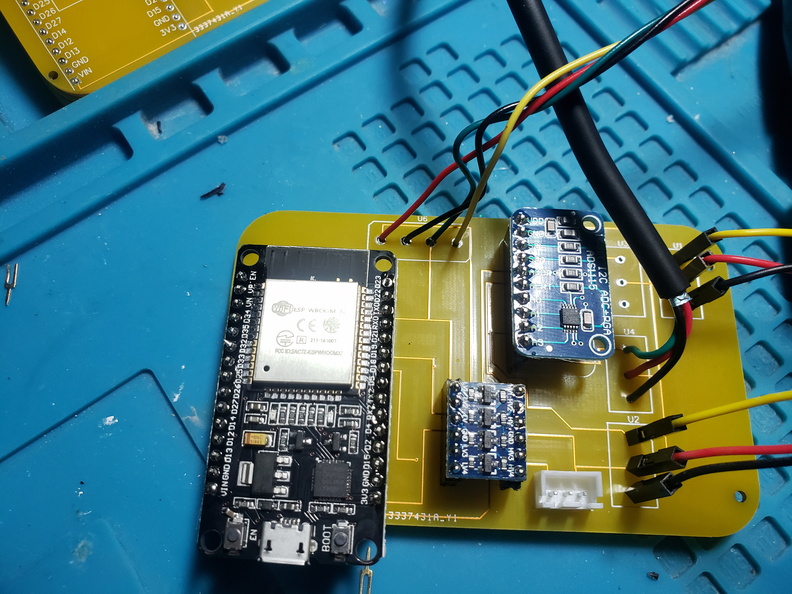
    However, all that said, I soldered all my parts in really quickly, and it worked on the first try!  Wow!  Not only that, but it was *so* much faster to assemble this than my breadboard mess.  This is just great.  I think I'll never do a breadboard jumper mess again!

    Because this board is different than the Electrocookie I used before, I had to change my design for the 3d printed box, but I knew that would have to happen.  Once I finish printing, I'll post a fully assembled pic and build instructions, and update the BOM.

    20210112_210916

  • Assembly and testing

    Tim Rightnour01/05/2021 at 17:21 0 comments

    I worked out all the design issues, so all that was left to do was assemble and test.  It was relatively straightforward to assemble, though there were a ton of wires needed to do this on a little breadboard...

    I ended up adding a flow meter, so I could measure how many gallons of water passed through the prefilter and carbon block stages, so I would know that they have processed X gallons.  Most of these are rated in the 5000-20000 gallon total use range, so, in theory, this is also a good indicator.  It's not how many gallons you produce, it's how much you pass through these before the RO membrane, which is really hard to know without directly measuring like I did here.

    It was a bit of a pain to convert the 1/8" Male NPT fitting on the transducer to 1/4" RO tubing.  They make a 1/4" NPT -> RO fitting, but then I had to find a 1/8" NPT -> 1/4" NPT and that was a total pain. Found one on Amazon eventually...

    With that, I basically needed to check if the numbers were sane.  I have manual TDS sensors on 2 of the RO units in my house, so I was able to get measured source water in little beakers from these at different values, and was easily able to check the TDS.  That part was more or less effortless, except that these TDS sensors are not temperature compensated, so I had to manually measure my tap water and use that as a hardcoded value.  :(

    Testing pressure basically came down to hooking the unit up to the business end of one of my RO units, adding a dial gauge inline, and then validating the readings.  It was pretty accurate out of the box in the 10-70 PSI range.

    Testing flow was a complete pain.  Basically just had to fill gallon buckets over and over and check the total consumption numbers until I had the right number.  On the device it's printed as F*23, but on the Amazon page it's noted as F*38.  All the reviews talk about needing a 1.5 correction, and basically, if you use the F*38 number from the product description, it seems to just work.


    With everything tested out, I printed a simple box for the board, and then hooked it to the main aquarium's RO/DI unit.  This is the one that runs the most often, so it's the most important to test and understand.  Got it hooked up, and immediately got good data from it.  Super happy.

    Now I just have to build 2 more.  And these are a total PITA to wire up.  I decided to try something new, and designed a PCB, and ordered 10 from JLCPCB.  I'm really hoping they work, as this is my first ever PCB design.  We will find out in 2 weeks!

  • Initital Attempts

    Tim Rightnour01/05/2021 at 13:23 0 comments

    The initial idea is simple.  Get a pressure sensor and some TDS sensors, hook them to an ESP32, and start pulling data.  TDS tells you when the membrane is failing, or when the DI resin (if you use that) is failing.   Pressure tells you when the prefilter is clogged.

    I managed to find both TDS sensors, and a pressure transducer on Amazon.  I started with the pressure.

    The transducer reads 0-100 PSI in 0.5v to 4.5v. This means it's a 5v sensor, so I threw together a quick voltage divider, and decided to just go with that, and hook it to one of the ADC ports on the ESP.  That seemed to work ok..

    Then I hooked up a TDS meter.  The TDS reads in the 0-2.5v range, and there is a complex formula for converting to TDS.  Seems easy enough, just hook it to another ADC port.  However, this is where I learned the problem with the ESP32 and it's ADC ports.  It turns out that at super low voltages, between 0 and 0.1, it just reads 0.  This means I basically can't tell the difference between 0 TDS, and 15 TDS.  This is a horrible problem, because at like 5-7 TDS, that means your DI stage has failed, so the whole thing is useless.

    I spent hours fiddling with this, before I realized I could use an ADS1115.  The ADS1115 is accurate down to near zero, and can measure up to about 6v (in theory).  I got myself a bunch of ADS1115's, and wired one into a level shifter, so I could run 5v to the sensors.  This lets me also run the pressure transducer without a voltage divider, so the math is easier.

    Boom.  Works perfectly.  Took a bunch of doing, but now I'm reading TDS down to zero, and getting accurate pressure data.  The pressure transducer is a little flaky though.  At 0 PSI, I get readings between 0.44v and 0.6v randomly.  However, what I care about is the 40-70PSI range, and at those ranges, it's good enough.  It's pretty stable to about a 2PSI swing, and really I just need to know if the pressure drops from 65 to 55, which it is more than accurate enough for.  I just have to ignore the random -1PSI readings from it all the time when the unit is off.

View all 3 project logs

  • 1
    Optional: Add headers to the board

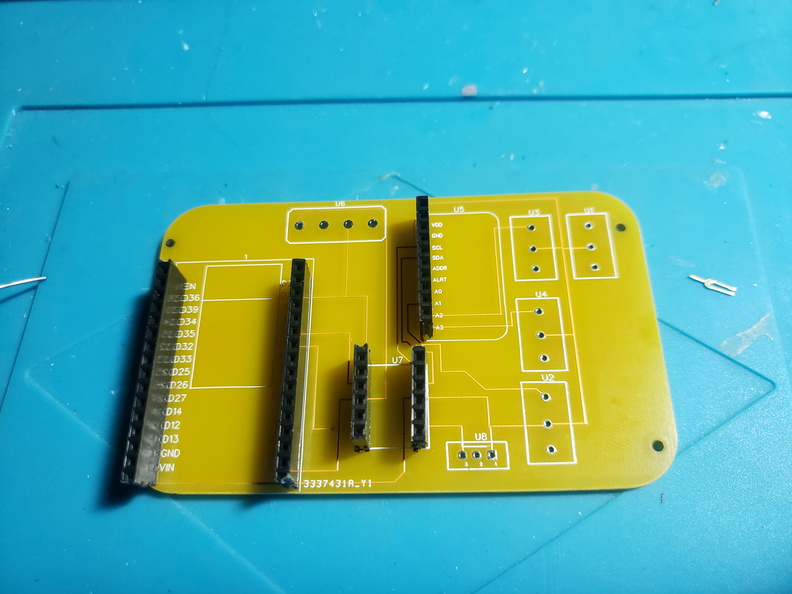
    I usually like to at least do a header for the ESP, in case it explodes or something and needs to be replaced, or if I want to pull it off and reprogram.  You don't need to do all of these unless you are paranoid like me

    20210112_054433
  • 2
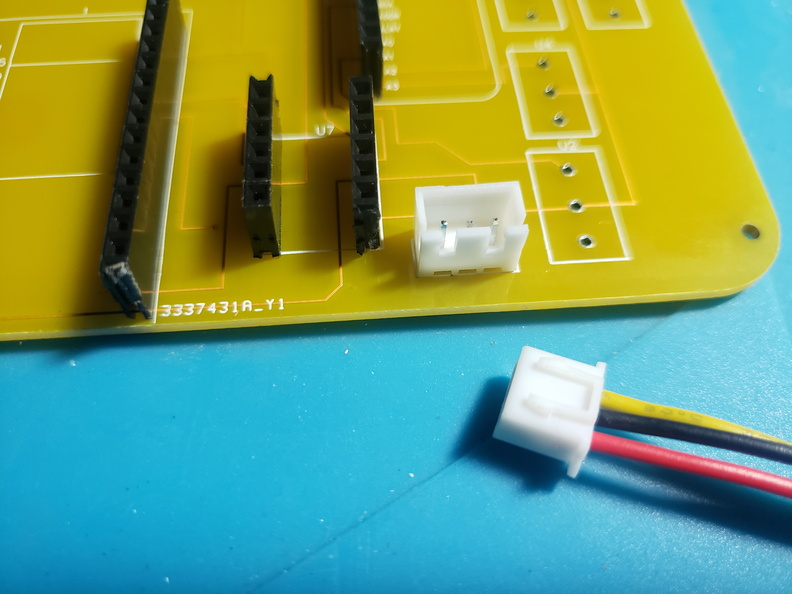
    Solder on the JST connector

    20210112_054627As shown above, solder in the JST connector.
  • 3
    Add the parts

    20210112_060348If you didn't do headers, solder in the boards.  If you did, solder the pins to them, and then insert.  For the level shifter, the low voltage side should face the ESP.

    For the TDS sensors, they go on U1, U2 and U3.  All of the TDS sensors are optional, you just need to delete the section in the yaml file for the one you don't need.  Here I'm just building a 2-TDS setup.  The ground goes on the bottom, VDD in the middle, and signal on the top.

View all 7 instructions

Enjoy this project?

Share

Discussions

Tony0727 wrote 09/27/2022 at 14:15 point

Can you share the esphome code for esp32 ? please.

  Are you sure? yes | no

pveerababu wrote 04/15/2022 at 16:27 point

CAN YOY PLEASE PROVIDE ESP32 CODE

  Are you sure? yes | no

gigaguy wrote 02/03/2022 at 15:10 point

This project is awesome I am trying to do the same thing with my RO system.  Would you mind sharing the ESP code?   I can get it working with one TDS, but not three.  Also, could you share the stl file for the case? Thanks!

  Are you sure? yes | no

Similar Projects

Does this project spark your interest?

Become a member to follow this project and never miss any updates