 Gonzalo P. Chomon
Here are some details about how the Jellybean3D is designed:
- The intention was to use 3D printed components and parts as much as possible, so I decided to make an unibody vehicle in order to avoid the use of a metallic chassis to support the body.
- Although a vehicle like this could be made by many other different approaches, it is designed to be 3D printed.
- Given the strength limitations of the materials available for hobby printers I have been very cautious on the structural design. So I created 4 different levels of structures: eggy shape, internal ribs (like airplanes fuselages), reticular structural web created by the bondings, and internal mesoscale structure created by the infill in every part.
- The big parts, body and door were designed as whole parts and later strategically cut in order to:
- Get the most strength in the directions that are more needed and make them coincident with the XY printing plane.
- Avoiding or enforcing the cuts in determinate areas in order to strengthen or not weaken them.
- Taking in account the appropriate cut orientations and cut locations in order to avoid the use of supports when printing.
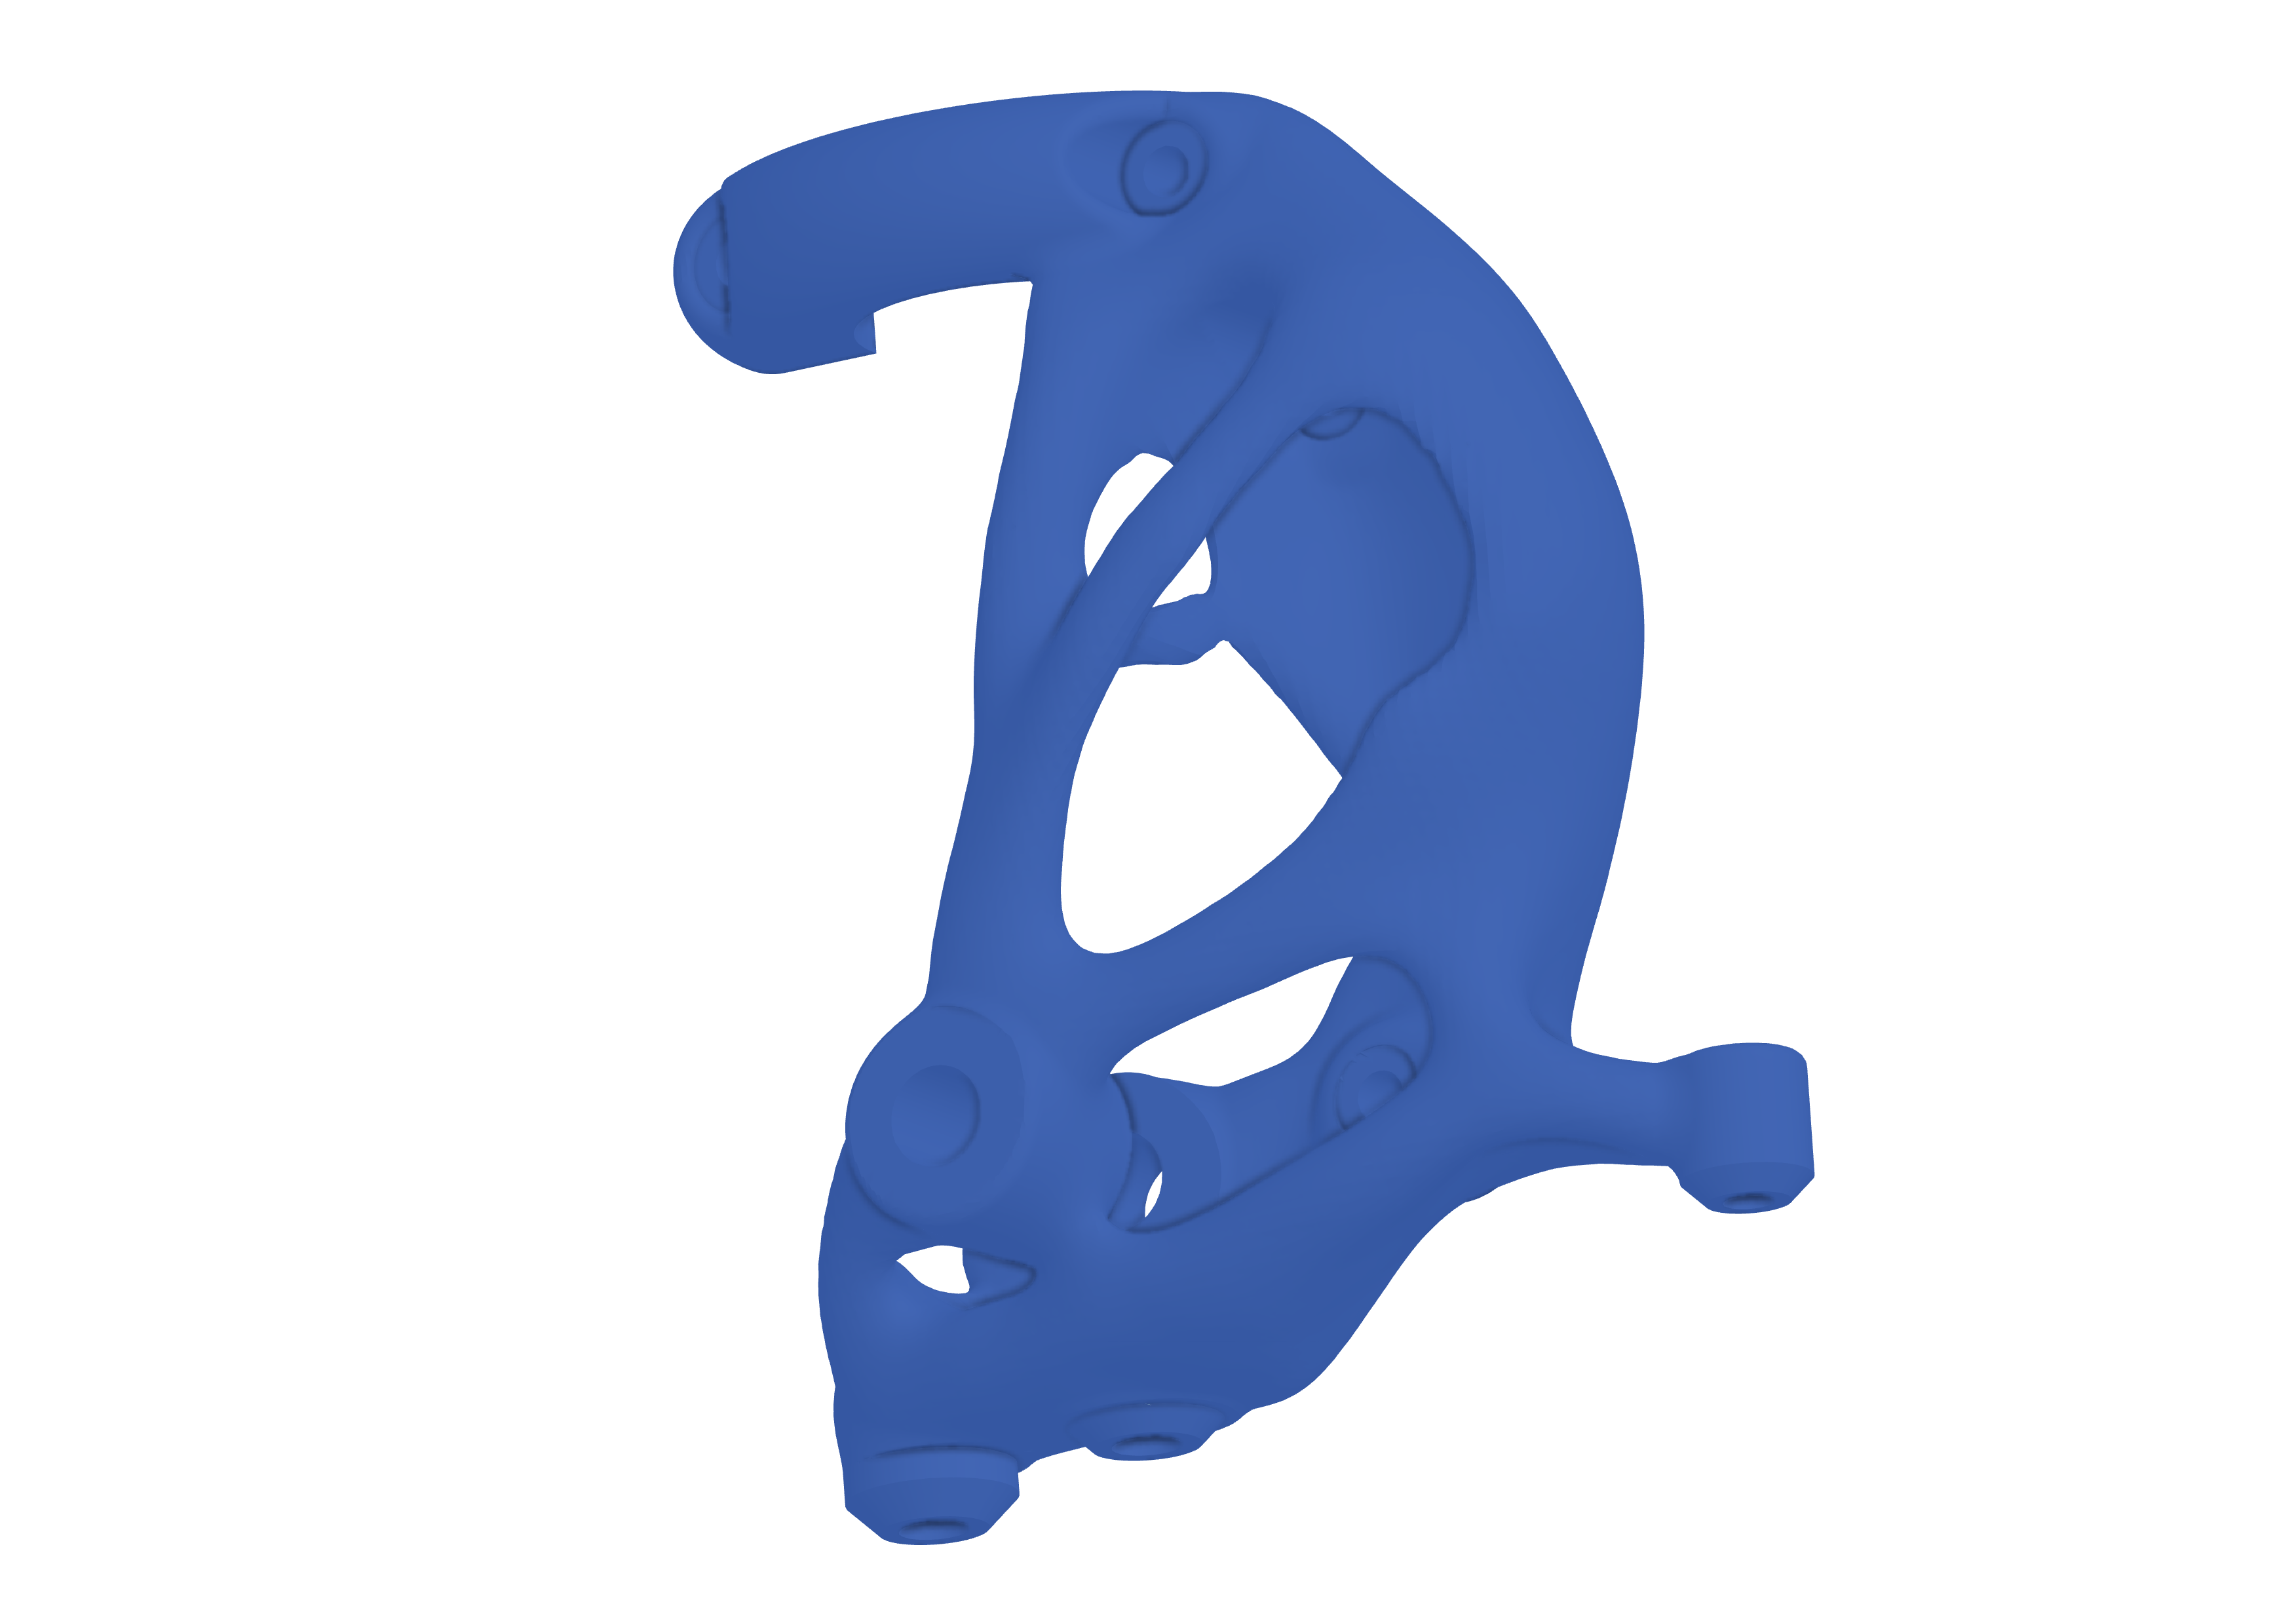
- Some parts like the knuckles and others, have been topology optimised.
- For the non printed parts and components I tried to use very easy to find materials or components.
- In order to make strong bondings between the parts I developed a chemical welding system, more info here: https://youtu.be/5LqmyYqS6-k
Discussions
Become a Hackaday.io Member
Create an account to leave a comment. Already have an account? Log In.