 Ben
BenI was looking for a simple project for my Adafruit PyBadge, and pretty quickly realized that a directional pad plus built-in accelerometer would be perfect for a digital Etch-A-Sketch! This could probably be done easily with Microsoft’s MakeCode Arcade but I wanted to try out CircuitPython and honestly it would probably do some good to relearn Python. The idea itself is simple, but I wanted to play around with all of the board’s capabilities including the piezo-electric buzzer speaker, the lis3dh accelerometer, and the front facing neopixel LEDs. The only hardware I couldn’t figure out how to use for this project was the light sensor, but I’m sure something will come to mind for version 2.0 of this project.
If you want to skip this guide and just play with the project, just download all the python files in this repo and copy them (including the lib folder) to the device. Instructions for use are at the start of the next section.
Note: Everything in this project should work out of the box with the PyGamer (and with some small modifications, most CircuitPython microcontrollers) as well, but I don’t have one to test with so please let me know if it doesn’t!
This is a purely Python project, so no additional tools besides a PyBadge or other Adafruit CircuitPython device are required. A battery for the board would be the only thing I recommend, but not required as long as the device is plugged into a usb port.
Features:
The project acts like a normal Etch-A-Sketch. The cursor is displayed as a blinking square, which starts off in the middle of the screen. Use the directional pad to control it. The cursor has a few different colors, the last of which is black – this can act as an eraser. The front LEDs will match the current cursor color. The current color can be rotated using the A button, and the size can be rotated through a few options using the B button.
Shaking the device will clear the screen just like the real toy, but to prevent accidental erasing of your masterpiece, there is a countdown. The device must detect shaking for about 2 seconds. To help visualize this, the five LEDs will count down and a tone will play for each detected shake. As a backup, the SELECT button can also be held for 2 seconds to simulate a shake. Currently there is no way to save the images as the flash memory on the PyBadge is not writeable from the device. ☹
 RoboPandaPDX
 Jacob Christ
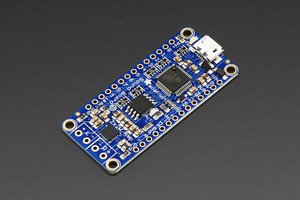
 Makers Making Change