 makeTVee
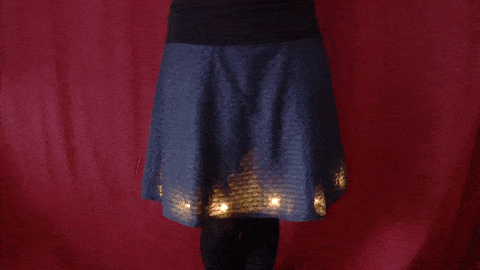
Video showing the fist implemented light effects:
- bouncing balls (motion triggered)
- meteor rain
- fire
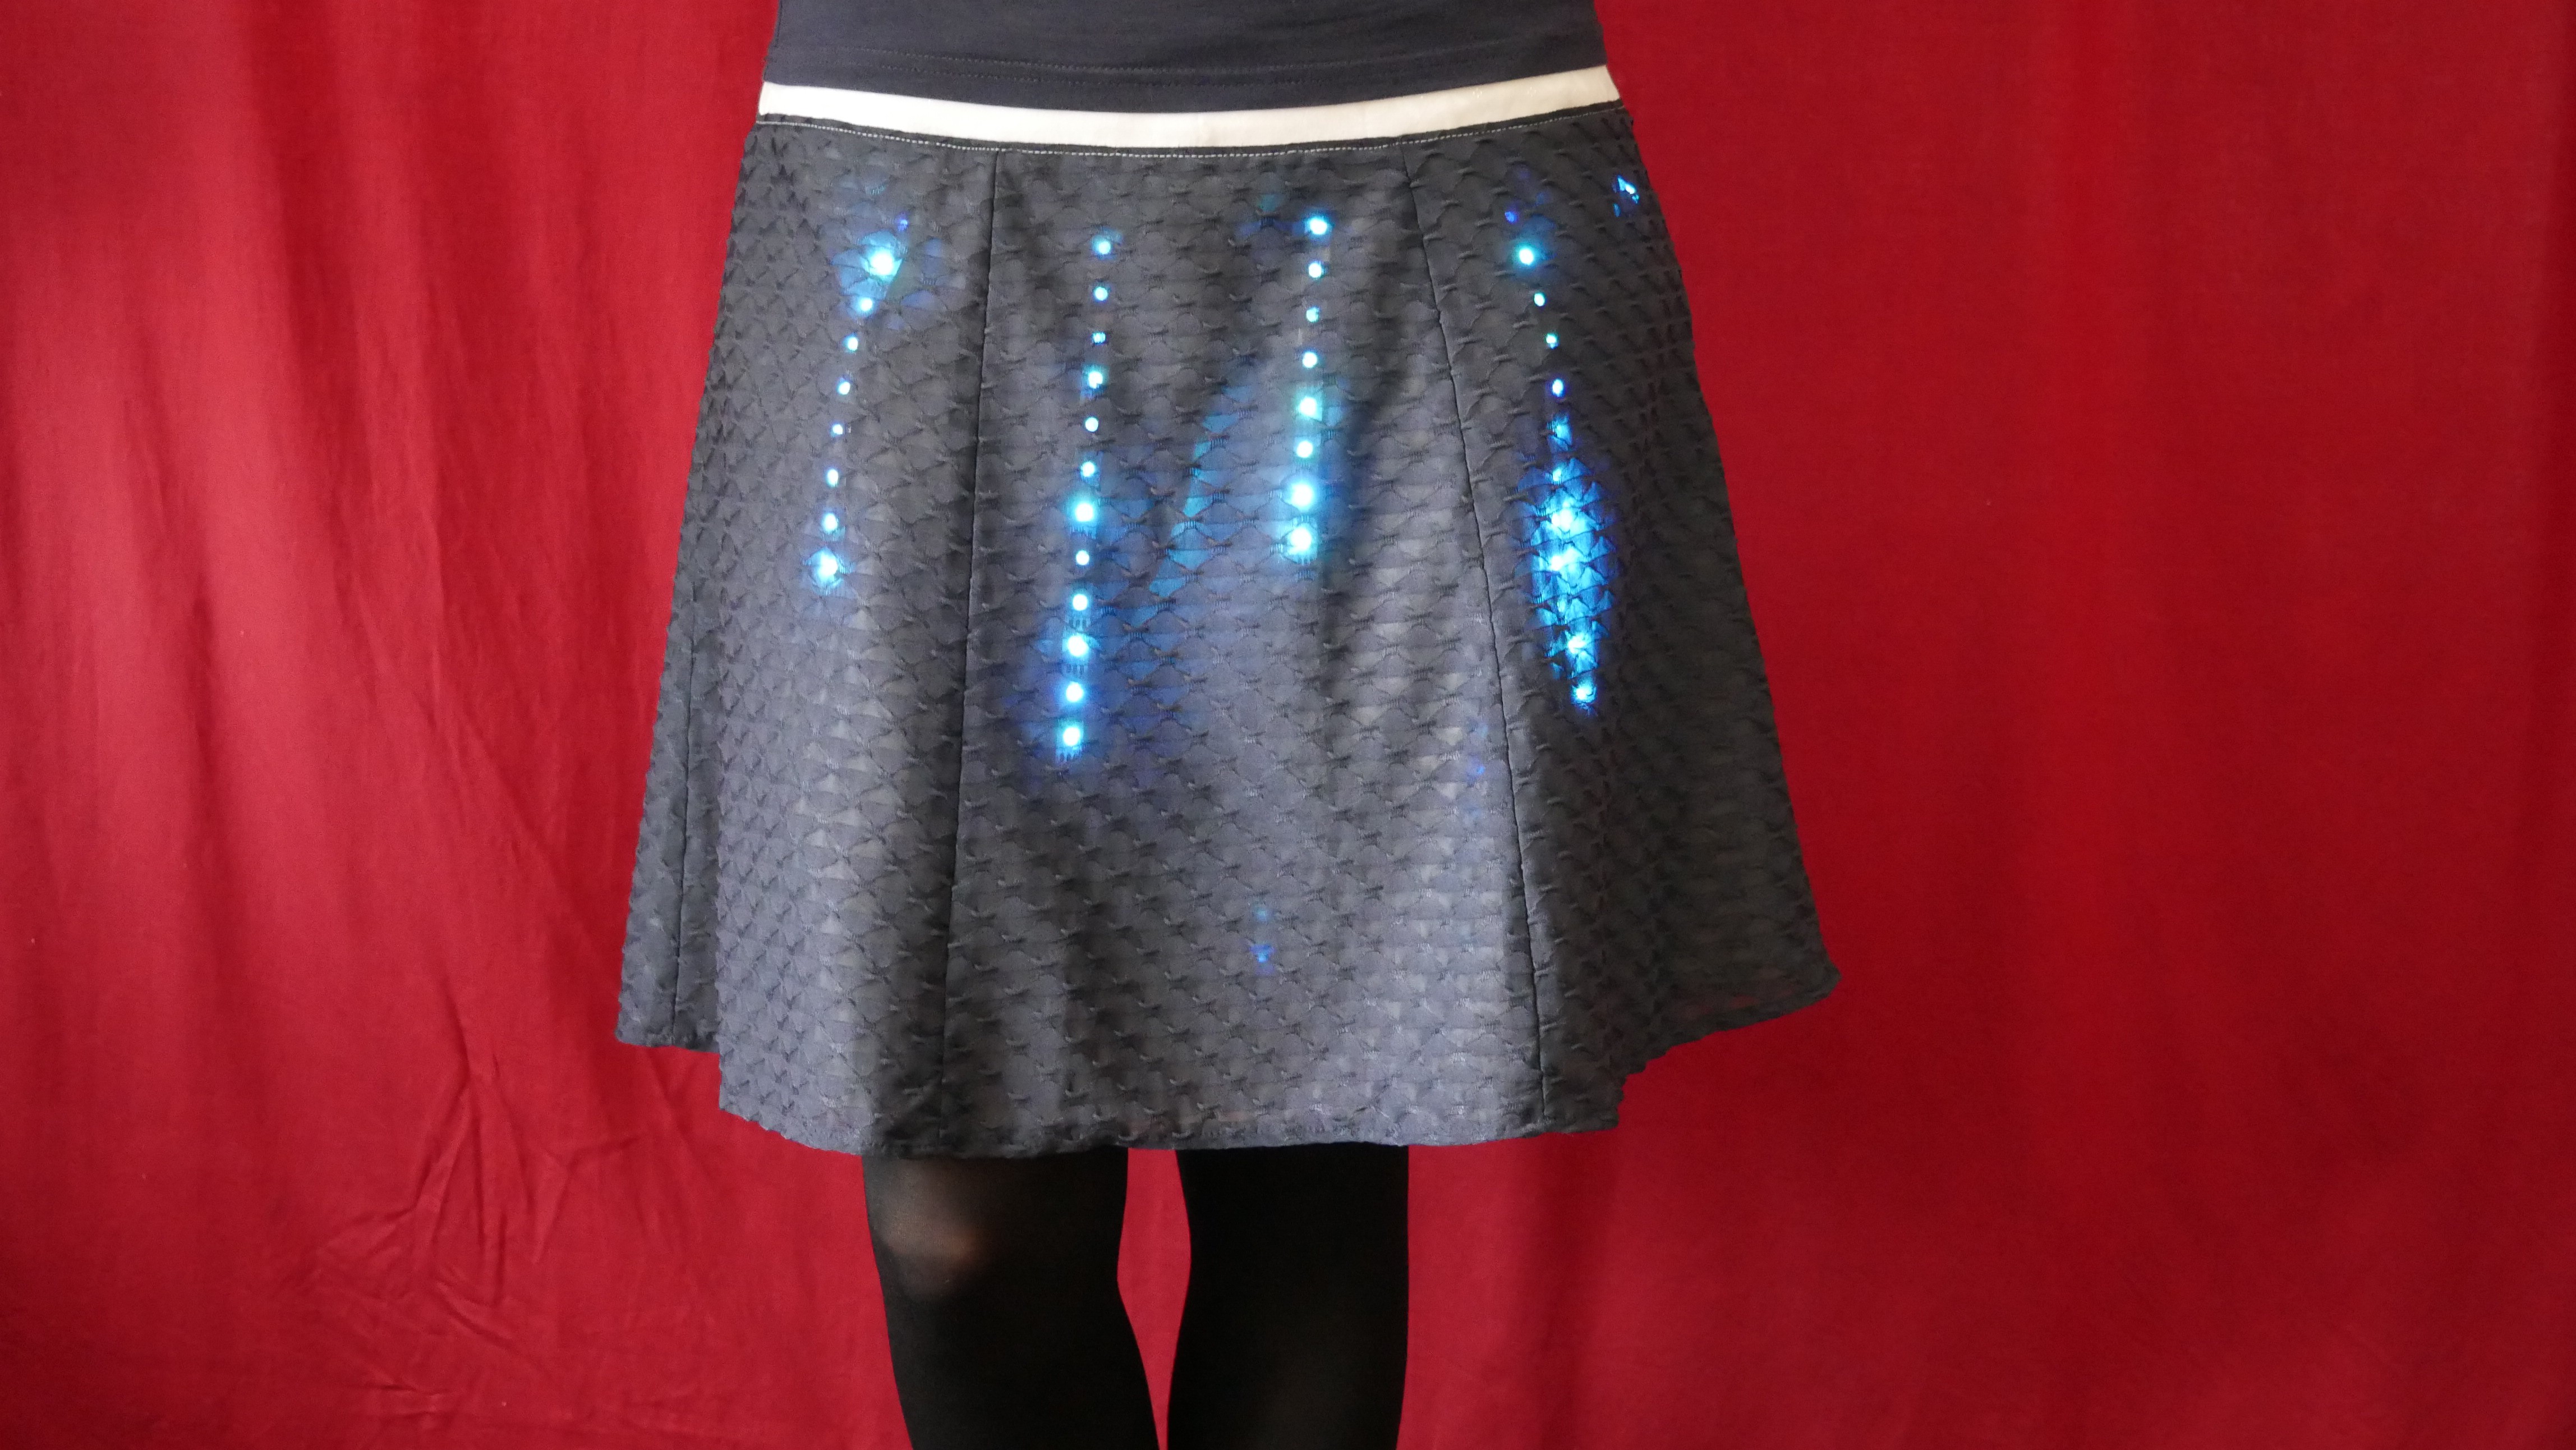
DIY Skirt with 120 Neopixel LEDs and motion detection
Already have an account? Log in.
To make the experience fit your profile, pick a username and tell us what interests you.
Video showing the fist implemented light effects:
meteor_rain.inoMeteor rain example from the videoino - 2.66 kB - 02/03/2021 at 17:50 |
|
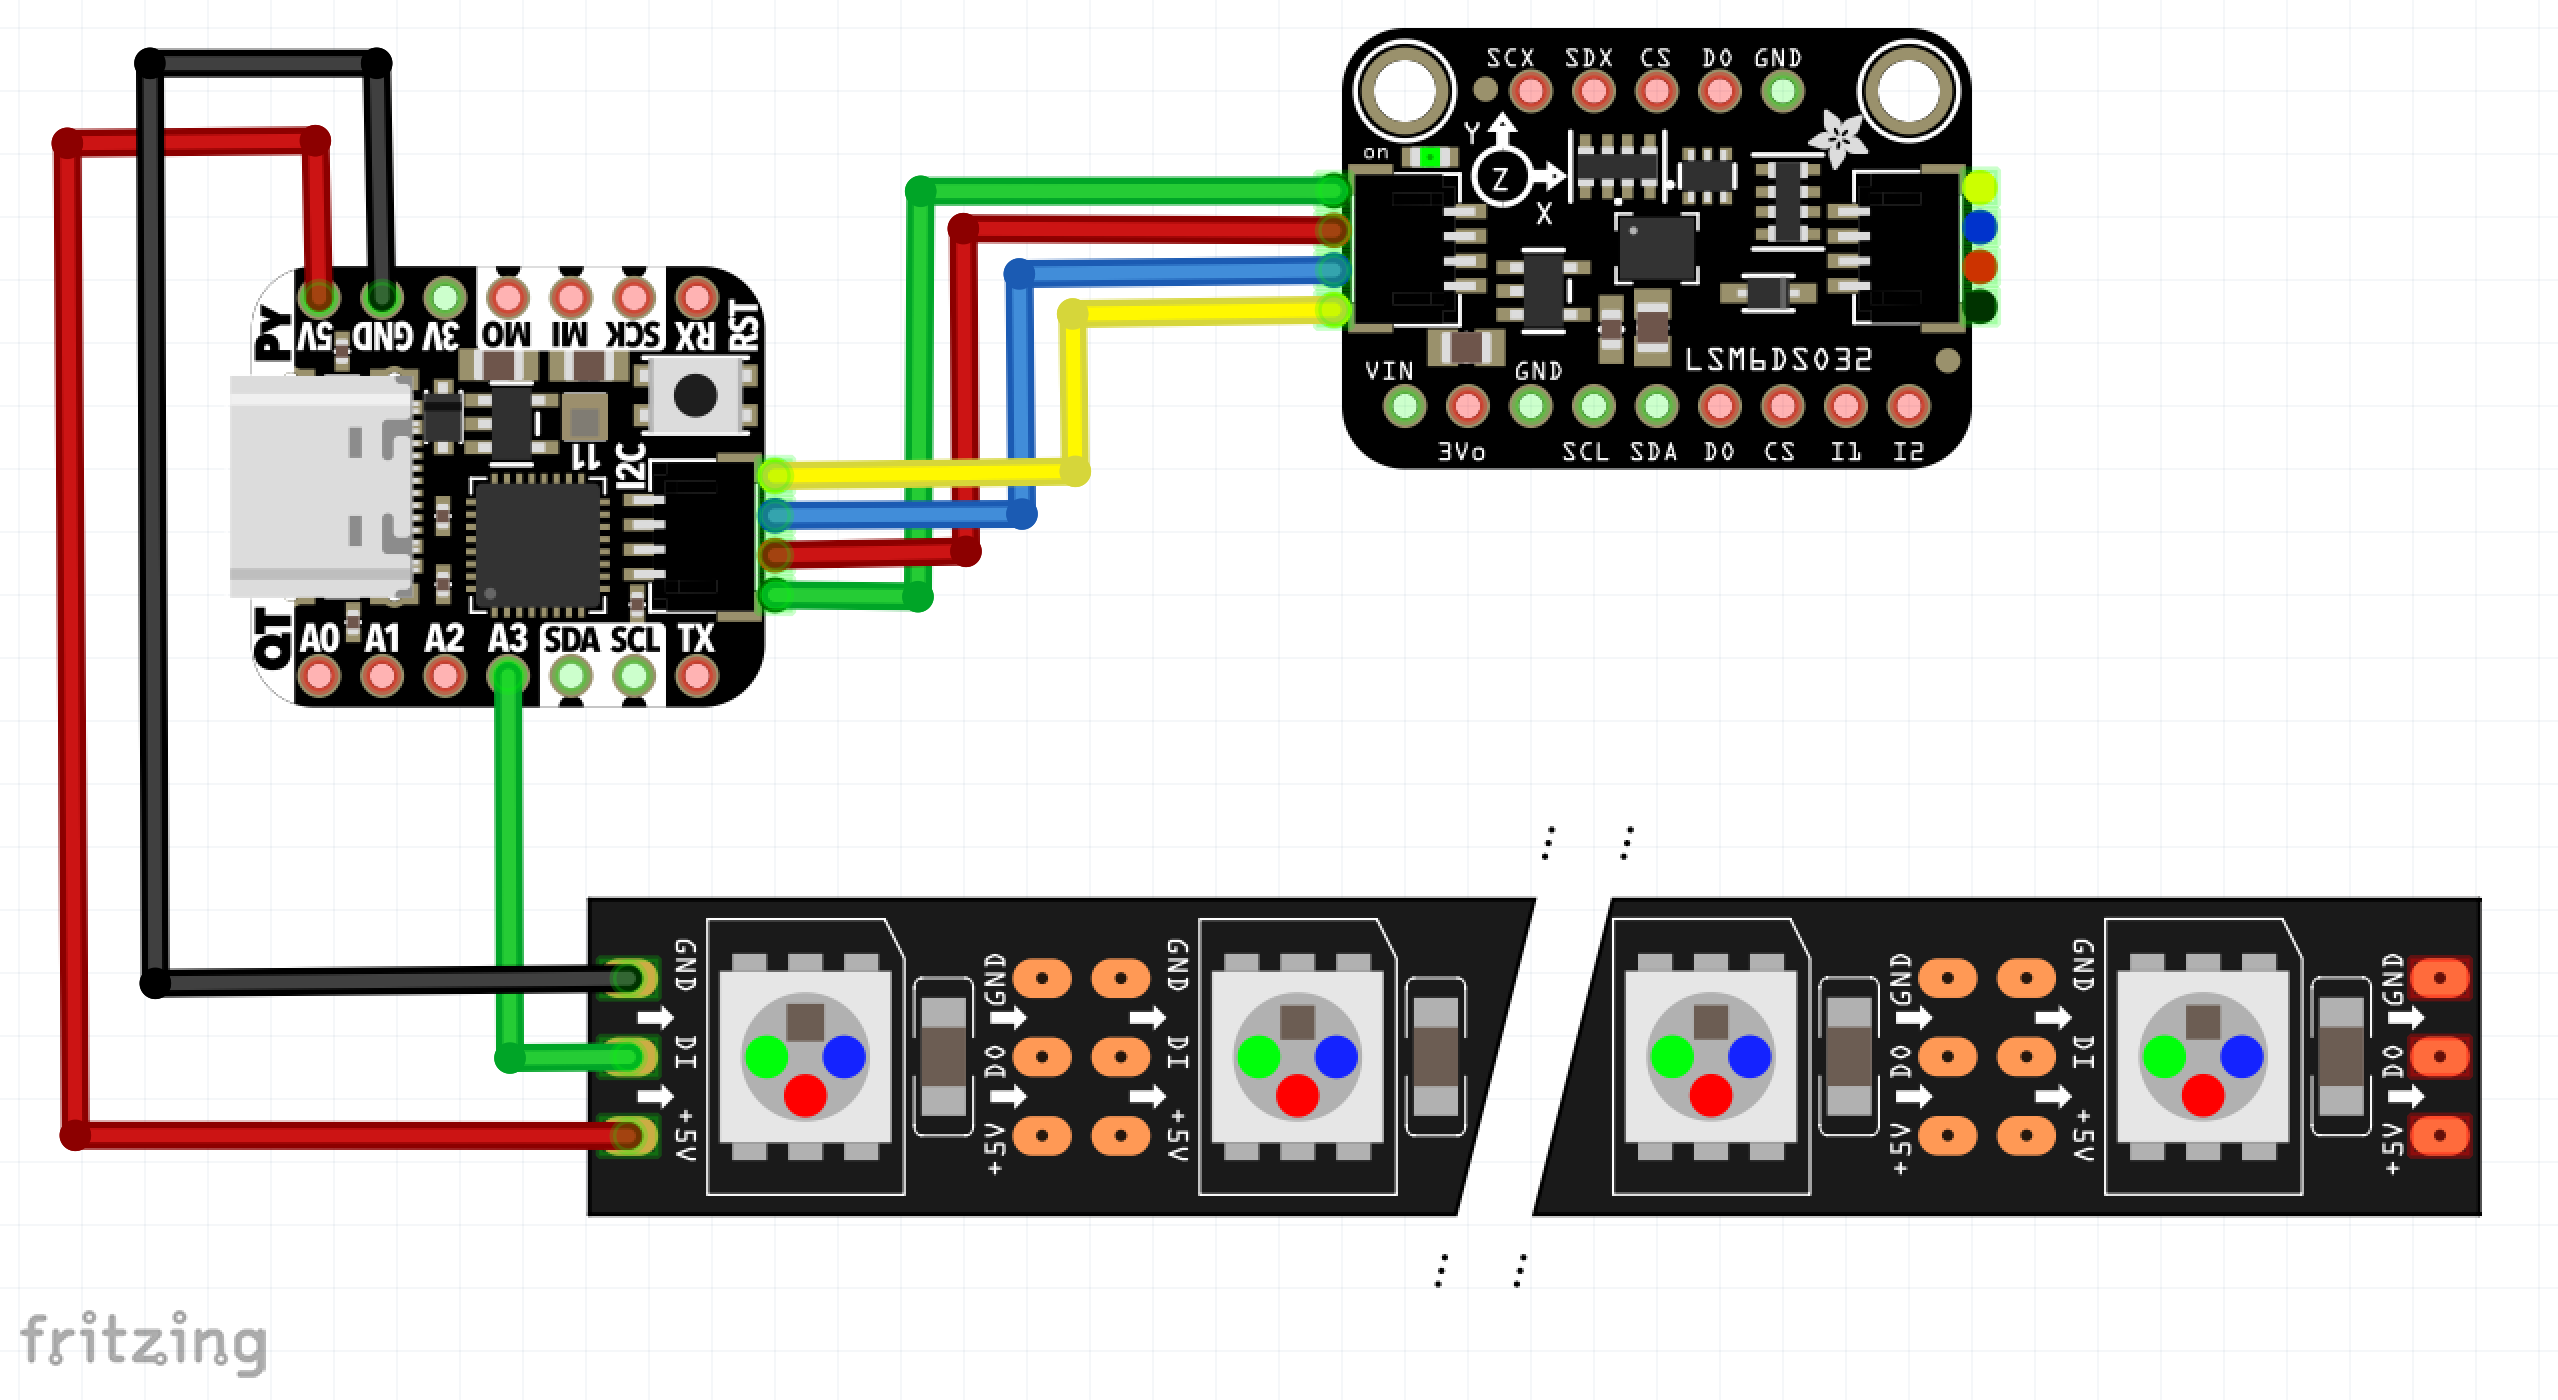
Simple circuit diagram for connecting the strip and sensor:
Simple example using the following lib: https://github.com/ArminiusM/Neopixel which I have found on https://www.tweaking4all.com/hardware/arduino/adruino-led-strip-effects/
To install the library, you have to download the AGNeoPatterns folder from the repository above, put it into a zip-file and include this AGNeoPatterns.zip in the Arduino IDE as a library.
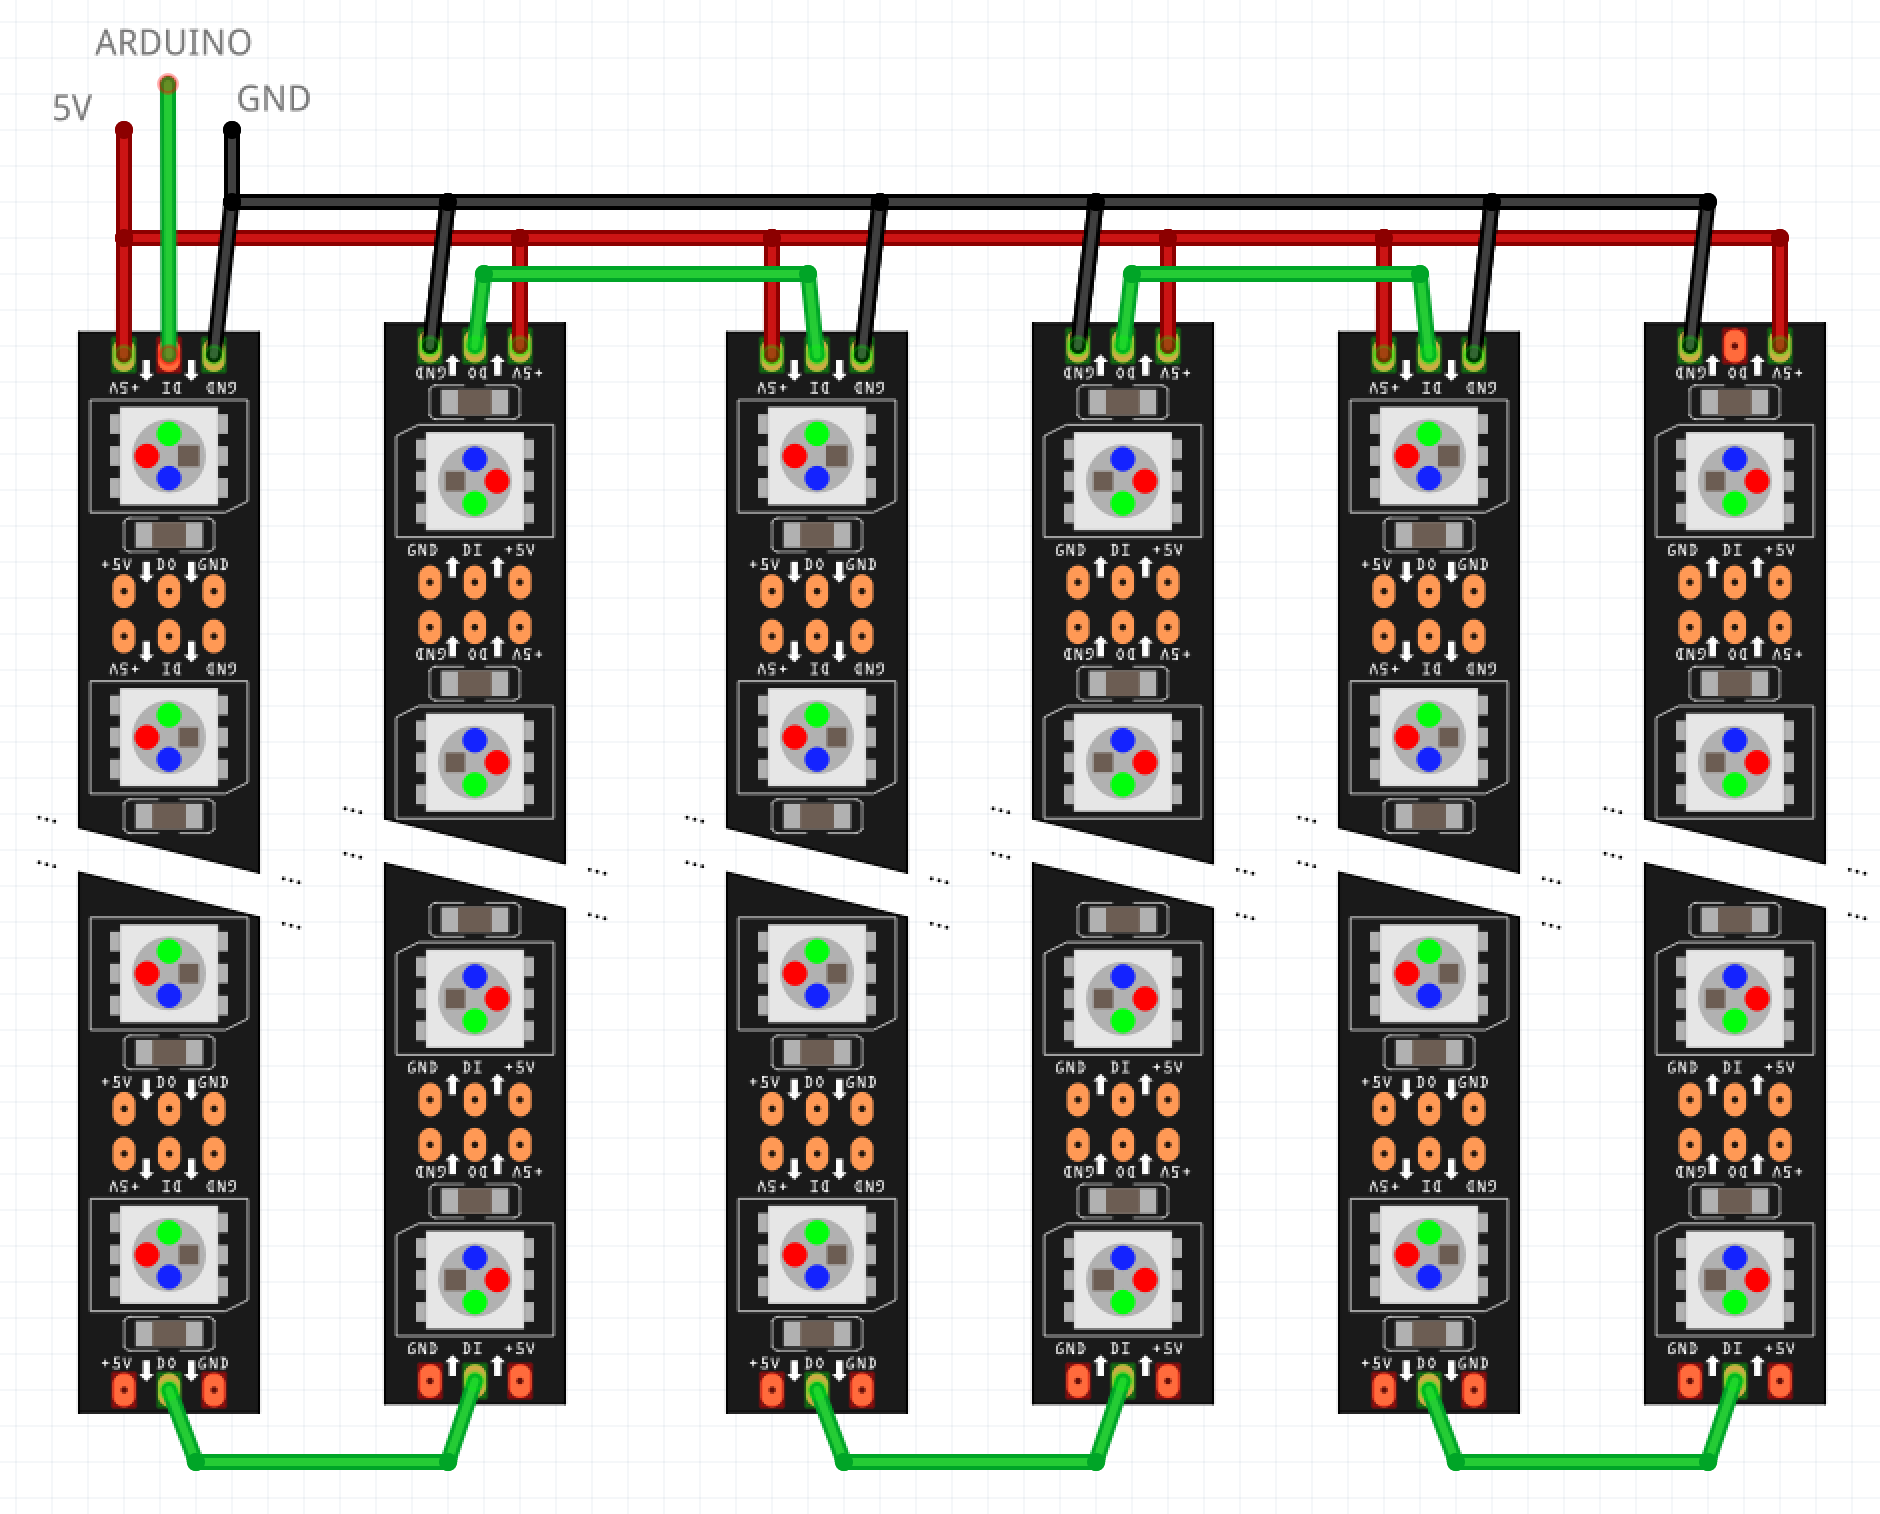
It allows me to define virtual strip segments in a long LED strip, so I can control the 6 strips separately even if they are connected to a single pin of the controller.
added to my Github: https://github.com/makeTVee/ledskirt as a PlatformIO project.
special version with rainbow color change balls, looks even better ;-)
If you are using RGBW strips instead of RGB strips, you have to change the init parameters for the Neopixels:
RGB: npNeoPixel pixels = npNeoPixel(20, NeoPin, NEO_GRB + NEO_KHZ800, 1.0);
RGBW: npNeoPixel pixels = npNeoPixel(20, NeoPin, NEO_GRBW + NEO_KHZ800, 1.0);
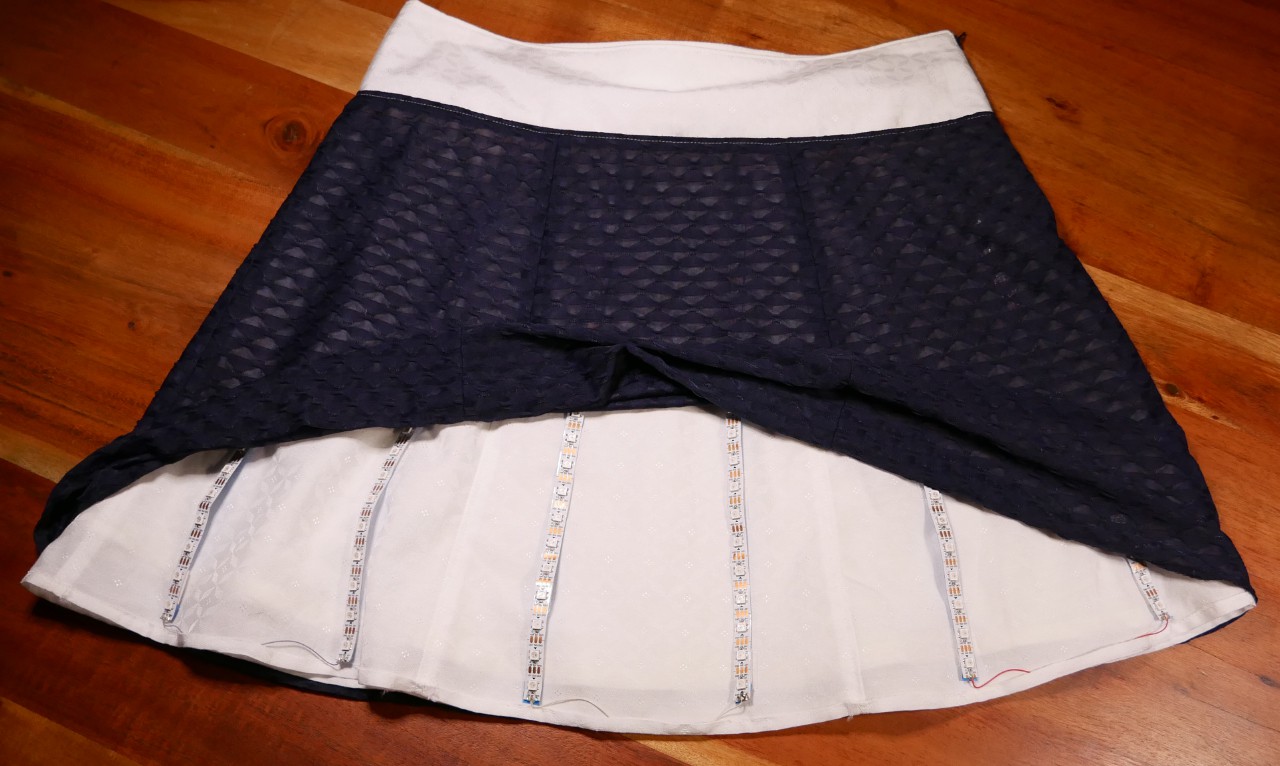
6 LED stripes with 20 LEDs each are installed only at the front of the skirt. There are no LEDs at the back because of practical reasons (sitting, rest room etc.).
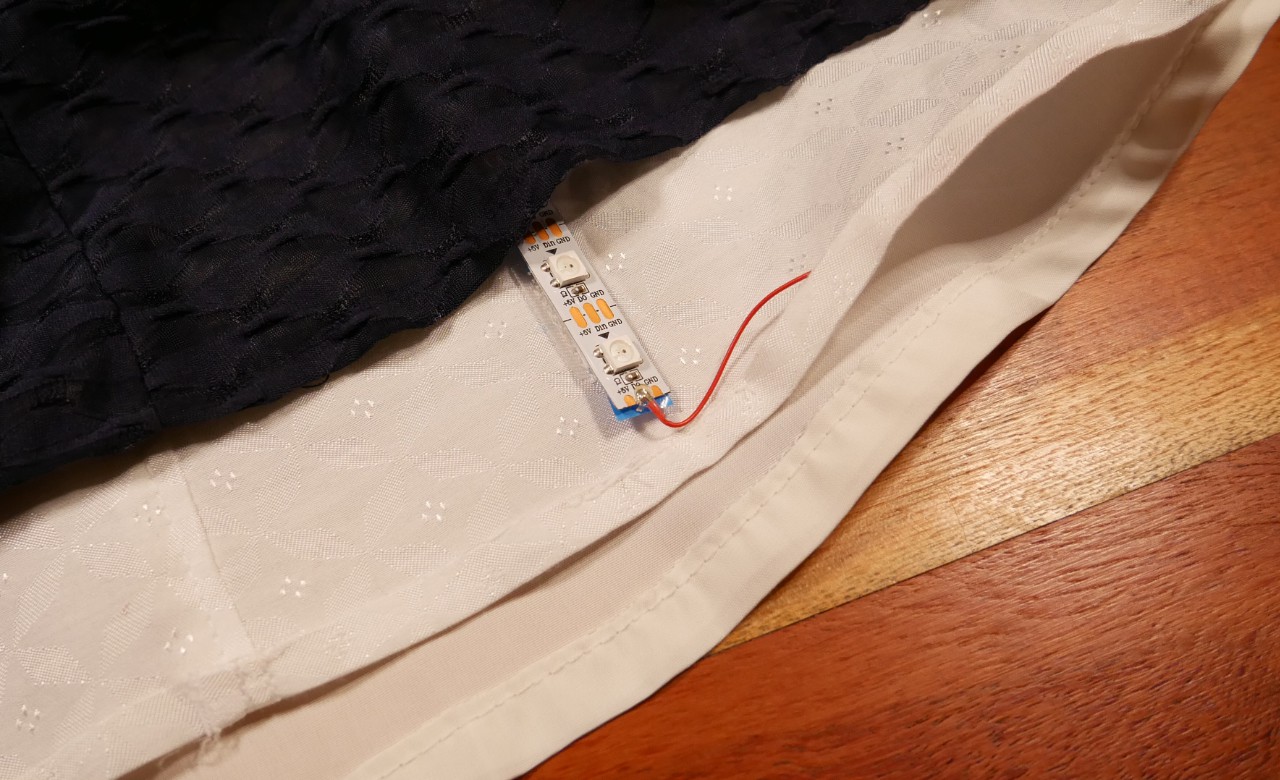
The stripes are connected in a serpentine layout, so only one pin on the QT PY is used. Therefore, there are three connections at the bottom of the skirt, which are secured on the stripe with some hot glue (not the final solution).
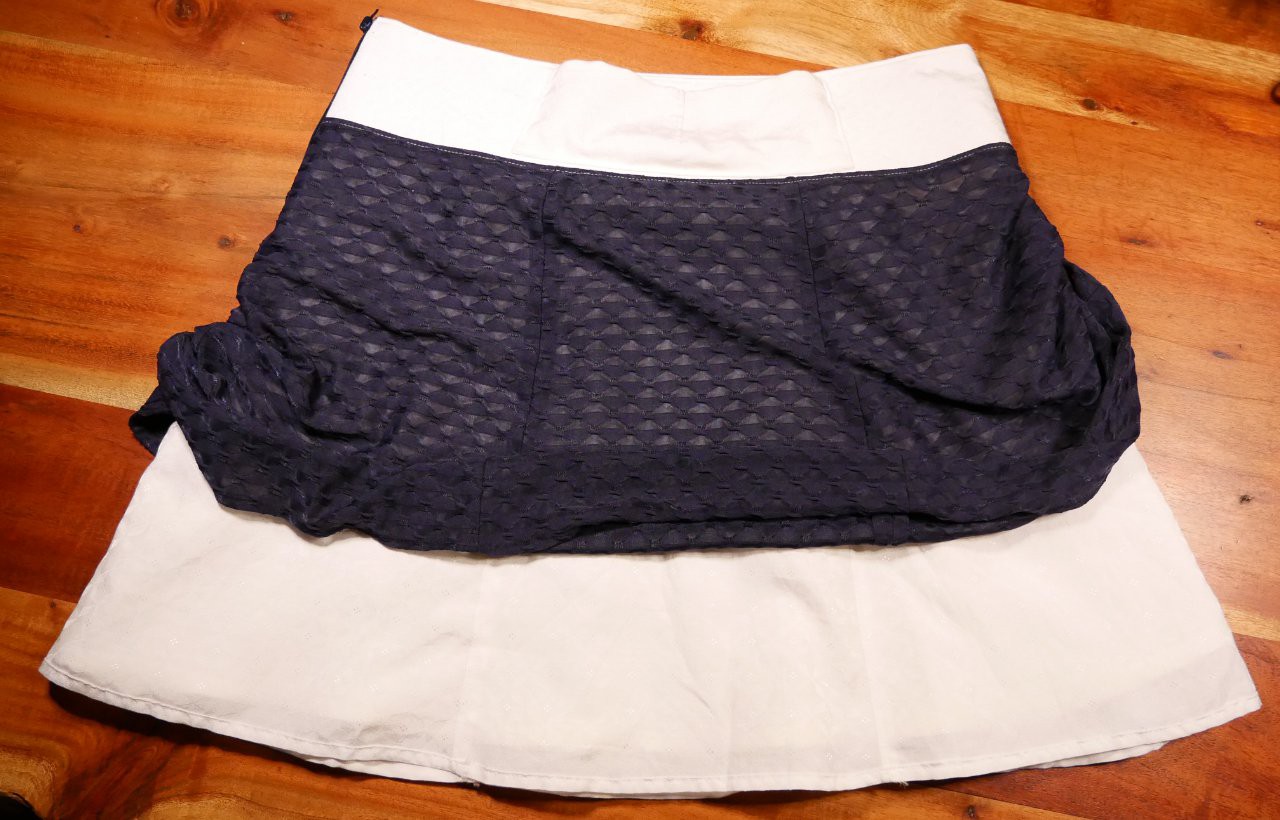
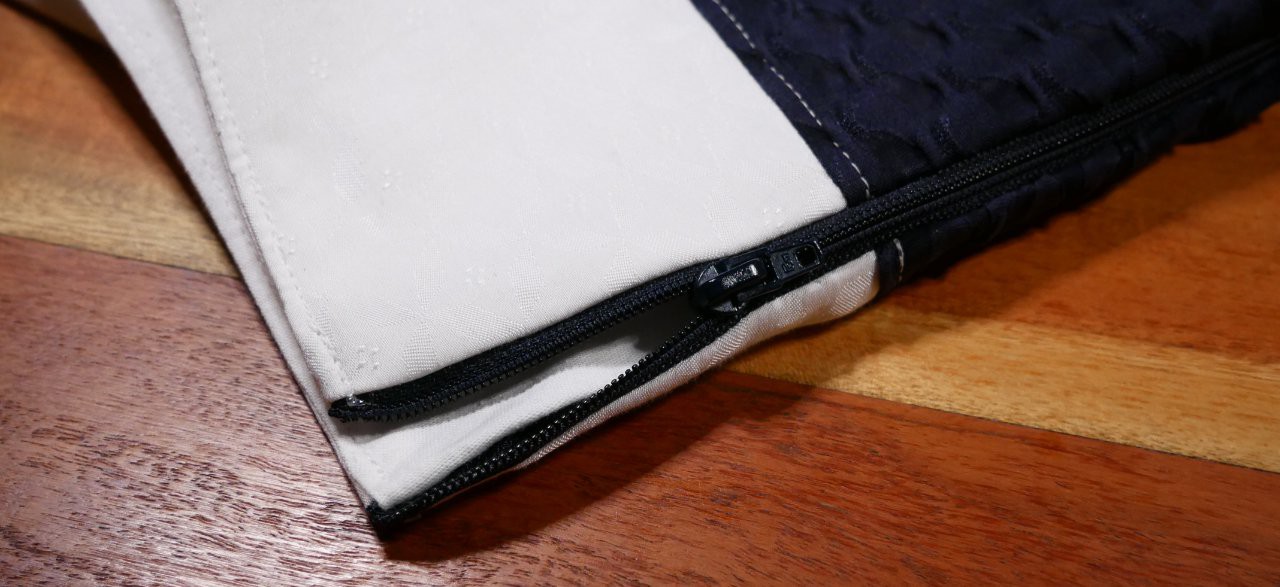
The skirt itself has 3 layers:
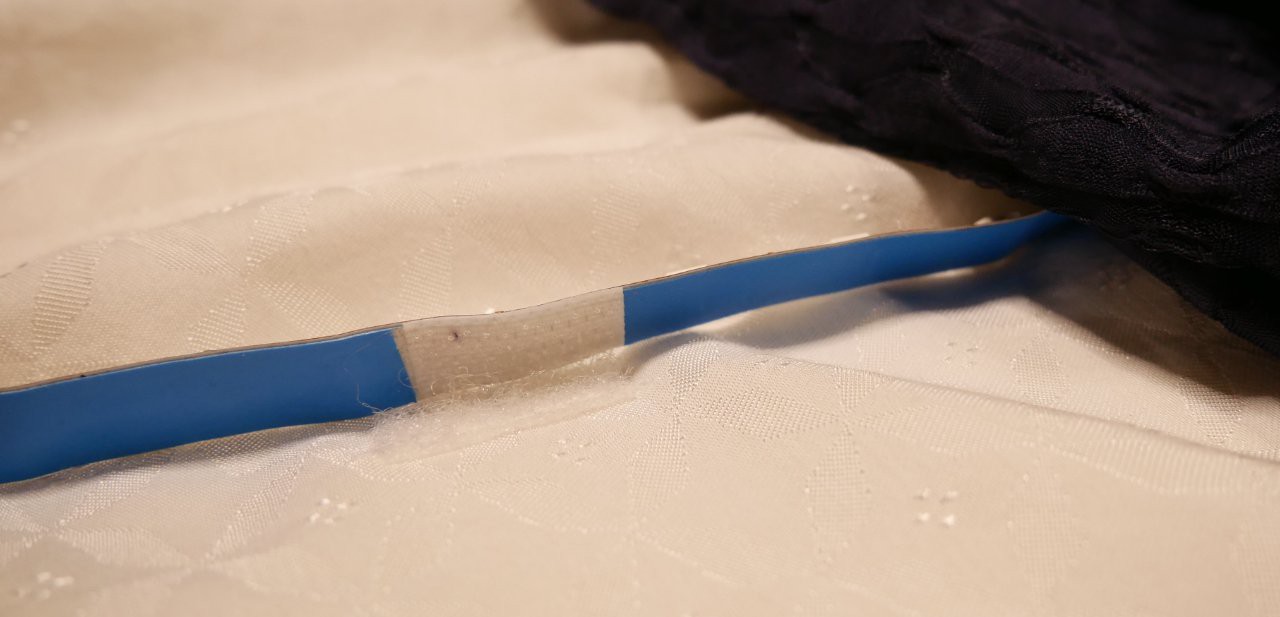
The stripes are attached to the skirt with Velcro, one side glued to the stripe, the other one sewed to the fabric. Every stripe has 4 Velcro points.
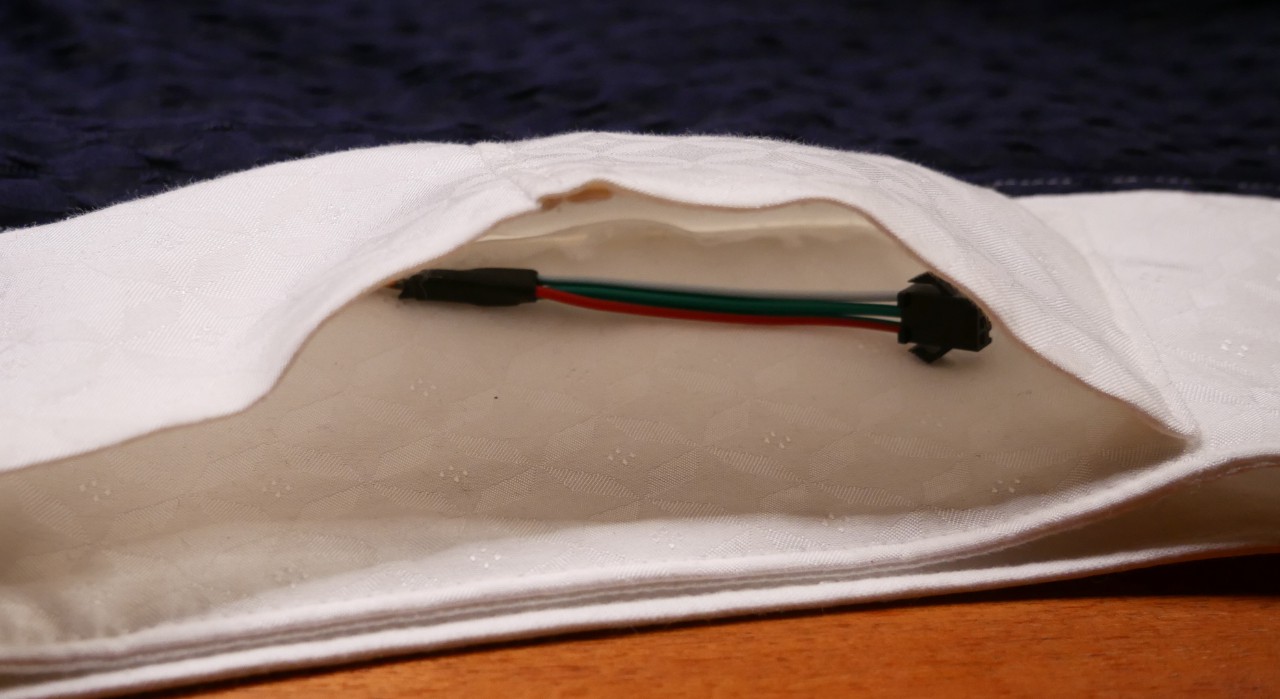
Power is distributed at the top of the stripes and hidden in the white double layer at the top.
Shrinking tubes are already installed, but not shrinked yet.
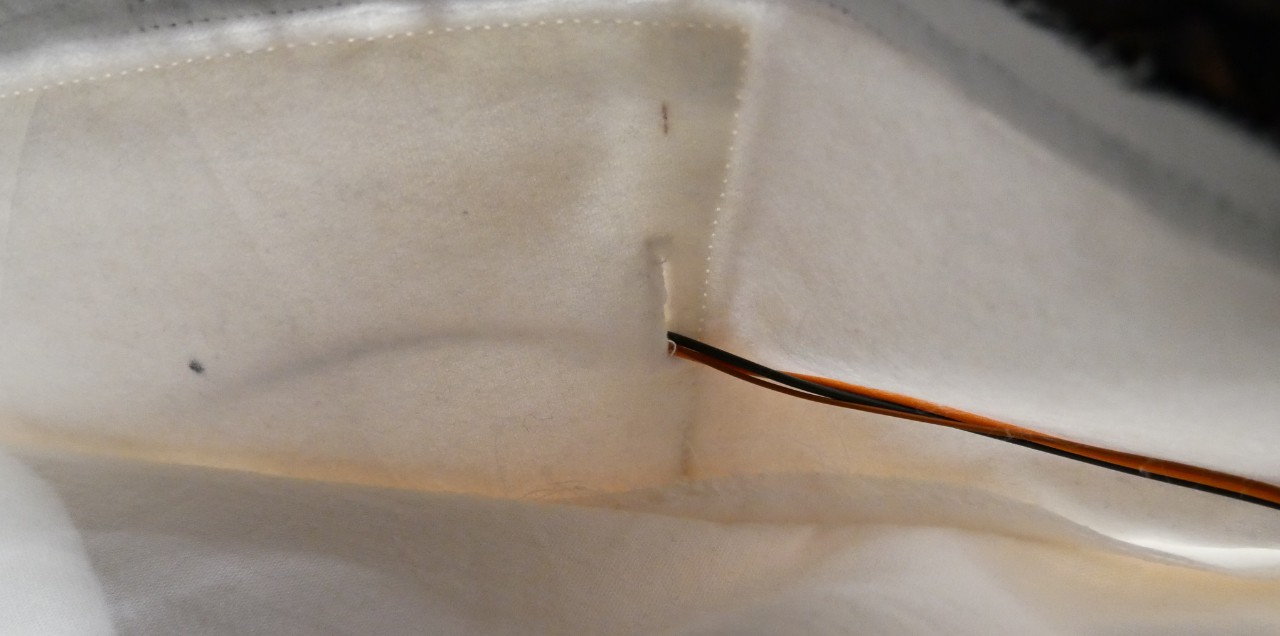
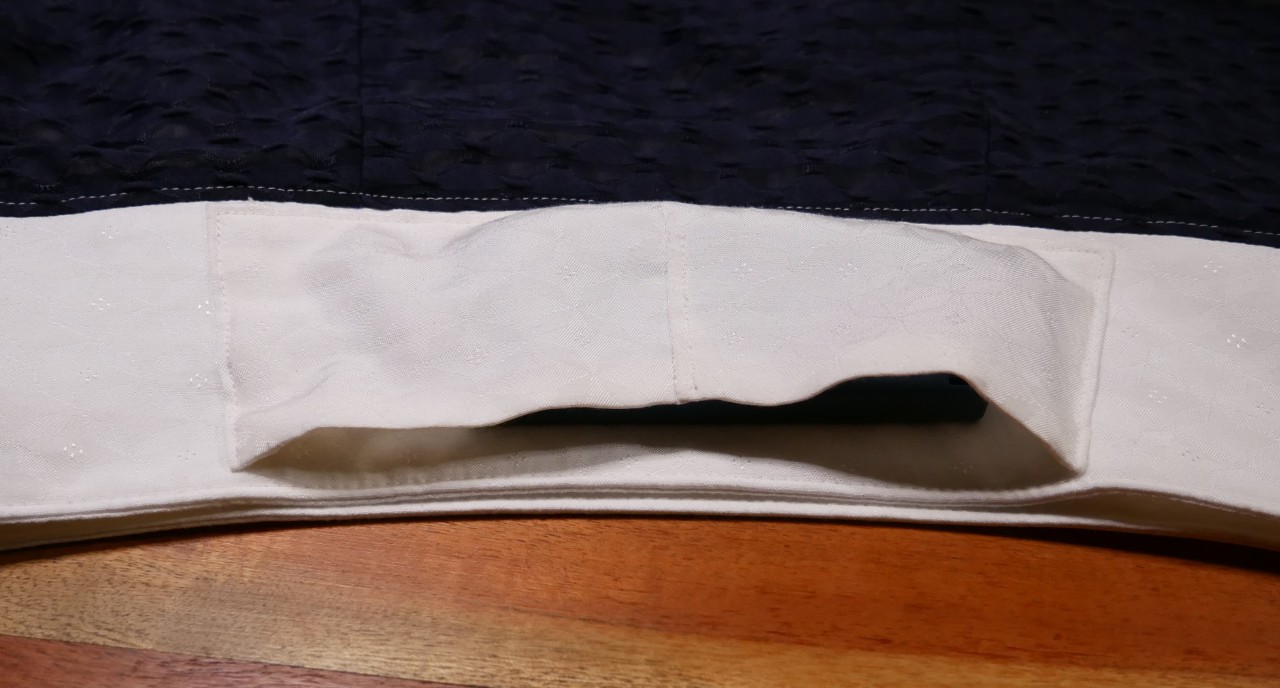
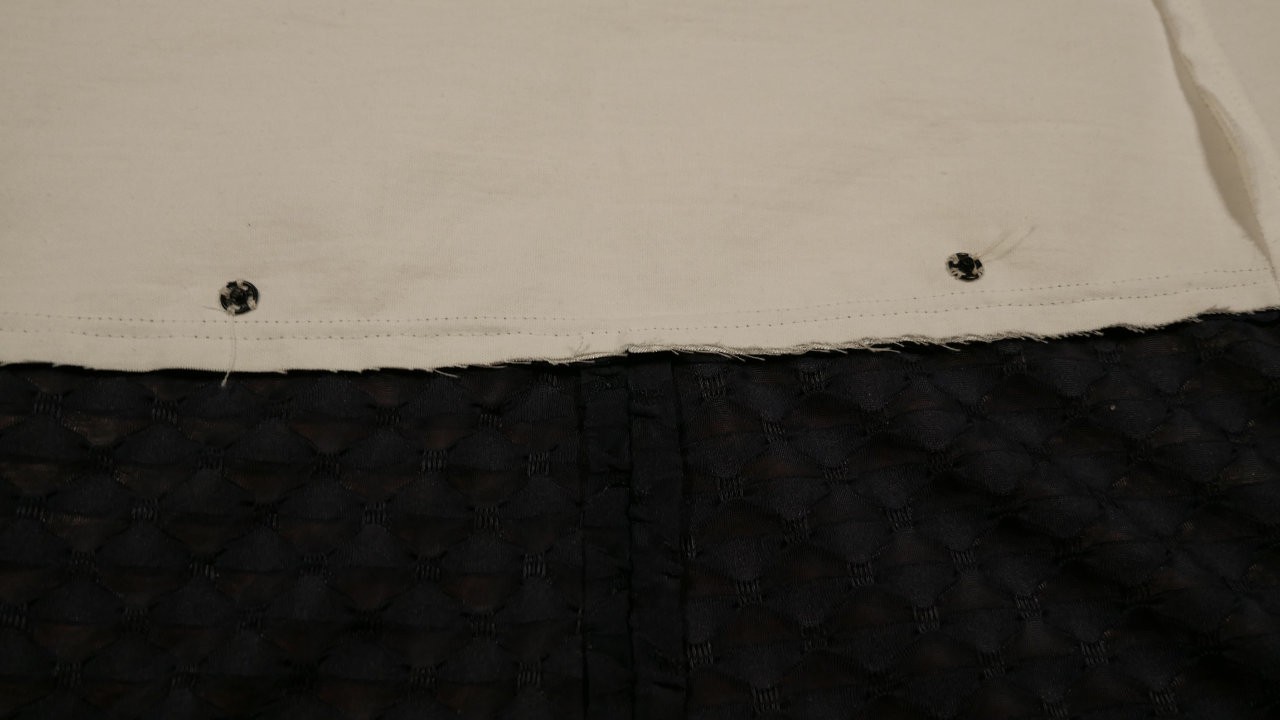
The cable is guided to a pocket at the back of the skirt. There is a buttonhole to reach the pocket from inside.
As mentioned, there are no LEDs at the back for better daily use. Of course, for special reasons (e.g. dancing), this skirt can be easily updated to a full LED set by adding stripes on the back via Velcro.
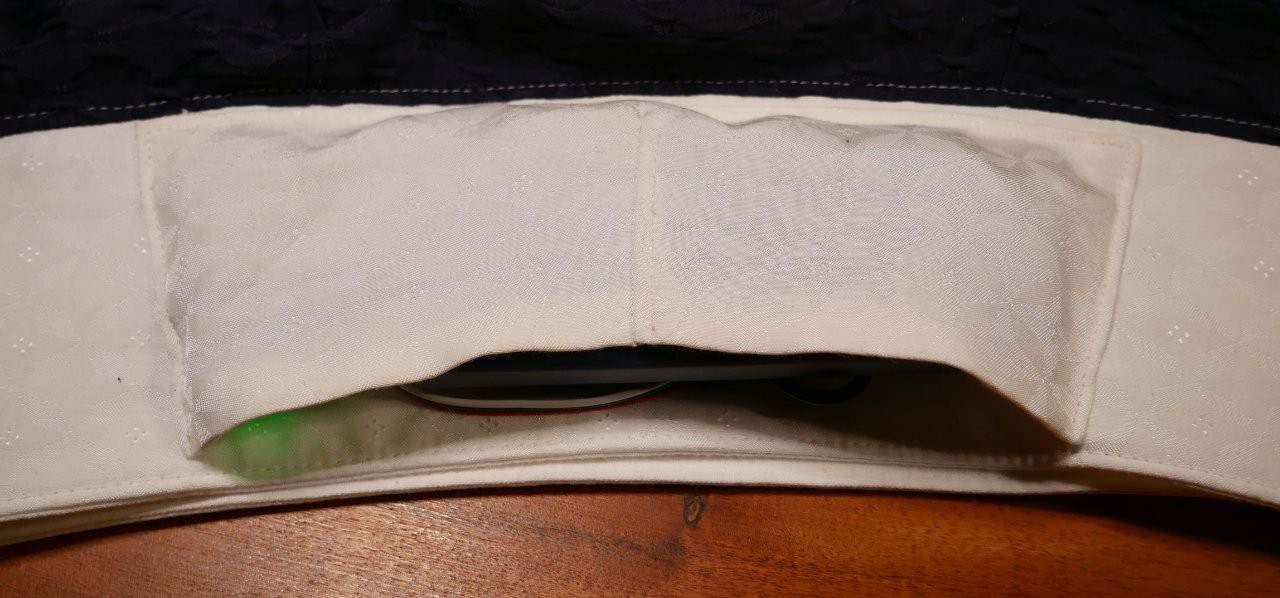
The pocket at the top of the back is large enough to hold the USB power bank and the controller, but still small enough to hide it under a shirt.
All 6 stripes are accessed by this single cable ending in the pocket.
If everything is install, the pocket looks like this
Apart from this, the skirt is a normal skirt with full functionality ;-) So it is also a nice skirt without LEDs. But why should someone do this....
So better switch the lights on:
:-)
Some pictures from the build process:
Pattern cut out:
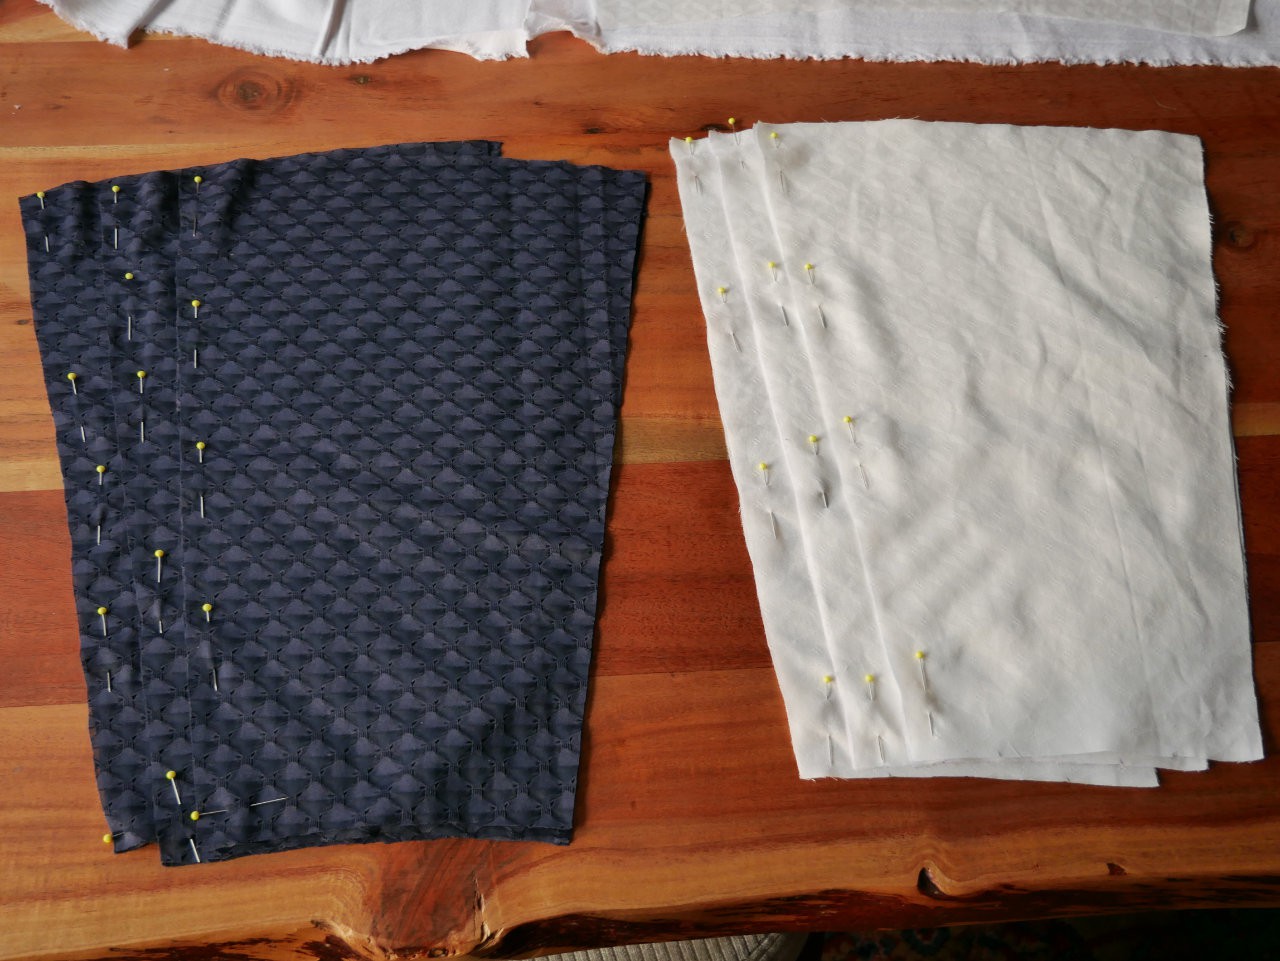
Velcro points on fabric: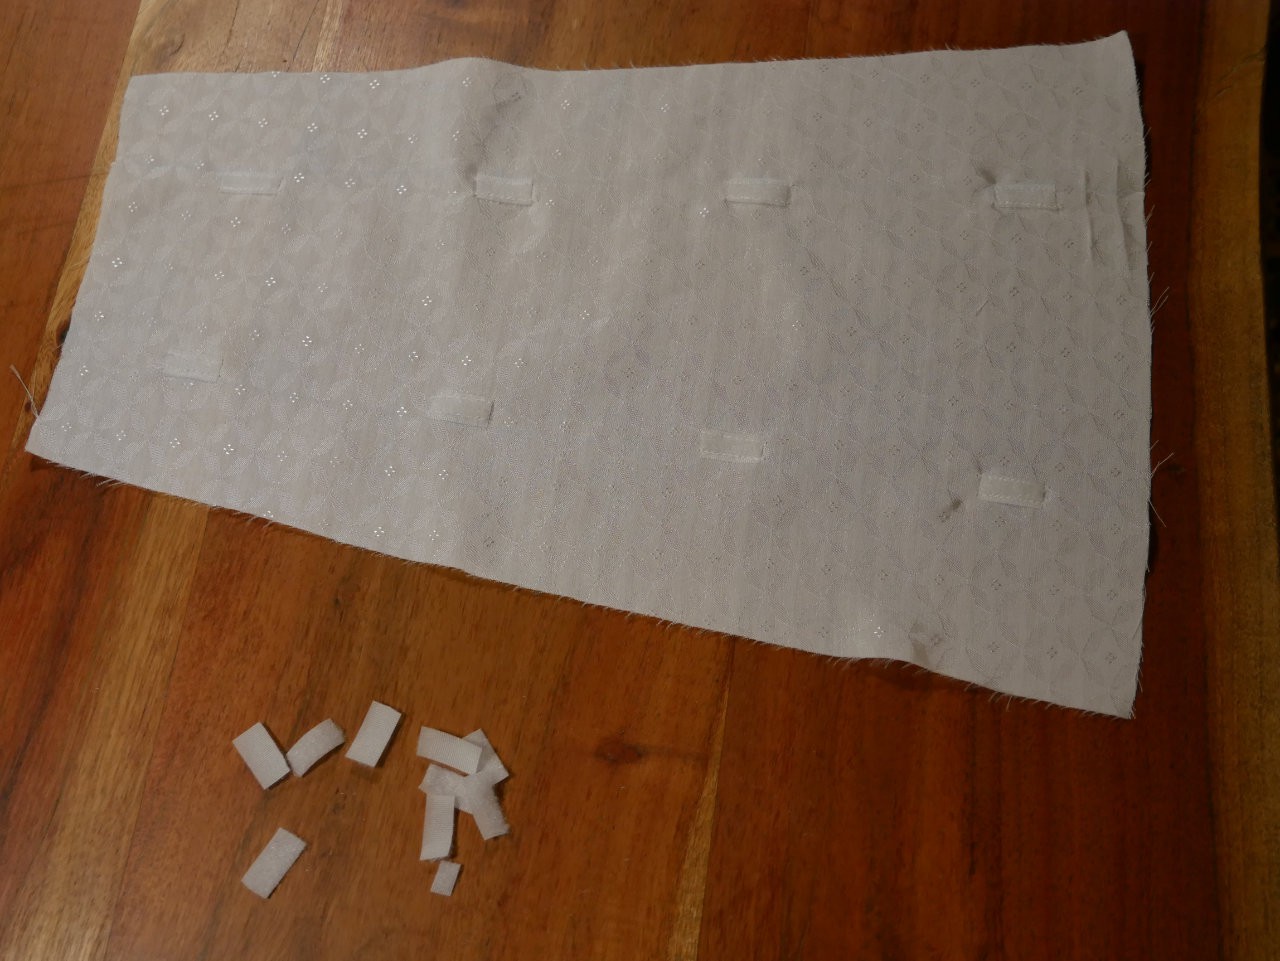
Fastener on waist band:


Thank you! Yes, it's a pretty simple LED setup, but it looks great and even better in real life. It is so much fun seeing the people's reaction on the street.
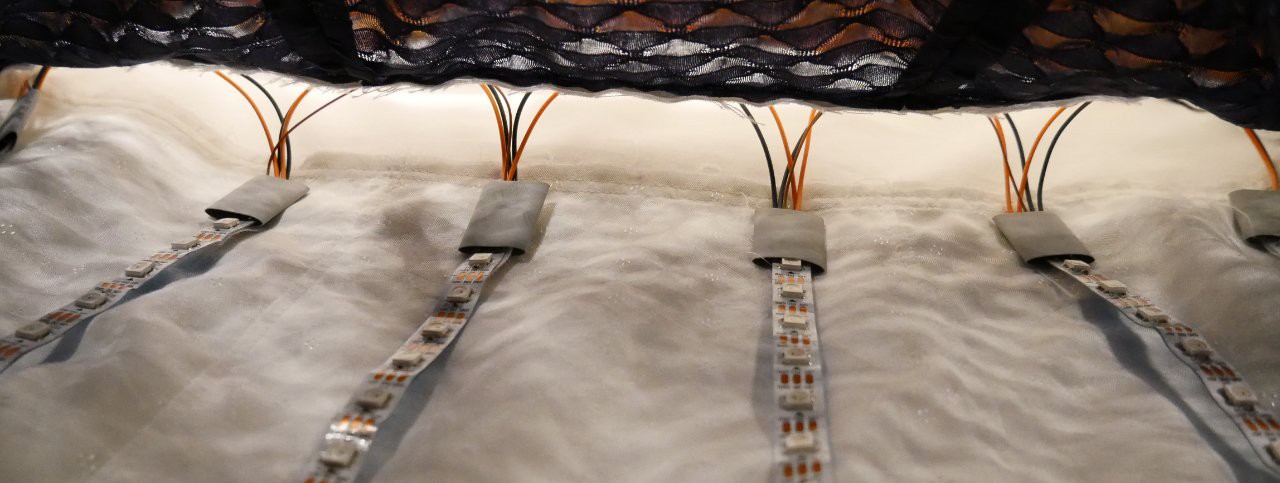
 LED arrangement (serpentine layout):
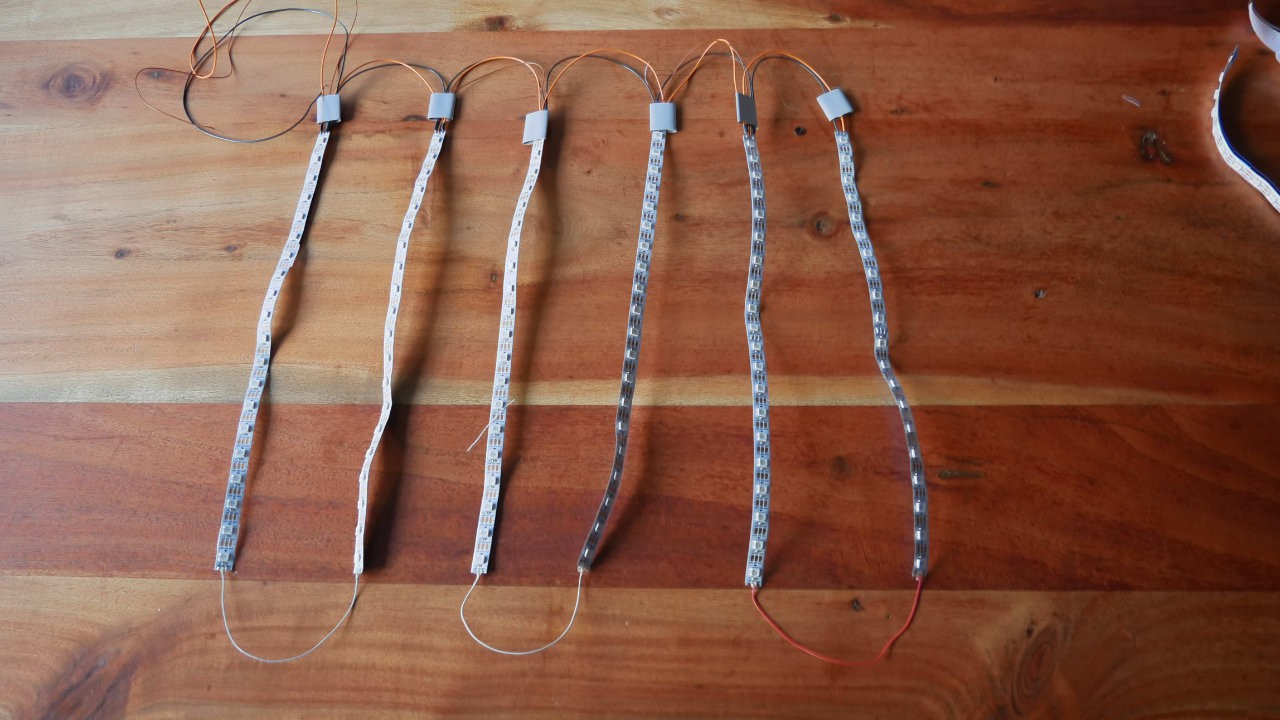
Wow! That came out great. I absolutely love the bouncing ball animations.
The material does a great job of obscuring the strips without blocking the light. Even thought I know the trick it fools my eye into thinking there's something more complex than a set of columns going on here. Love it!