To program the dsPIC, I use the MPLAB X IDE from Microchip.
The initial setup is fairly straightforward. After selecting the device and programming tool, it creates an empty project.
To save some time perusing through the datasheet, I use the MPLAB Code Configurator (MCC). This tool allows setting some of the most used registers through a GUI and even visualizes the package's pin assignment.
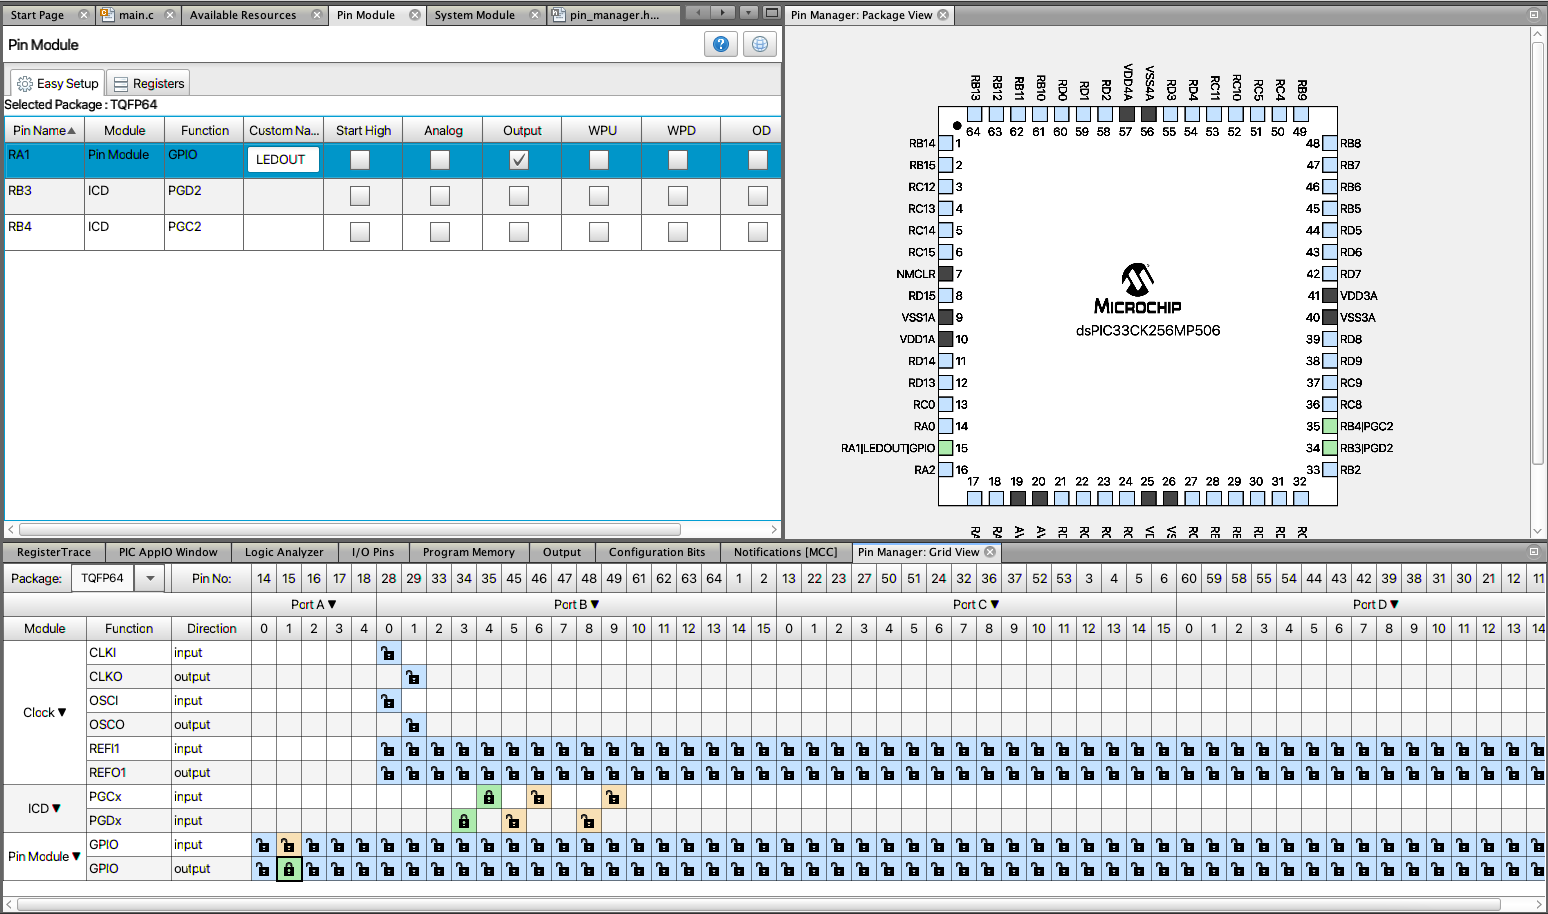
For this blink test, I set pin 15 as output and assigned a custom name LEDOUT. On the breadboard, I added a small LED to pin 15 with a current limiting resistor - all in a way such that the microcontroller acts as a sink and the absolute maximum current rating of the IO pin is satisfied.
Back in the IDE, I used the main.c file created by MCC and included some of the generated files.
Next, the instruction cycle clock (FCY) needs to be defined for the wait function to work. The frequency of the selected internal oscillator (FOSC) is 8MHz, and the datasheet states that the FCY is half that of FOSC.
#define FCY 4000000UL //UL suffix sets the data type to be unsigned long
Now I add the blink loop, which uses the custom name from MCC:
int main(void)
{
    // initialize the device
    SYSTEM_Initialize();
    while (1)
    {
        LEDOUT_Toggle();
        __delay_ms(1000);
    }
    return 1;
}
After compilation and upload, the LED blinks.
Discussions
Become a Hackaday.io Member
Create an account to leave a comment. Already have an account? Log In.