dmoisan
-
Installing STM32IDE and modifying the HTTP example project
03/28/2021 at 20:36 • 0 commentsThe STM32H735 Discovery Kit was a new board to me. Normally, for most of ST Microelectronic's other boards, they provide a tool--the STM32CubeMX package--that automatically generates template code based on what modules you require in your project. The Discovery Kit was recently introduced, and the CubeMX tool doesn't have complete board support for it. The STM32Cube IDE is the recommended tool to write code for this board. After much time running in circles, I decided to just rip apart, I mean, adapt existing sample code for this.
Amongst the sample projects for the Discovery Kit, there is a HTTP server project, using the FreeRTOS real time OS, and lwIP, the Light-Weight IP Stack. This was perfect. All of the elements were present. All I needed to do was to enable and include the sample SNTP client.
I built this project with the STM32CubeIDE ("CubeIDE") While I'd much prefer having a toolchain with my favorite software--I already have a multitude of IDE's from Texas Instruments, Microchip and others--I had to go with what STM32 developers are using, and so I will be using CubeIDE. It, like many other IDE's, is built on Eclipse. Love it or hate it, it is a known quantity.
I started by installing CubeIDE, accepting the defaults. During installation, CubeIDE may ask to update the latest firmware for the device. Don't skip this! When ST refers to "firmware", they mean to say, "all of the libraries and HAL's that are needed by your device!" (The ST firmware and libraries are also on Github.) and then opening CubeIDE and selecting New/New STM32 Project:
![]()
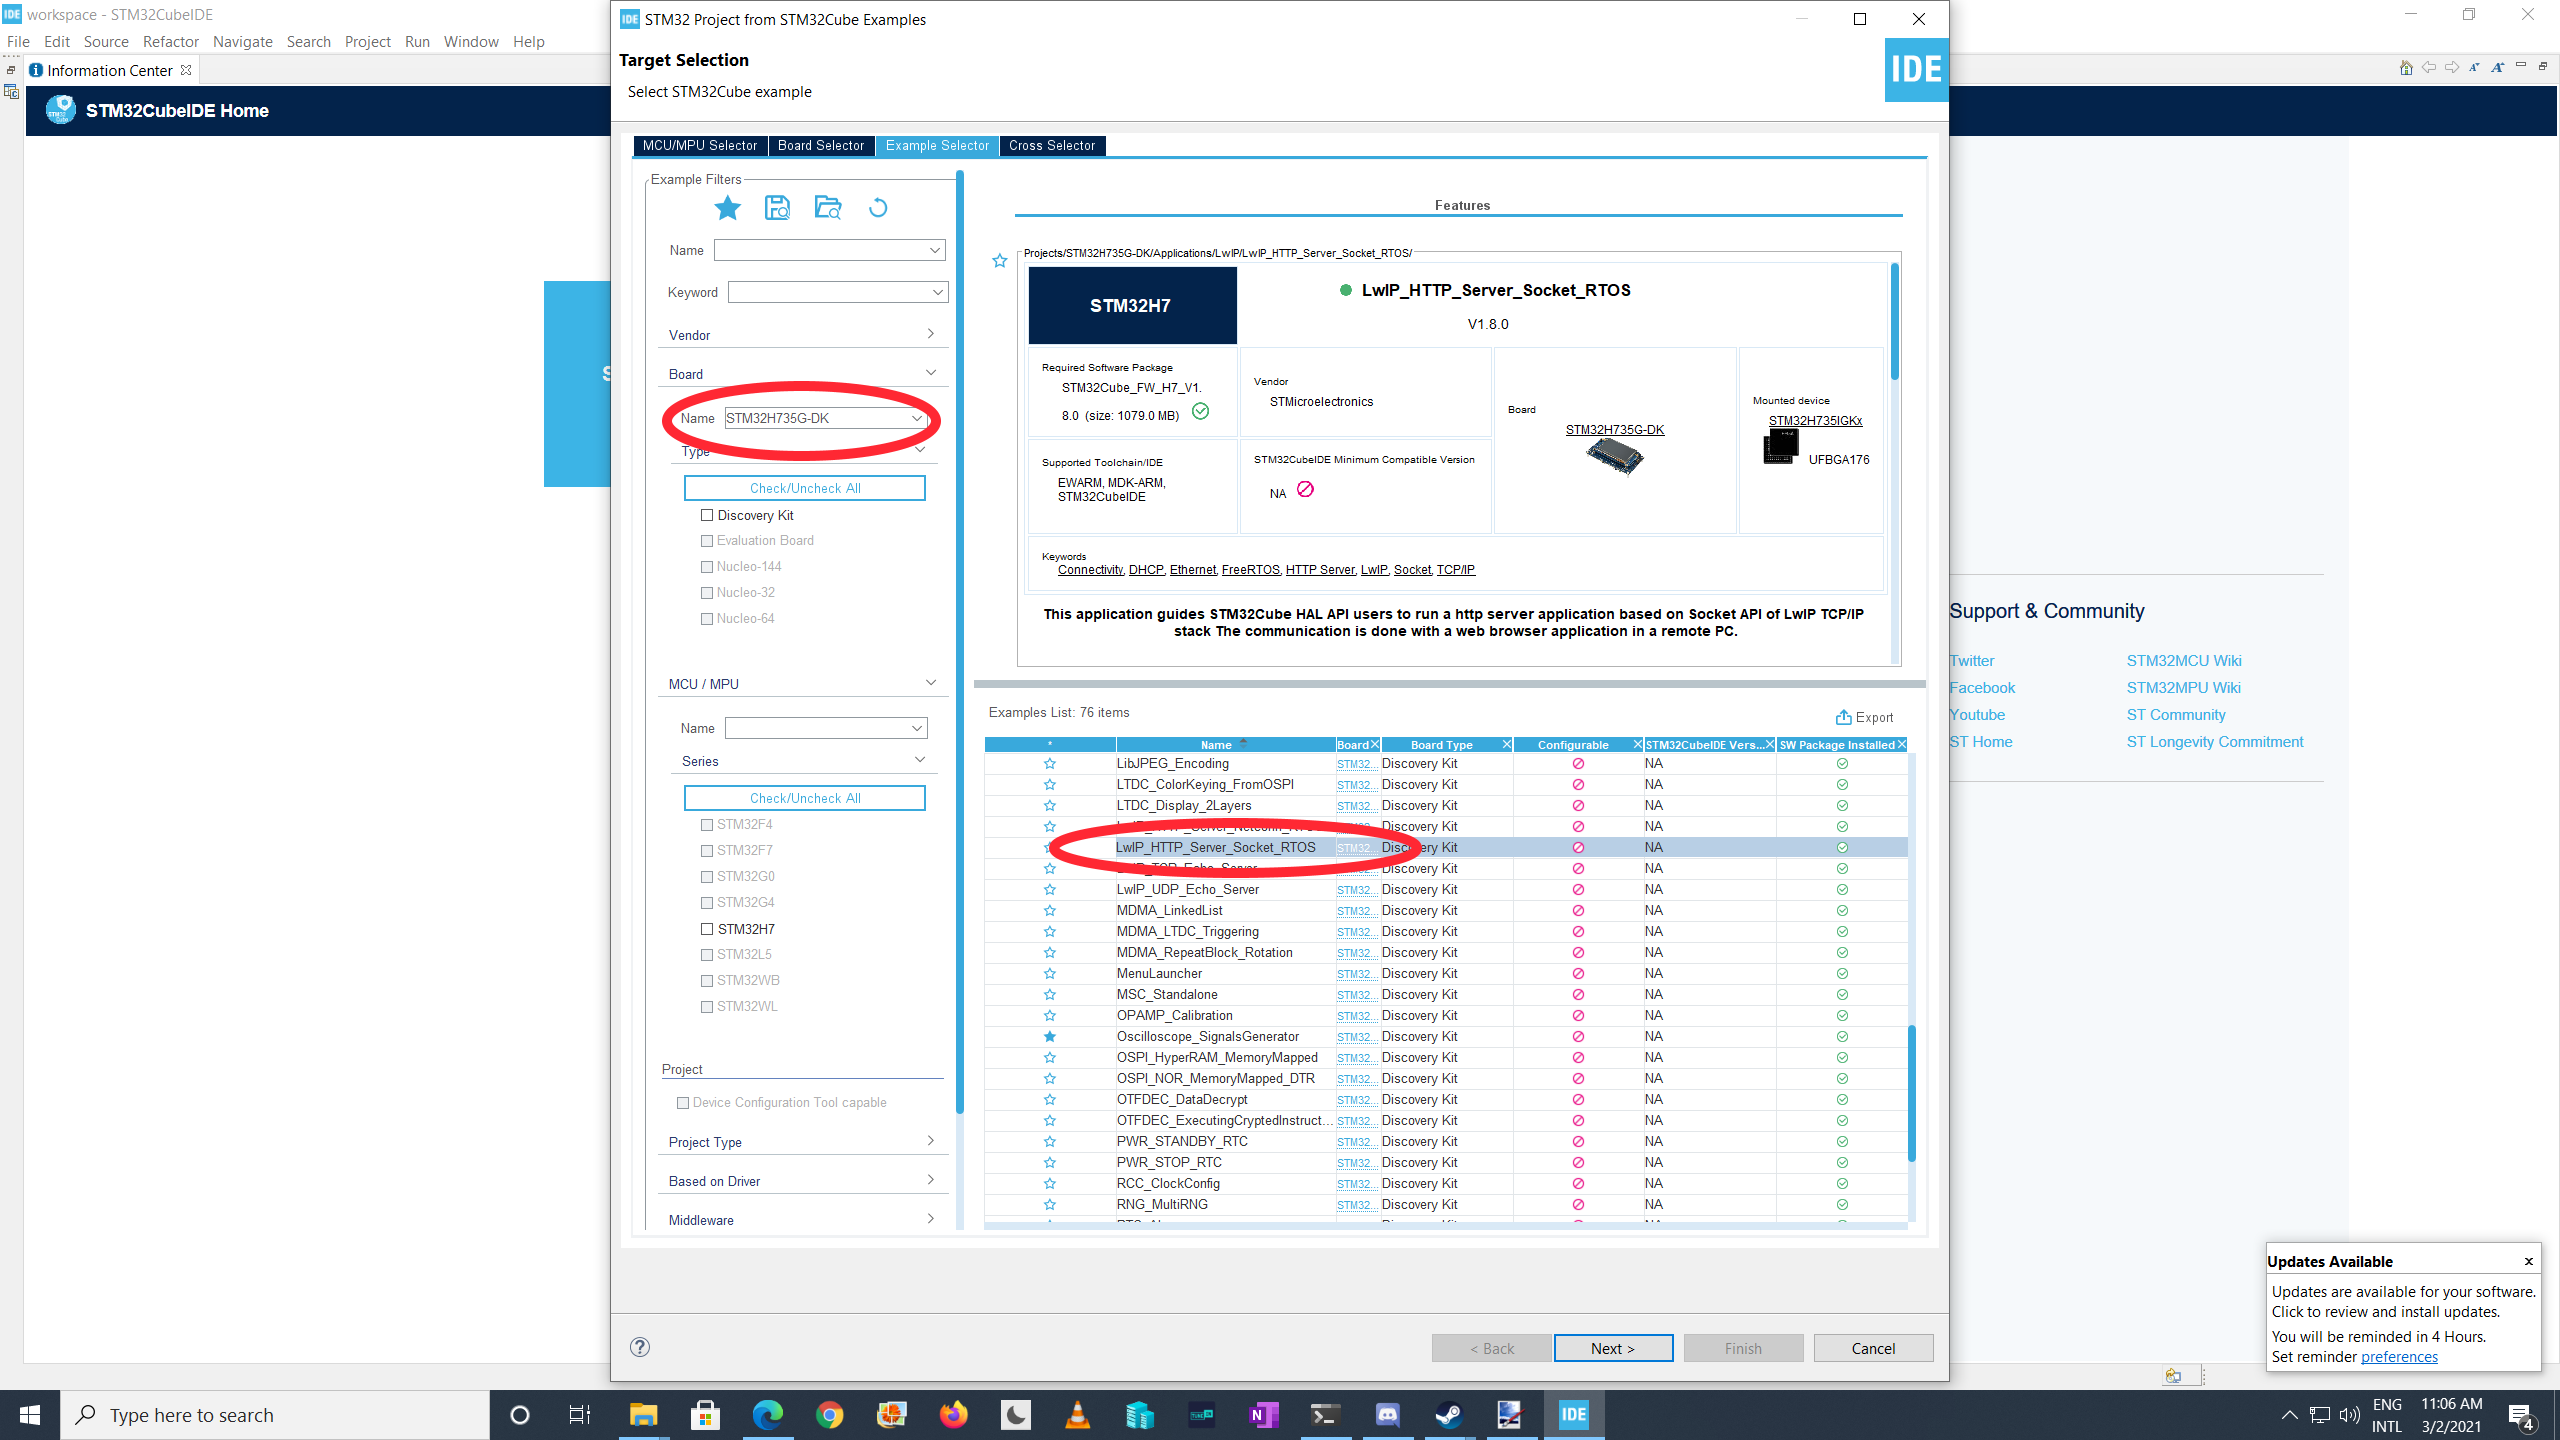
Then, in the following dialog box, select the target board on the left ("STM32H735G-DK") , and when the project list appears, select "LwIP_HTTP_Server_Socket_RTOS". IClick Next. Click through the next two dialogs and accept the defaults.
![]()
The project is now loaded into your workspace. When I repurpose sample code, I rename it to fit the new purpose of the project. CubeIDE makes this nearly impossible. I will explain a workaround in the next project log.
-
Introduction
03/02/2021 at 19:37 • 0 commentsHello! I'm going to document the building and configuration of my new NTP display clock. It's based on the ST Microelectronics STM32H735 Discovery Kit board. I've had a history with NTP clocks. Ten years ago, I got a #Twatch. This was an early Internet device that would connect to an Ethernet connection, and retrieve the top trending tags on Twitter. It was based on the Microchip PIC 18F67J60 microcontroller, and it was paired with a commonplace 20x2 character LCD based on the Hitachi 44780. A very common and useful display.
I didn't care about the Twitter functionality, so I wrote an SNTP clock display. I work at my local cable-TV community-access studio; I built the network. I've long wanted to get NTP display clocks for the facility, but they are very expensive. Ten years since I built the original clock, and I'm still dismayed: I cannot buy an NTP clock. The Net is still complicated enough that I can't just get a clock and plug it in. Our facility has an NTP server, but no clock displays.
I couldn't go any further with the original #Twatch: The microcontroller was long discontinued, and there was a hard limit on the number of times I could flash the controller--no more than 50 to 100 times. Once I got the bugs out of my clock, I couldn't do more with it. Nevertheless, the clock has been very reliable--it has just passed its 10th anniversary as I'm writing this.
This past winter, I wanted to refresh the clock and find new hardware to keep up my skills. I did an extensive search.
No, really.
I just saw an banner ad from Digi-Key that advertised the STM32H735 Discovery Kit. I'm not great at scratch building, so it seemed to have all I needed to make a clock, and so I bought it. As I write, I've had the device for three months and have been coding with it for most of that time.
I can't give a complete tutorial for embedded devices in this log. But ST Micro, fairly or unfairly, has a reputation for having a steep learning curve, and I do want to highlight some of the problems I had to solve while bringing the clock to its implementation.
NTP Clock Based on STM32H735 Discovery Kit
This is an SNTP clock based on the STM32H735 Discovery Kit.