I think I'm close to being done tweaking the design of the main clusters.
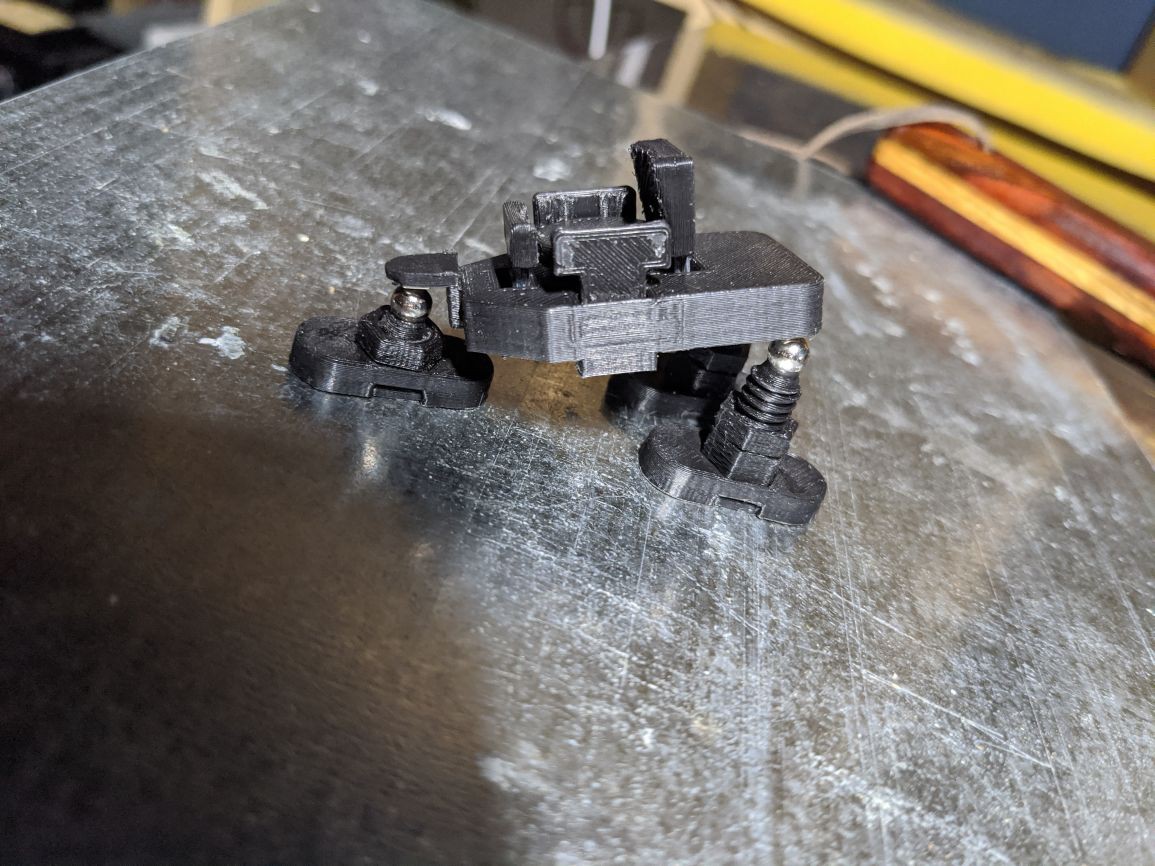
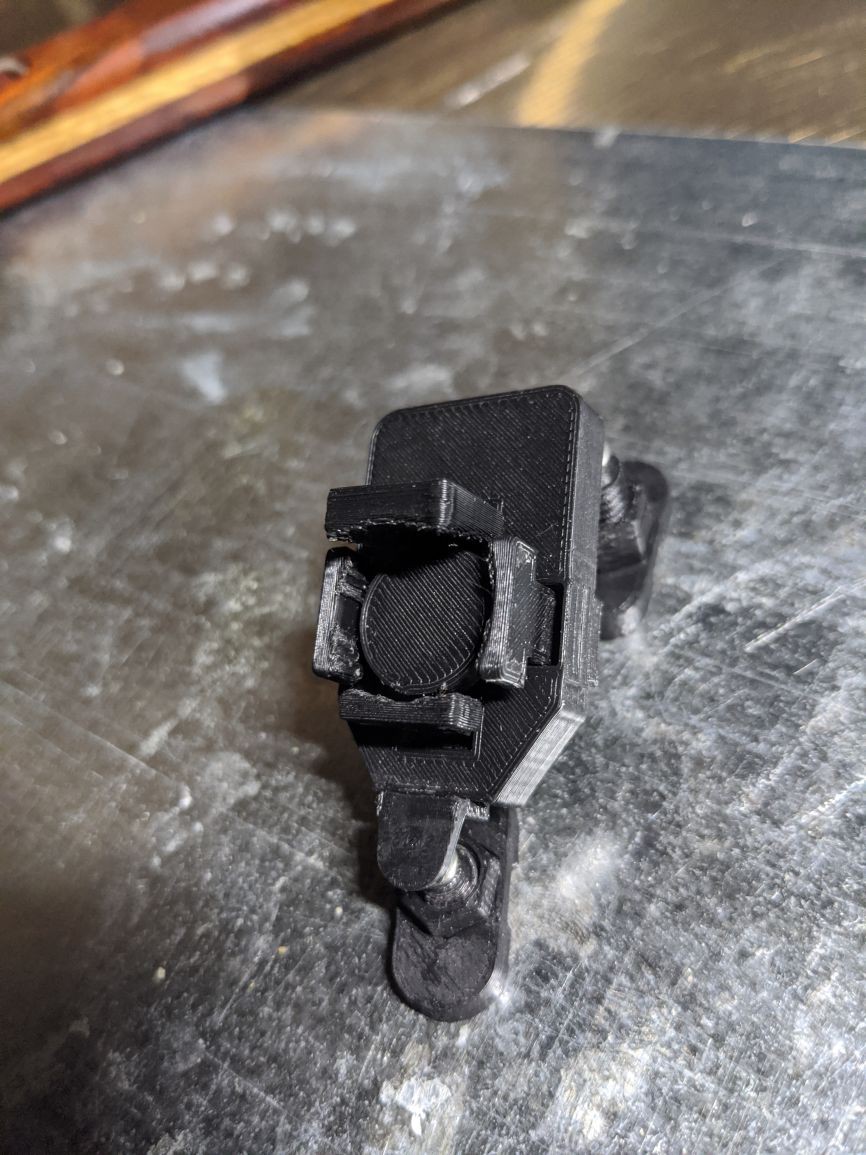
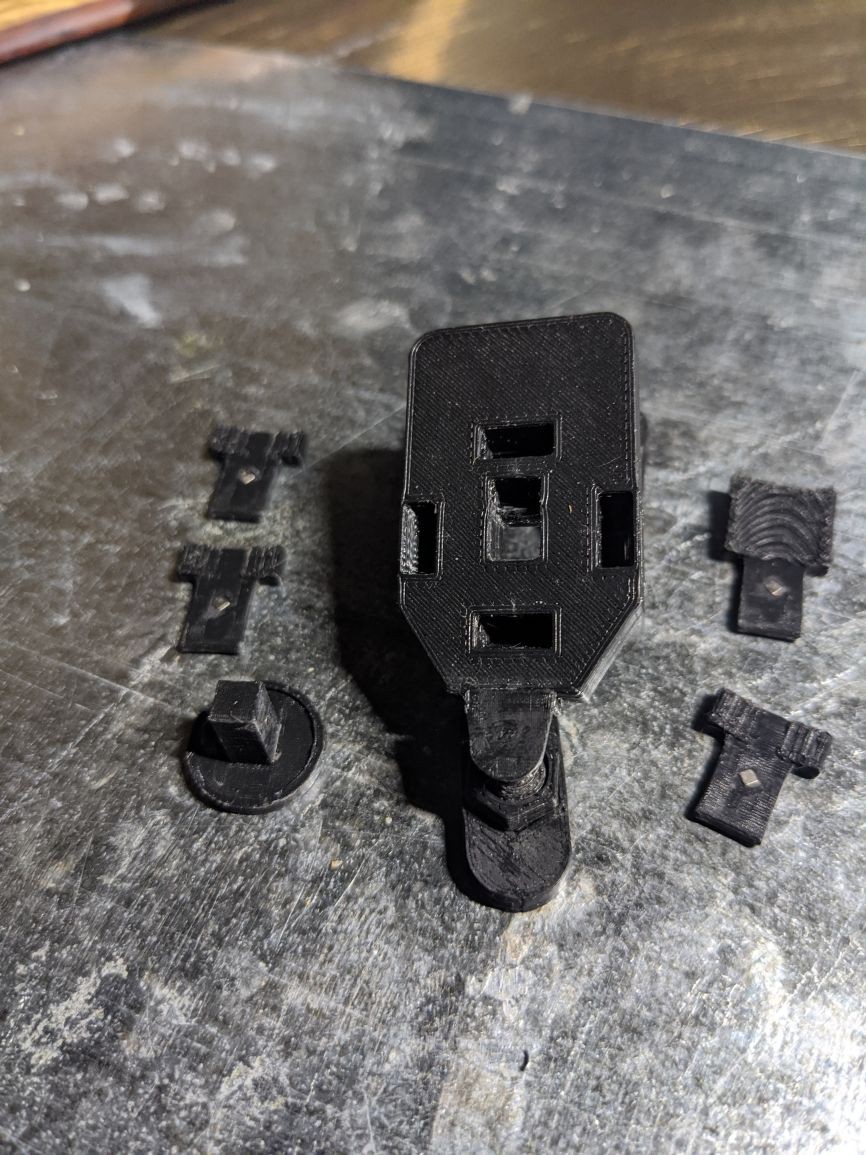
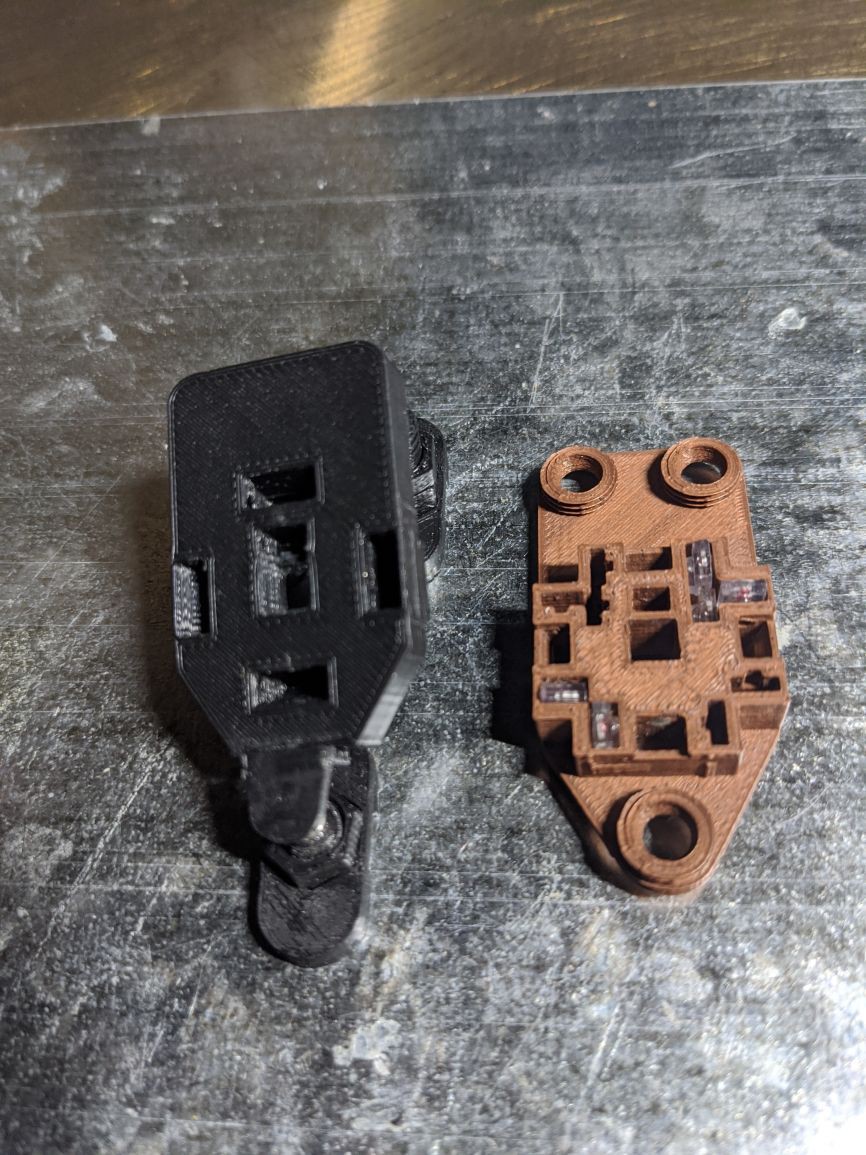
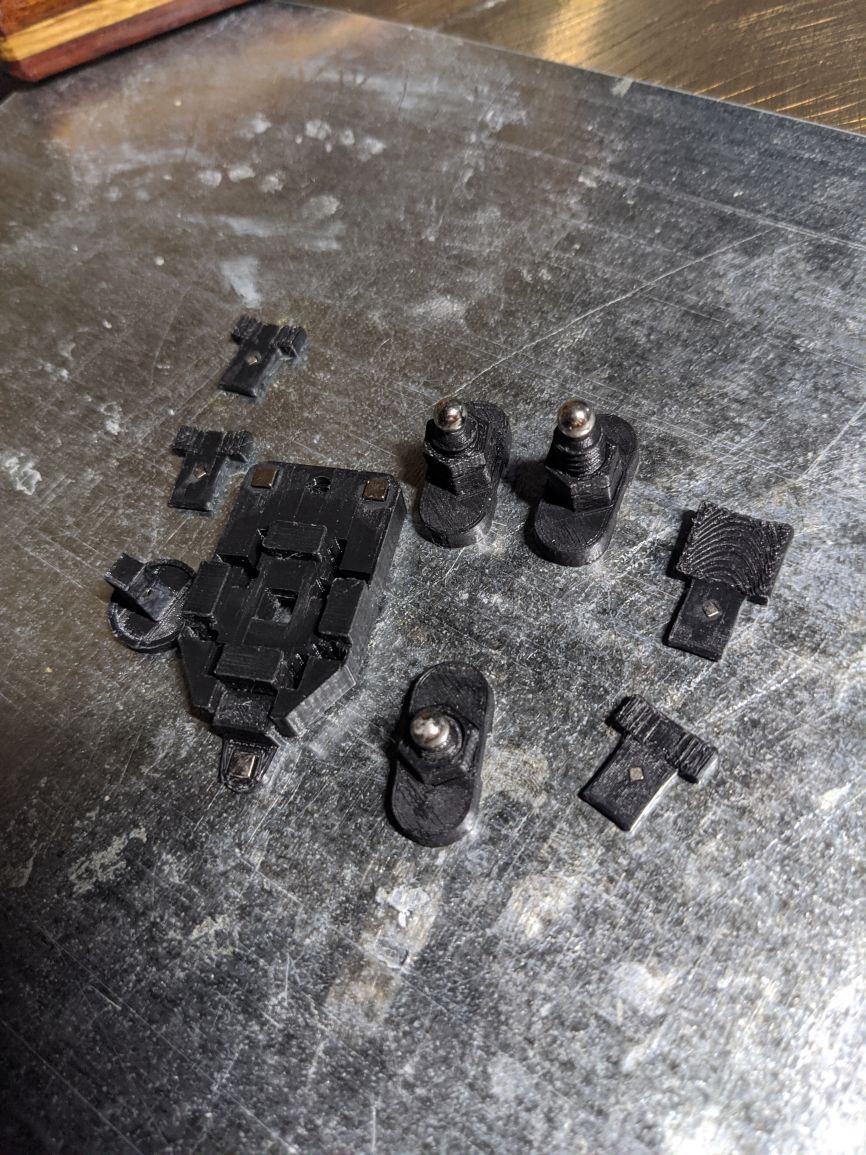
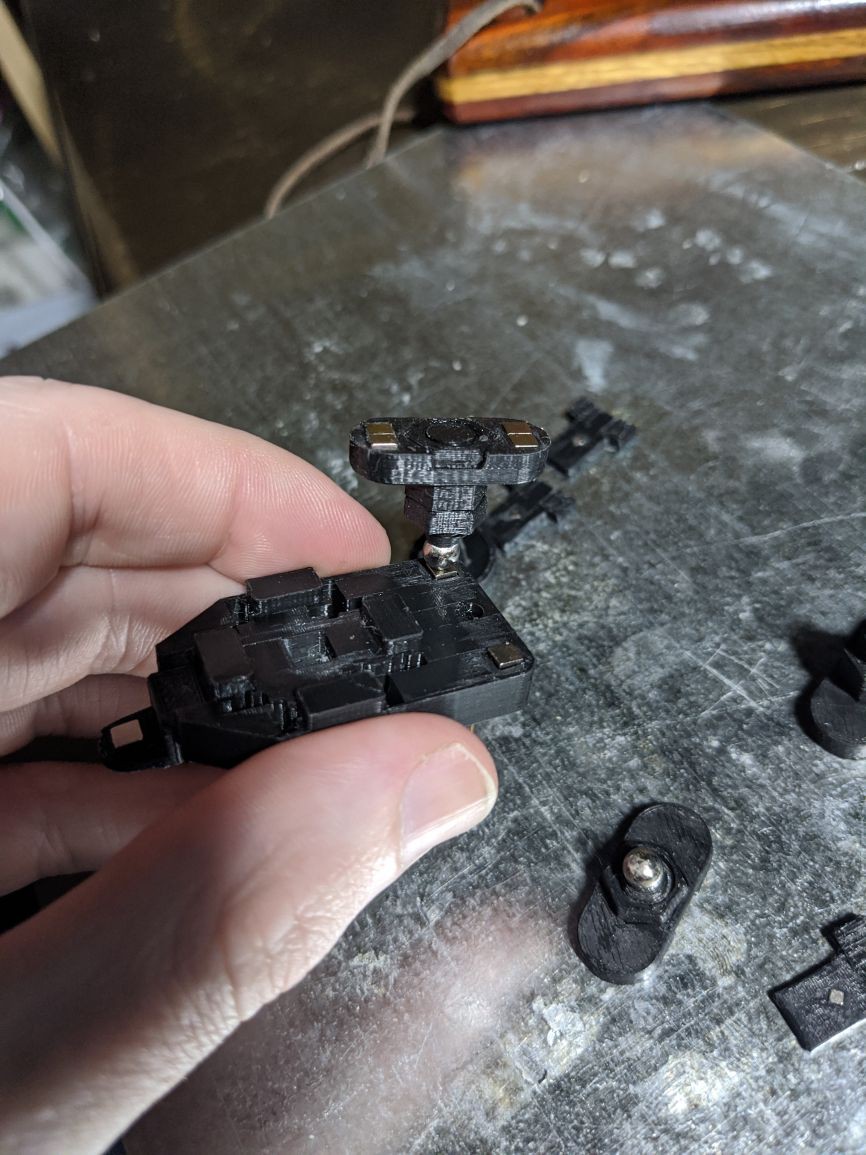
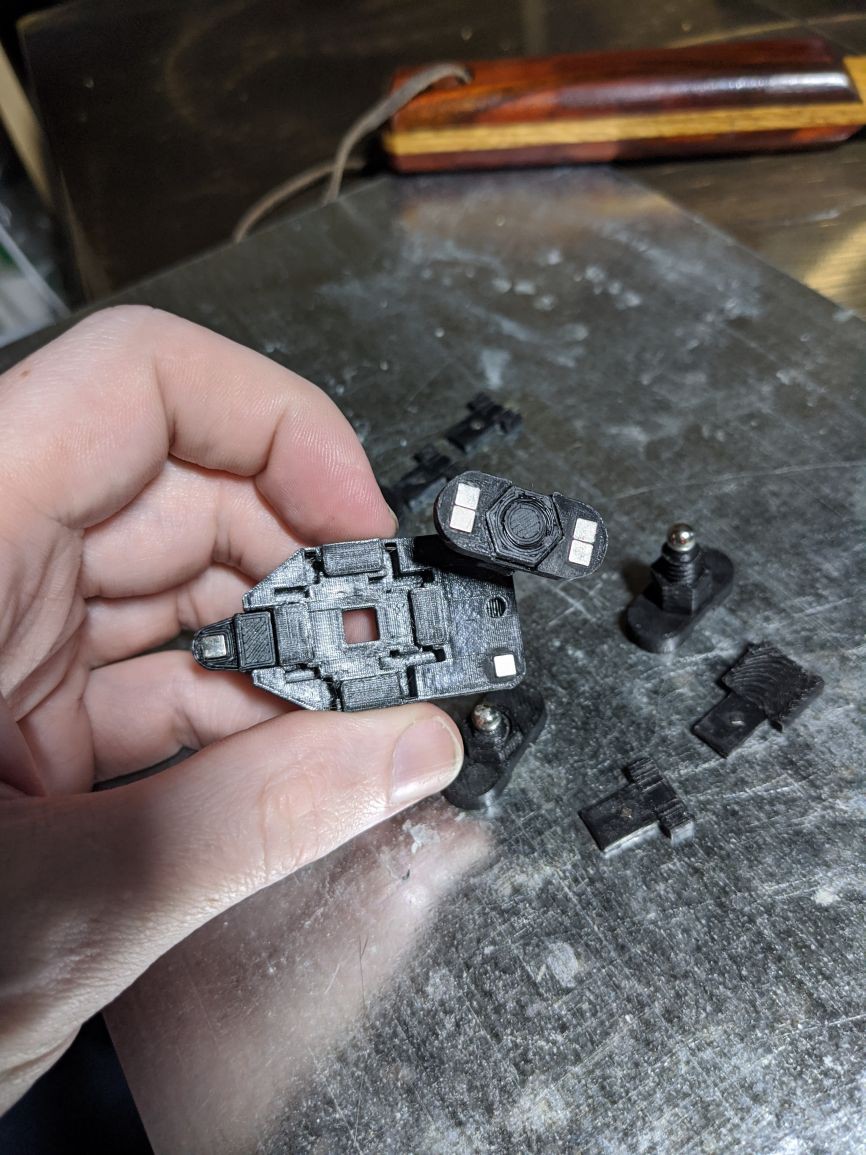
There are some significant changes from the original version
- The photodiodes and LEDs are inserted from the bottom now, so that the PCB can be inserted and removed without having to desolder everything
- The cluster is printed upside down now, and the top surface of the cluster is flush with the top of the key wells, instead of having a thin, flat plate on the bottom of the cluster that the key wells rise up from.
- The keys are wider, to hopefully make them less prone to breakage
- It uses the IR908 LED instead of the IR928 LED, which is a bit thinner, and is the same shape as the PT908 photodiode that is used.
- The adjustable mounting system is now based on using 1/8" x 1/8" x 1/16" rectangular magnets on the bottom of the cluster, and having the adjustable screw mounts use a 5mm spherical magnet.
- This gives a fairly firm attachment, while still allowing the angle between the cluster and vertical supports to vary, as the support heights are changed.
- This also has the advantage that the cluster can be picked up and removed from the supports, while keeping the supports in place, so that the cluster can be placed back down at the same location.
- The bases that the screw supports screw into are now multi-part, and have 2 pairs of 1/8" x 1/8" x 1/16" magnets for more holding power.
- The magnets are on a separate part that slides down securely over the central "pillar", so that the central pillar can be swapped out (e.g. to adjust the height), while re-using the same magnets.
- If more friction is needed, to avoid the bases from sliding around laterally, I found that you could rub a bit of beeswax on the bottom magnets. The beeswax provides some slight adhesiveness, while still allowing the supports to be repositioned.
- The screw supports and the bases they screw into now have a very loose fit, that can be easily turned by hand, but with an additional nut that can be tightened down to keep the screw from wiggling or accidentally rotating and changing height.
- The front attachment of the cluster is now a separate part. This allows the attachment point to be higher up, which allows the front of cluster itself to be closer to the base plate.
- This is useful especially for the pinky clusters, which are usually the lowest clusters, and typically don't have much room for the screw supports underneath, especially on the front.
- This also allows that front support part to be removed when switching to a static base down the line, which should be able to hold the cluster with just the 2 back magnets.
I also have a PCB design in the works in kicad, although it needs to be updated a bit with some recent design changes I've made to the cluster.
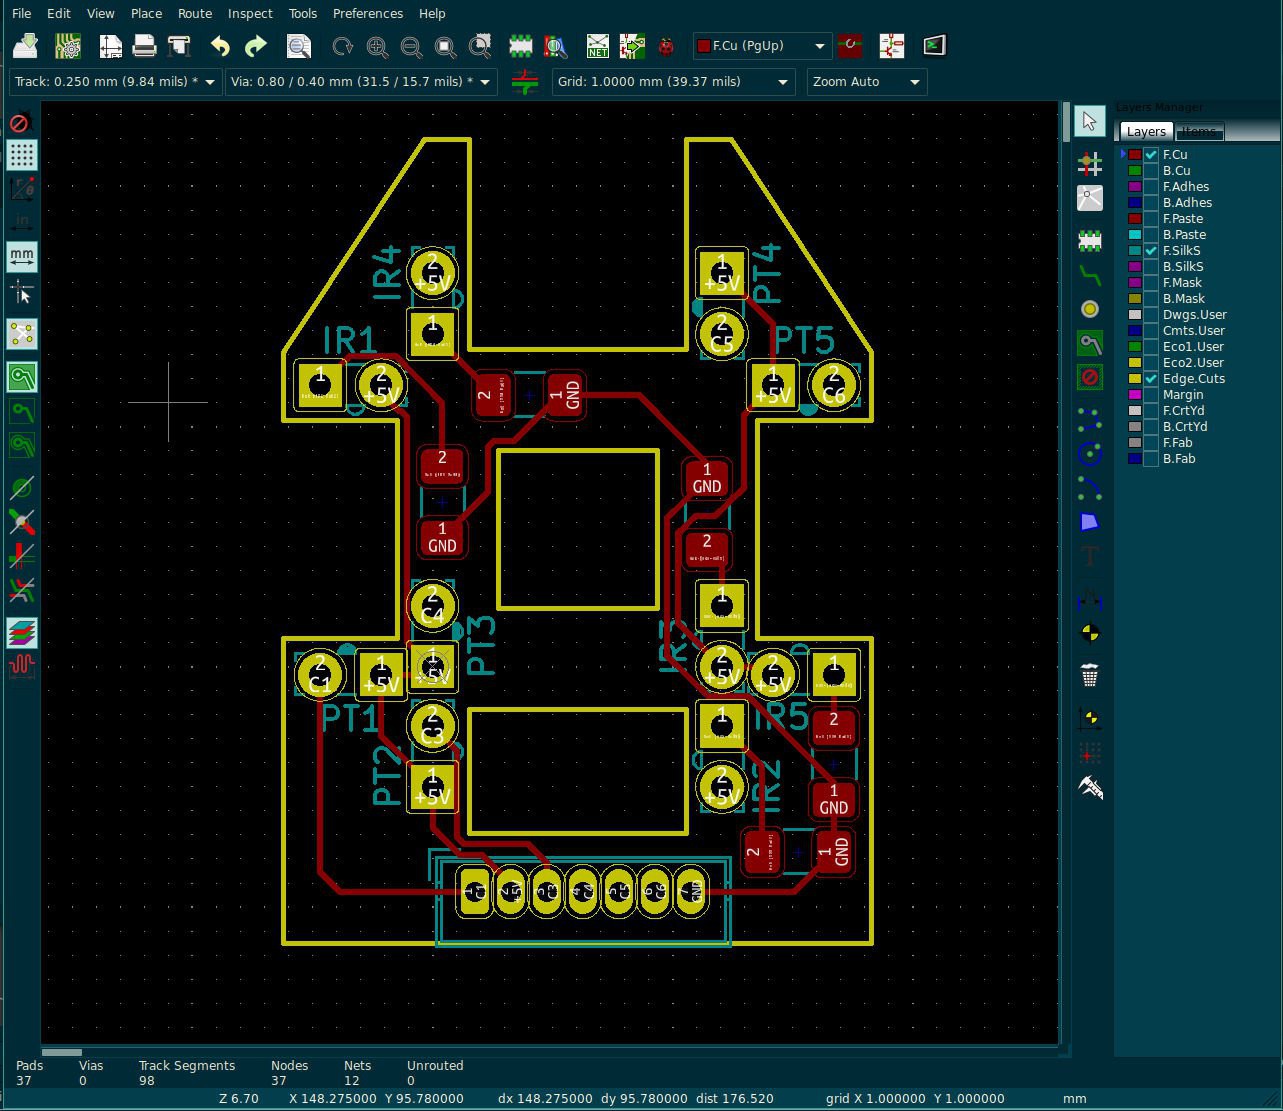
I think the next steps for now are: (sorry, another list :p)
- Get some of the new IR908 LEDs, and breadboard up a proof-of-concept of the electronics, to verify that there are no light-leakage issues with the new design.
- e.g. make sure that the IR light from one key doesn't trigger the photodiode of a different key.
- There were some changes to the north key's optical component placement in particular that might be problematic. I don't think it will be, but I need to verify that
- Get a saola board to play around with. It doesn't support USB HID out of the box (it still uses a USB<->TTY converter.. WHYYYYYY??), but from what I've read, I think you can just connect a usb micro/C connector up to pins 19 and 20 and get real usb connectivity.
- Update the kicad design for the cluster PCB
- I'd like to finish up and finalize the thumb and central PCBs before I send it off to be fabbed, so I can just have them all fabbed at once.
- Apply some of the recent tweaks I've made to the finger cluster to the thumb clusters, and get those finalized
 Ben Gruver
Discussions
Become a Hackaday.io Member
Create an account to leave a comment. Already have an account? Log In.