 kutluhan_aktar
- current follower count,
- current account name and ID,
- three preceding follower counts.
First of all, to manage to glean information from Twitter by avoiding any authentification process pertaining to the Twitter API, I chose to use a content delivery network (CDN) - cdn.syndication.twimg - to obtain the number of followers of a selected Twitter account by its screen name. When I managed to get information from Twitter, I programmed a web application in PHP, named Twitter Follower Tracker, running on Raspberry Pi to print a data packet containing:
- the follower count,
- the account name,
- and the account ID.
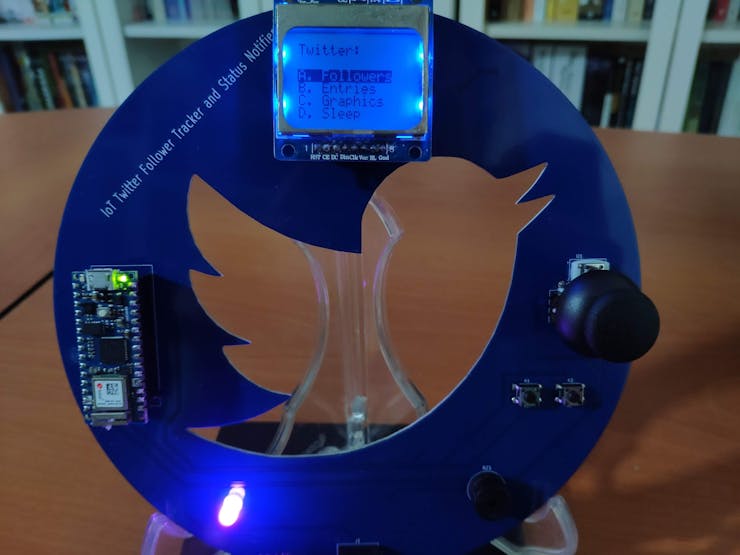
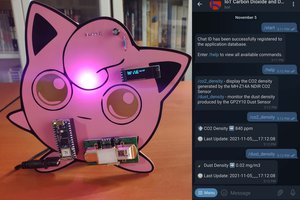
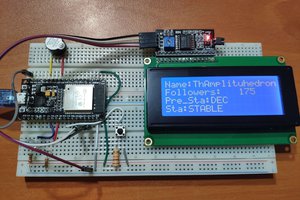
Then, I used an Arduino Nano 33 IoT to get my Twitter account information and follower count transferred by the PHP web application and display them with a Nokia 5110 Screen.
Finally, I added a COM-09032 analog joystick and two buttons to control the menu options and scroll text.
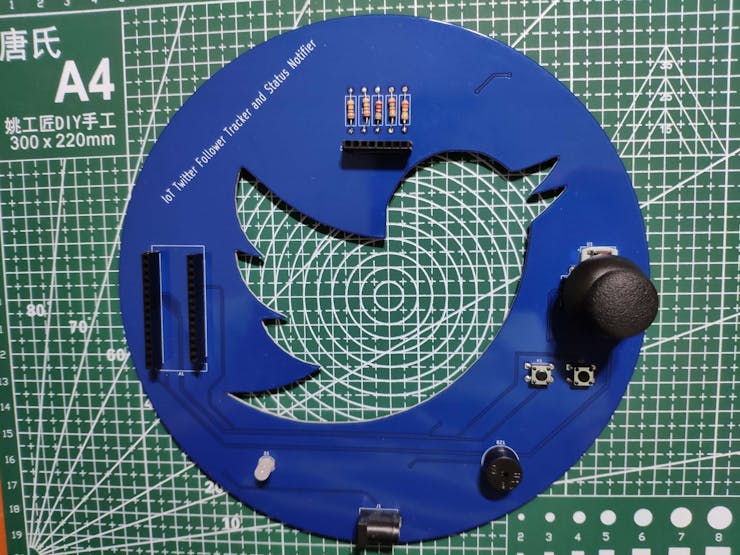
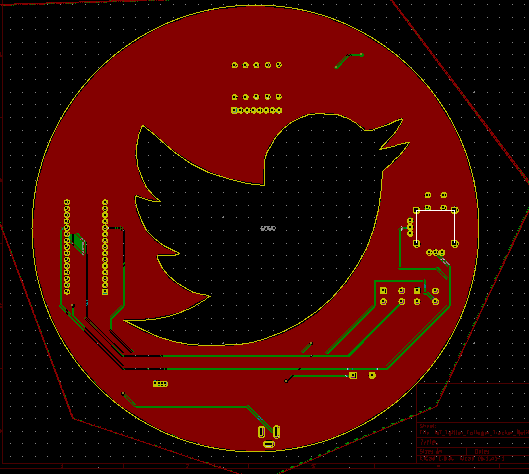
After completing wiring on a breadboard and testing the code, I designed a PCB (Twitter Follower Tracker) having the Twitter logo carved at its center. It became a stylish and fitting addition to my desk as an efficient apparatus to track the follower count of my account :)
In addition to displaying information, the device:
- Notifies the user when there is a change in the follower count - INC or DEC.
- Shows monochrome images as a screensaver if selected.
Huge thanks to PCBWay for sponsoring this project.
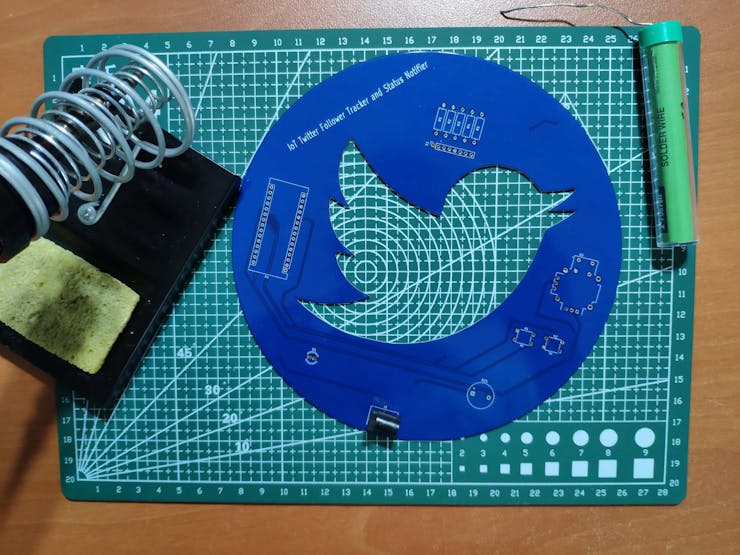
Step 1: Designing and soldering the Twitter Follower Tracker PCB
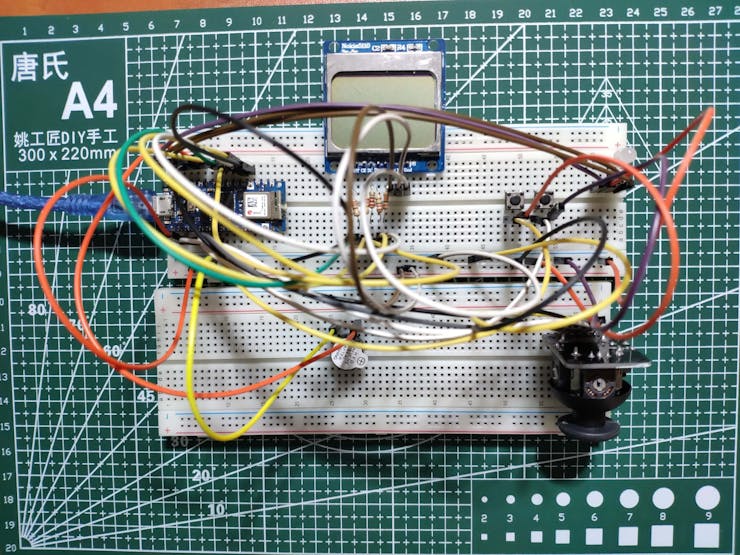
Before prototyping my PCB design, I tested all connections and wiring with the Arduino Nano 33 IoT on the breadboard.
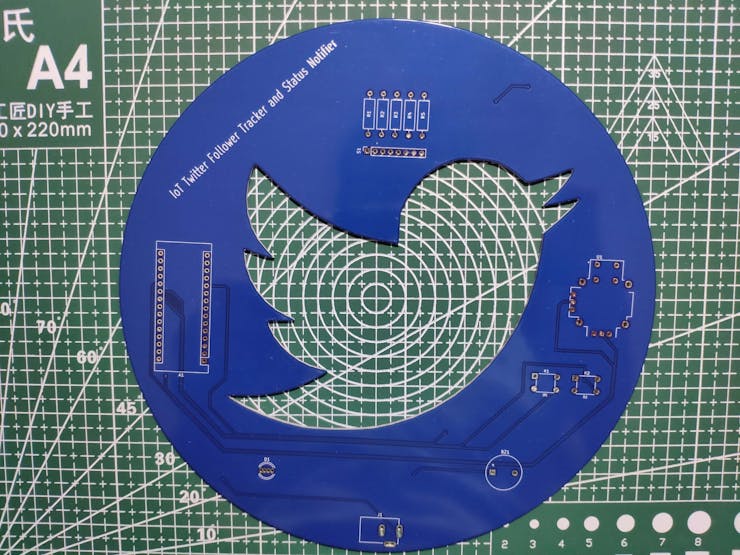
Then, I designed the Twitter Follower Tracker and Status Notifier PCB by using KiCad. I attached the Gerber file of the PCB below, so if you want, you can order this PCB from PCBWay to create a stylish and fitting apparatus to display the follower count of a selected account and get notified when there is a change, inspired by the Twitter logo :)
Click here to inspect and order this PCB directly on PCBWay.
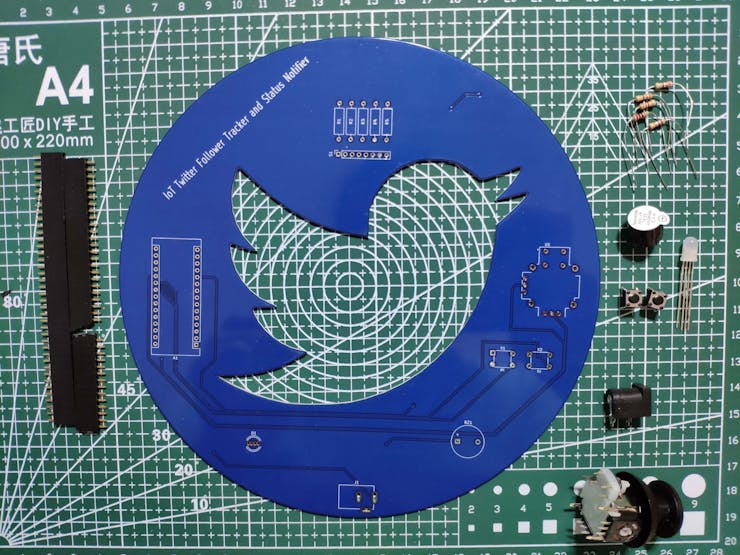
First of all, by using a soldering iron, I attached headers (female), COM-09032 analog joystick, buzzer, 5mm common cathode RGB LED, 6x6 pushbuttons, 1K resistors, and the power jack.
Component list on the PCB:
A1 (Headers for Arduino Nano 33 IoT)
S1 (Headers for Nokia 5110 Screen)
U1 (COM-09032 Analog Joystick)
BZ1 (Buzzer)
D1 (5mm Common Cathode RGB LED)
K1, K2 (6x6 Pushbutton)
R1, R2, R3, R4, R5 (1K Resistor)
J1 (Power Jack)
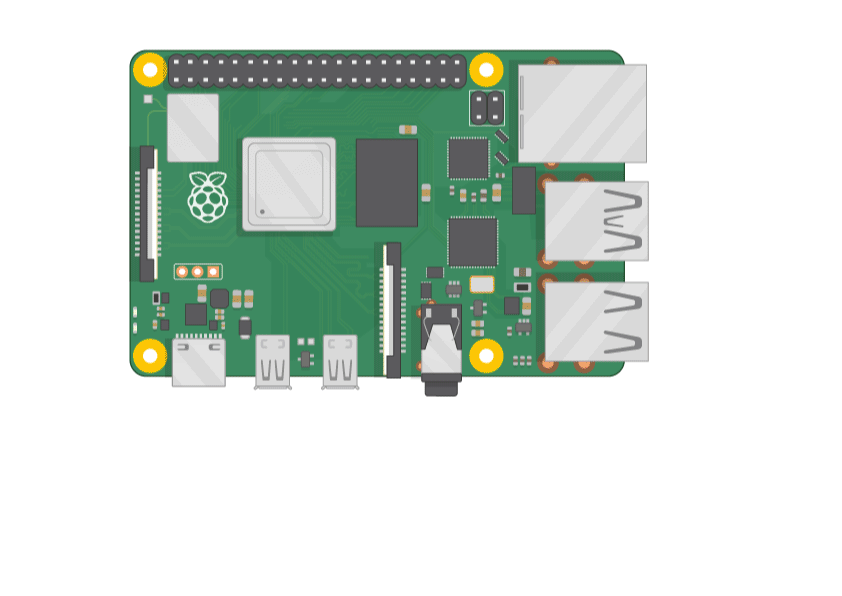
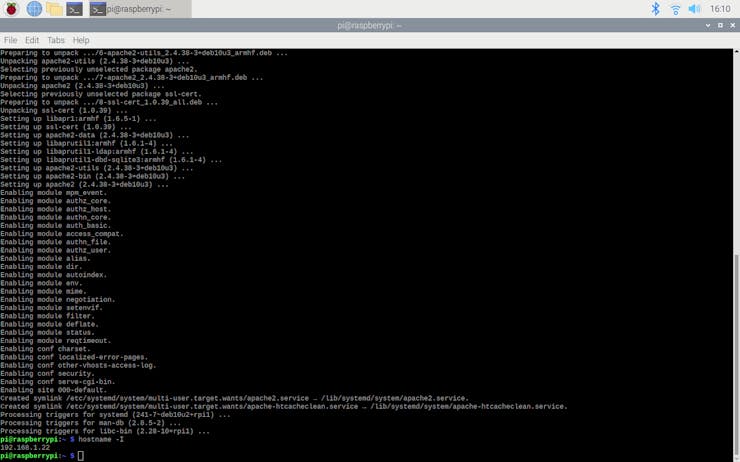
Step 2: Setting up a LAMP web server on Raspberry Pi
If you are a novice in programming with Raspberry Pi, you can inspect well-explained instructions and tutorials on the official Raspberry Pi website.
To go to the official Raspberry Pi setting up tutorial, click here.
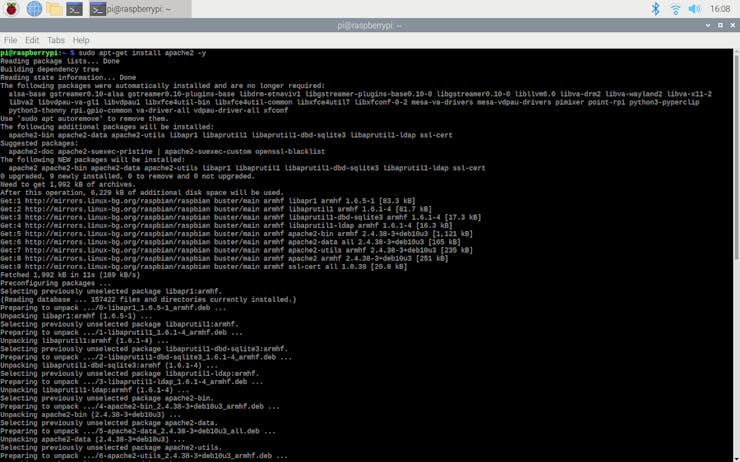
⭐ Open a terminal window by selecting Accessories > Terminal from the menu.
⭐ Install the apache2 package by typing the following command into the terminal and pressing Enter:
sudo apt-get install apache2 -y
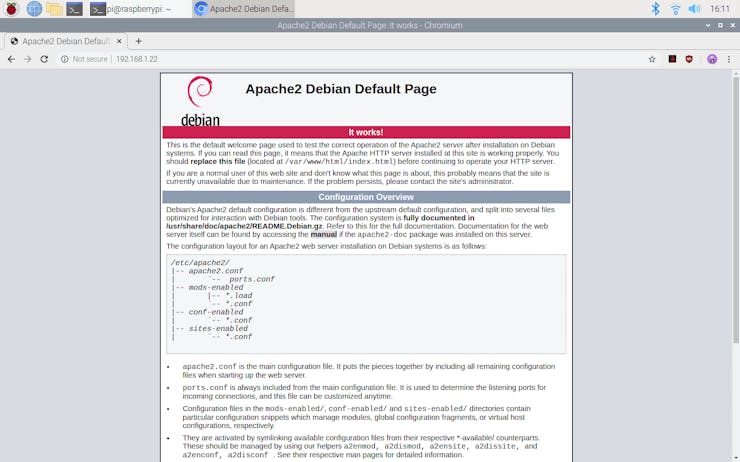
⭐ To test the server, open Chromium by selecting Internet > Chromium Web Browser from the menu and enter http://localhost.
⭐ If you want, you can use the IP address of your Raspberry Pi as well.
hostname -I
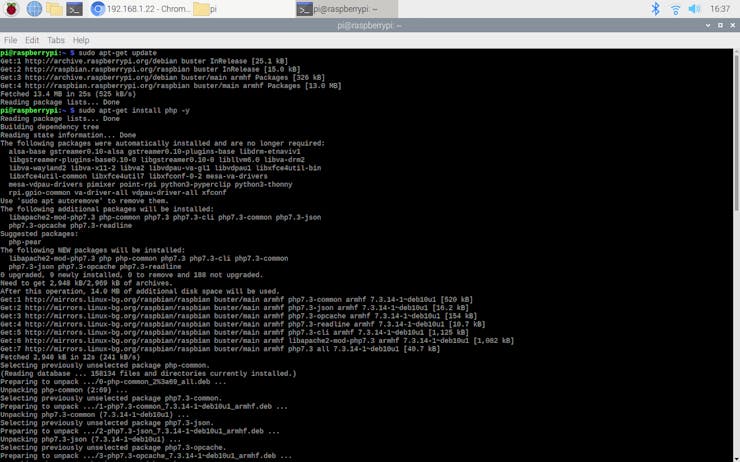
⭐ Install the PHP package with the following command:
⭐ Do not forget to update the Pi.
sudo apt-get update
sudo apt-get install php -y
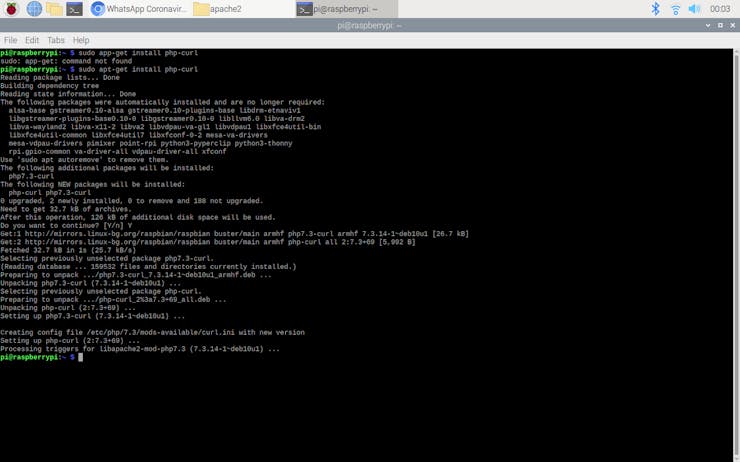
⭐ To be able to obtain information from the cdn.syndication.twimg (CDN), install the php-curl package:
sudo apt-get install php-curl
⭐ Then, restart the apache server to be able to use the installed packages on the localhost:
sudo service apache2 restart
Step 3: Developing the Twitter Follower Tracker web application in PHP to elicit information from the CDN
Although Twitter provides an API to collate information on Twitter accounts, tweets, replies, etc., I decided to use a content delivery network (CDN) in this project since ...
Read more »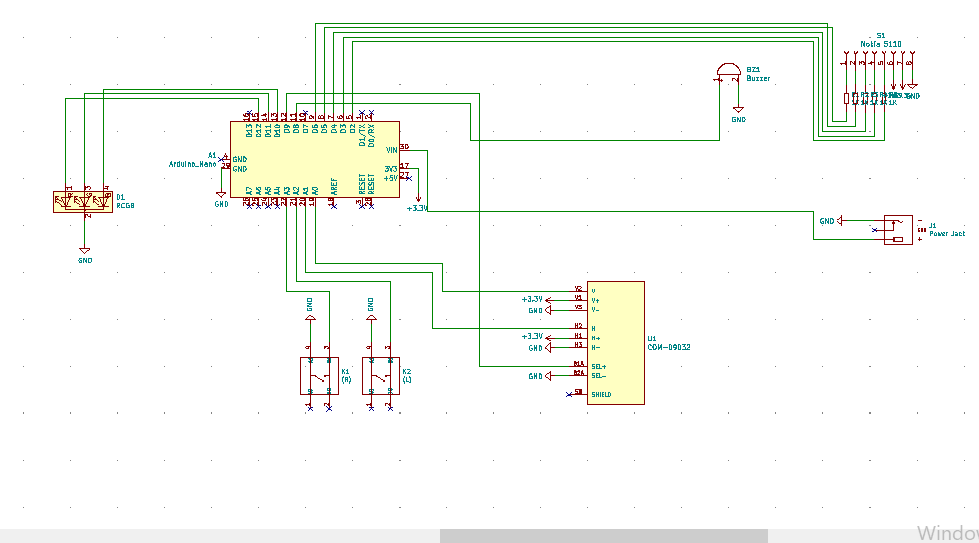


 Sumit
Sumit
Please feel free to leave a comment here if you have any questions or concerns regarding this project 😃