Few days ago I promised to write a bit more about new boards and ongoing development. In the weekend I was able to find some time to play with the board and configure software side a little bit. But let me start from the beginning.
Heatsink
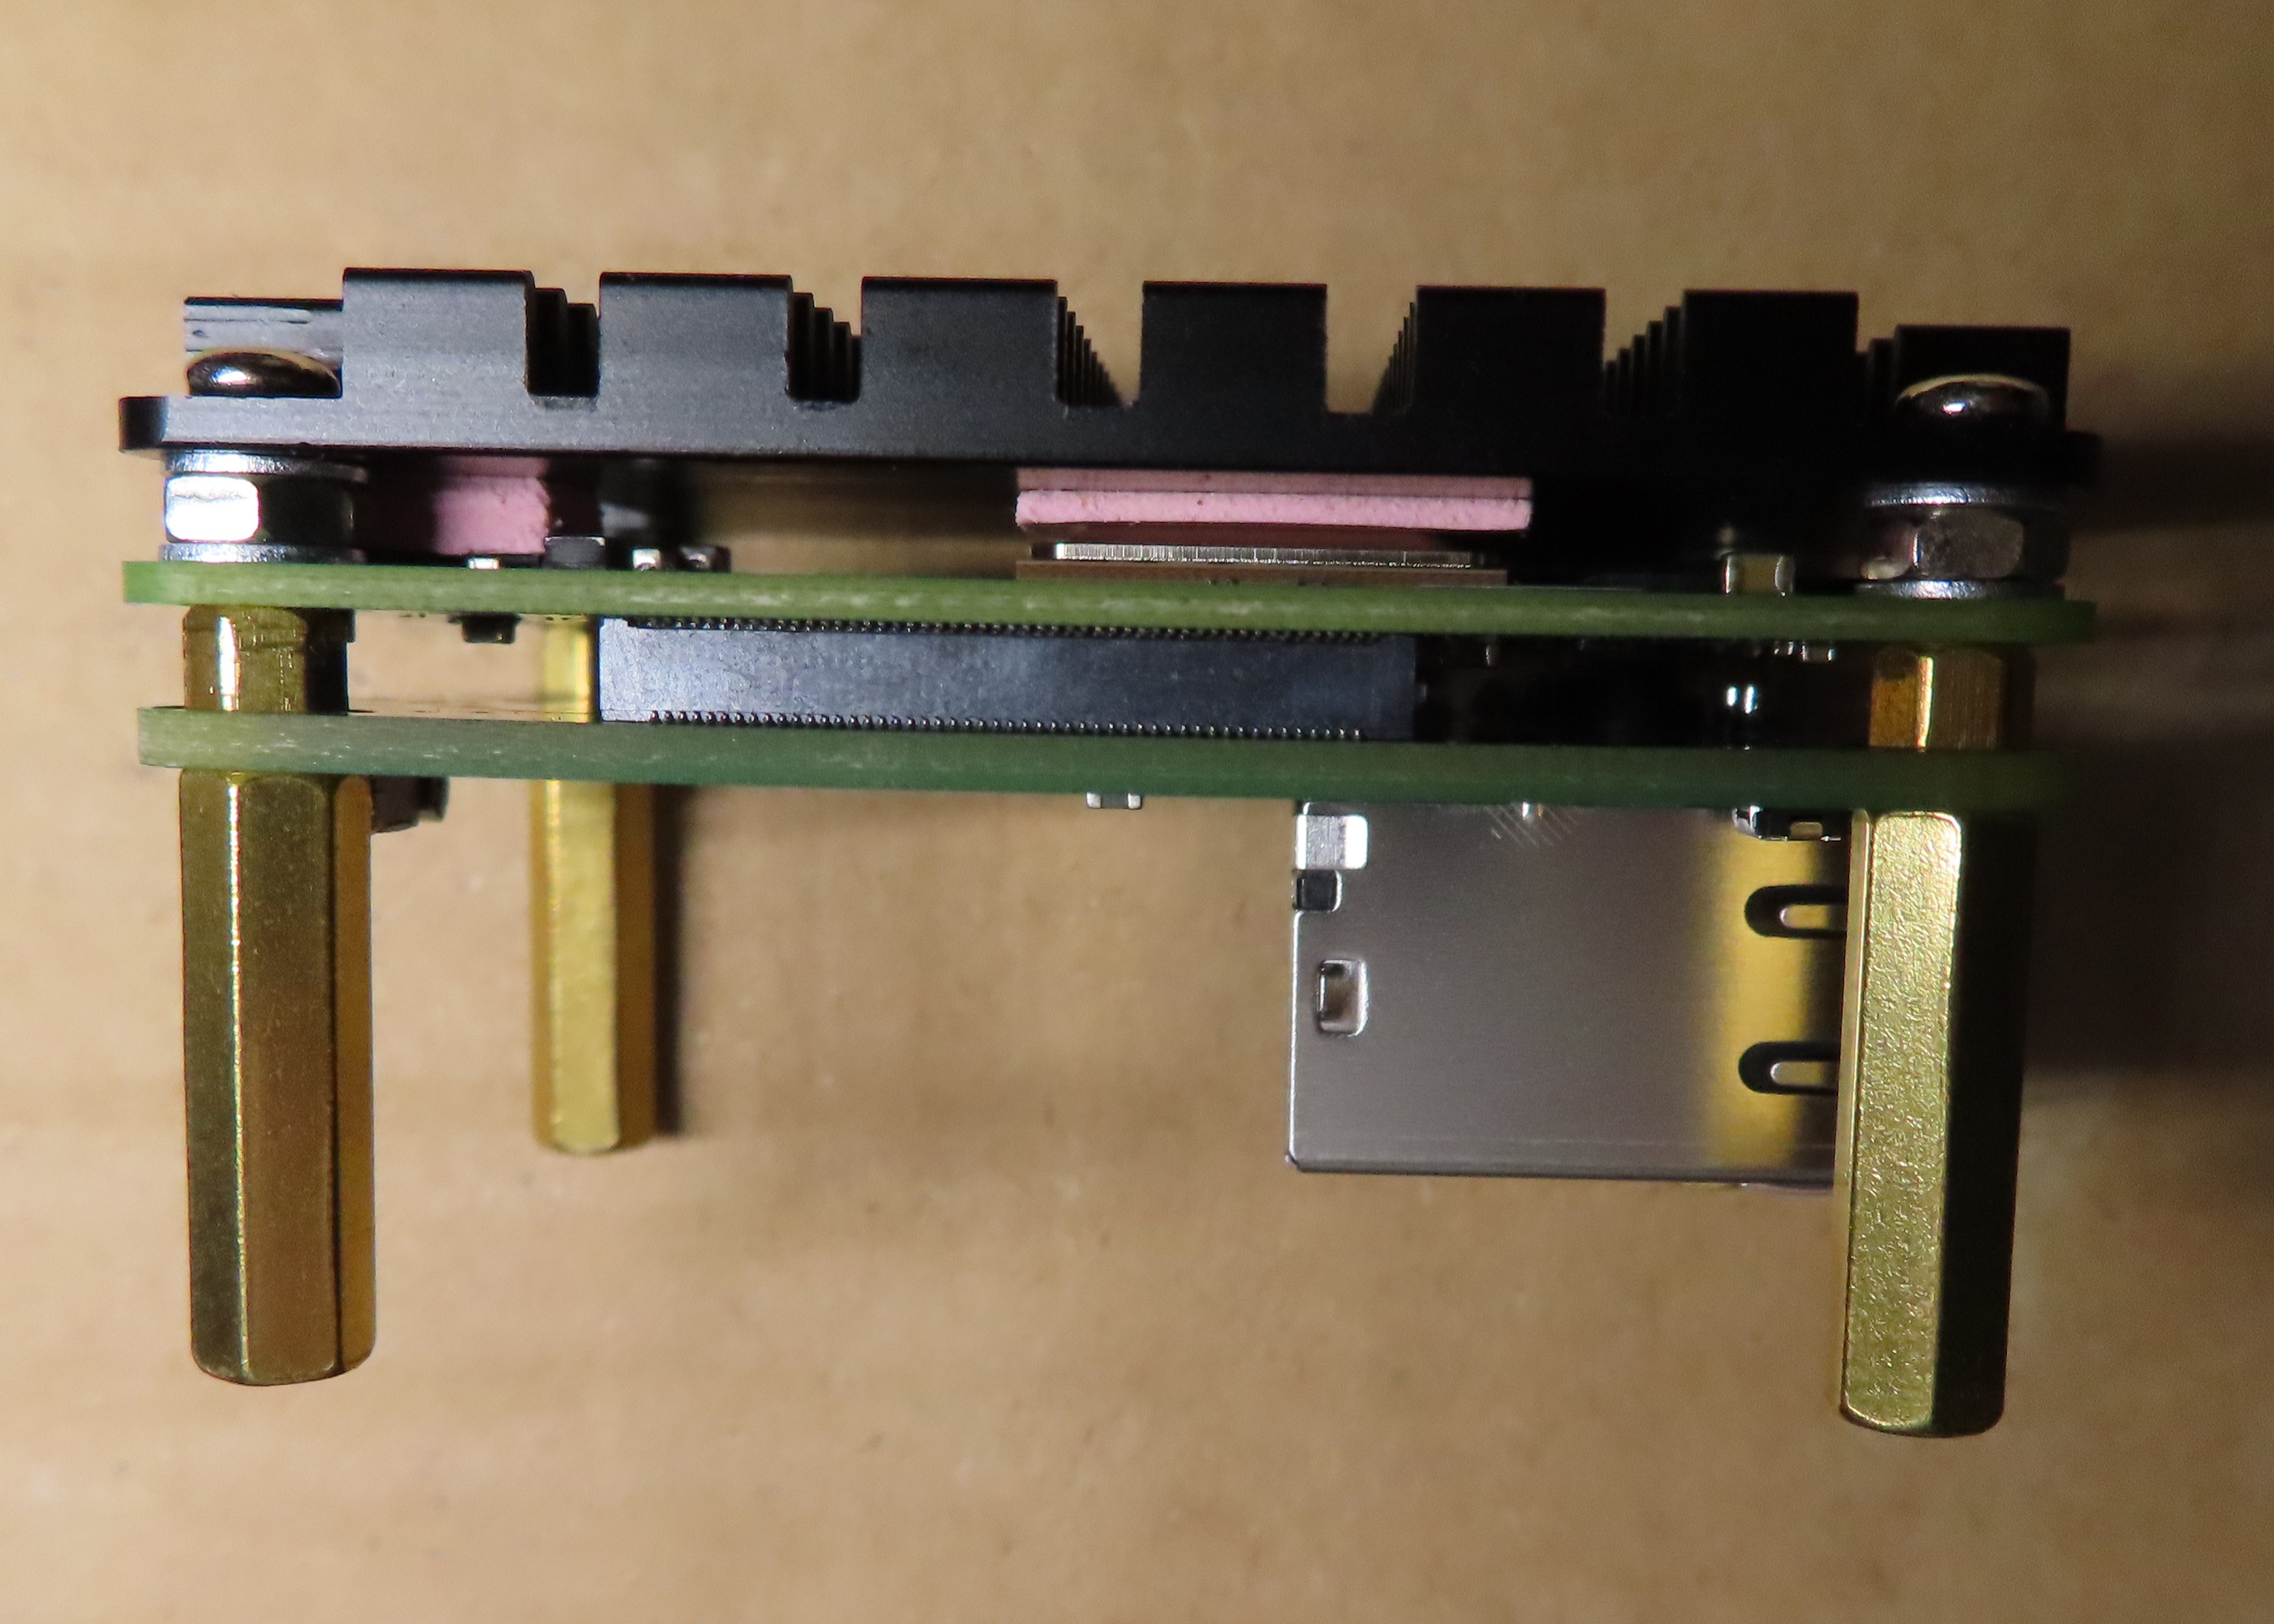
If you have seen the photos in the previous update, then you know I mounted a heatsink to my board. For those interested in buying one themselves, this is a model by Waveshare, precisely this one. It wasn't as trivial as following the manual to make it look like on the photos, because I wanted to still have spacer under the whole setup. I ended up with something like this:

This whole set of screws, washers and spacers is a mix of Waveshare set and whatever I was able to find. Finally I managed to do it like I wanted, so it is now standing on my desk and at the same time it should be a little bit colder. To be honest, I did not do any stress tests yet, so can't tell if it was worth the effort, but marketing materials looks promising. Maybe if I get more finished software stack, I will do my real world tests, to not make judgements based on stress-ng only, as it is never like the real environment.
New front panel
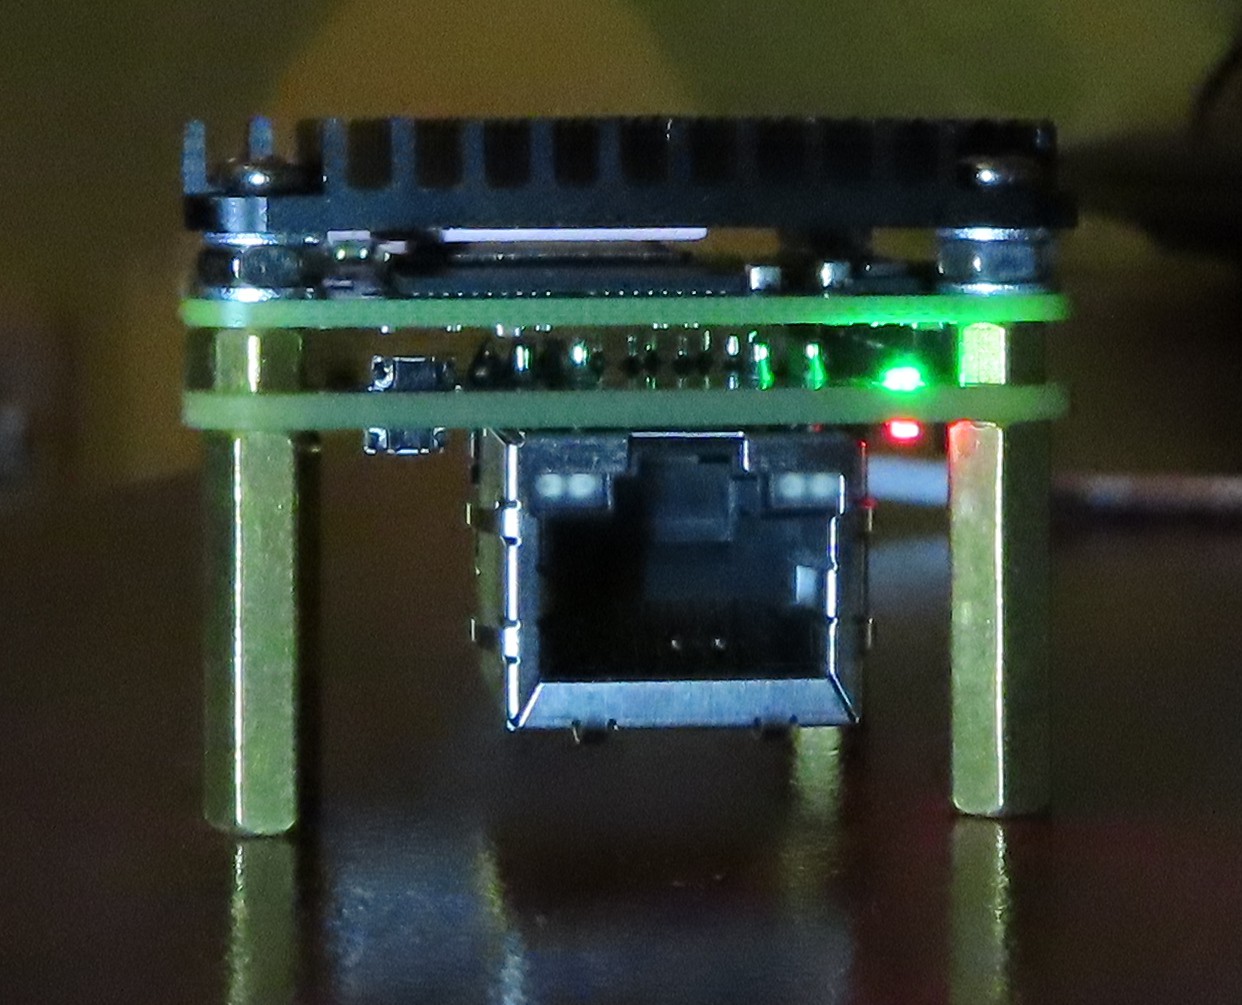
One of the goals of last PCB revision was to make the board more clustering friendly. While you still have to use Micro USB connector on the back, which is unfortunate, but this is how things are for now, everything else is now on a side, that can be called front. So, on this new front there is Ethernet connector, power and activity LED, power and reset buttons. This is how this new front looks like:

Maybe it is not obvious from this perspective, but these two things left to the Ethernet connector are power and reset buttons. While playing with Alpine I had to use reset a lot and I can already say that it is not easy to use at first, but with help of toothpick, one can get used to it. In final setup, it should not be necessary to use any of these buttons anyway.
Alpine Linux booted from network
Finally, the most important part. My goal, when choosing OS for the cluster, I would like to build was to get something really lightweight. I already knew that there is a distro called Alpine that people use in-container. So, I decided to give it a try. It turned out Raspberry is at the moment supported officially, so no hacking should be needed to make it work. On official website, one can download special package for Raspberry Pi. Despite that official support, it wasn't immediately ready to serve via TFTP, so I had to make some small adjustments:
- First of all I extracted alpine-rpi-3.14.3-aarch64.tar.gz package to tftp directory, so my dnsmasq.conf could serve it. You can use the same config that I used for ordinary Linux before (don't remember whether it was Arch or Raspberry Pi OS, sorry :) ).
- In the extracted package, two files require modification. First is config.txt to enable UART, as SSH will not work at this point. So this is what needs to be appended to [all] section:
dtoverlay=disable-bt
- Second is cmdline.txt, as it is not configured for netboot, which is no surprise, as this is not the default way to boot OS. Try something like that:
modules=loop,squashfs console=serial0,115200 ip=dhcp modloop=http://10.42.0.1:8080/modloop-rpi4 alpine_repo=http://10.42.0.1:8080/apks apkovl=http://10.42.0.1:8080/localhost.apkovl.tar.gzNote that 10.42.0.1 is my Linux system that will serve as TFTP/DHCP server, as well as HTTP server to give Alpine-specific files. By the way, its nice, you don't need NFS at all, when netbooting Alpine, which is rather unique function.
Last thing to prepare is public_html that will serve those 3 files (apkovl will not exist for now, we will add it later). Modloop files can be found at tftp/boot/ directory, so let's copy them to public_html. apks are directly in tftp, copy them, too.
Finally we have to start DHCP/TFTP and HTTP servers:
sudo dnsmasq -dC dnsmasq.conf -i enp1s0 &
darkhttpd public_html &
This makes them run in background of current shell, so not exactly a permanent solution, but good enough for now :)
And we are ready to go, connect Ethernet cable, configure network on server side and plug power cable to uCM4 (provided you already have netboot enabled, otherwise, go to my previous tutorial).
- Wait a bit and you should start seeing stuff happening on dnsmasq, then UART and finally darkhttpd. A minute or so and login prompt should appear on UART. root does not have password for now. You can set your system up by calling setup-alpine, choosing your preferred config, then exporting LBU_BACKUPDIR variable to anything, like /tmp directory and calling:
lbu ci
to save your settings. As a result apkovl file appeared in the directory you chose, so now you should be able to transfer it to your server and place in public_html with name set in cmdline.txt. You are set! Next time you boot your system, you should have it configured.
Cluster
My final attempt was trying to setup master node for my cluster. And with this one, I failed. I was able to configure repositories in Alpine and even I had docker up and running. This is surprising for me, as I tried that on Arch and it was hanging on docker run, whatever I did. Here it was all fine. But installing kubeadm lead me to the ENOSPC error. It turned out that I ran out of disk space, which was tmpfs filesystem, in my RAM. I was using 1 GiB CM4, so there was no hope for me at this point, but I did not give up yet. Just for science :) I remounted / to give it astonishing 768 MiB of disk space. It worked and kubeadm with all dependencies installed, but trying to create master node gave me information that 2 GiB of free RAM is minimum for Kubernetes. Obviously, I ignored this error, but few seconds later I got an error from docker. Closer look at that issue revealed that while pulling Kubernetes image, I was left with 10 or so MiB of disk space and a bit more of RAM, so it is practically impossible to succeed with 1 GiB module. 2 GiB is rather unlikely to start Kubernetes, too, especially due to the fact that RAM is used as disk, too, so everything that is running is duplicated.
As a result, I bought one 4 GiB CM4 Lite module, which should arrive tomorrow, as I am lucky that distributor in Poland just got new batch of them few days ago and they are still there.
NFS root under Alpine
There is one more option to decrease RAM consumption by the system - mounting root as NFS. I even tried that in the weekend, but it did not work out-of-the-box. It seems that this is a kind of experimental feature and what's more, I have issues with regeneration initramfs, so no success for now. I should be able to get back to the topic next weekend, with my shiny new CM4, unless 4 GiB turns out to be enough. But I doubt it will :)
Conclusion
So, this is all for now. Hope that somebody will find my Alpine guide useful. For anybody else, there is one lesson to learn for here - do not buy 1 GiB CM4, if you want to build your own cluster on top of that. Buy 4 GiB instead, or 8 GiB, if anyhow you have access to it in a reasonable price.
Discussions
Become a Hackaday.io Member
Create an account to leave a comment. Already have an account? Log In.