My goal for this project was to turn one of my FPV quadcopters into a Nerf Aerial Assault monster to finally settle some scores with my children. I could have disassembled a nerf gun and installed the important parts onto a quadcopter, but I wanted to customize the solution more than that. My primary design goals were:
1. Make it removable. I only had one appropriate quadcopter at that time and I didn't want to permanently modify it.
2. Provide a method to fire using the existing RC link and controller that I use for flying the quadcopter. Additionally, only use 1 of the RC channels
3. Try to use mainly parts that I already own and 3D print most other pieces
4. Needed to be able to hold at least a few darts.
The results of this project can be seen in this video. I decided that I considered this a success.
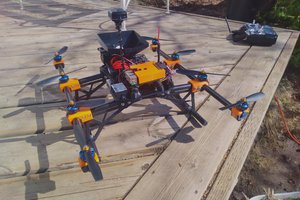
The quadcopter that I used was a Shendrones Squirt V2. I'm a big fan of this quadcopter for closer in, cinematic type work. I have flown this around my family and friends because of the reduced risk. The ducts help provide increased safety over an open design. Don't worry, I know it still isn't 100% safe... but it's closer. I run BetaFlight on my flight controllers for all of my quadcopters. The only modification required was a small wire harness connected to the flight controller board. I connected 5V, Ground, and a single 5V signal to the harness.
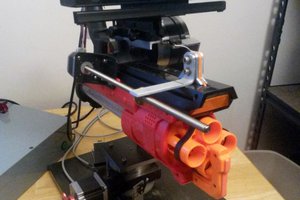
For the Nerf mechanics I started my design around the "standard" nerf dart magazine. To launch the darts I opted to use 2 motors that I had on hand for quadcopter builds. I controlled the motors from an Arduino Nano using a PWM interface. The motors were powered from the main LiPo battery power, and the Arduino was powered from 5V provided by the quadcopter flight controller harness. I designed and 3D printed some attachments for the motors and spaced them in a way to squeeze the dart and propel them forward as they acted as flywheels. To load the dart into the flywheels I created a plunger that was pushed and retracted using a MG90S servo. A gear mechanism would control the plunger, and the plunger would push the nerf dart into the flywheels.
For control I setup BetaFlight to assert an IO pin when I toggled one of the AUX switches. I chose a spring loaded AUX switch, so I would hold it to fire, and when I released it firing would stop. When the Arduino received the signal it would do the following:
1. Start the motors and give them time to spin up - 2 seconds
2. Engage the plunger servo to load and fire a dart - 500 ms
3. Keep motors spinning and delay for a bit - 3 seconds
4. Repeat steps 2-3 until told to stop
During the state machine loop the software would check the status of the control signal. If I kept the fire switch held it would continue the loop. If the switch was released it would halt and stop the motors, then wait for a signal again. This allowed me to control everything with 1 switch, and the 3 second delay was a good balance to allow me to make the decision of "keep firing, readjust aim" or "reset for a new attack run"
I attached this to the quadcopter with a battery strap (if you fly quadcopters, you have looooots of these). For power I created a Y-cable that would connect to the battery with one leg going to the quadcopter and the other going to the Nerf mechanism. I could mount this on the bottom of the quadcopter, strap it on with the battery strap, connect the flight controller harness, connect power, and I'd be ready to go.
 Cory
Cory

 Drew Pilcher
 Quinn
Quinn
 Andrew Bills
 Dylan Radcliffe
Great project! What motors did you use for the nerf launcher mechanism? I just see extra motors you had on hand but would like to get something that fits your 3D print designs.