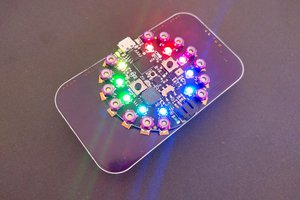
The actually design for the face is probably where I spent most of the time on the build to be honest, never actually getting it quite right; But eventually I settled on the 5 ring design of the finished watch. The outer most ring has 60 blue LEDs that signify seconds, moving around the face as though it was the old watches hand. The second ring has 60 green LEDs for the minutes moving the same as the first. The third ring has 24 red LEDs for the hours, I decided on 24 hour both to make it a bit different and because 12 LEDs just didn’t really fill up the space nicely. The fourth ring has 7 orange LEDs showing the day of the week (I like to start with 1 LED as Monday but there’s no real reason for that). The inner ring isn’t on under normal use and is simply a battery charge indicator with 3 red while charging and 3 green when charged, I didn’t use bicolour LEDs for this so all the LEDs on the front looked the same. Each ring is joined by a silk screen circle but for aesthetic reasons that is the only silk screen on the PCB.
There was one main rule I had for this project; I couldn’t modify the case itself in any way. That meant no new holes made and nothing permanently attached to it in any way. As a secondary goal I wanted the new movement to work as closely to the old one as possible. So with both of these in mind, the time needed to be set using a watch key in the centre of the face and charging had to be done through the same hole in the back that would have originally been the winder. I did briefly look into wireless charging however that wasn’t happening through the silver case. This meant I had to find a charging socket that would both fit in the hole made for the old key and not be too long to fit within the case, obviously all USB standards were out, along with DC jacks as although you can source one that would fit within the existing hole none available at the time were short enough to fully fit inside the case. In the end I chose to use a 2.5mm headphone socket, not a standard in any way of course but it was the only way I was going to get away with not enlarging the hole in the case.
Setting the time was an easier decision as since I was making a custom face I could control the size of the setting hole. The obvious choice for this was a rotary encoder but the trouble came again with the size, the entire interior depth I had to work with in this case was less than 7mm and that had to also include a battery and given the requirement of setting in the same way the old movement would have the encoder had to be in the centre of the watch face. I eventually found an Alps encoder (part number EC05E1220401) that was only 2.7mm tall that would do the job nicely.
For a battery I wanted to use the largest capacity possible so the only real choice was a Li-pol I ended up going with a 380mAh cell as it was the physically largest cell I could fit in the space (while not being from a dodgy source like the magical ones on ebay that claim over 1Ah in the same size for the 2 seconds before they explode).
At this point the only major component I had left to pick was the processor. Now I must admit here that my usual response for needing a Micro is to look up which PIC has all the features I need for the given project as for my day job, the product we know and have all the tools for is basically required. But for this I decided to cast a wider net and try something new, I didn’t need much in processing power but what I did need is something that would be as power efficient as possible, I wanted all the power available to go to the LEDs. Originally I also wanted to use a capacitive touch sensor to turn on the face when someone picked up the watch so my processor choice was also affected by this, however as I will explain later on, this did not end up going to plan... The processor I ended up going for was a cortex M0 based chip made by Silicon Labs called the ‘EFM32 Zero Gecko’ or more specifically ‘EFM32ZG222F32-QFP48’...
Read more »


 VALENTINE
 Maso
Maso
 Jean Simonet
 deʃhipu
It's wonderful! How to have a completed watch?