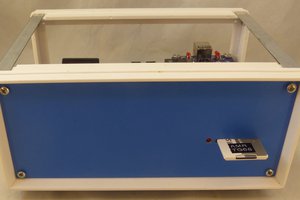
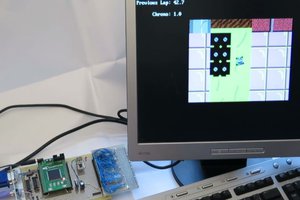
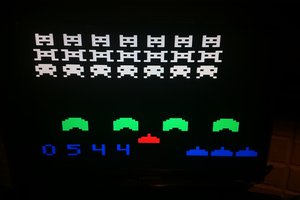
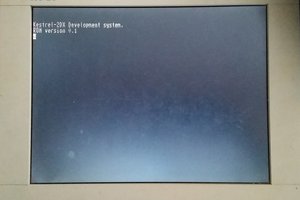
The software is read from an SD card at startup. So it is easy to change it. Here you see a few video's.
The Moncky project
Creating a complete working retro 16-bit computer from scratch in the style of the C64, CPC 464 and alike using an FPGA
Creating a complete working retro 16-bit computer from scratch in the style of the C64, CPC 464 and alike using an FPGA
To make the experience fit your profile, pick a username and tell us what interests you.
We found and based on your interests.
The software is read from an SD card at startup. So it is easy to change it. Here you see a few video's.
M5_The_Moncky_programming_language.pdfAdobe Portable Document Format - 169.44 kB - 08/17/2022 at 14:15 |
|
|
M4_The_Moncky_firmware.pdfAdobe Portable Document Format - 120.33 kB - 08/17/2022 at 14:14 |
|
|
M3_The_Moncky_Assembler.pdfAdobe Portable Document Format - 460.34 kB - 08/17/2022 at 14:14 |
|
|
M2_The_Moncky_Computer.pdfAdobe Portable Document Format - 141.45 kB - 08/17/2022 at 14:14 |
|
|
M1_The_Moncky_Processor_family.pdfAdobe Portable Document Format - 432.48 kB - 08/17/2022 at 14:14 |
|
|
Currently looking at CORDIC algorithms for calculating sin, cos, tan, exp, log, ... Very interesting! This algorithm was invented in 1957!!! It is still used in a lot of hardware. I hope to implement it soon so I can show it of with some 3D graphics or so :-)
I updated the documentation. It is now split into different parts. You can find all files on:
https://gitlab.com/big-bat/moncky/-/tree/master/documentation
This is the Moncky code for the game I created as a proof of concept:
const CANON_WIDTH = 10
const CANON_HEIGHT = 10
const ALIEN_WIDTH = 4
const ALIEN_HEIGHT = 8
const BULLET_HEIGHT = 5

const LEFT_KEY = 0x16B
const RIGHT_KEY = 0x174
const SPACE = 0x29

var score : uint8 = 0
var canonX : uint16 = 160
var alienX : int16 = 4
var bulletX : int16 = 160
var bulletY : int16 = -1

fun drawScore() {
    call graphics_setCol(0xFF)
    call text_setCursor(0 0)
    call text_printString("score: ")
    call text_printHex(score)
}

fun drawCanon() {
    if ((canonX >= CANON_WIDTH) & (canonX <= (319 - CANON_WIDTH))) {
        call graphics_setCol(0xFF)
        call graphics_line((canonX - CANON_WIDTH) 199 canonX (199 - CANON_HEIGHT))
        call graphics_line(canonX (199 - CANON_HEIGHT) (canonX + CANON_WIDTH) 199)    }
}

fun drawAlien() {
    if ((alienX >= ALIEN_WIDTH) & (alienX <=(319 - ALIEN_WIDTH))) {
        call graphics_setCol(0x0F)
        call text_drawChar((alienX - ALIEN_WIDTH) 8 'O')
    }
}

fun drawBullet() {
    if ((bulletY >= BULLET_HEIGHT) & (bulletY < (199- BULLET_HEIGHT))) {
        call graphics_setCol(0xF0)
        call graphics_line(bulletX (bulletY - BULLET_HEIGHT) bulletX (bulletY + BULLET_HEIGHT))
    }
}

fun checkKeyCode(keycode: uint16): uint16 {
    if (keycode == LEFT_KEY) {
        let canonX = (canonX - 5)
        if (canonX < CANON_WIDTH) {
            let canonX = CANON_WIDTH
        }
    }
    if (keycode == RIGHT_KEY) {
        let canonX = (canonX + 5)
        if (canonX > (319 - CANON_WIDTH)) {
            let canonX = (319 - CANON_WIDTH)
        }
    }
    if (keycode == SPACE) {
        let bulletX = canonX
        let bulletY = ((199 - CANON_HEIGHT) - BULLET_HEIGHT)
    }
}

fun animateBullet() {
    if (bulletY > ((BULLET_HEIGHT + ALIEN_HEIGHT) + 8)) {
        let bulletY = (bulletY - 1)
    } else {
        if (bulletY > 0) {
            if ((bulletX >= (alienX - ALIEN_WIDTH)) & (bulletX <= (alienX + ALIEN_WIDTH))) {
                let score = (score + 1)
            }
            let bulletY = -1
        }
    }
}

fun animateAlien() {
    if (alienX >= ALIEN_WIDTH) {
        let alienX = (alienX + 1)
        if (alienX > (319 - ALIEN_WIDTH)) {
            let alienX = ALIEN_WIDTH
        }
    }
}

main
keycode : uint16
drawBuffer : uint8
{
    let drawBuffer = 0
    call graphics_setBgCol(0)
    while true {
        call graphics_setScreenBuffer((1 - drawBuffer))
        call graphics_setDrawBuffer(drawBuffer)
        call graphics_clrscr()
        call drawScore()
        call drawCanon()
        call drawAlien()
        call drawBullet()
        let keycode = call keyboard_readKeyCode()
        call checkKeyCode(keycode)
        call animateBullet()
        call animateAlien()
        let drawBuffer = (1 - drawBuffer)
        call util_enableInterrupts()
        call graphics_waitVertRetrace()
        call util_disableInterrupts()
    }
}
I abbandoned the C-compiler project since it has been too long since I worked on it and it got too complicated.
But all the experience has made me want to create my own programming language.
So I started that. You can follow the progress on Gitlab. The EBNF specification is rather stable and is made to be easily parsed. I hope to be able to finish it somewhere in the summer. Because then I can start coding on a nice game for the Moncky-computer. My partner has been asking for a packman so I'll see what I can do :-)
The C compiler now also knows external functions (from firmware), while, if, and return statements. See the file "testje.c" on gitlab. It will compile and execute on the Moncky computer.
A first implementation of the C compiler is available on gitlab.
The code can use some refactoring, and comments.
The compiler can already parse a lot of C-files but code generation is not implemented for a lot of constructions. However, the basic structure is there and just needs extra code.
Still a lot of work :-)
Make sure the arduino shield does not have any components that could generate a 5V signal on one of the pins. The FPGA cannot handle this! I also took away the LED that was connected to pin 13.
Use the arduino shield to connect the SD card reader to the board. Power (3.3 V) can be drawn from the standard pins. The SPI pins are also standard for an arduino UNO (pins 10, 11, 12, and 13 are used for SS, MOSI, MISO, CLK respectively).
You can find the file "top.bit" in the "Moncky3_verilog" folder in the project files (https://gitlab.com/big-bat/moncky). This file can be used to program the FPGA. Uploading the file to the FPGA can be done with Vivado software (freely available at the Xilinx site). The chipset of the flash-chip is "s25fl128sxxxxxxx0" and not the one in the documentation of the board.
The assembler will output many different files. One of them is a ".img" file. Rename this file to "MONCKYOS".
Now create a partition on an SD card <32 MB (currently only small partitions are supported). Format the partition with a FAT16 file system. Now copy the "MONCKYOS" file to the SD card.
Put the SD card into the computer and boot it up. It should load your project and execute it.
Create an account to leave a comment. Already have an account? Log In.
Thanks! Our projects are similar indeed. Nice to meet another great/weird mind! :-)
@bigbat Do you plan to add more RAM? Via the DRAM of the FPGA Dev-board? Having a lot of RAM is one of the key for implementing more complex applications. But of course, it depends what you want to acheive, what kind of application.
Good suggestion! I don't have any plans to add DRAM at the moment. The most important reason is that I didn't have enough time to figure out how to drive it. This is my first HDL project, so I had to learn a lot in a short time. On the other hand I have 128 KiB available at this moment and the commodore 64 only had half of that :-) The compiler I just wrote, creates quite dense code, so I'm still hopeful it will be enough. If I would make this project again, DRAM could be an interesting choice because the use of BRAM is very slow I find (but maybe I could improve the design :-) )
The goal now is to play pack-man and that should be feasible :-)
Become a member to follow this project and never miss any updates

 land-boards.com
 f4hdk
f4hdk

 Samuel A. Falvo II
@bigbat Great project. I like it. Quite similar to my old project AZ2 Computer : https://hackaday.io/project/18206