Overview
Mood lighting highlights and enhances any space dramatically, and make your home look much nicer and more inviting.
Increasing adoption of smart mood lightning solutions during Covid! With the increasing demands of a single space that meets the atmosphere and requirements of both working stations and living places, the necessity of smart lighting for the home has gained new ground. This technology of smart lighting for homes actively minimizes energy consumption to a significant level, benefiting work from home workers to stabilize their electricity usage. It also adds convenience allowing the utility of lights only when absolutely necessary, while keeping track of the daylight control system. This lighting system is home helps to efficiently create an environment that suits both the moods of the workspace and relaxing space whenever required.
I prefer to make my own smart bulb with an immense amount of customization and reverse engineering factors.
I prefer to make my own smart bulb with an immense amount of customization and reverse engineering factors.
Technology Used:
Based on the Tuya Smart platform, a smart light can be developed simply and quickly. This tutorial introduces how to use the Tuya Cloud API and IoT platform to quickly complete a smart light product prototype. You don't need to have any prior experience with Arduino programming or any soldering for this tutorial, it is purely in simple Python language. If you haven't signed up for the Tuya IoT account, sign up here, c'mon it's free for all developers to Sign up and join the Tuya Developer Arduino Beta Test
Also, I have been preparing several articles for people and hobbyists who are new to the Tuya IoT platform, do visit those for reference:
- https://steptostem.com/3553/aquamon-aquaponics-and-fish-tank-monitoring-with-tuya-iot/
- https://steptostem.com/3360/getting-started-with-arduino-iot-control-with-tuya-iot-platform/
What is Tuya IoT and Cloud ?
Tuya Is a leading global IoT Cloud Platform that connects the intelligent needs of brands, OEMs, developers, and retail chains. The platform provides developers with a one-stop IoT PaaS-level solution that contains hardware development tools, global cloud services, and smart business platform development, Tuya offers comprehensive ecosystem empowerment from technology to marketing channels to build the world’s leading IoT Cloud Platform. Even you can use the Tuya Cloud platform to connect hardware to the cloud and then use their API to control and monitor these objects.
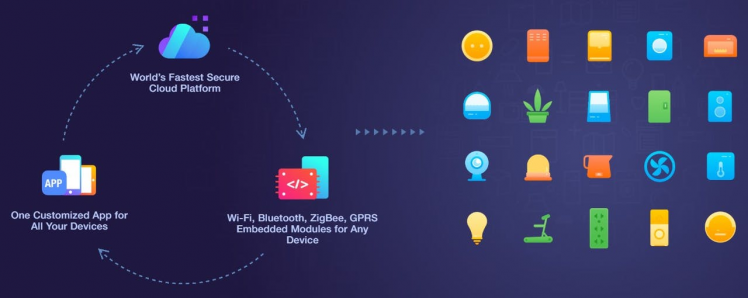
Let's build it!
Hardware Setup:
All the hardware we need here, just added sink and fan with thermal tape to keep the device performance consistent
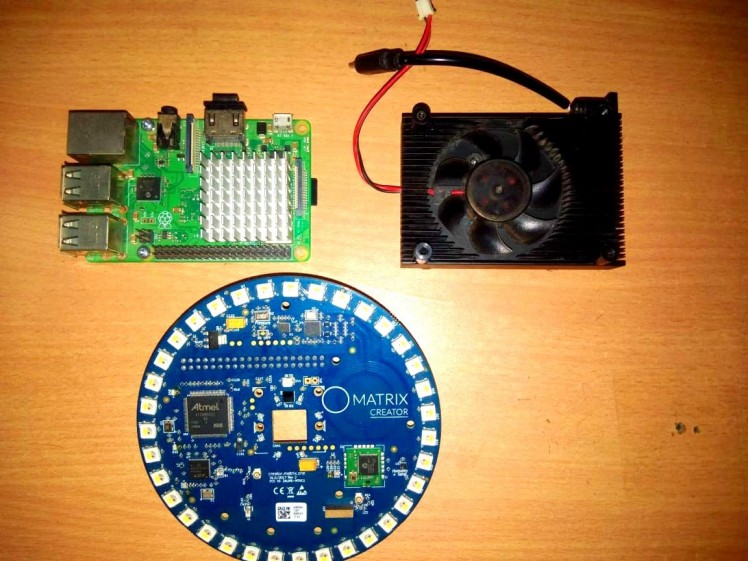
All the hardware we need here, just added sink and fan with thermal tape to keep the device performance consistent
Let's set up the hardware first, we are going to use Raspberry Pi 3B+, you can use any version above it as well, for the LED array I am going to Matrix Creator Board, this board is my favourite of all boards with many on-board sensors and 35 RGBw LEDs.
1 / 2
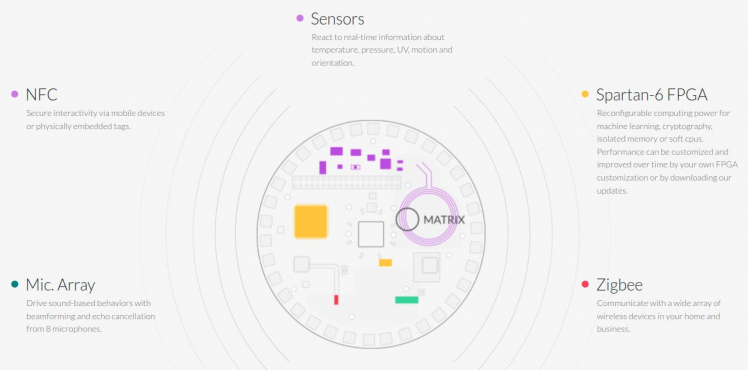
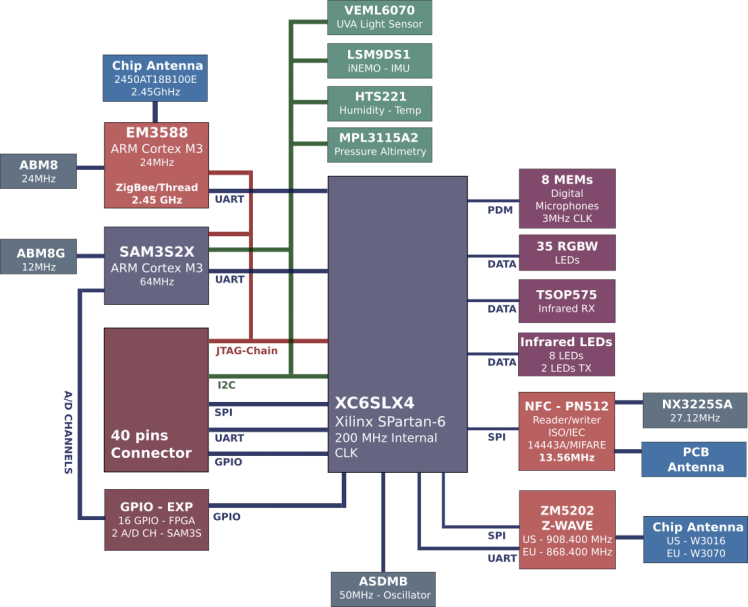
matrix Expanded Overview
Recommended 5V 3A Micro USB Power Supply, now use MicroSD Card with the latest version of Raspberry Pi OS installed. Flash and burn the Raspberry OS using Etcher.io for easy flashing.
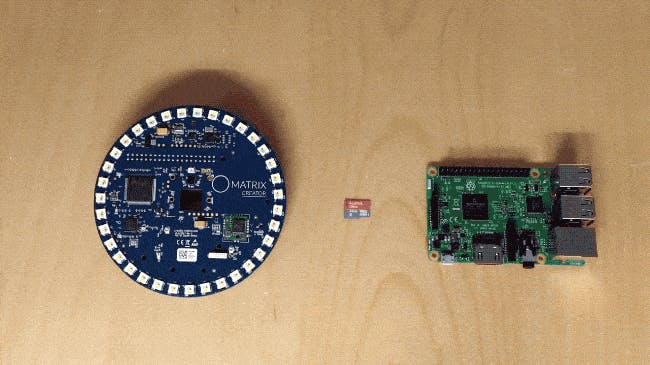
After OS is flashed, try connecting a monitor for the first time and then later you can access the device remotely through VNC or SSH. Let us install the Matrix Creator device drivers and packages, https://matrix-io.github.io/matrix-documentation/matrix-hal/getting-started/installation-package/
# Add repo and key
curl -L https://apt.matrix.one/doc/apt-key.gpg | sudo apt-key add -
echo "deb https://apt.matrix.one/raspbian $(lsb_release -sc) main" | sudo tee /etc/apt/sources.list.d/matrixlabs.list

# Update repo and packages
sudo apt-get update
sudo apt-get upgrade

# Install MATRIX HAL Packages
sudo...
Read more »
 Sumit
Sumit
 Grandeur
 tdicola
 Roman V