0%
0%
Powerline Controlled LED Strings
Analysis of a RGB LED string and recreating its functionality
 Tim
TimBecome a Hackaday.io member
Already have an account? Log in.
Just one more thing
To make the experience fit your profile, pick a username and tell us what interests you.
Pick an awesome username
hackaday.io/
Your profile's URL: hackaday.io/username. Max 25 alphanumeric characters.
Pick a few interests
Projects that share your interests
People that share your interests
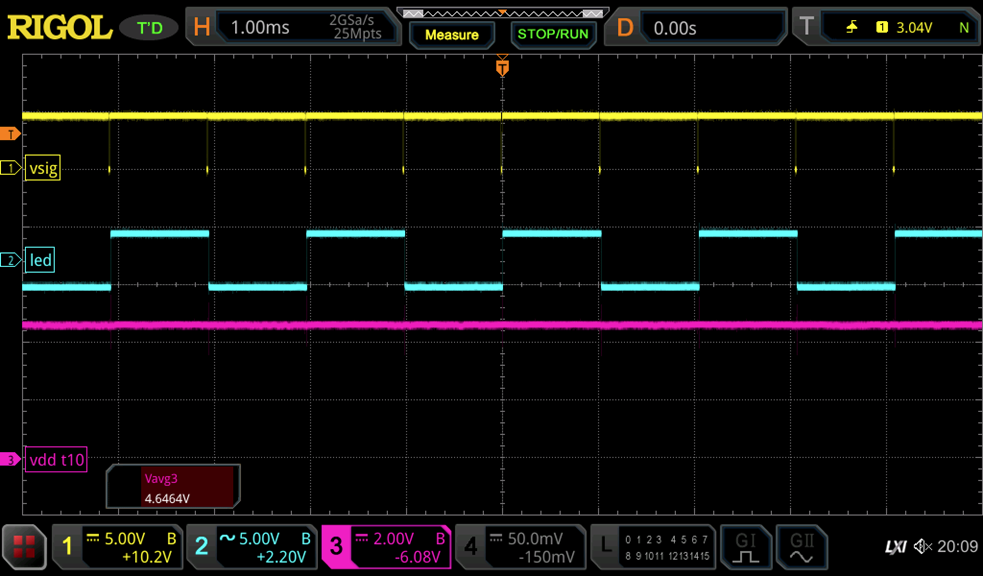 The yellow trace ("vsig") on top corresponds to VLED. We can see that it is mostly in Hi state with short low pulses. Every pulse toggles the state of the LED, as intended. The voltage at VCC is 4.6V - apparently there is some voltage drop in the ATMega328 board and/or the USB port that is used to power it.
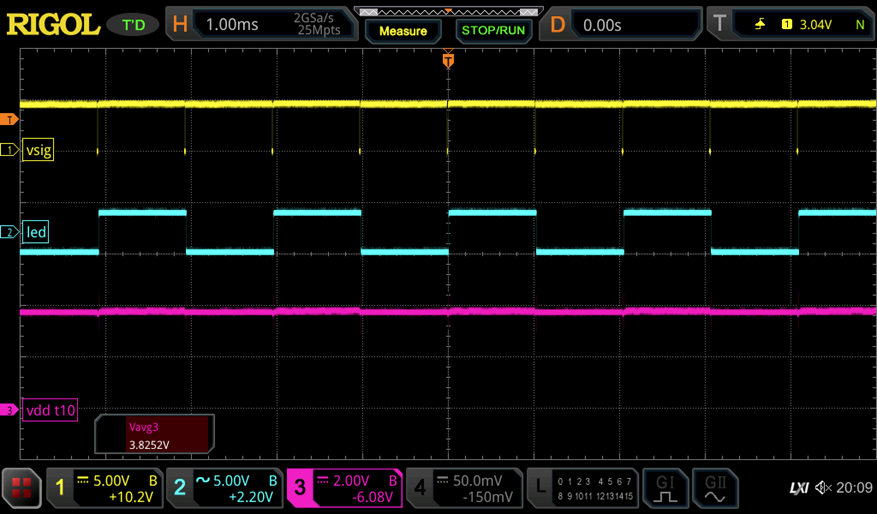 Repeating the same experiment without the connection to VCC releals exactly the same behavior. The ATtiny10 is powered only by the parasitic supply through PB2 and the capacitor now. Yay, it works!
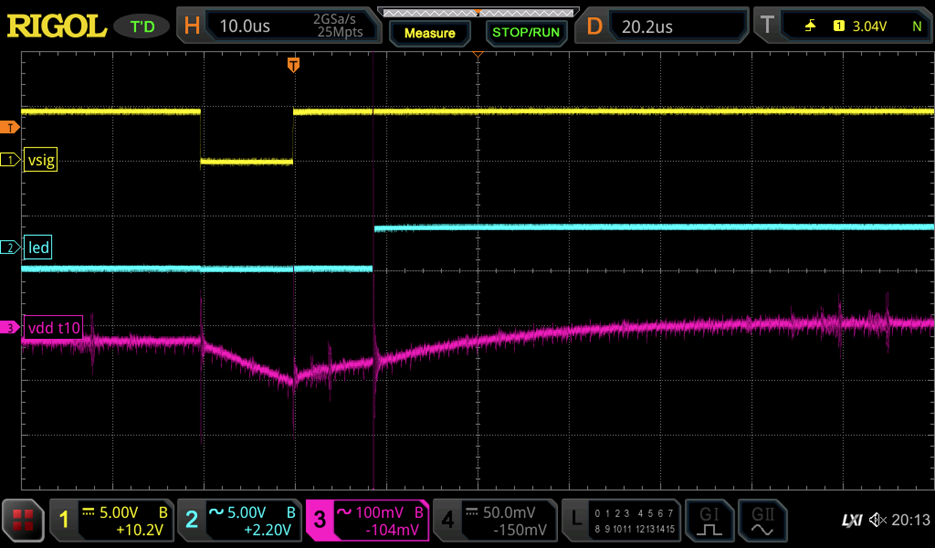

 Tyler Gerritsen
 Christoph Tack

 Hulk
Hulk