Close
0%
0%

Print HUGE parts with Conveyor Belt 3D Printing

Full tutorial on how to build a conveyor belt 3D printer. I provide completely free and opensource CAD and firmware to build this printer.

Similar projects worth following
Conveyor belt 3D printing is awesome ... and also mysterious. I hope this document acts as a definitive guide on how to build a conveyor belt 3D printer: https://youtu.be/gruBm8ppwgY

**BEFORE ANYTHING ELSE, CHECK THIS OUT. IT WILL ANSWER ALL QUESTIONS.**👇👇

[Figure 1: Full Explanation Video]

Intro

Conveyor belt 3D printers are arguably the most exciting development in 3D printing since RepRap. With its unique design, a conveyor belt 3D printer has two features which no other desktop 3D printer can offer: automatic part ejection and infinitely long printing. Resultantly, a conveyor belt 3D printer can both mass produce parts and print extremely large parts. If it works…

Over the past half decade, a number of desktop conveyor belt 3D printers have been released to the public. Unfortunately, these machines are buggy and finicky; their print quality does not meet our expectations of a 3D printer in 2022. Current conveyor belt printers are reminiscent of hobby 3D printers from 2007-2009: low quality, unreliable, prototype adjacent, but also lots of fun! The caveats and details of conveyor belt 3D printers still need to be ironed out. I believe that there is a missing ingredient that will rapidly move this design forwards: community. In its early stages, amateur 3D printer designs made rapid progress due to a large, committed, opensource community that was working together to make low cost 3D printers viable. Conveyor belt 3D printers need the same open source catalyst.

I have built many, many, many, manymany conveyor belt 3D printers. From the knowledge gained through these successes (and failures), I have designed a new conveyor belt 3D printer that is extremely simple for people to build. The 3D printer is completely free and opensource with the CAD and firmware available in this document. I have also provided detailed build instructions to make it straight forwards for others to replicate (and hopefully improve) the 3D printer. Due to the opensource nature of this project, I have aptly named this 3D printer design OpenBelt - The Opensource Conveyor Belt 3D Printer.

Demos

[Figure 2: Printing Sword Demo]

[Figure 3: Printing Skateboard Demo]

[Figure 4: Printing Funny Thing Demo]

[Figure 5: Printing Cricket Bat Demo]

Design Choices

My goal is that as many people as possible are able to replicate this 3D printer. Therefore, I tried to make the design accessible and easy to follow for people from all technical background. In pursuit of this goal, I made the following design choices while developing this project.

  1. All components for this project can be 3D printed
    In my previous conveyor belt 3D printer designs, I used a lathe and mill to machine some of the components. I am assuming most people attempting this project do not have access to such expensive machines. So I specifically designed all of the fixtures, jigs, and other components to be 3D printable. I hope this makes it easier for others to fabricate these components.
  2. Simple Design >>> Perfect Design
    I chose to make this conveyor belt 3D printer as simple as possible. There are many extra features that I would love to add to this machine. But I chose to only include the bare essentials for this tutorial.
  3. Starting with a 3D Printer
    In this tutorial, we start with an existing 3D printer and convert it into a conveyor belt 3D printer. If I were to instead build the 3D printer from scratch, I would have to include a lot of additional details that are irrelevant to the key conveyor belt aspect. There are already many tutorials online that document building a 3D printer from raw materials. I see no point reinventing the wheel. If you are looking for a good resource on building 3D printers from scratch, I recommend Dr. D Flo’s YouTube Channel!

Future Skills Center (FSC) Support

This project was generously supported by the Future Skills Center (FSC) federal program, via McMaster University. In exchange for academic support, an OpenBelt 3D printer is currently active at McMaster University's Learning Factory Industry 4.0 Lab. Students are welcome to use the 3D printer for any academic/hobby...

Read more »

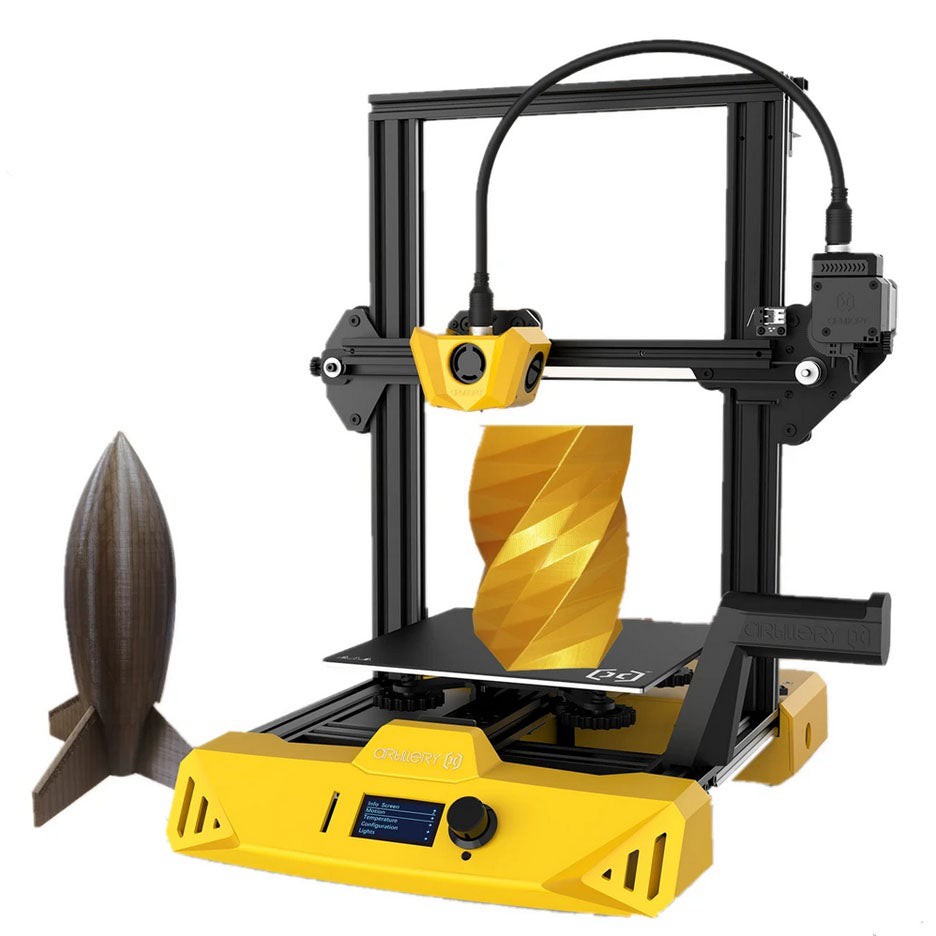
  • 1 × FDM 3D Printer Instead of starting from scratch, we will be modifying an exiting 3D printer into a conveyor belt 3D printer. Almost any FDM 3D printer is suitable for this conversion. i am using an Artillery3D Hornet for my conversion.
  • 50 × M5x8mm Hex Bolts Hex Socket Head
  • 50 × M5 Drop In T Nuts
  • 4 × M5 Sliding T Nuts
  • 2 × 8mm Metal Axle Each axle must be at least 200mm long. You can cheaply purchase such axles from vendors like Home Depot, Amazon, Canadian Tire, McMaster-Carr, etc

  • 1
    Find a 3D Printer to Modify

    [Figure 1: Artillery3D Hornet - The 3D Printer I will be Modifying]

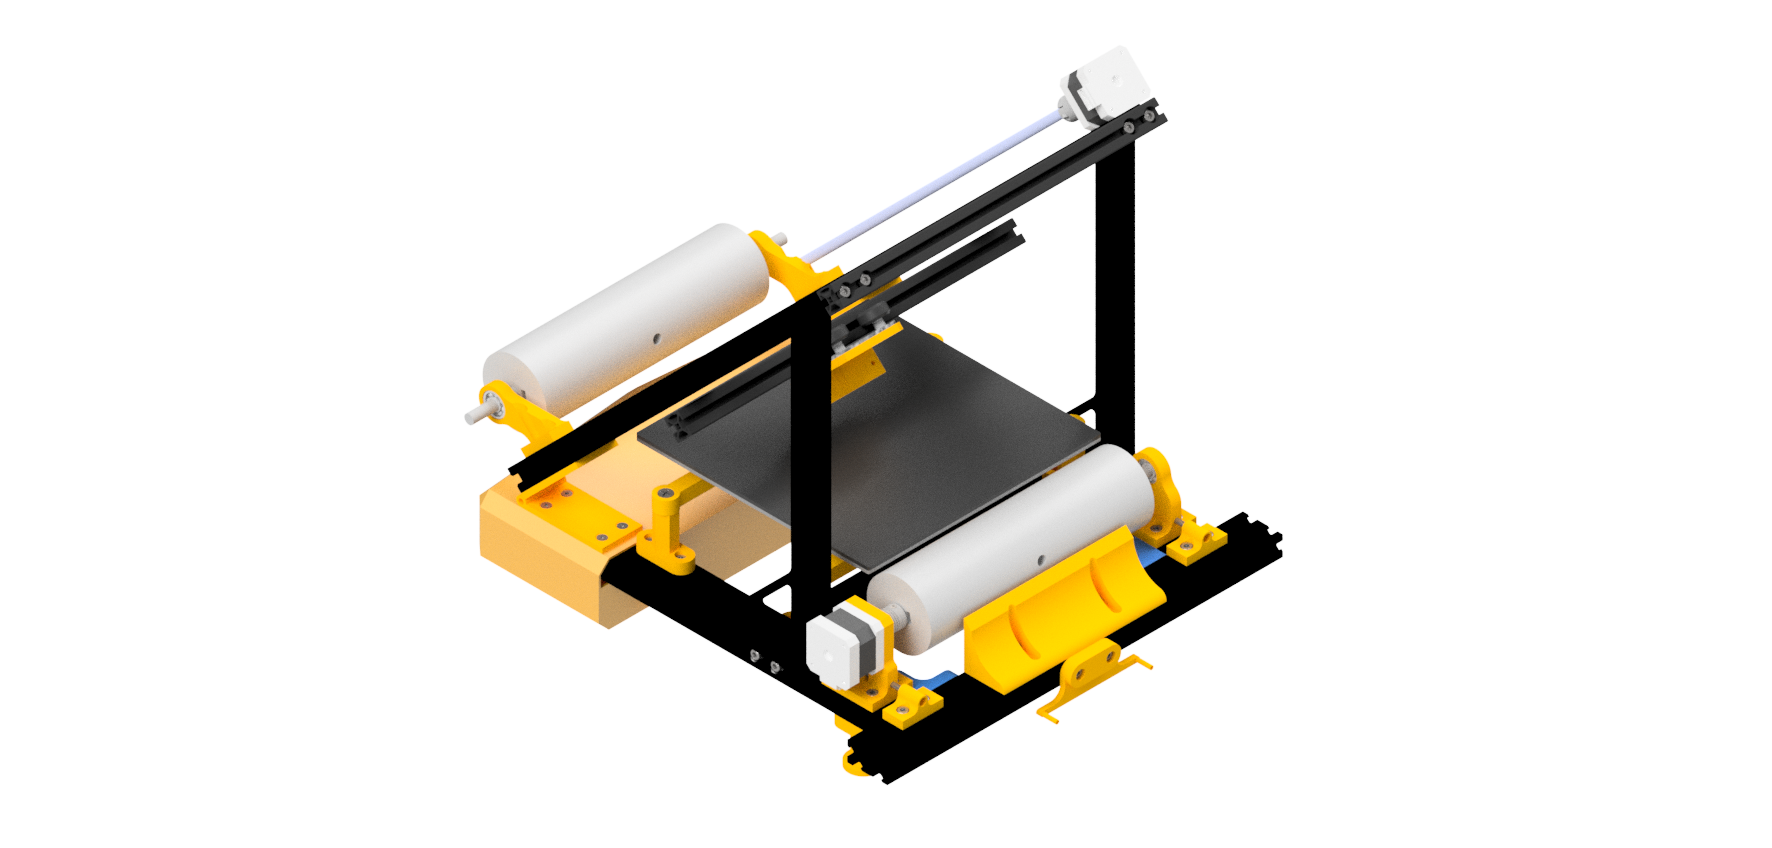
    [Figure 2: CAD Render of Artillery3D Hornet after Conversion is Complete]

    We could build our 3D printer entirely from scratch, but that would be a lot of work and a total PITA. Instead, it is much easy to take an old shitty 3D printer and reincarnate it as a s3xy conveyor belt 3D printer. I am assuming anyone who is interested in building a conveyor belt 3D on Hackaday already has some 3D printer parts lying around 💪

    You can turn almost desktop FDM 3D printer into a conveyor belt 3D printer. In this tutorial, I will be modifying an Artillery3D Hornet 3D Printer. I am modifying this 3D printer because Artillery3D gave me several of them for free. Thanks Arillery3D!

    I repeat, you can use pretty much any hobby FDM 3D printer for this project. However, all of 3D models I designed are specifically meant for the Artillery3D Hornet. The easiest way to following this tutorial is by using that exact 3D printer. However however, I have included the CAD for all of these 3D models as well. So you can modify the parts to match other 3D printers (i.e. TronyXY, Ender3, Prusa, etc). 

    If you do modify the CAD, please let me know! I would love to add your models to the repo (with proper credit of course:)) so that more people can build conveyor belt 3D printers.

  • 2
    Print out the Parts
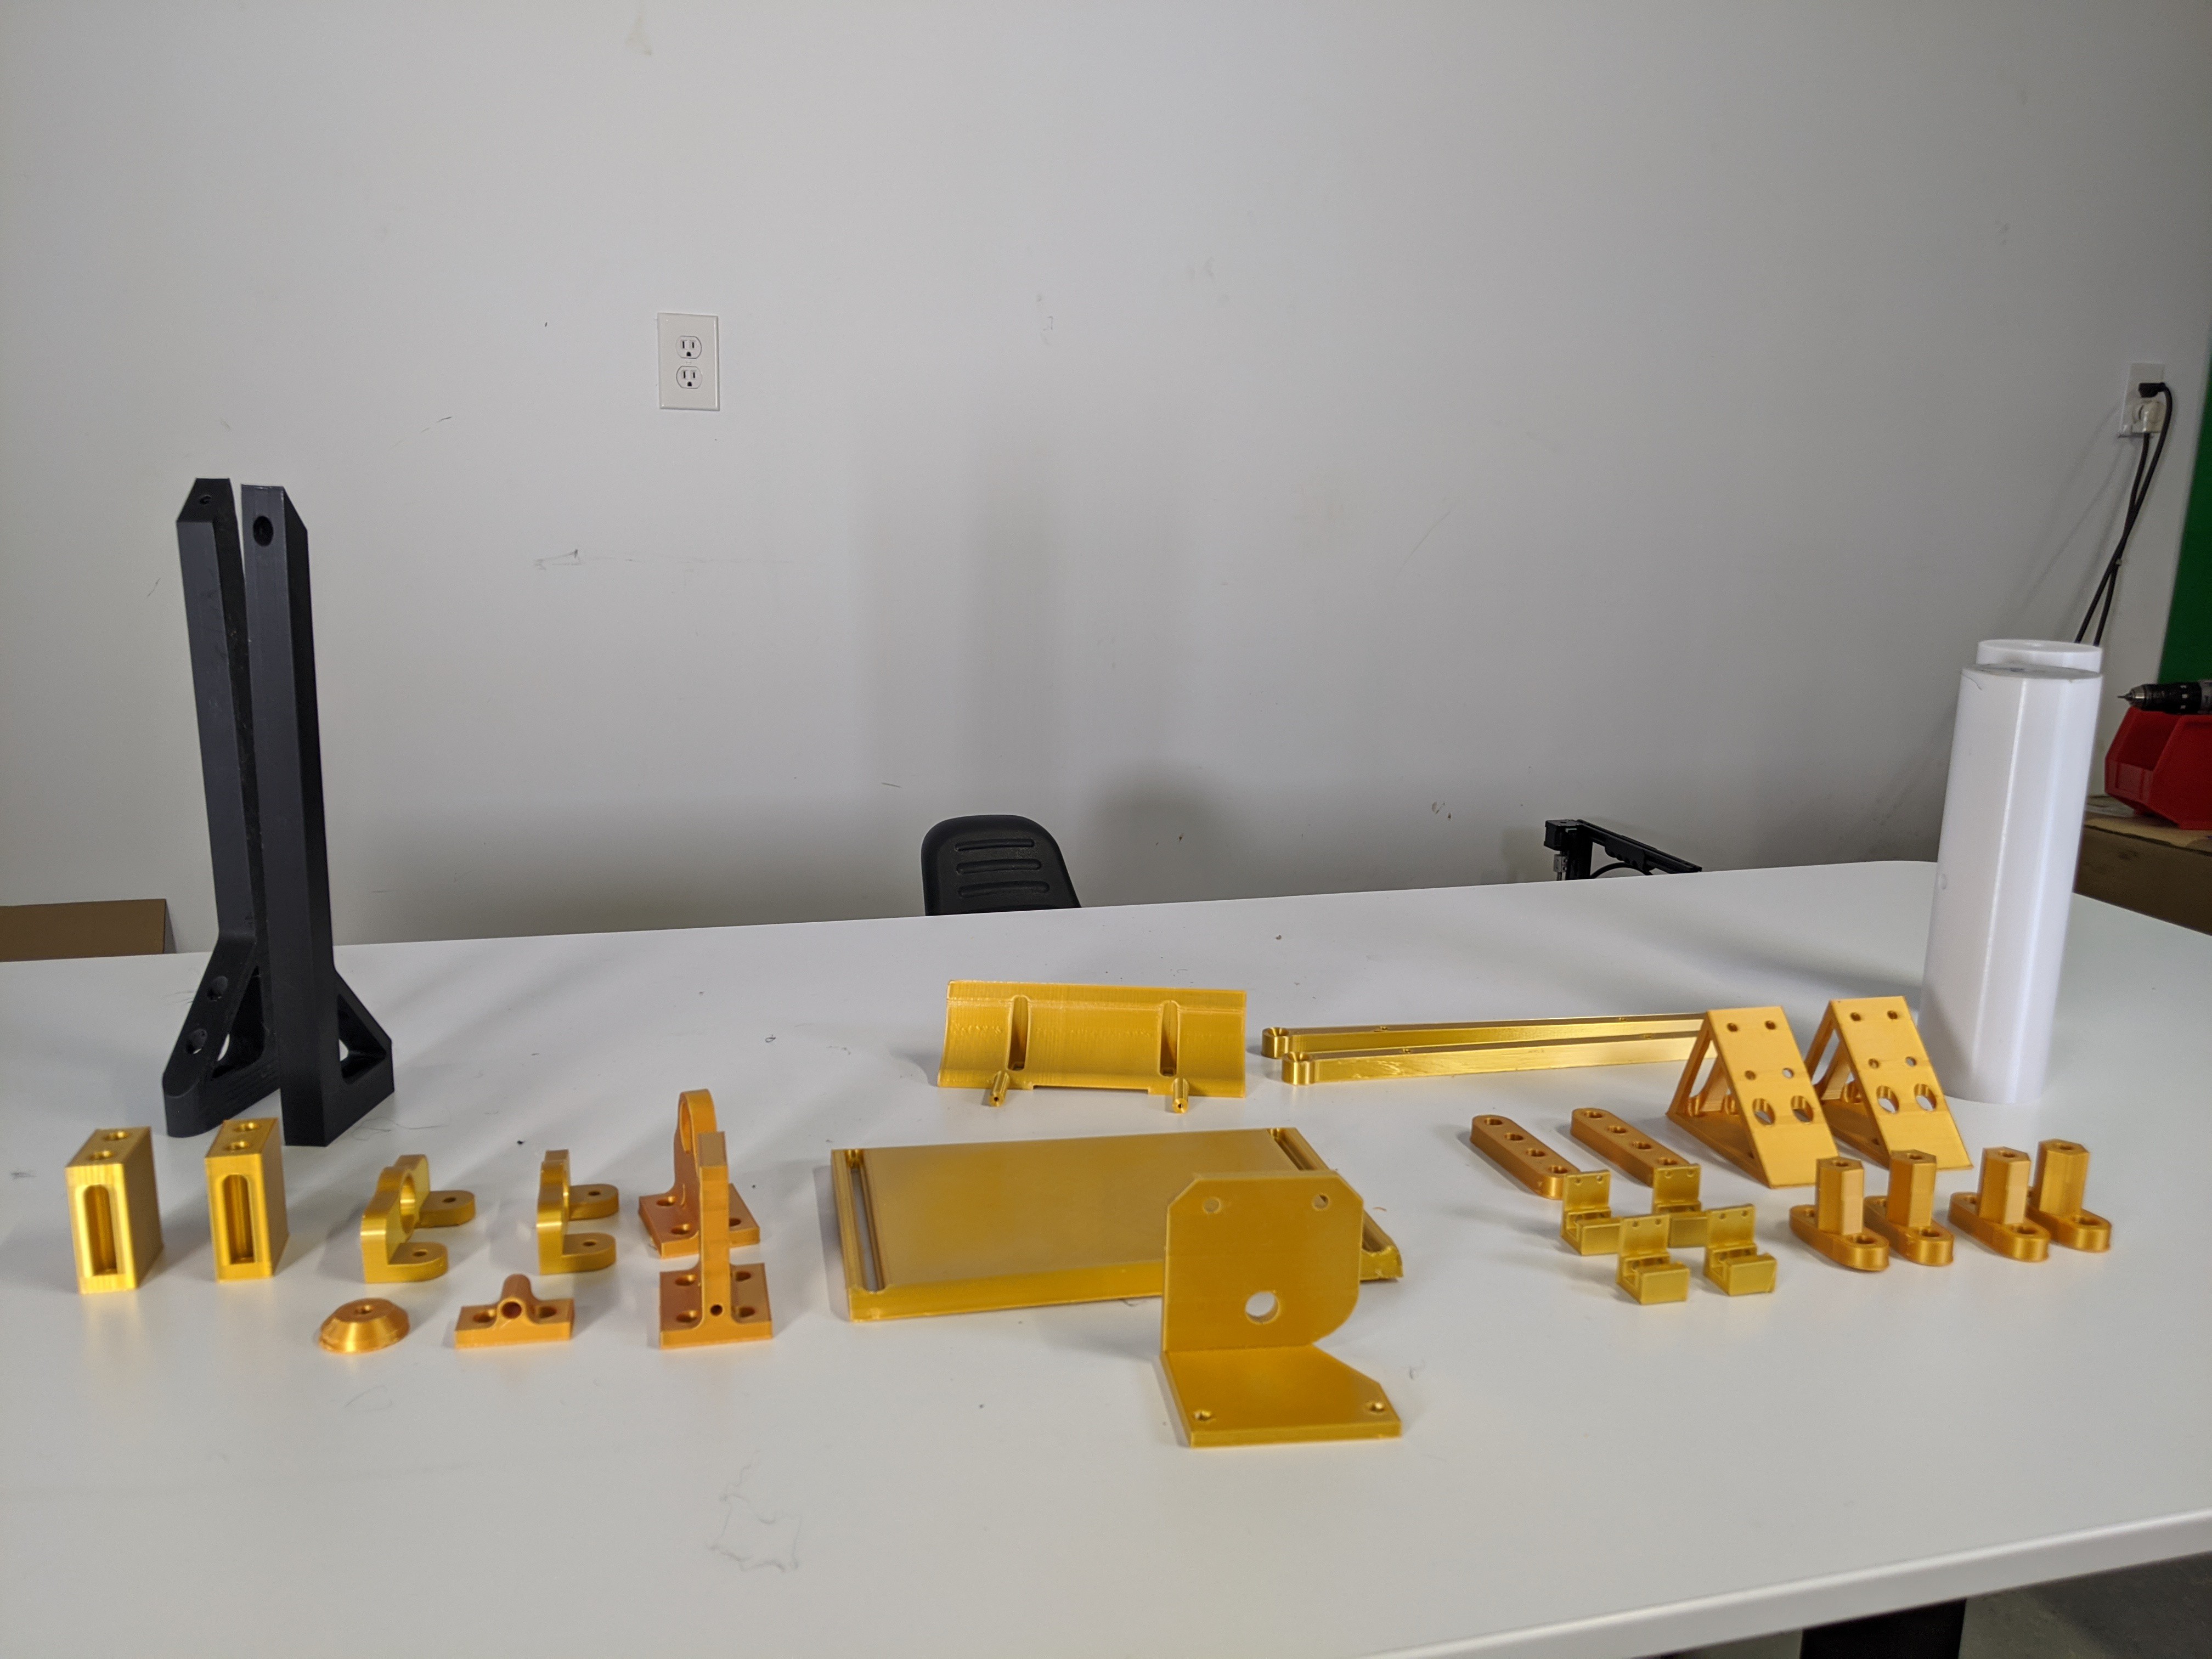
    [Figure 3: Parts to be 3D Printed for this Project]
    All custom parts in this project can be 3D printed. ALL CUSTOM PARTS IN THIS PROJECT CAN BE 3D PRINTED!

    A major flaw in my previous conveyor belt 3D printer designs is that some of the parts had to be machined on a lathe, mill, or other expensivew equipment. Obviously, this made the design less accessible to others. Duh!

    I want people to be able to build this 3D printer even if they don't have access to their school's machine shop. I want people to be able to build this machine even if they do have access to their school's machine but their faculty is too crusty to let them use it. Therefore, I ensured that all of the mounts, jigs, etc. used in this project can be 3D printed. Once again, the CAD is available in addition to the STL models. So if you want, your more than welcome to machine high quality components out of metal (and if you do let me know!). But 3D printing works just fine.

    You can access the CAD repo at this link: https://workbench.grabcad.com/workbench/projects/gcrHAT38NfZQu4oat4sHk3-AmwWRcN0bsbNID3e-RBKutN#/space/gcM1a6sAM3-5xPhVuC2xhwSpQXkVfuiPFueX-V44tka35n

    I printed all components at 35% infill and .32 layer height.

    Components to Print

    Below is the parts lists for the all of the essential components to print. I have also included the CAD files for a few extra unnecessary files in the repo.

    [Table 1: Components to Print]

    ComponentQuantity
    ANGLE_BLOCK2
    BELT_FLATTENER4
    BOTTOM_BRACE2
    BOTTOM_FOOT2
    BOTTOM_LEG2
    BRACE2
    CORNER_BRACE2
    CORNER_BRACE_LONG2
    COUPLER1
    DRUM2
    EXTENSION_BOTTOM2
    EXTENSION_TOP2
    EXTRUDER_BRACE1
    FRONT_BEARING_BLOCK1
    HEATBED_STRUT2
    MOTOR_BLOCK1
    REARING_BEARING_BLOCK2
    SHEAR1
    STANDOFF_MOUNT4
    TENSIONING_BLOCK2
  • 3
    Remove Y-Axis

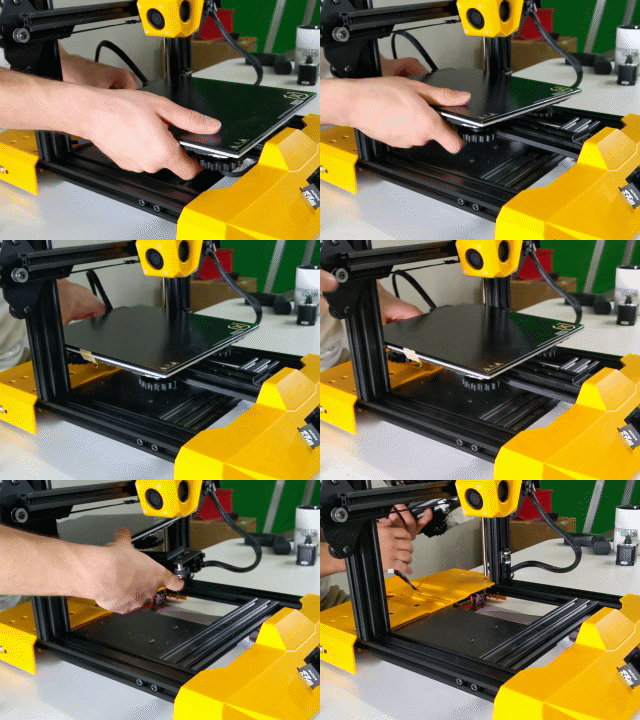
    [Figure: Removing Y-Axis]

    [Figure: Salvaging Stepper Motor]

    Finally, we can start assembling our 3D printer. And by assembling, I mean disassembling.

    My tutorial assumes you are starting this project with a functional fully assembled FDM 3D printer which you want to turn into a conveyor belt 3D printer. I am also assuming your 3D printer has a standard cartesian kinematics system and not some other weird shit (i.e. CoreXY).

    The first step we must take is removing the y-axis of the 3D printer. This is the axis that moves the heat bed forwards and backwards. We will be replacing this axis later on with the motion of the conveyor belt.

    Unbolt the extrusion that connects the y-axis to the printer and disconnect all of the electronics (heat bed, stepper motor, limit switch) from the main board. Carefully remove the y-axis components and store them in a safe place. Because we are recyclers, we will be reusing all of these components later on in the project.

View all 16 instructions

Enjoy this project?

Share

Discussions

danielroda wrote 06/18/2022 at 17:32 point

perhaps you should examine general rules about Patents. Patents protects against industrial and commercial use of a patented idea, personal use is out of scope.

  Are you sure? yes | no

Peabody1929 wrote 02/15/2022 at 01:02 point

Perhaps you should examine US Patent: US 8,668,859 B2   Building this device may violate the patent.  There are patent trolls who are ready, willing and  to sue for infringement.

  Are you sure? yes | no

Similar Projects

Does this project spark your interest?

Become a member to follow this project and never miss any updates