Many times we have seen advertising lighting signs of different colors or images with texts sliding from left to right or vice versa, mostly in shopping centers or businesses, and we wonder how expensive it is to have one. But here we will learn how to make an expandable advertising panel (8x40) through the ATMEGA328P-AU(SMD) microcontroller.
GERBER DEL PCB
https://mega.nz/file/Kd40GBCa#hh5WNz4eHy24ywPyZN9Gq8O_wNC7hQWsYoROIYh5yrU
DATASHEET ATMEGA328P-AU
https://mega.nz/file/CM5imBTb#XwQ2-X6fQGMp3nv5a_pfC13LZuHpoJuD1Lt_-7jMom8
DATASHEET CH340C
https://mega.nz/file/XBgAGJQK#qQgzdaxvzKvIpuA2bXqwoNivkQ017ndzww7F2CLIXHc
DATASHEET MAX7219CNG
https://mega.nz/file/6ZwyiLyL#1NVYfOsd7tRC3arU-hVszt4Vbili4ojUbbTBU0zxqwM
DATASHEET 7805 SMD
https://mega.nz/file/aMo03ZIB#rrRcrYjqTRfAxjCnJBQ62hXYYR4ltB39aGpndoEJwjo
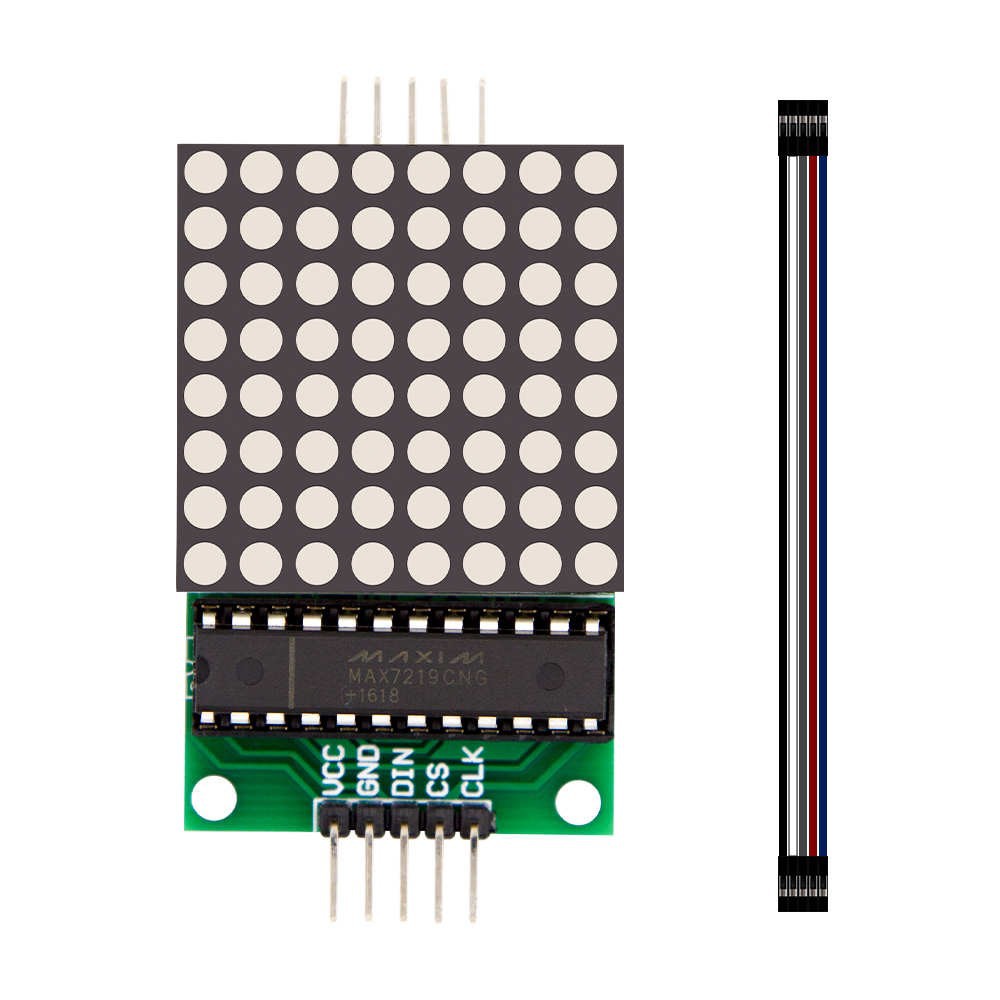
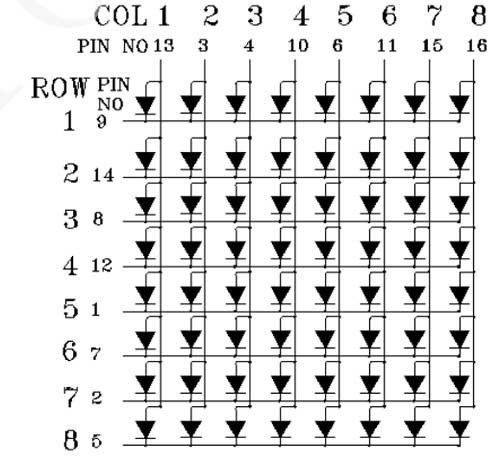
MAX7219 MODULE
Our project is based on the integrated MAX7219CNG is an integrated to control 8x8 matrices, for our project we will use this module as a reference to be able to assemble 5 matrices in a single pcb and with 5mm leds. Next we will see the characteristics of this module:
- Serial control interface: with only 3 pins we can control an entire matrix of LEDs
- Simple external circuit – requires few external components
- Cascading: Multiple MAX7219s can be cascaded. In this way you can control several LED arrays using only 3 pins of the Arduino board.
- Low power mode: can consume only 120 uA.
The matrix of our project is 5 max7219 modules connected in cascade as we will see below:
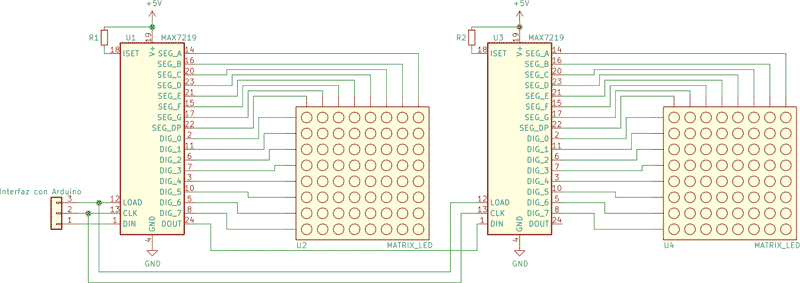
In our case there are 5 max7219 connected in cascade and we only control it with 3 DIN-CS-CLOCK pins.
Now we will see the test code to upload our program, We will use the arduino IDE, for this we must know that we need the MAX7219 library. This library is very good and will allow us to move the text from one side to another, for this we must include it in the Arduino libraries. Next we will see the code:
/* Matriz de Desplazamiento LED 8x8
Usando Arduino UNO y el Controlador MAX7219
Debe instalar la libreria MaxMatrix para que funcione el programa
Libreria: MaxMatrix
Conexiones del Arduino al Modulo MAX7219:
ARDUINIO MAX7219
10 CLK
9 CS
8 DIN
GND GND
5V VCC
Conexion de la cascada de MAX7219(1) al MAX7219(2)
MAX7219(1) MAX7219(2)
CLK CLK
CS CS
DOUT DIN
GND GND
VCC VCC
La cascada se hace conectano de los pines Superiores a los inferiores del modulo MAX7219
y los modulos se instalan de derecha a izquierda
*/
#include <MaxMatrix.h>
#include <avr/pgmspace.h>
PROGMEM unsigned char const CH[] = {
3, 8, B00000000, B00000000, B00000000, B00000000, B00000000, // space
1, 8, B01011111, B00000000, B00000000, B00000000, B00000000, // !
3, 8, B00000011, B00000000, B00000011, B00000000, B00000000, // "
5, 8, B00010100, B00111110, B00010100, B00111110, B00010100, // #
4, 8, B00100100, B01101010, B00101011, B00010010, B00000000, // $
5, 8, B01100011, B00010011, B00001000, B01100100, B01100011, // %
5, 8, B00110110, B01001001, B01010110, B00100000, B01010000, // &
1, 8, B00000011, B00000000, B00000000, B00000000, B00000000, // '
3, 8, B00011100, B00100010, B01000001, B00000000, B00000000, // (
3, 8, B01000001, B00100010, B00011100, B00000000, B00000000, // )
5, 8, B00101000, B00011000, B00001110, B00011000, B00101000, // *
5, 8, B00001000, B00001000, B00111110, B00001000, B00001000, // +
2, 8, B10110000, B01110000, B00000000, B00000000, B00000000, // ,
4, 8, B00001000, B00001000, B00001000, B00001000, B00000000,...
 ElectronicABC
 Sagar 001
The industry term for these us EMC ( Electronic Message Center)