 Andy
AndyWhat you need:
| items | quantity |
| bearing 608zz | 2 |
| M3X6 | 1 |
| M3X14 | 16 |
| M3X20 | 8 |
| M3X30 | 6 ~ 12 |
| M3X78(or 80) | 6~12 |
| M3 nuts | several |
| ∅5mm steel ball | several |
| all the printed parts(including one ARM2 part) |
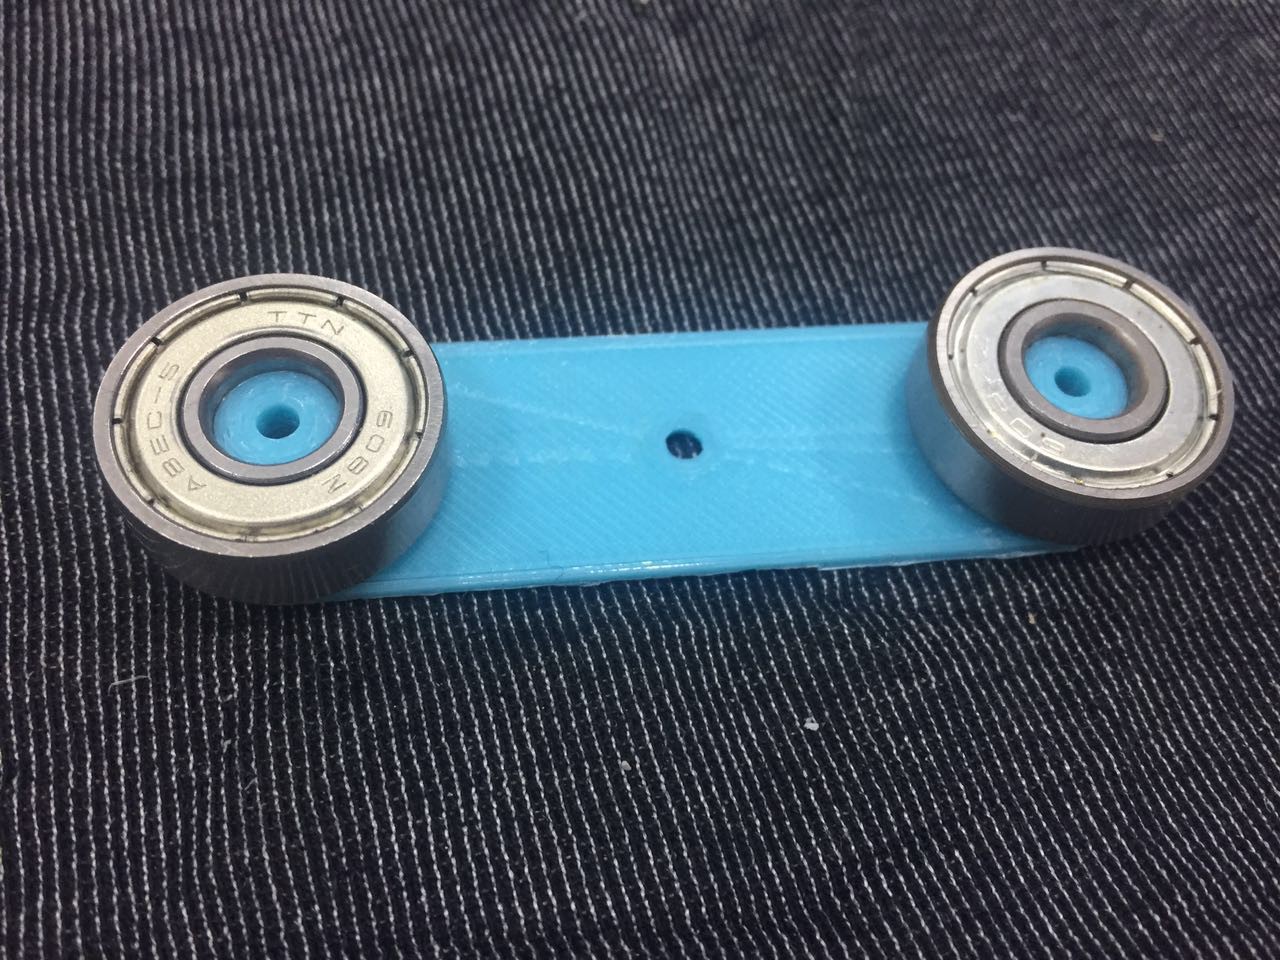
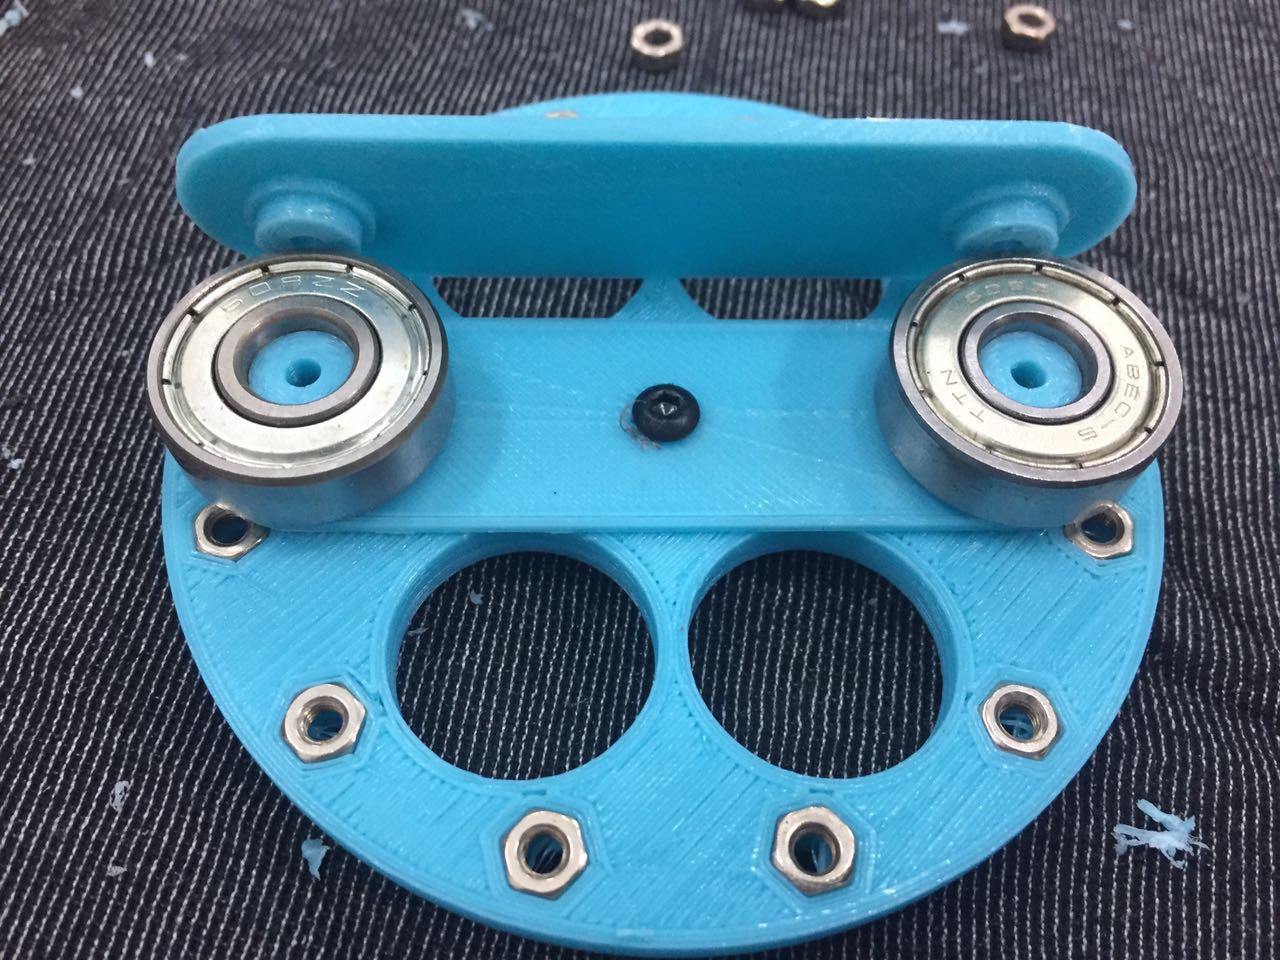
put two 608zz on the ARM1_wave_generator
add 12 nuts to the ARM1_slew_inner_b
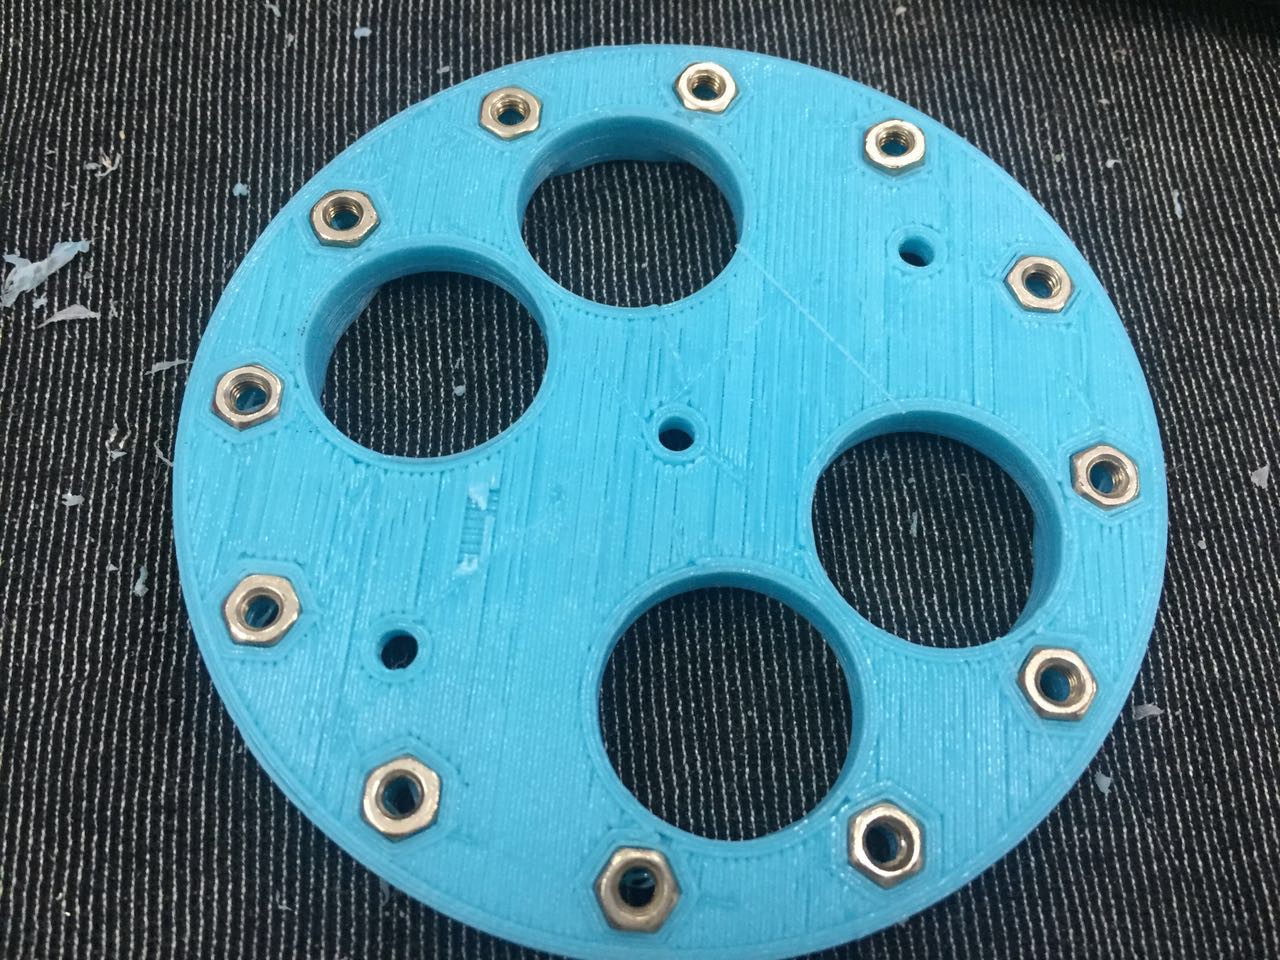
and 3 nuts on back of inner_b
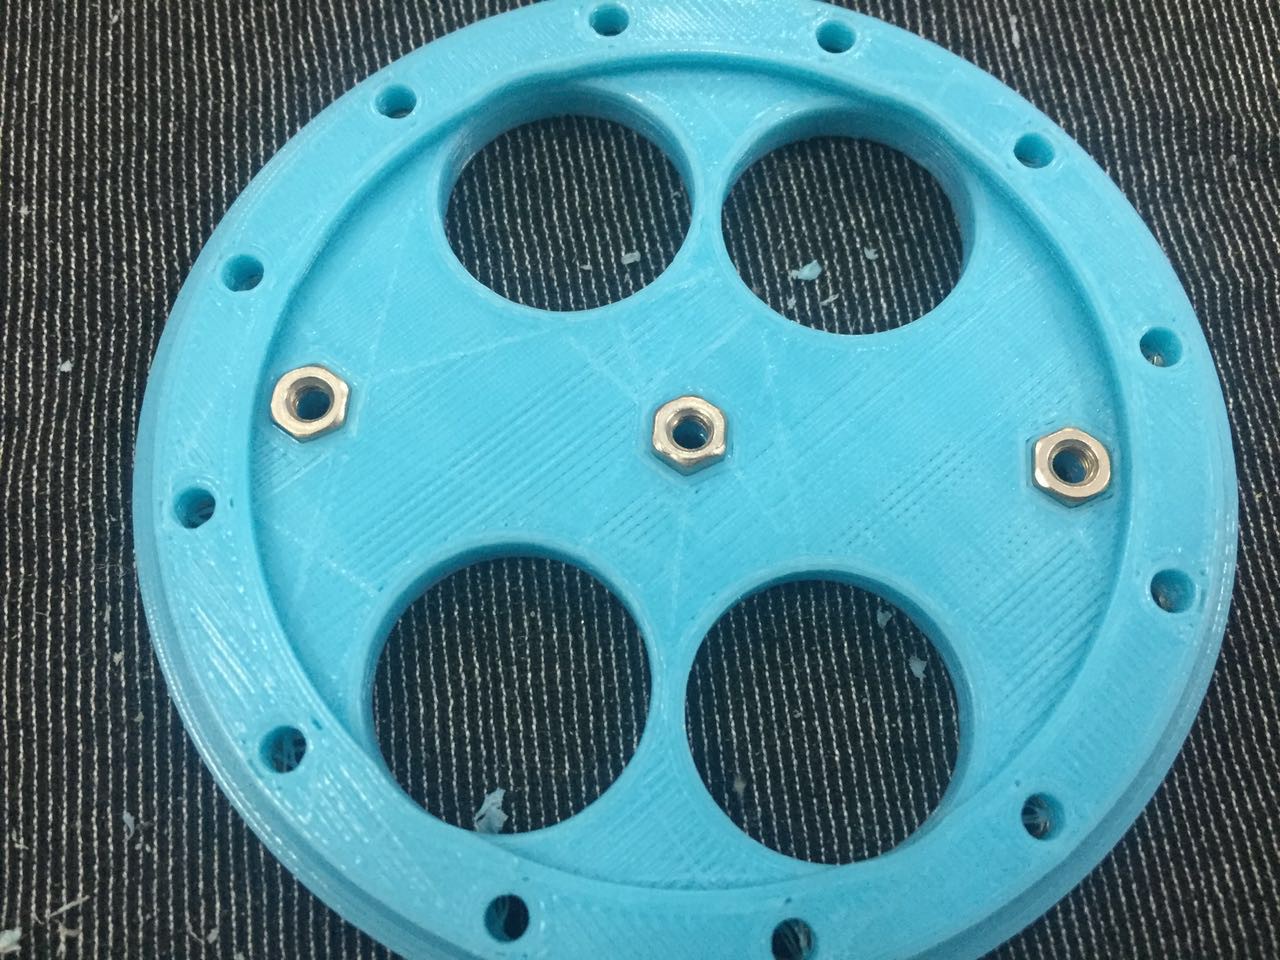
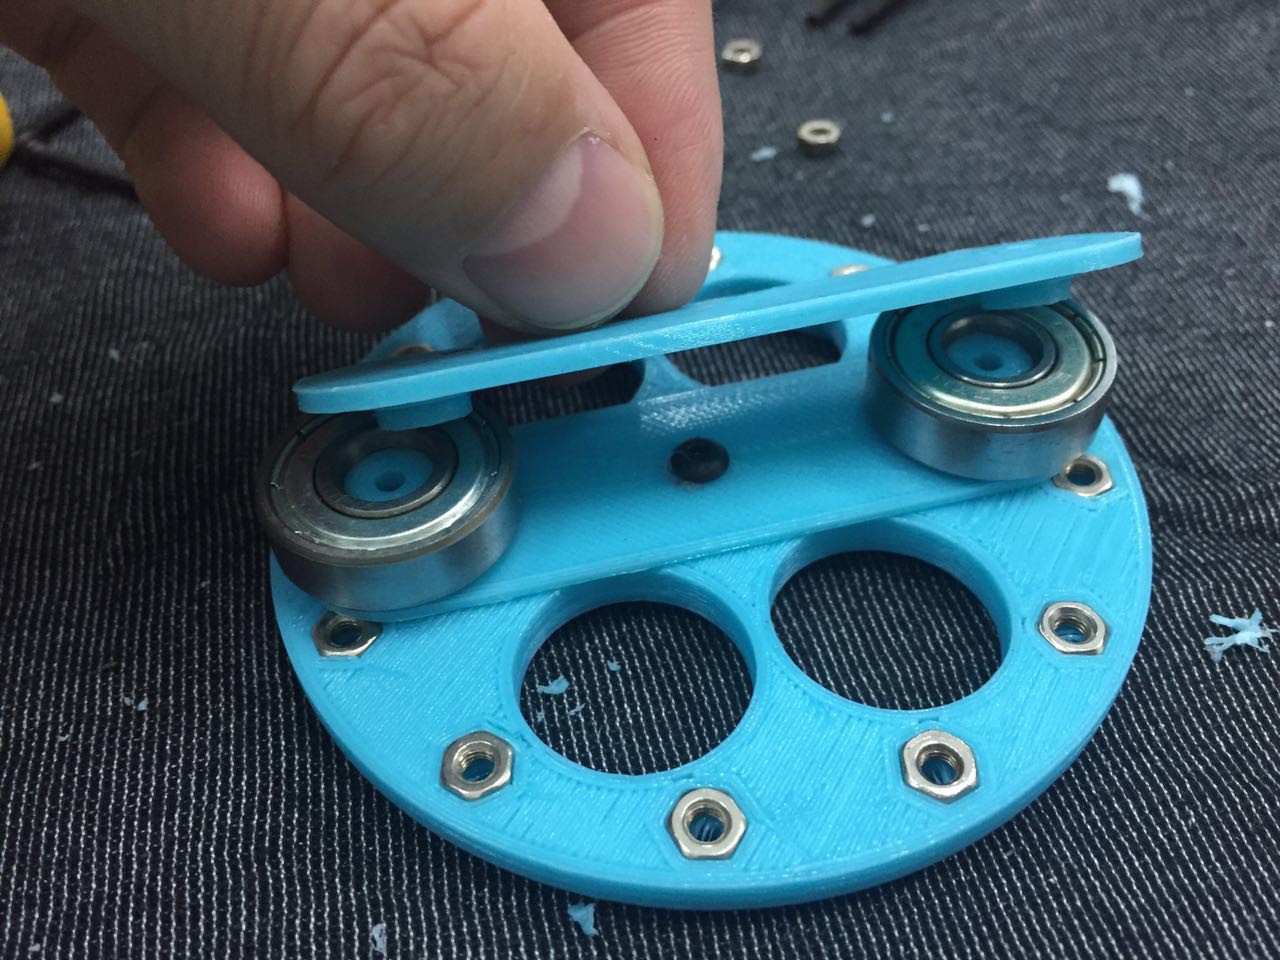
Put two parts together
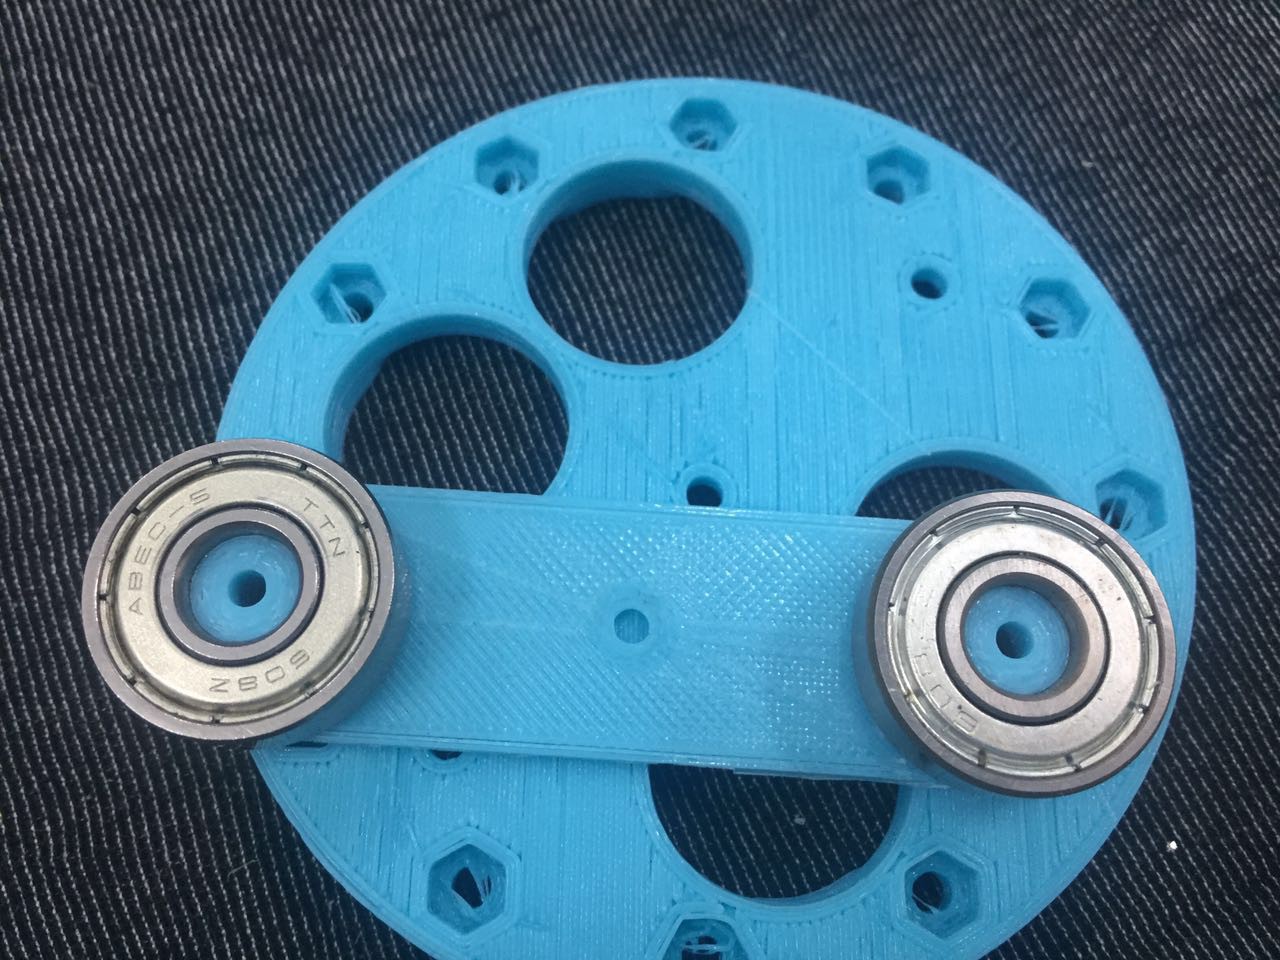
A M3X6 bolts will do the job

put ARM1_bearing_holder on top of the bearing.
And install 2 M3X20 to fasten the bearing holder.
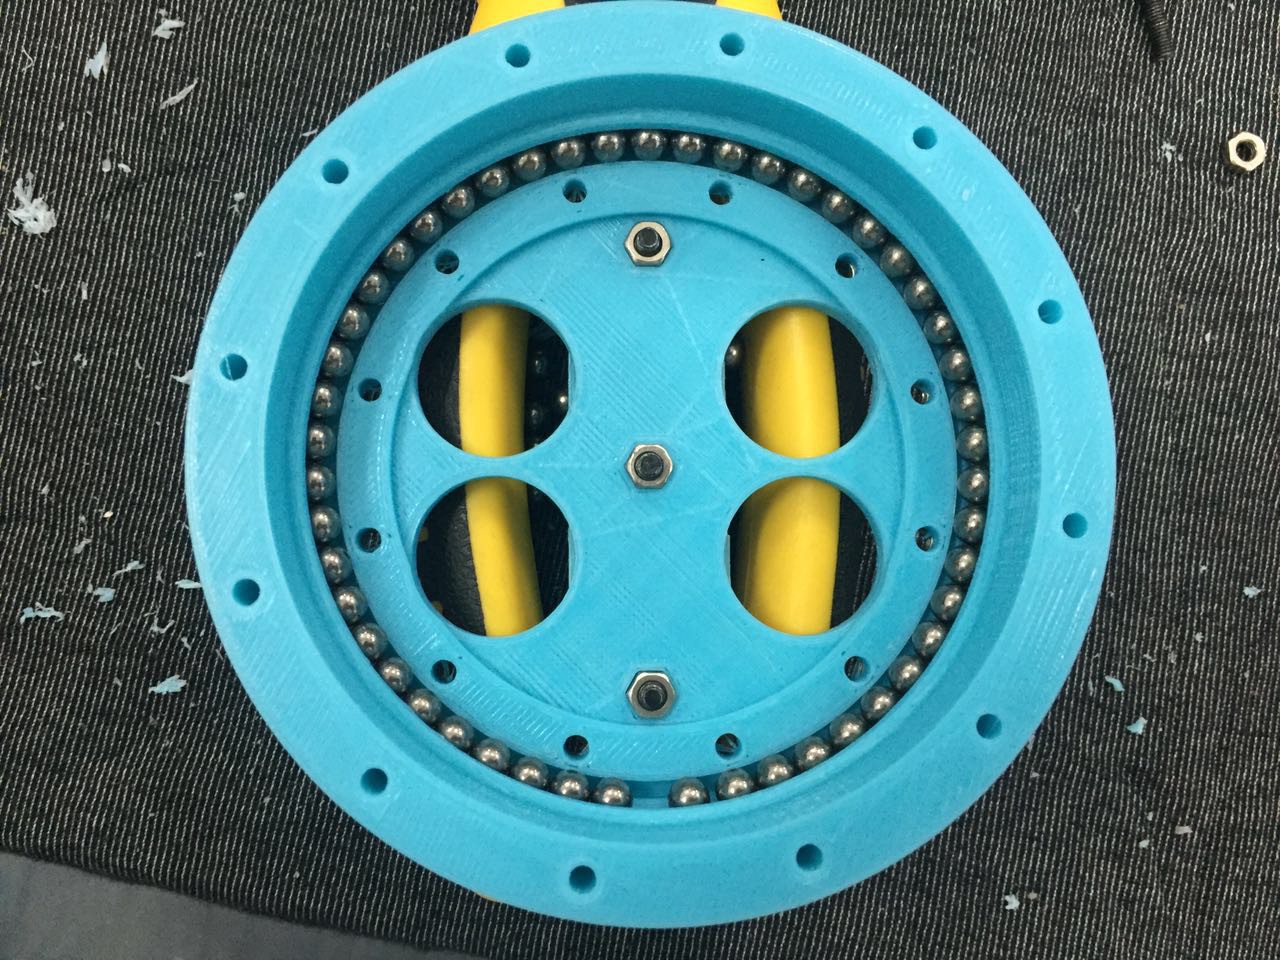
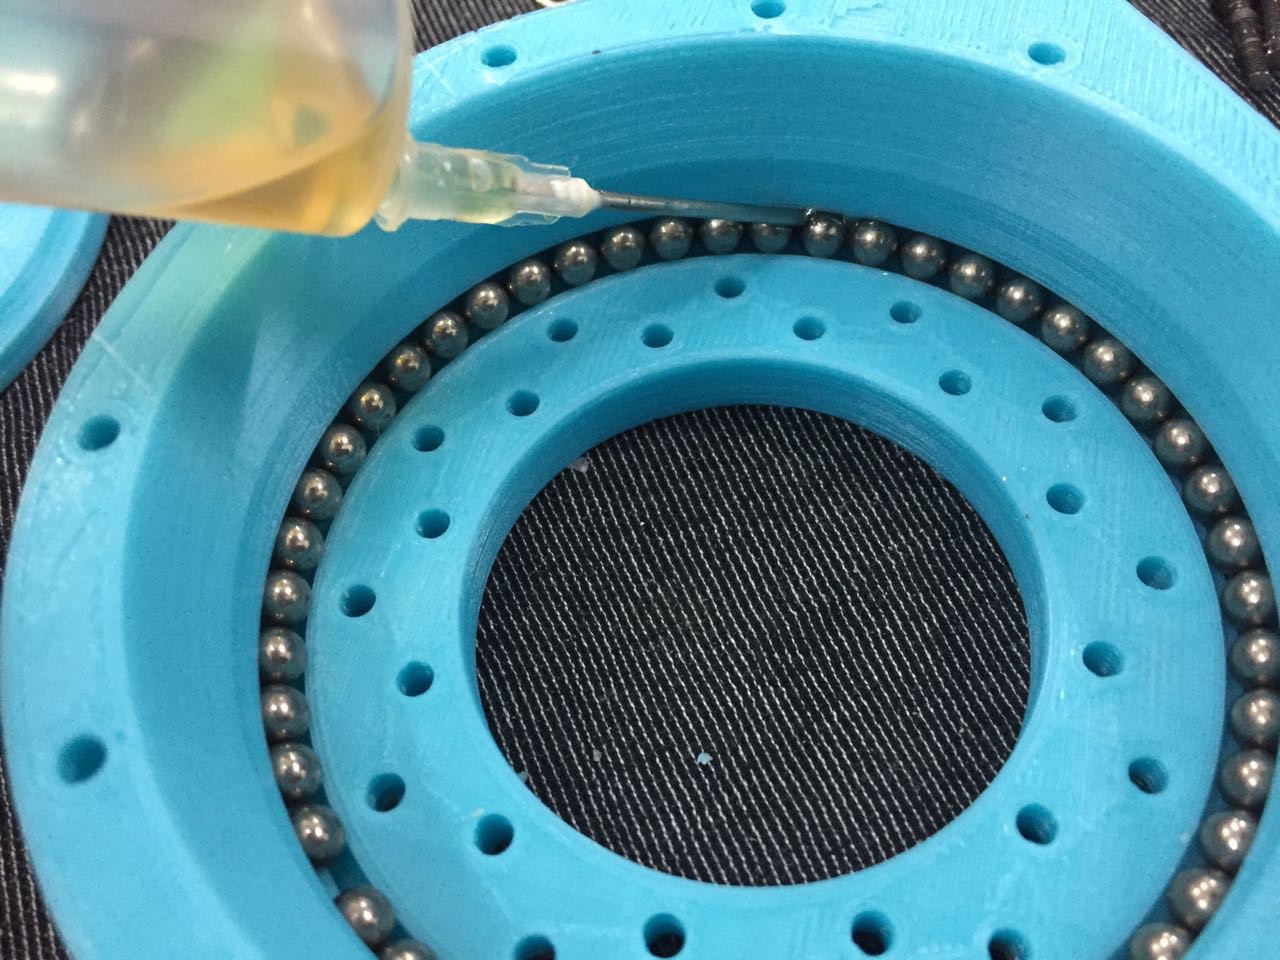
Like the BASE parts, slew bearing( there are two slew bearing in ARM1) need ∅5mm steel balls

add steel balls to the slew bearing, small gap is needed. (PS. don't forget apply some grease/lubricant.)
 Put ARM1_slew_inner_a_with_gear_1mX60 in place, and 6 ~ 12 M3X14 bolts to fasten the parts.
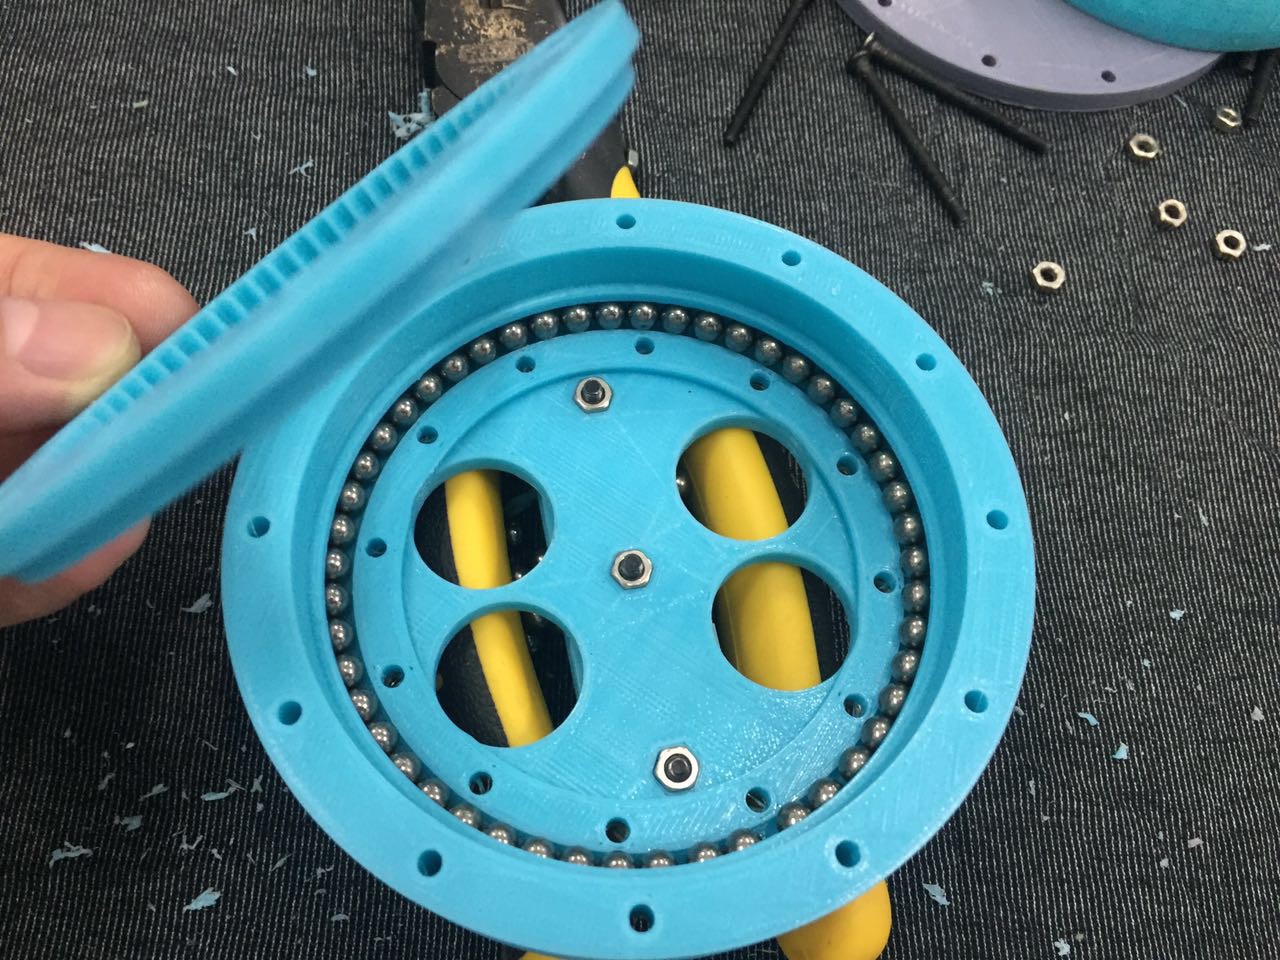 put ARM1_input_gear_1mX15 to the NEMA 17 motor( high torque one is needed).
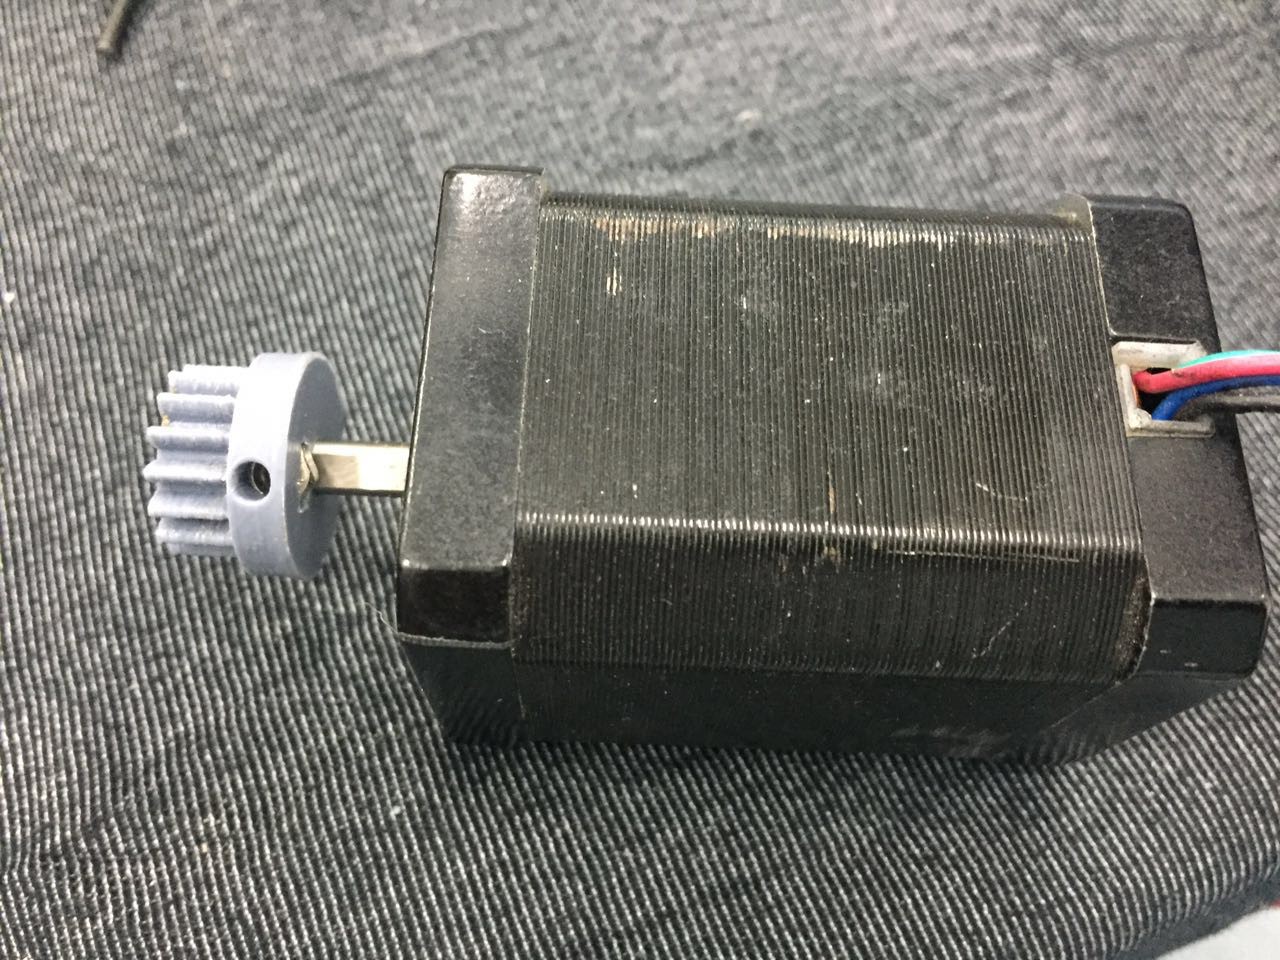 4 M3X14 to fix the motor.
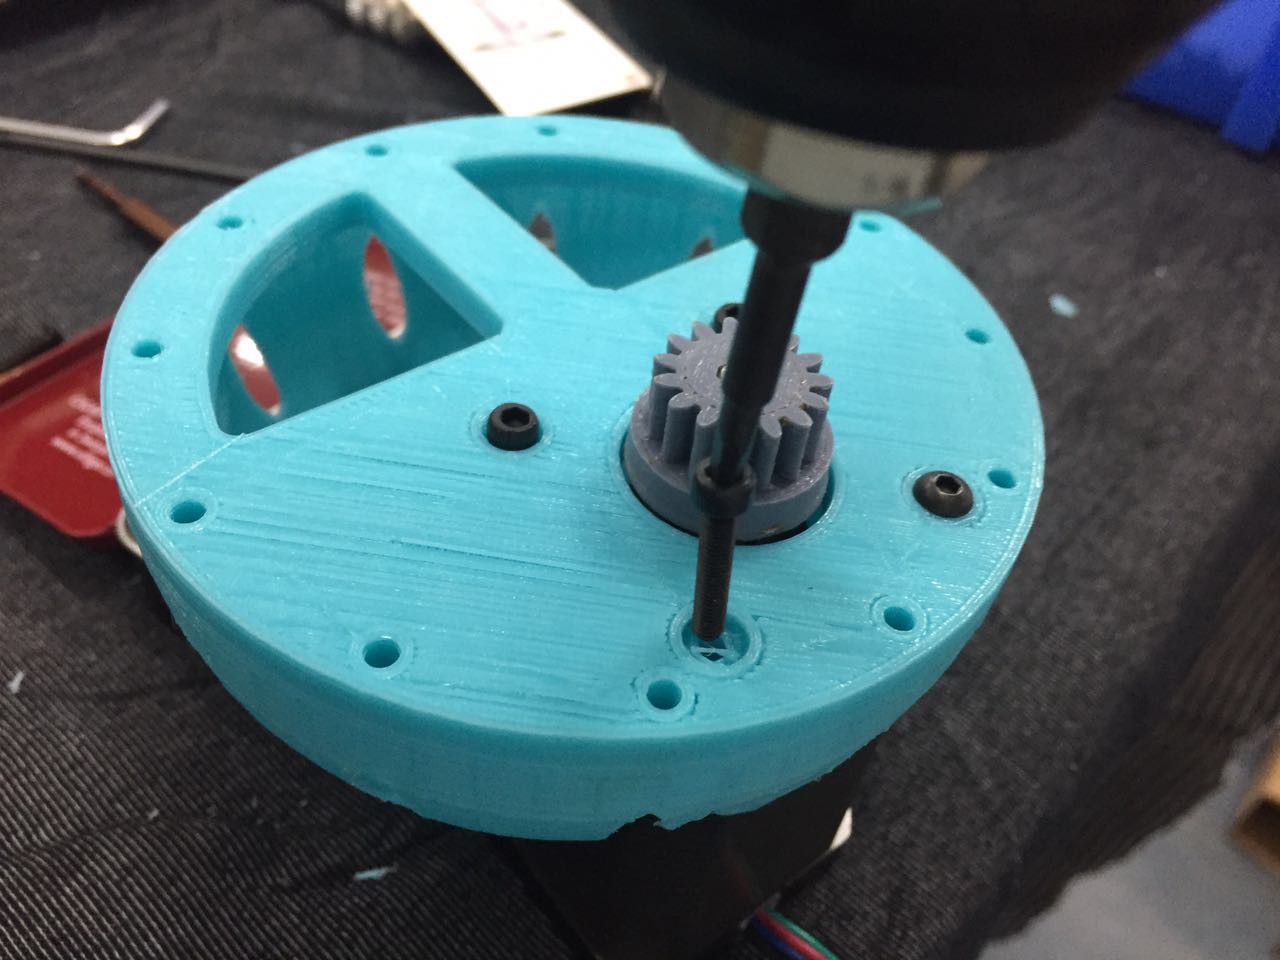 Another slew bearing, as before.
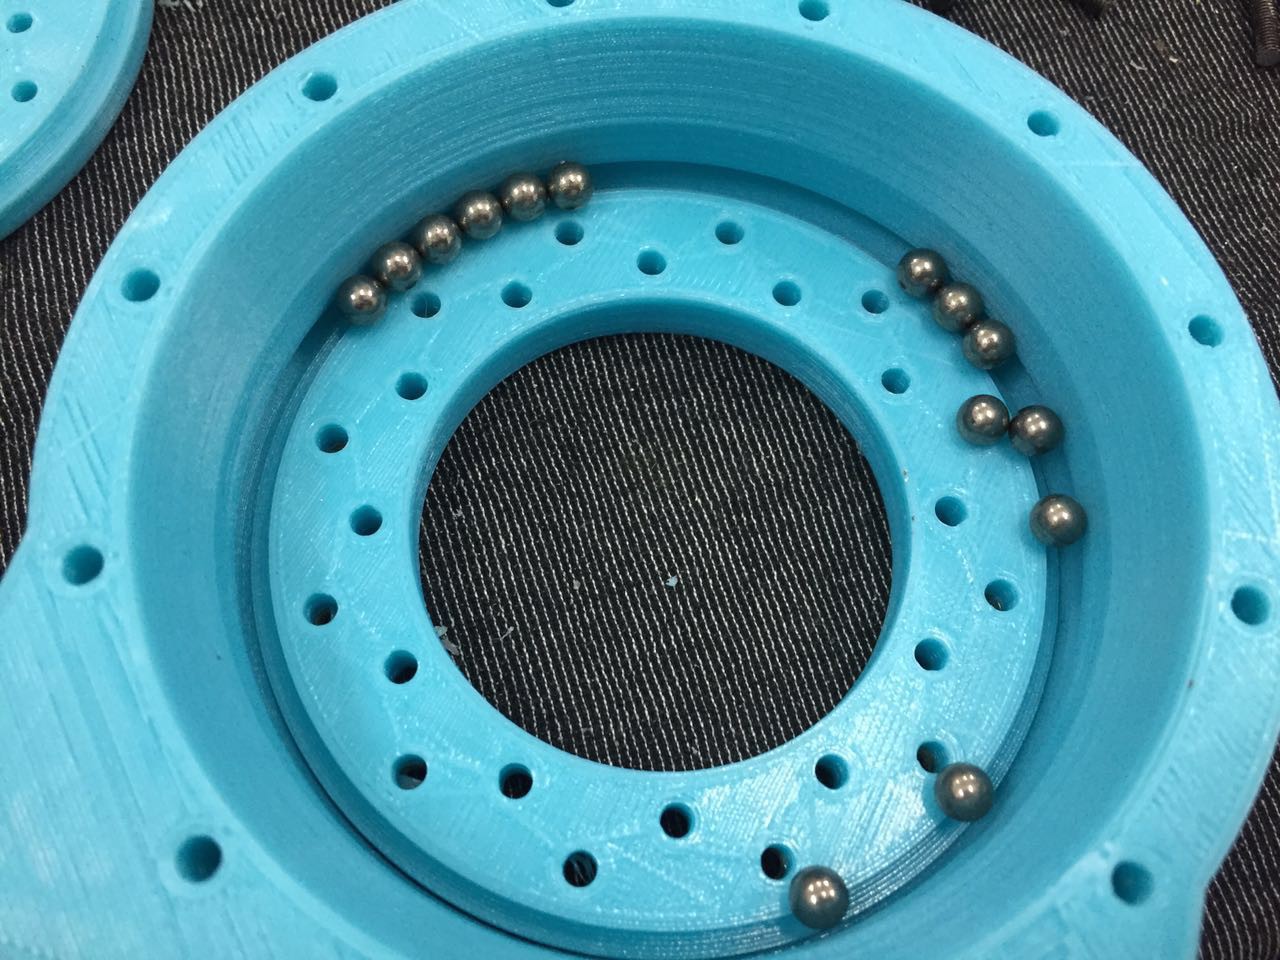

 6 M3X14 to fasten the ARM1_slew_bearing_inner_part1 and ARM1_slew_bearing_inner_part2, 6 M3X20 fasten ARM1_slew_bearing_inner_part1 , ARM1_slew_bearing_inner_part1 and ARM1_flex_08mX98_v2.
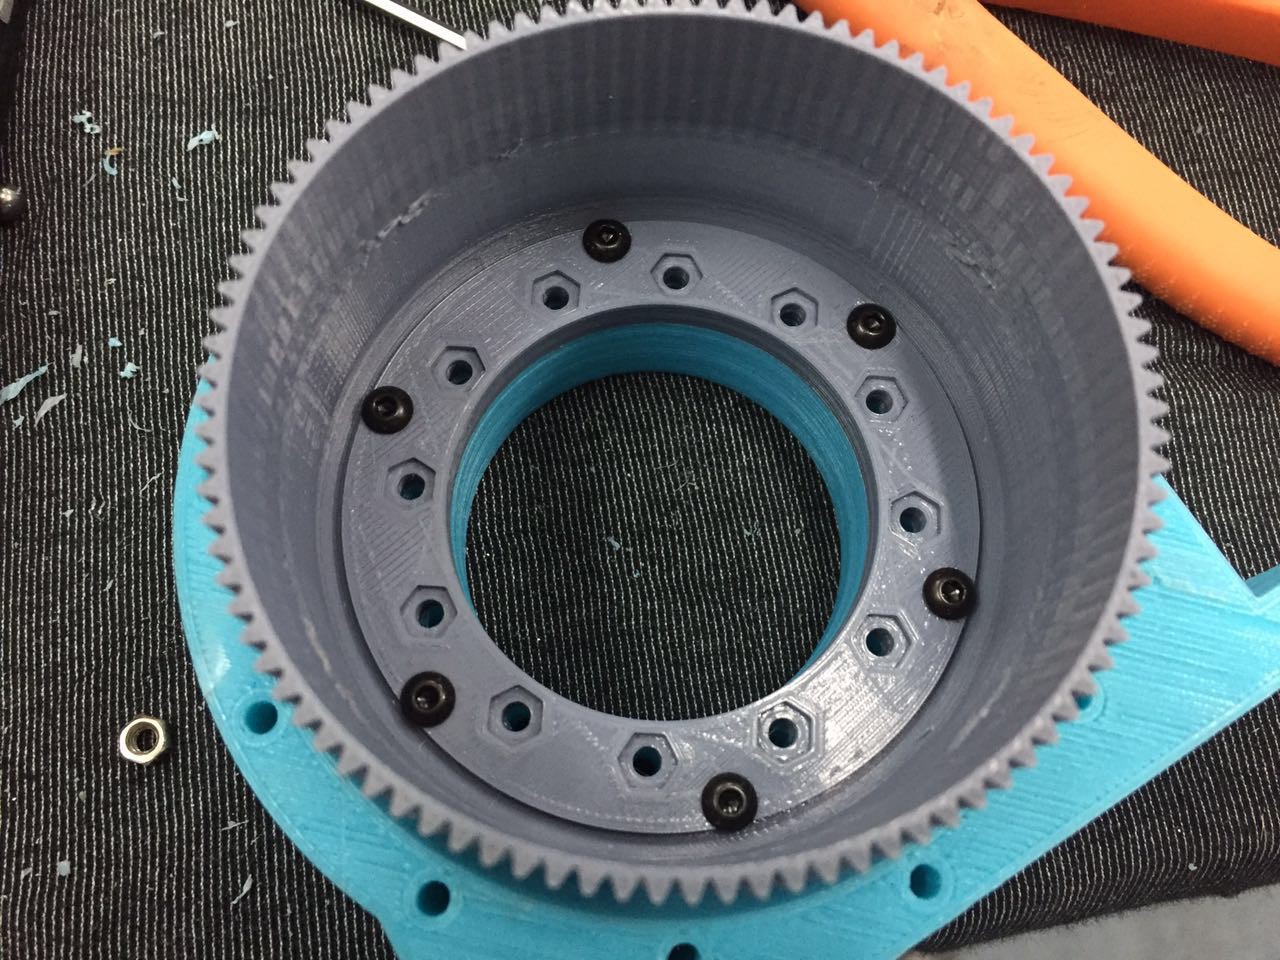 We also need ARM2_connector_to_arm1( belongs to ARM2 parts) for easy assembly ( because we must fasten this to add other parts).
  Put those together. Don't forget nuts on ARM1_slew_bearing_outer ( If you don't have M3X80 bolts, you can apply M3X40 before you fix ARM2_connector_to_arm1) .
 Put all the parts together, done.
Discussions
Become a Hackaday.io Member
Create an account to leave a comment. Already have an account? Log In.