Well, now that I'm not sick any more -- dunno what I had, but it sucked; lots of fatigue and a fever were the only notable symptoms, though -- I figured I might as well do the writeup for the stuff I did like a week ago lol. This was actually done the night that I put up this project and the other logs, I've just been kinda out-of-commission or doing other stuff since. (It's not like I've not had other stuff to do!)
Anyways.
I'd actually bought an (overpriced as heck IMO but I guess I don't know prices these days) ALICE pack frame from Amazon. For those who don't know -- which will be most Americans who aren't in or anywhere near the military, and most international civilians unless they were invaded by us before the Twin Towers fell. (Since then we've largely been using ALICE's successor, MOLLE.)
The ALICE pack system -- it's not just a frame -- was created in the late 1960s and early 1970s for US Army grunts serving in Vietnam. It's a whole modular backpack system that's about as comprehensive as you'd expect, if you know your military stuff (and if you don't... there's something for everything), and it's simple and rugged, as military stuff tends to be, because it has to be. I'll refer you to Wikipedia for the historical background; as I understand it, US Army field manuals on stuff like this are, for the most part, public record -- especially for things like the ALICE system that aren't in significant use any more (Wikipedia notes that a few US Navy and USAF ground units, as well as the US Army National Guard, still sometimes use the ALICE system, but mostly for training purposes, and only very, very rarely for actual in-action on-duty purposes if at all) -- some of those manuals can be a bit hard to get ahold of online, but some are just... out there in PDF. I can't speak to which it is for the ALICE system in general, but you usually don't need a field manual for a backpack anyways.
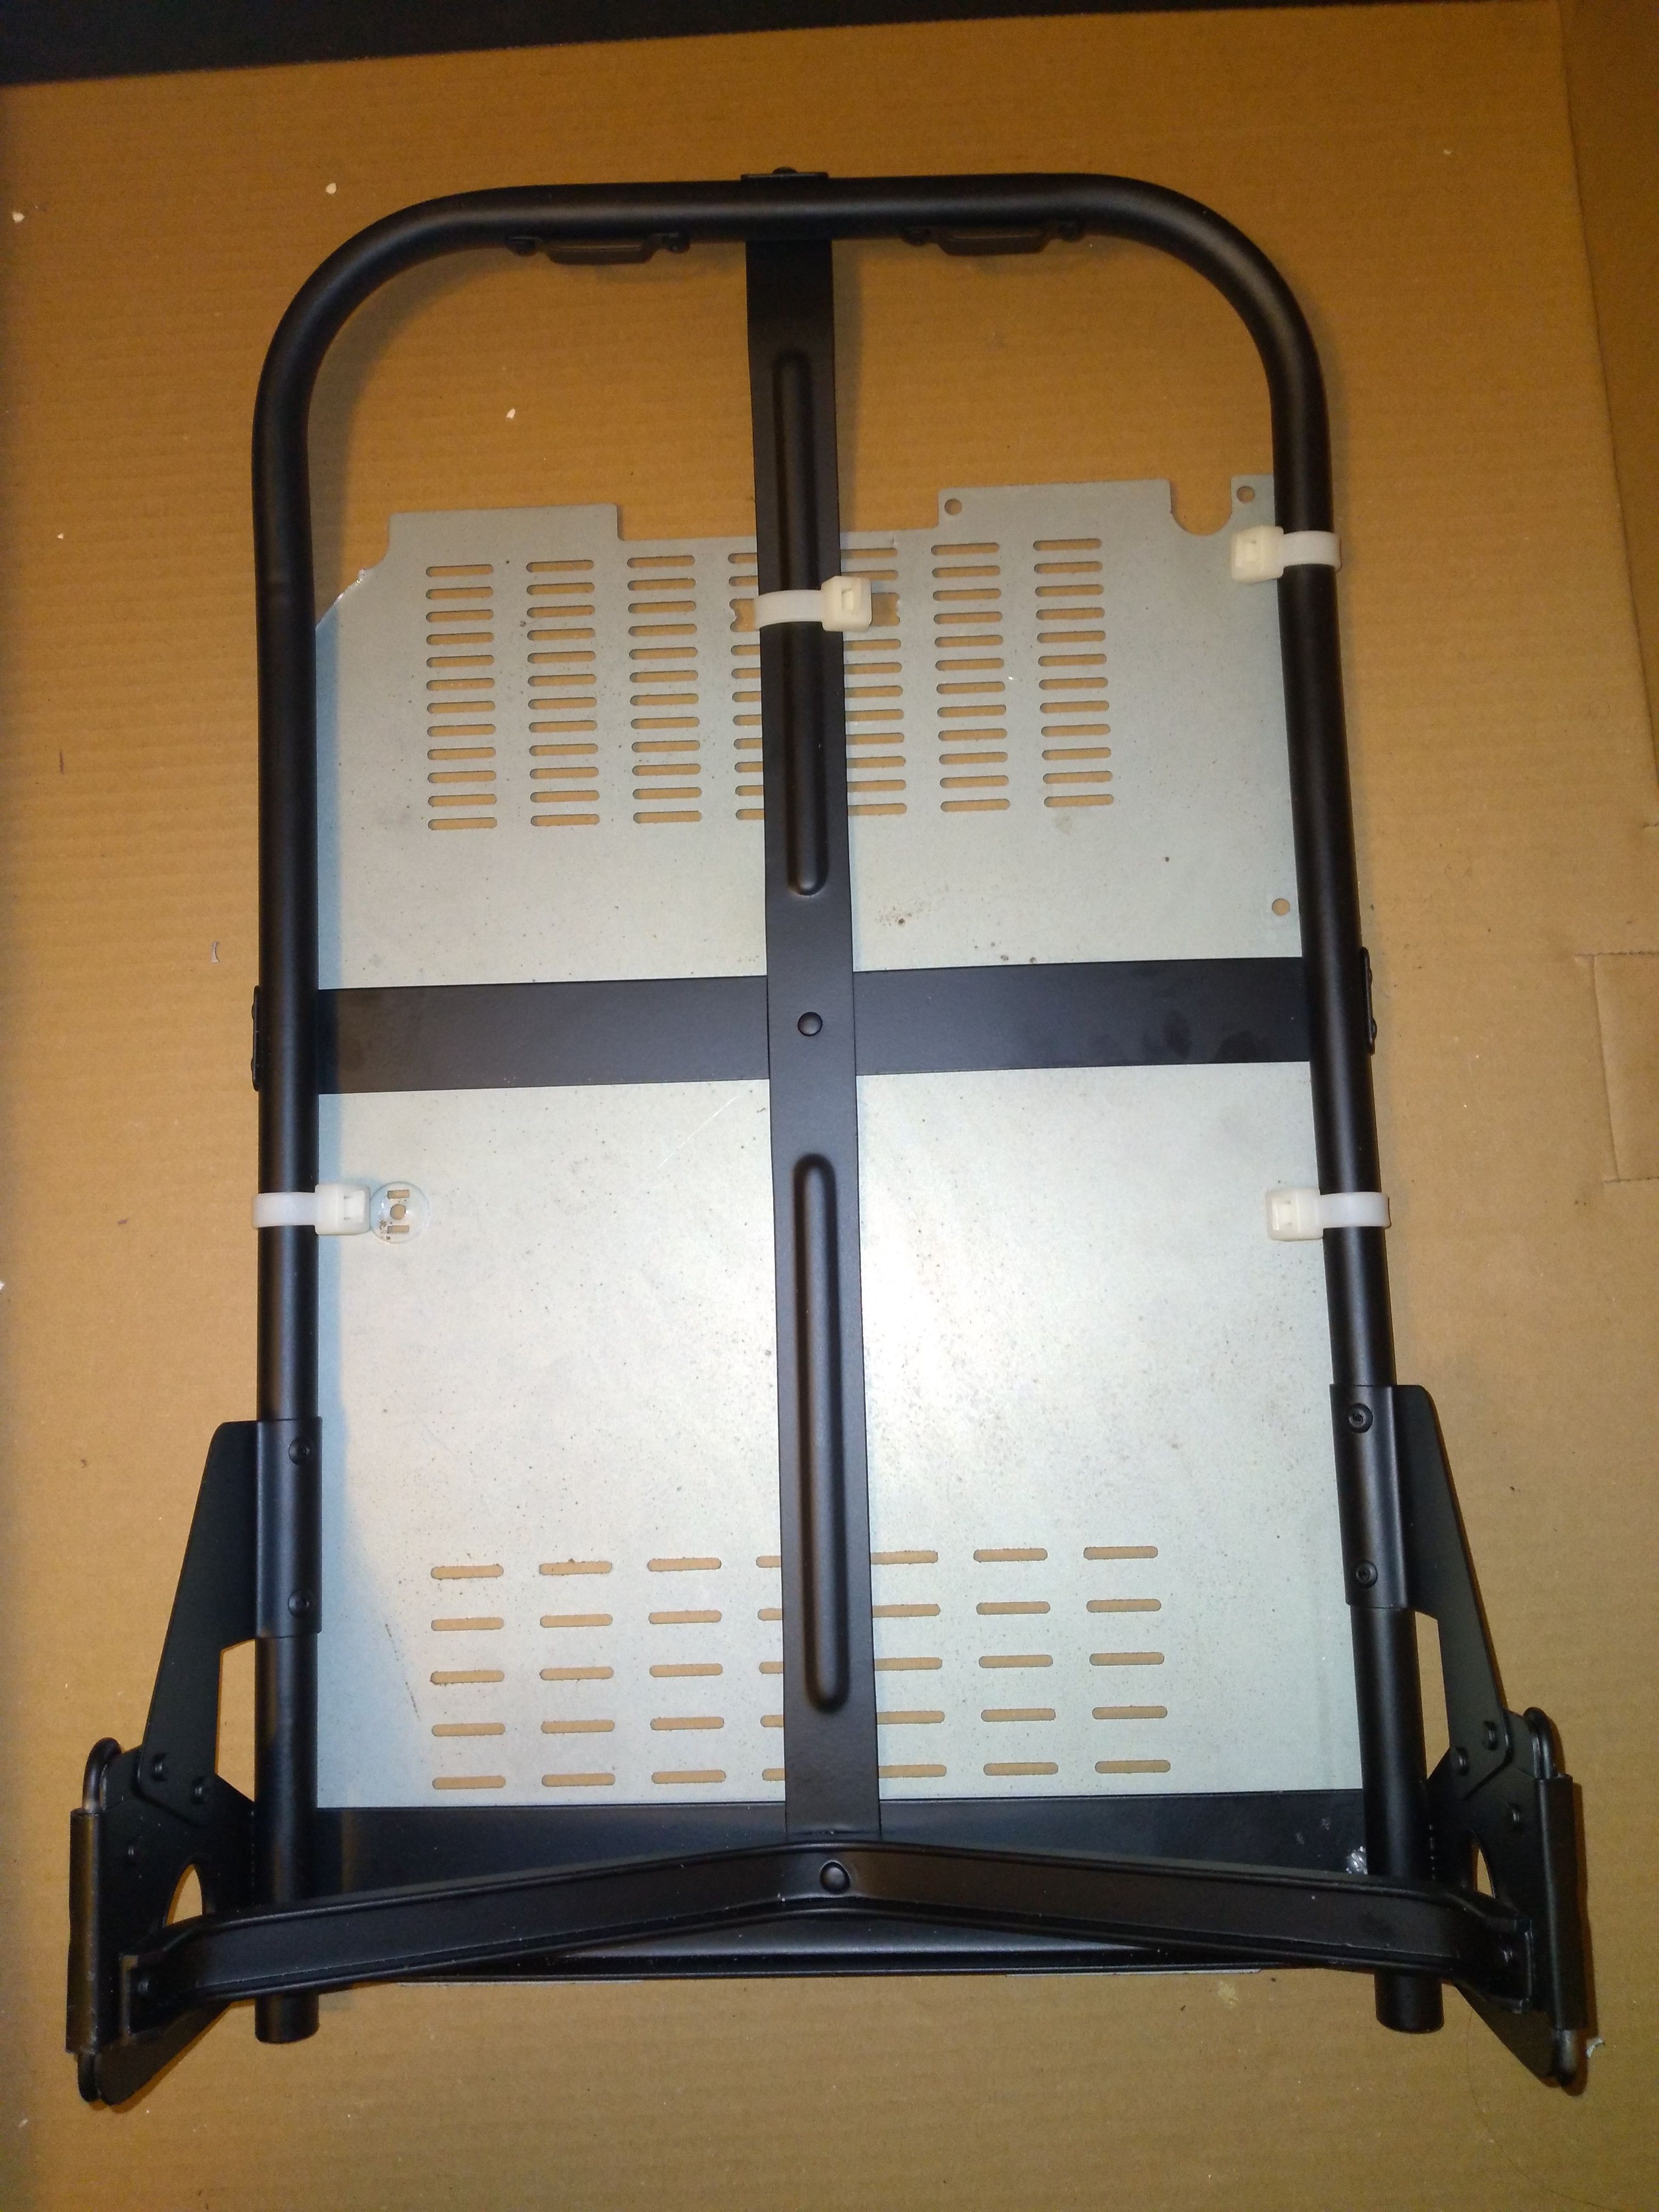
Mine is a modern knockoff, all the actual mil-spec ones are long out of production and very, very used. I'm fine with that, as I'm not planning on getting shot. This isn't a GI Joe cosplay, after all (heh...)! It's simple, cheap tube steel and sheet metal in black enamel. The olive green strapping is visibly cheap and the padding doesn't inspire confidence, even just looking at it.
Ehhh, it'll do. Again, this is cosplay-grade. I'm not expecting this to perform like the real thing in the rough, and I'm not expecting to put it through those paces.
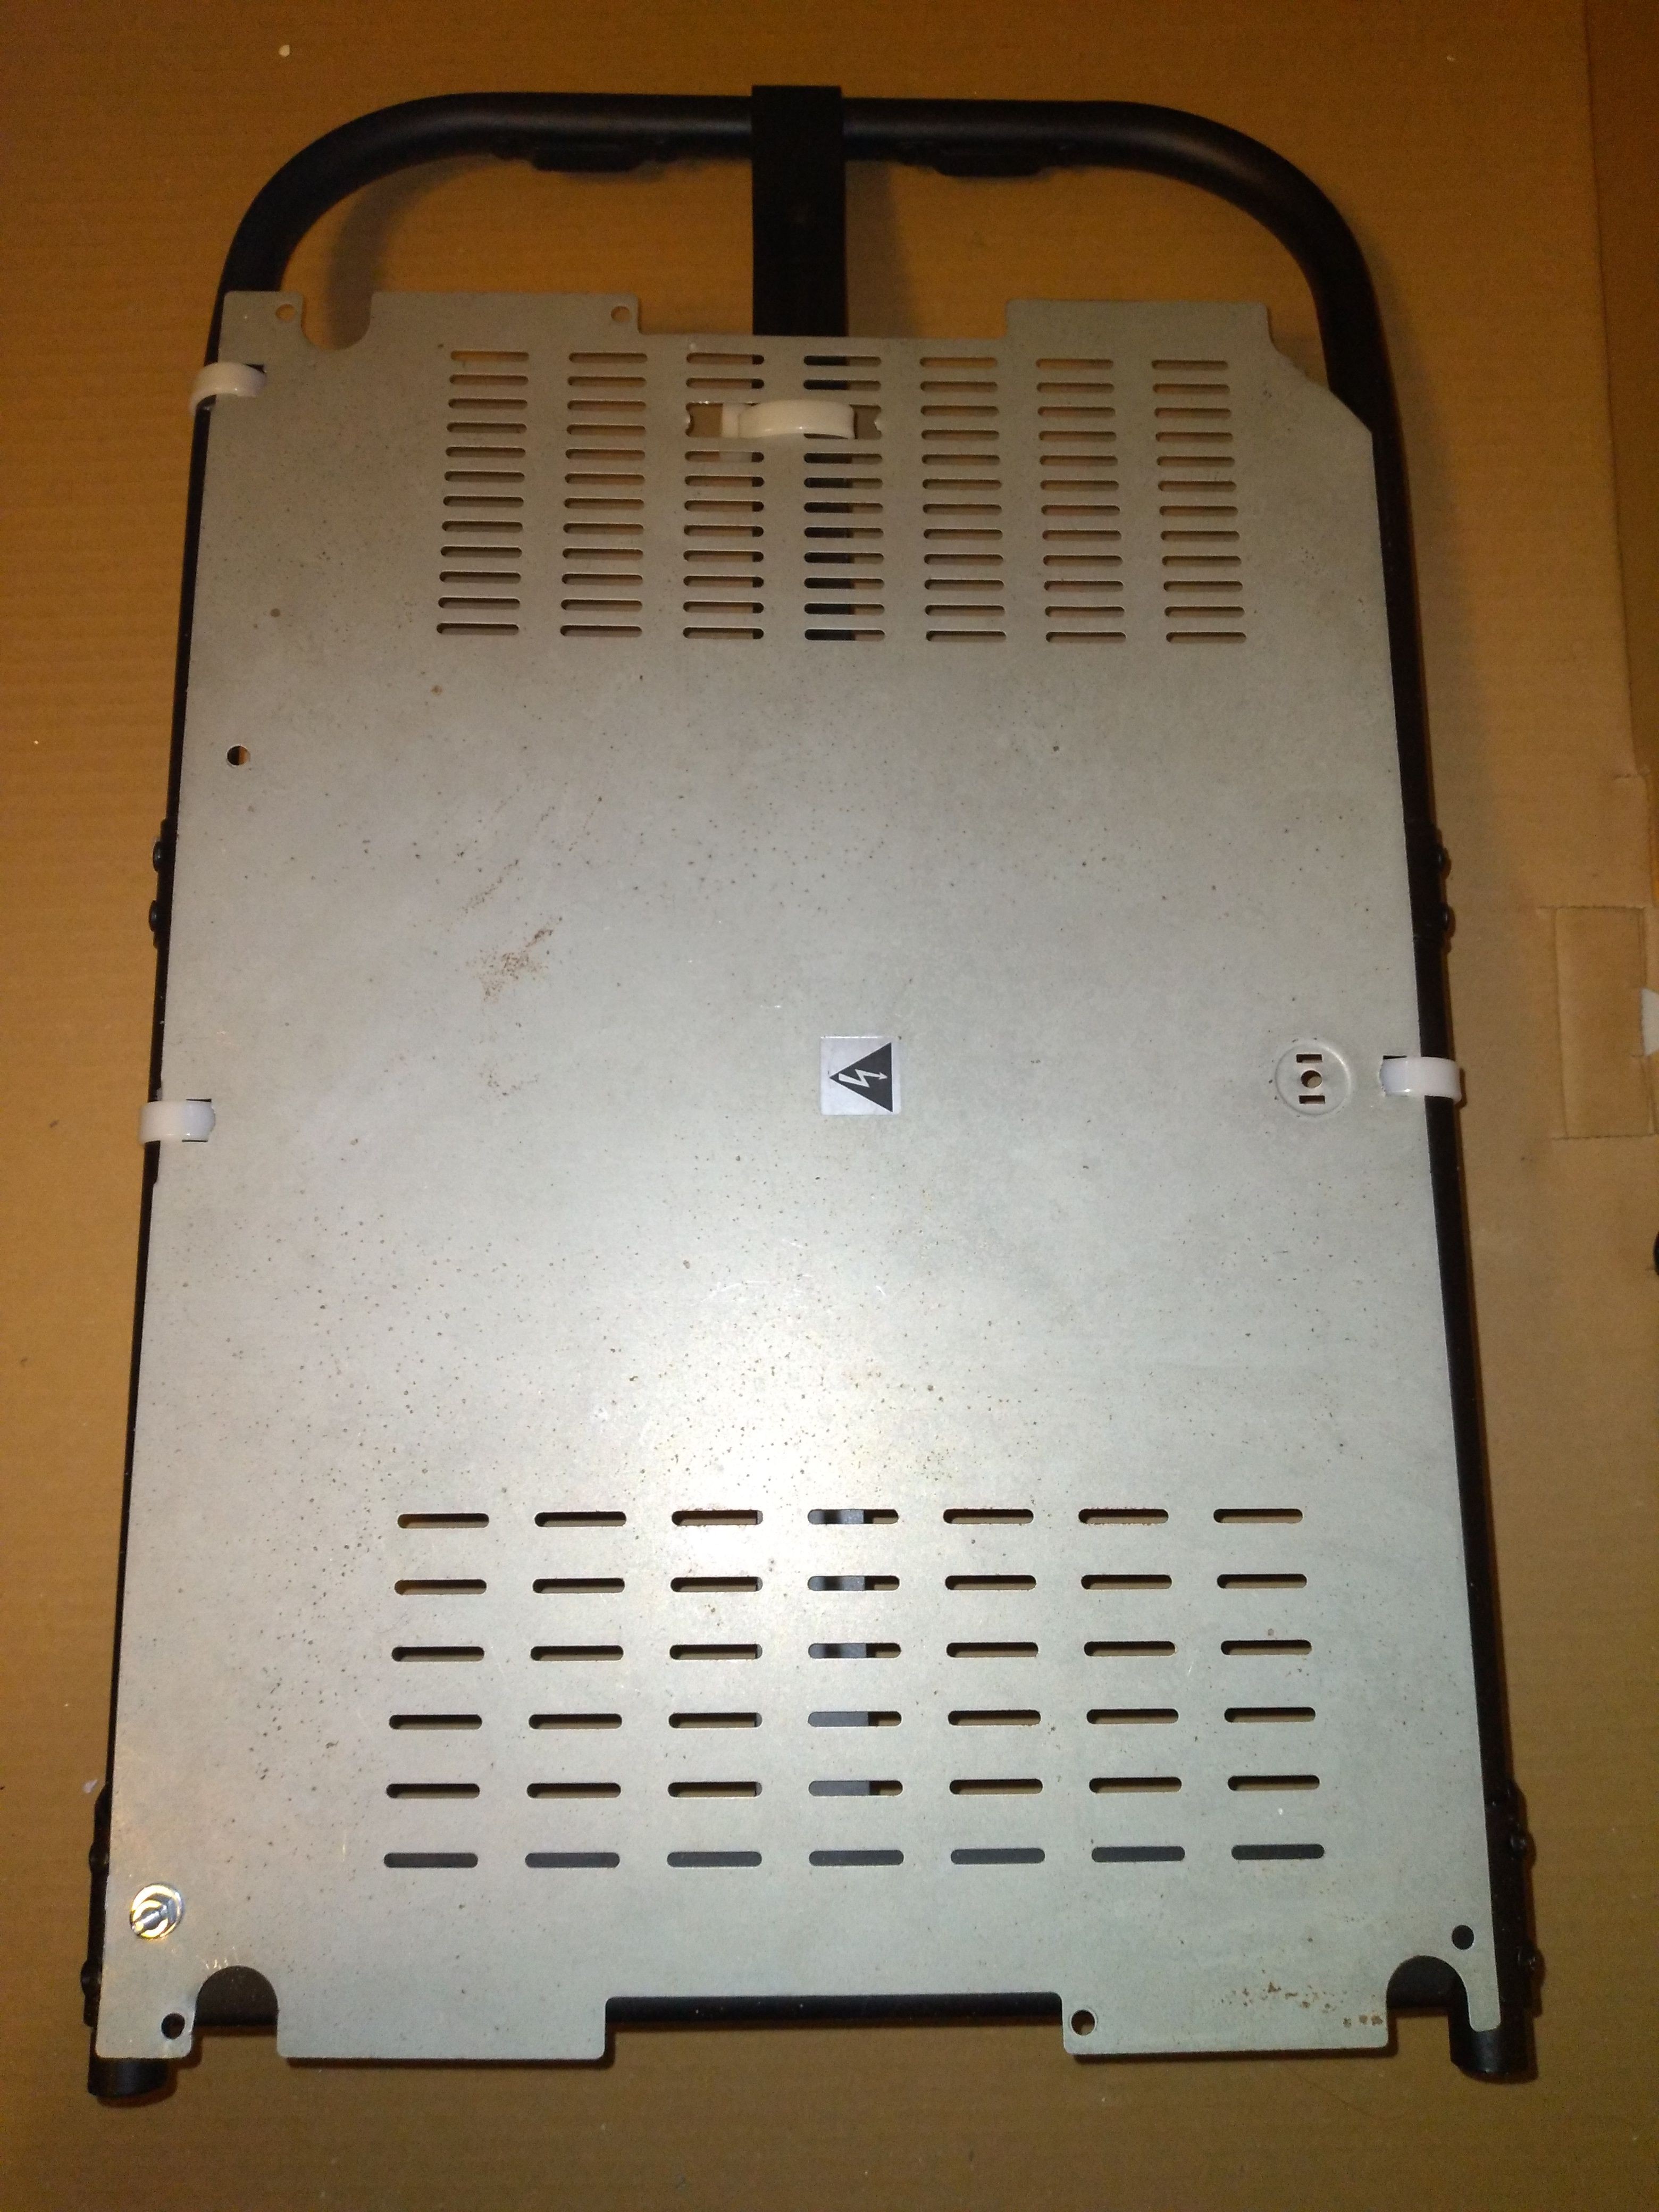
I had a bit of sheet metal from an ancient system that didn't make it. I think it was from the first-gen Compaq Deskpro someone gave me years ago that had a bad power supply. Never figured it out, but the system wouldn't run and the supply smelled like electrical Bad Things Are Happening when you turned it on... despite a complete lack of visible symptoms of any kind. I think this bit of sheet metal was the bottom of the chassis. Well, it's now the baseplate for my Proton Pack!


Yes, those zipties are arguably even more of a Florida Man Hoo-Raa MURRIKA grade mounting solution than flag-print "duck" tape, but they're also a freaking half inch wide. That sheet metal ain't movin'!
For what (very, very little, at this point) it's worth -- I'd planned on the electrical warning sticker being visible on the other side, and mounted the dang thing backwards. Oops! But I decided afterwards that I just didn't care that much... and that if I tried to fix it by moving the sticker, it probably wouldn't stick to anything afterwards. So there it stays.
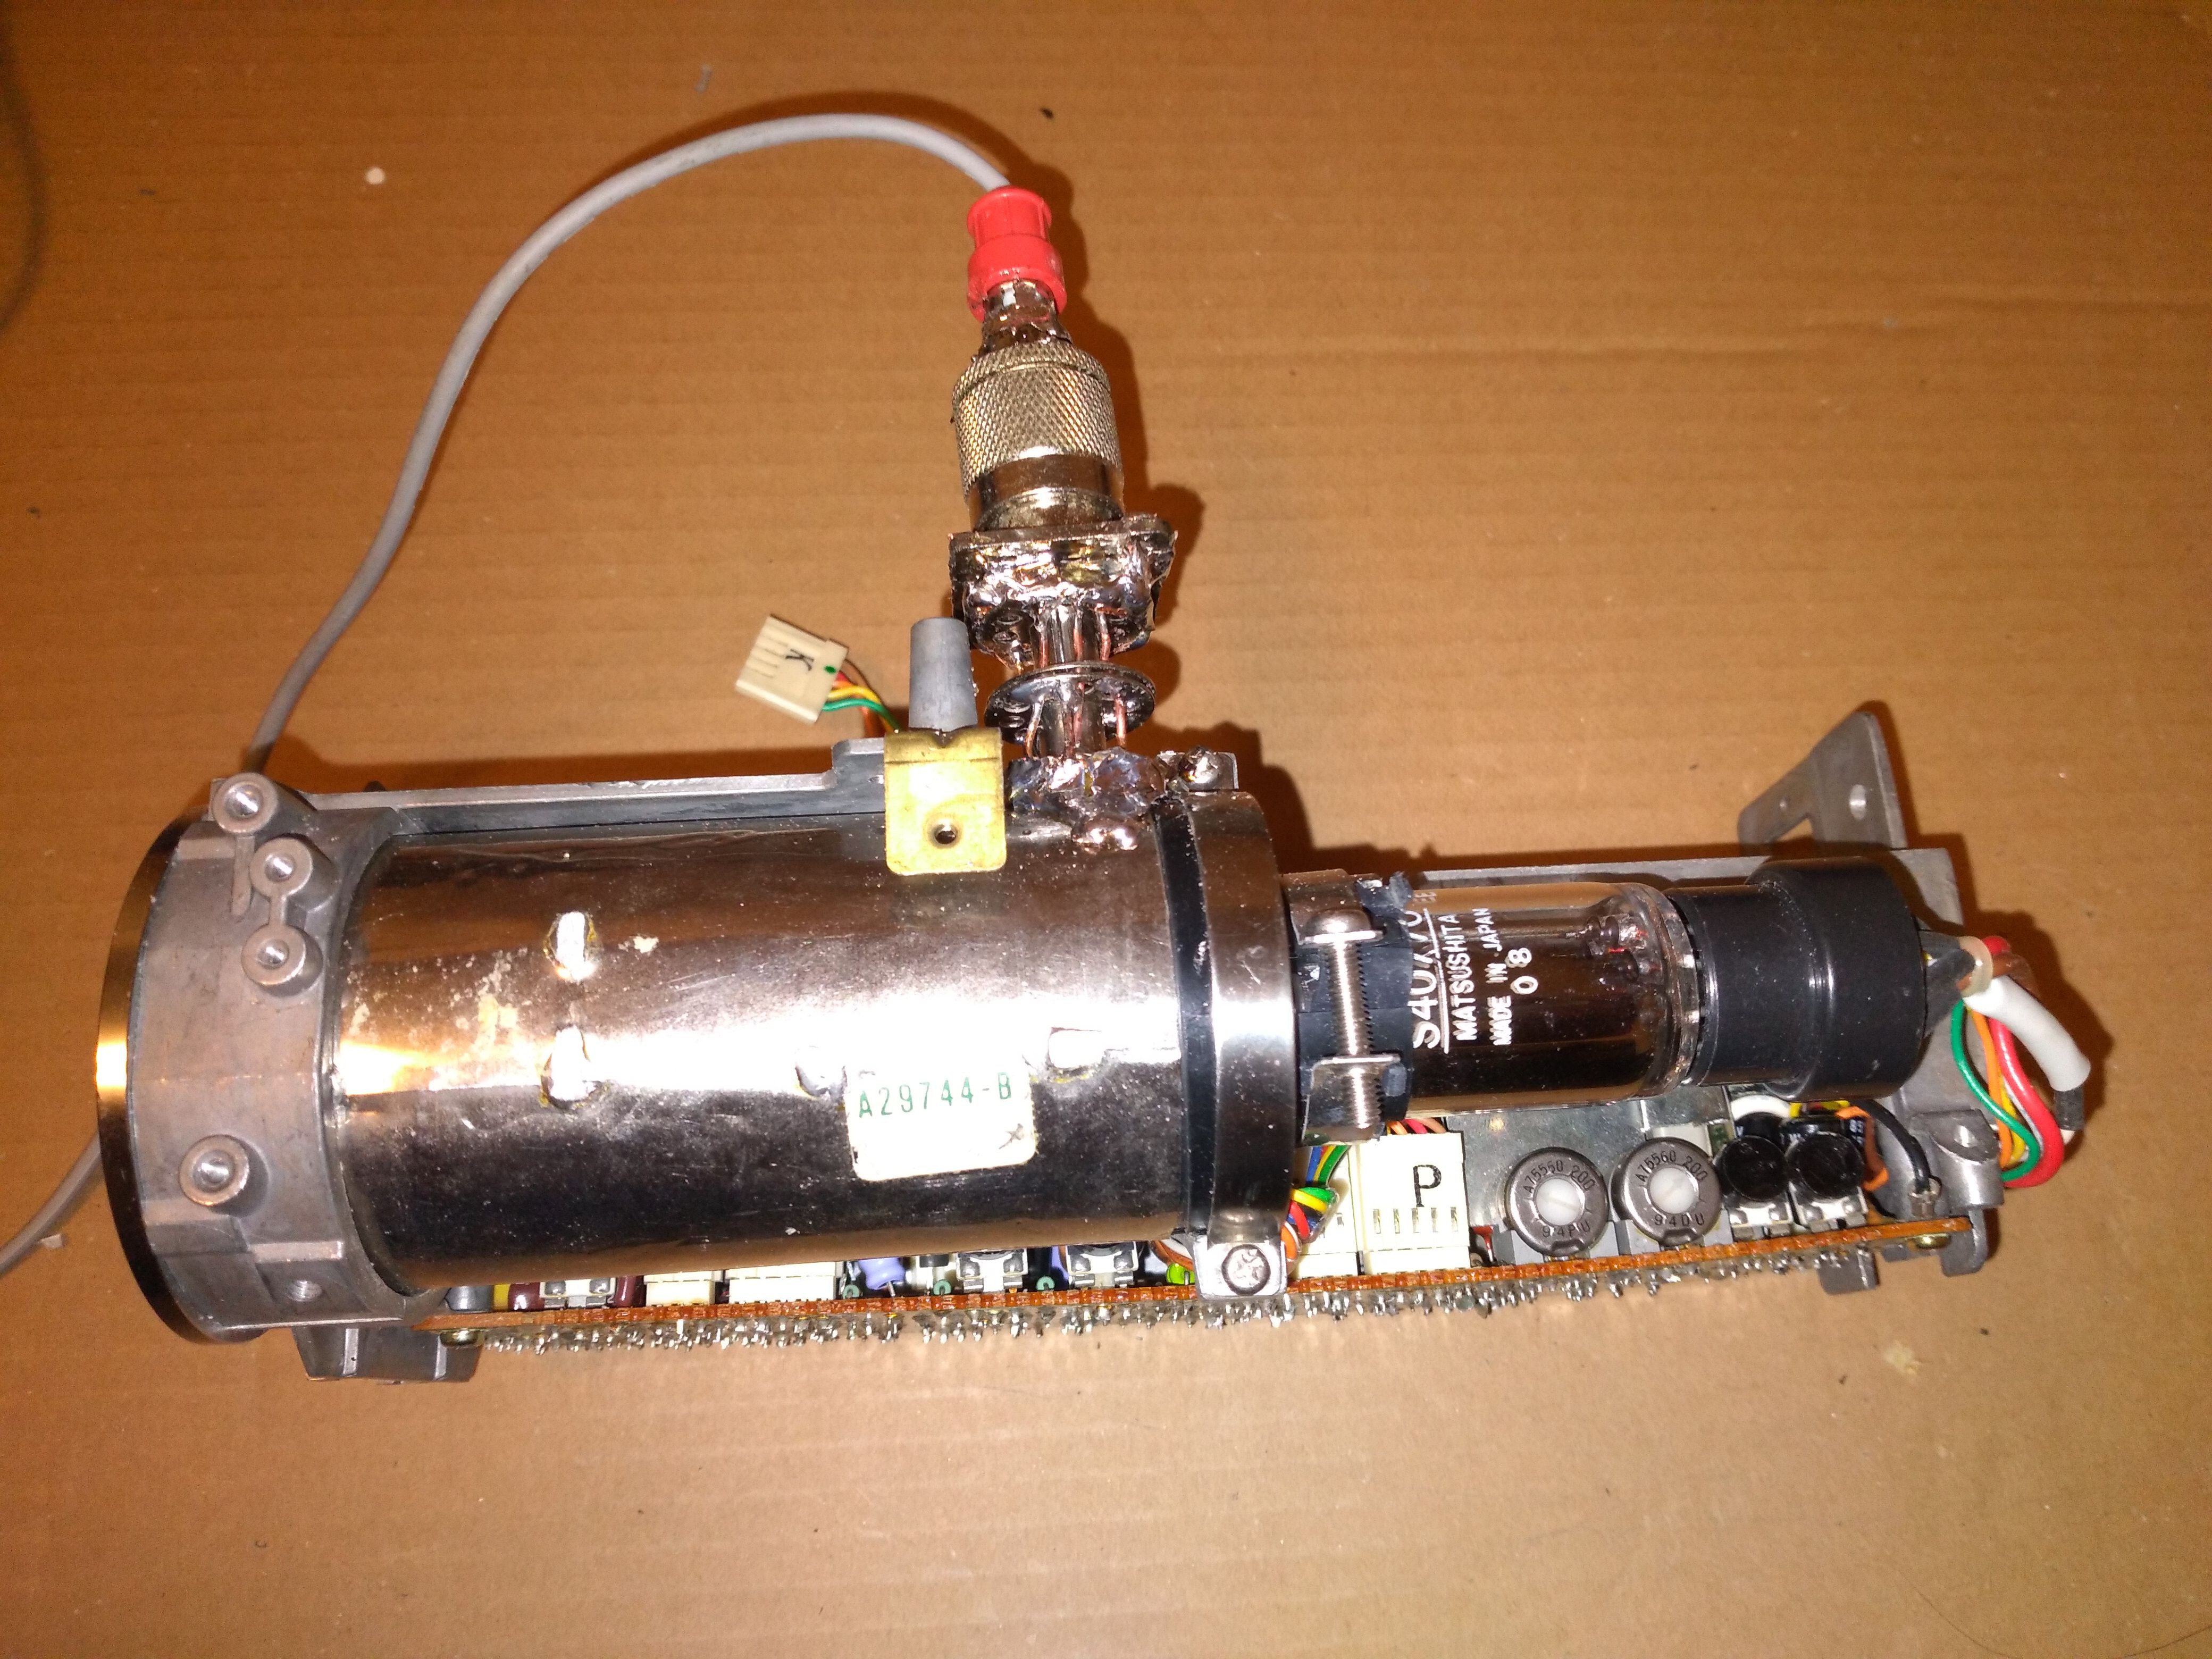
I then started building the prop version of the anode ray tube. I had a couple ideas for this, but what I ultimately went with was, IMO, both kind of interesting and kind of clever. Keep in mind, most of the people looking at this are either going to be hopeless nerds like me, or cosplay anime dorks who think a vacuum tube is something that makes an audio amplifier very, very expensive but worth it because their online pals swear it'll make their $35 Aiwa CD changer from Walmart not sound like auditory poo... except they haven't told their online friends that their CD changer is a $35 Aiwa from Walmart.


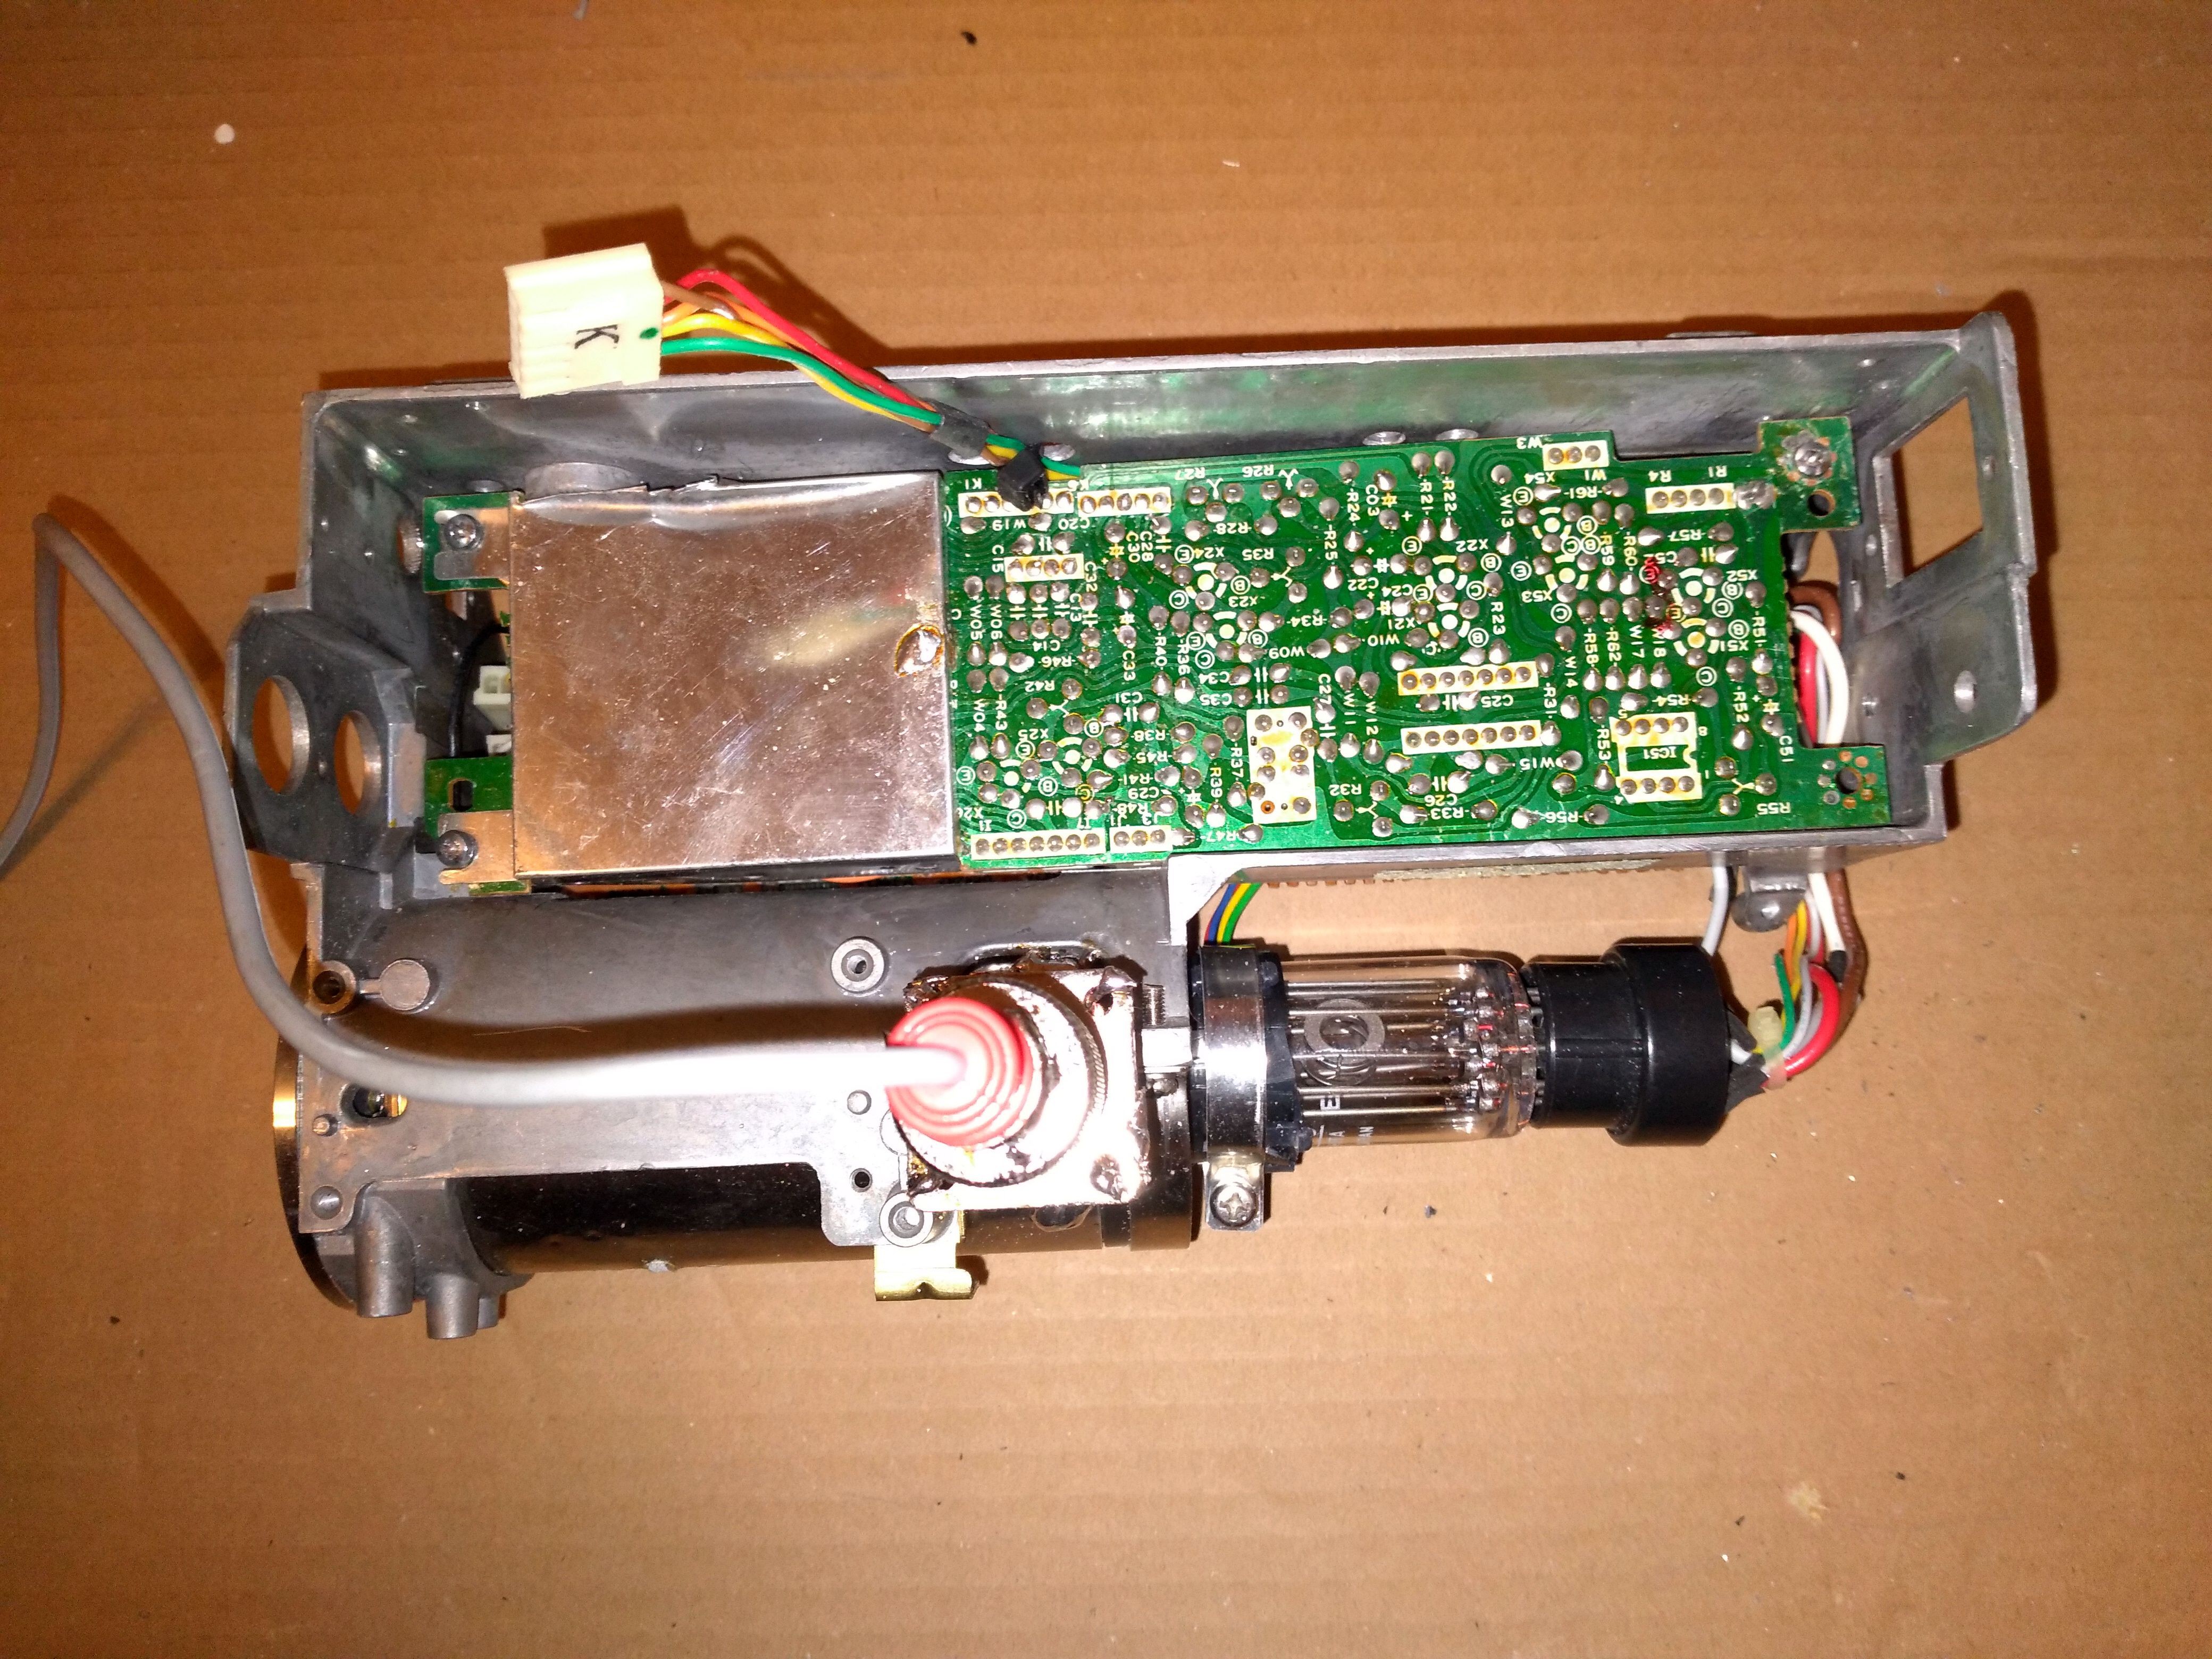
Had an absolutely aaancient JVC video camera -- it'd be a camcorder except the "corder" part is separate, it's that old! -- one of the ones so ungodly antique that 'color' was a feature! -- that was so dead even Jesus couldn't save it. Kind of a shame. So that's a bit of the frame and the picture tube... with some, erm, creative modifications...
Specifically, a couple of the circuit boards are wired in entirely wrong as the "tube driver circuitry" (seriously, they're entirely cross-connected inside and it's two of like five PCBs from the thing), with the bit sticking out being a newly-constructed add-on. It's made of a pair of sewing machine bobbins, an 80s Tandy (?) RCA audio lead, and an N-Connector to... TS9 I think? (Don't ask.) adapter, very poorly soldered to each other with 20AWG solid copper and 5mm copper tape, and to the foil shield around the tube with more of the same.
It's a bit Mad Max, sure, but it'll do.
I can't yet say when the next update will be with any real certainty, but it's gonna be the stuff that makes up the anode ray collimator -- essentially the intake manifold for the accelerator. I've actually mostly got the accelerator itself worked out, it's what started the whole idea for this build... but I've got a bit of building and testing to do on that front, before I show that off. Maybe I can do both at once. Maybe not. Time will tell!
 Starhawk
Discussions
Become a Hackaday.io Member
Create an account to leave a comment. Already have an account? Log In.