Close
0%
0%

Investigating an old Vidicon camera prototype

I'll try to obtain as much information as possible from this prototype, and maybe get it to do something!

Similar projects worth following
317 views
0 followers
When I first got in contact with this device I didn't even know what a Vidicon tube is. I'm trying to reverse engineer it.
I'm not an electronics engineer, sometimes I may speak without enough knowledge, so have that in mind while enjoying this adventure.

I'm pretty sure this is a prototype, it has prototype pcbs, components soldered one in top of another, a microammeter built in and a weird connector with no labels anywhere.

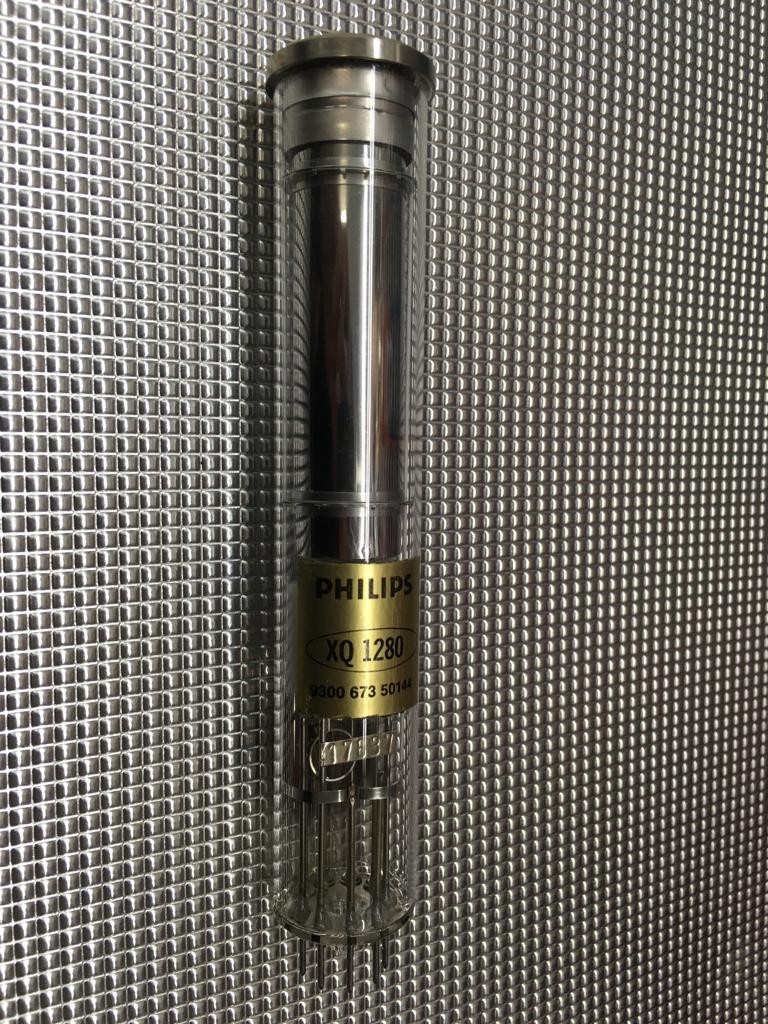
It is indeed a very beautifull piece, I date it from the mid 70s, according to the model of the Vidicon.
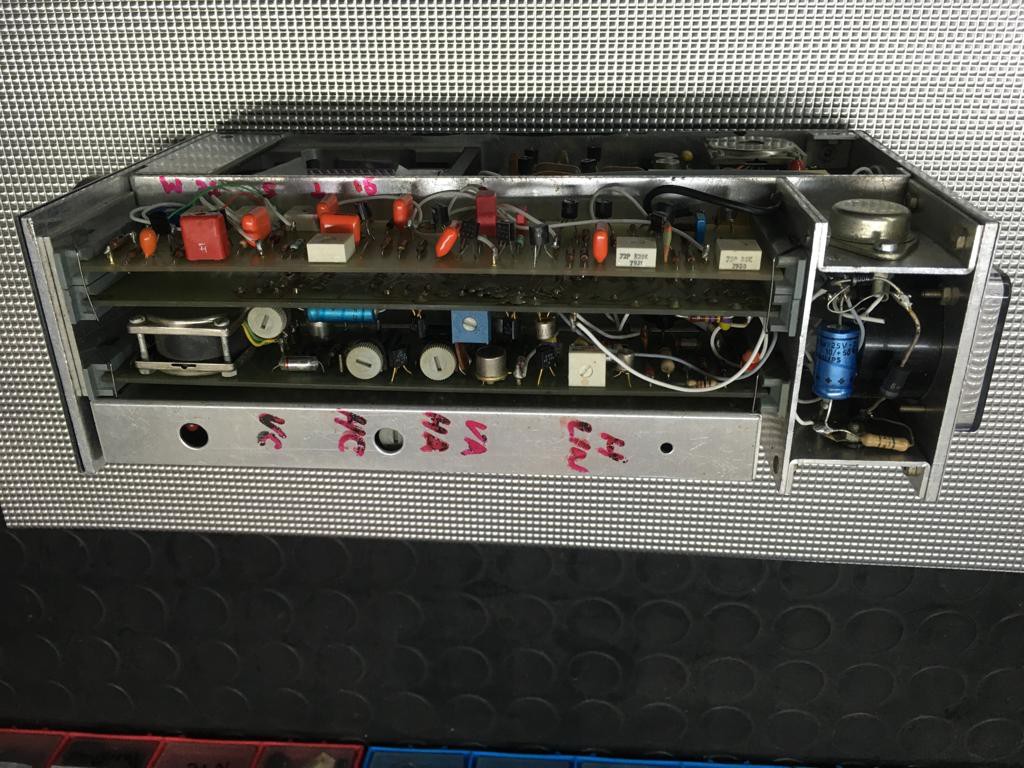
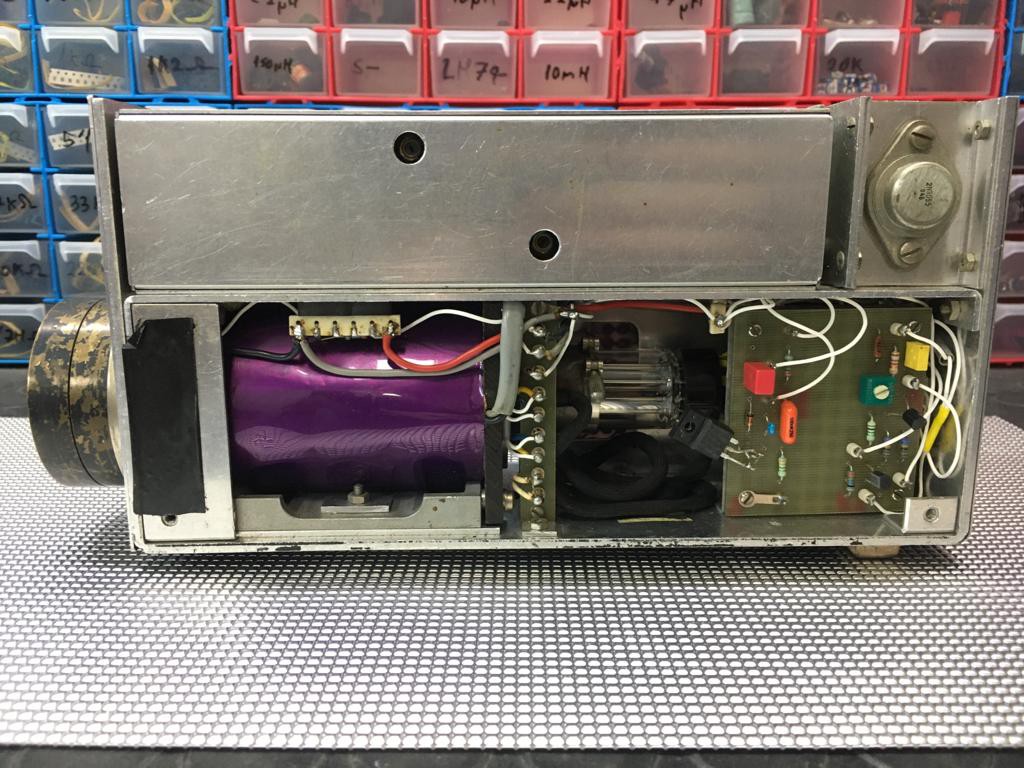
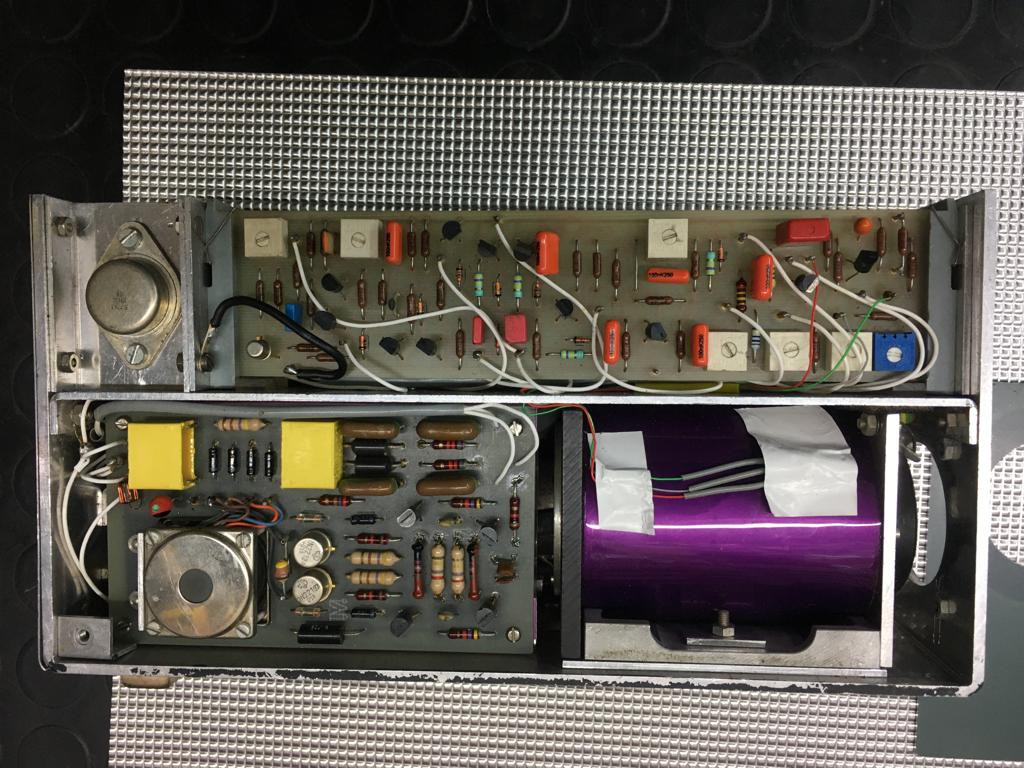
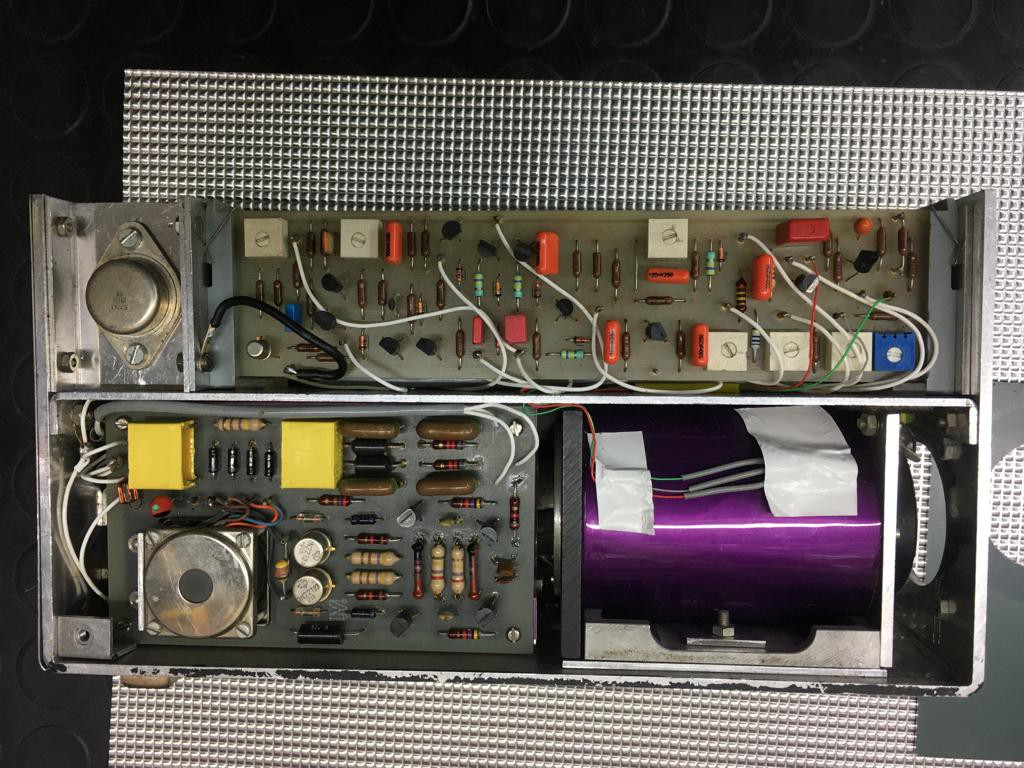
It has a total of 6 boards and a little bit of wiring which has no labeling at all. The Vidicon uses magnetic deflection and not electrostatic. This thing needs to generate high voltages for the anode of the tube, the focus, etc, and I'm pretty sure the board with the transformer (the one you see in the image above) is the one in charge of generatig those voltages.

The idea of this project is to obtain the diagrams of all of the boards, and maybe have a clue of what each one does. I don't expect this thing to give a standard video output signal, I don't think you can achieve that only with a bunch of transistors, but I expect it to drive correctly the defelction coils and the tube. Maybe this thing never worked at all, but it will be fun to find out.

  • High Voltage supply board

    El Juanan02/18/2022 at 22:51 4 comments

    There is one board easy to access and has a little transformer, diodes, caps and stuff that gives you an idea of what the board does.

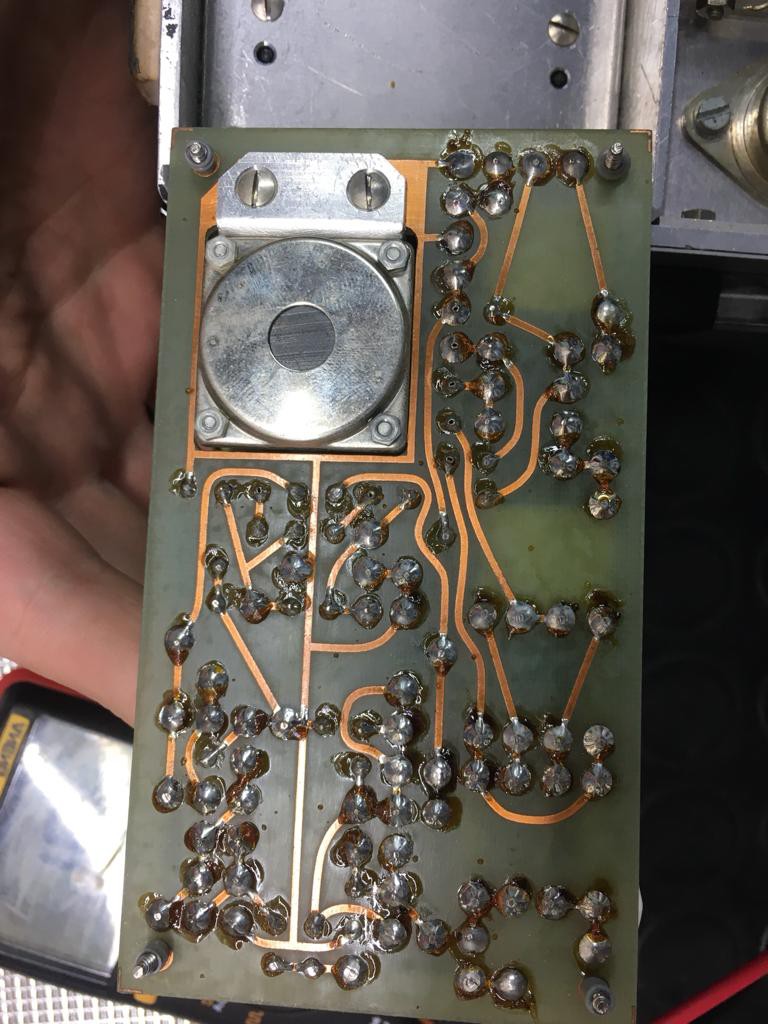
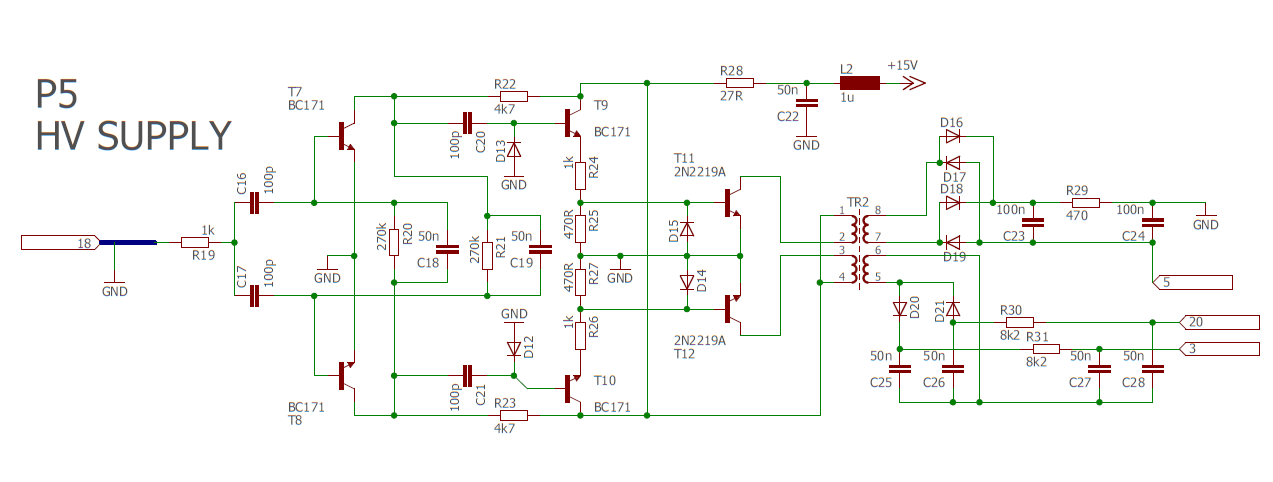
    I labeled the board as P5. It is the one on the bottom in the previous image. It has a total of 7 wires connected to it. One of them is the center of one of the the coaxes (18) connected to the connector of the front pannel. It is powered by the 15V provided by the LM7815.

    I traced all the board into a schematic in Eagle. The board has some kind of simmetric amplificator with 3 transistors on each side for gain purposes I suppose. It is used to power the transformer, which gives power on two outputs at different voltages.

    I tested it with a 5kHz square signal (feeded into the base of T7 or T8, I get in the output the same frecuency) and it works, kinda? I get around 70V in cable 5, around 200V in cable 3 and -40V on cable 20. If I feed the 5kHz signal into R19 I get half the frequency in the output (If anybody knows how this configuration is called, please tell me). I'm waiting for a function generator to arrive so I can test different waveforms. 

    I'm thinking it works with the horizontal deflection signal (which I presume I have to inject via the front panel connector), which for 50Hz should be 15625Hz. As the frecuency rises, the output voltage rises too, I need to find the frecuency at which this board powers the vidicon correctly, and I think it should give me voltages of around 1000V for the anode.

    Also, I've ordered some JFET transistors as I've measured some of them and they were not quite right. I think I'll wait untill I get the function generator before I do more testing, but maybe I make the schematics for another board (an easy one hehe).

    I'm sorry if I'm rambling too much and if there are typos. I'm not a native English speaker.

  • Starting with the basics

    El Juanan02/11/2022 at 20:08 0 comments

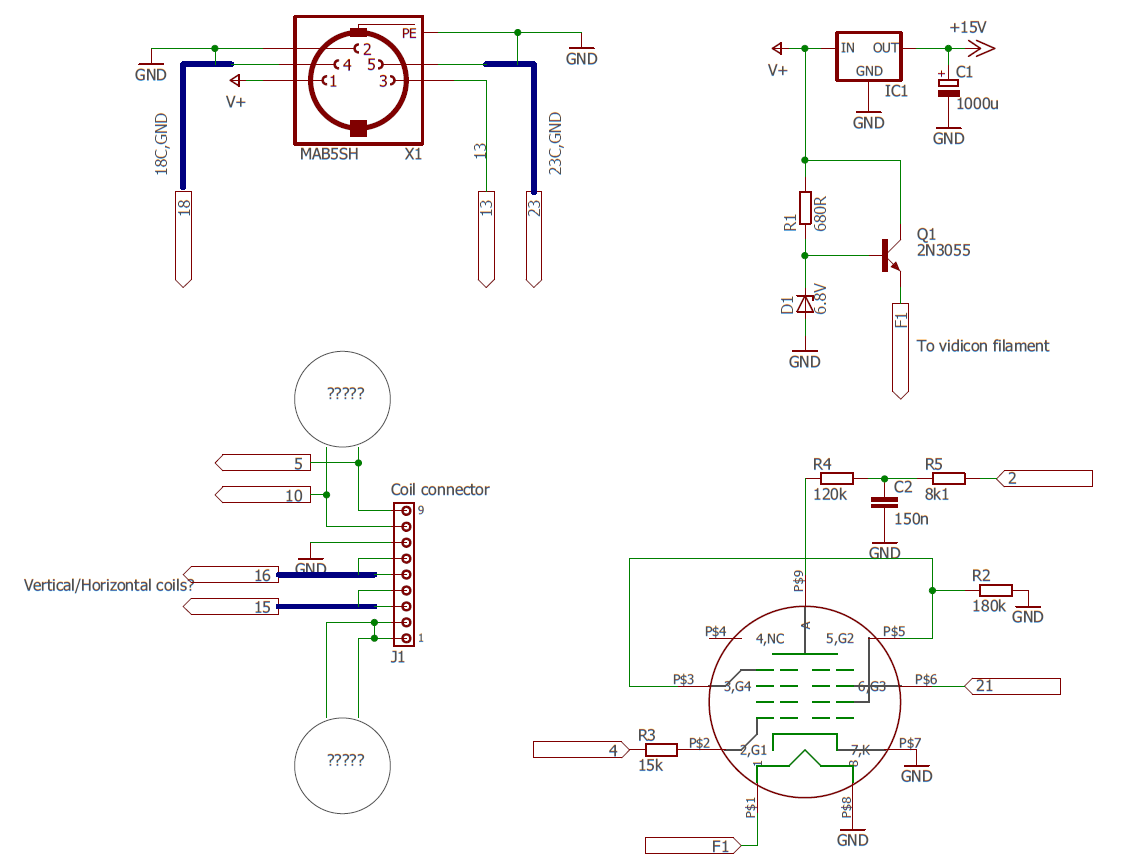
    First thing to do is obvious: get the more obvious wiring: the main connector, the power supply and the vidicon connector, and also a nine terminal socket that has wired lots of coils. The numbers you see in the diagram are the numbers I gave to each wire. They appear to be random numbers because I didn't really started from here, but it's the best way to explain the circuit.

    The connector isn't a 5 pin DIN, but it doesn't matter for the schematic. The position of the contacts is equivalent. This connector provides power via pin 1 (V+) and pin 2 (GND). There are 2 coax cables (18, 23) connected to pins 4 and 5 respectively. There is a fifth wire (13) connecting to pin 3.

    The power supply consists of an LM7805 in a TO-3 package and a 2N3055 transistor with a zener diode to provide a constant 6.3V to the vidicon filament. The 9 terminal sochet above the coils is connecting the vertical and horizontal deflection coils, which I can't differentiate yet; and there are another two pairs of wires going somewhere in that enclosure. Maybe some focus coil or something related? One of the pairs is shorted with a piece of wire, and is connected to nowhere else.

    The Vidicon has 10 connections: 1 is the anode and is ubicated in the opposite extreme of the tube where the socket is, pins 4 and 9 are not connected and the rest are. I measure the cathode going directly to ground, I don't think that's quite right, but I'll leave that for now.  

    Next step will be looking at some of the pcbs.

View all 2 project logs

Enjoy this project?

Share

Discussions

Similar Projects

Does this project spark your interest?

Become a member to follow this project and never miss any updates