 David Tucker
I have been on the hunt for a low cost laser bed for my MultiBot machine. The beds I could find were either very hacky, dangerous (made of wood) or crazy expensive like the honeycomb beds. Early on I tried a baking pan and wire cooling rack. That worked ok, but it was much smaller than the working volume of my machine, and it was unstable and difficult to repeatable run a job.
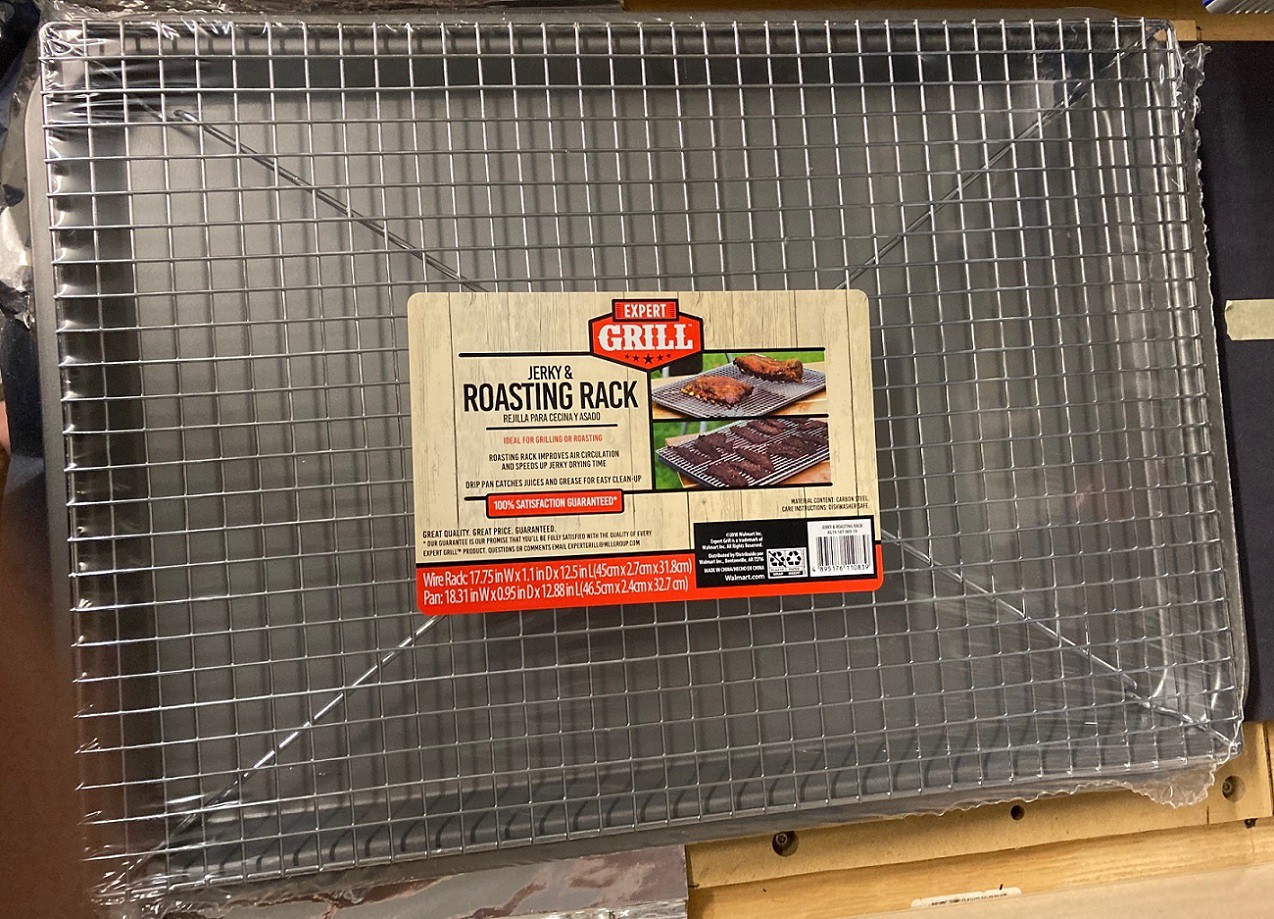
I came across this $9 Expert Grill Jerky rack at Walmart and thought it would be a good base for a bed. It is quite a bit larger than my old cooling rack, it has a stronger rack that is better supported, and the rack extends over the edge of the drip pan, providing a continuous surface for the material to rest on.

It's biggest flaw is that it is much too shiny and that was causing some flashback burns on the bottom of my material when cutting. I have previously found that matt black paint does a good job of stopping the laser light from reflecting. So I washed the pan with soap and water and scuffed things up a bit then gave it a few coats of black paint.
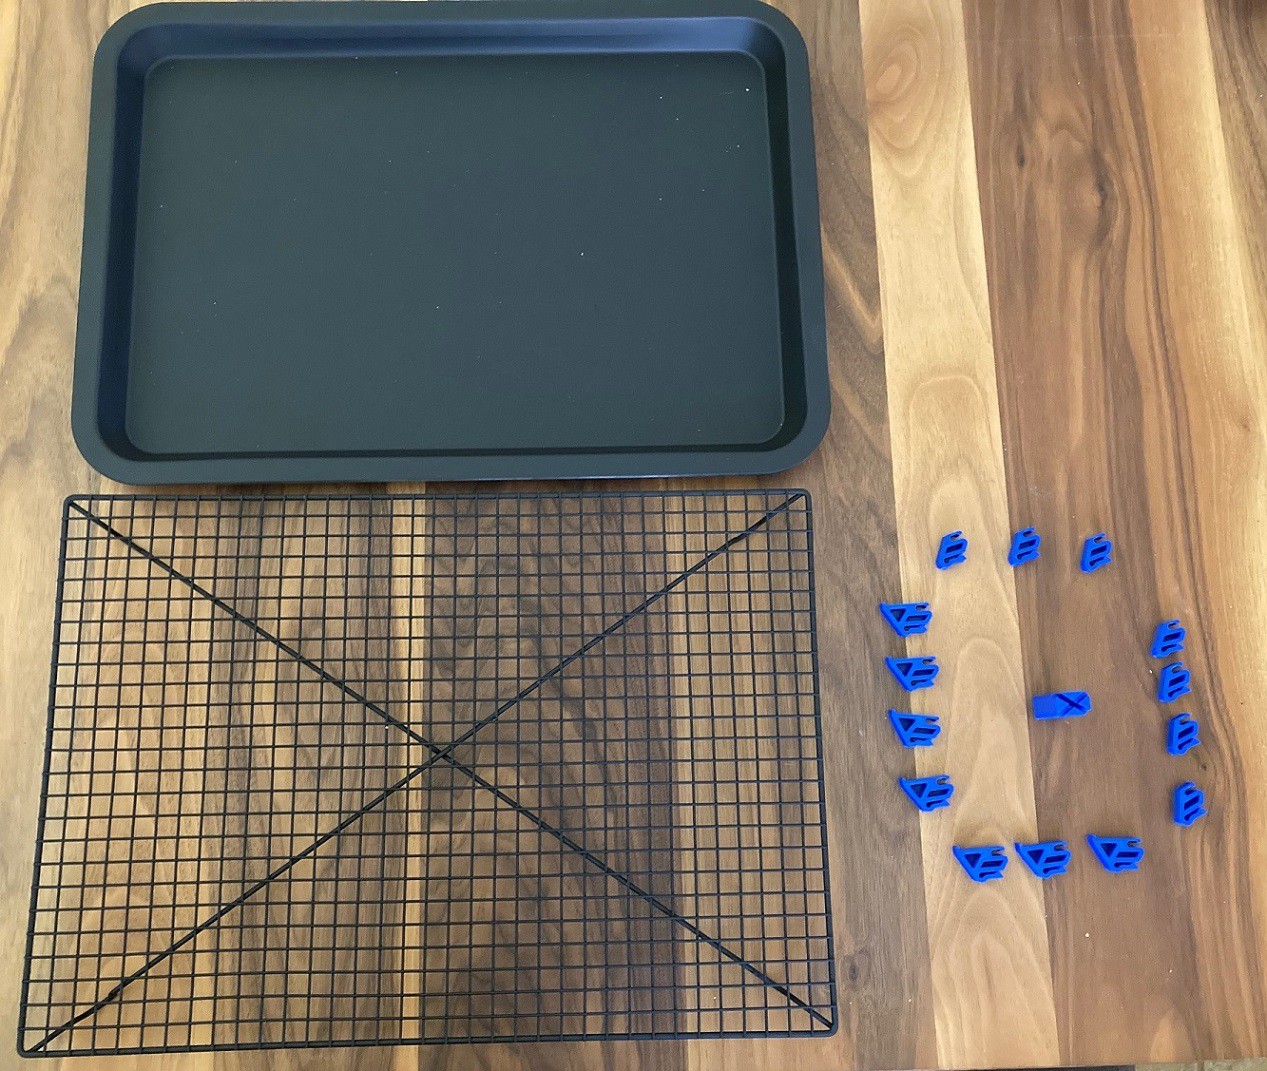
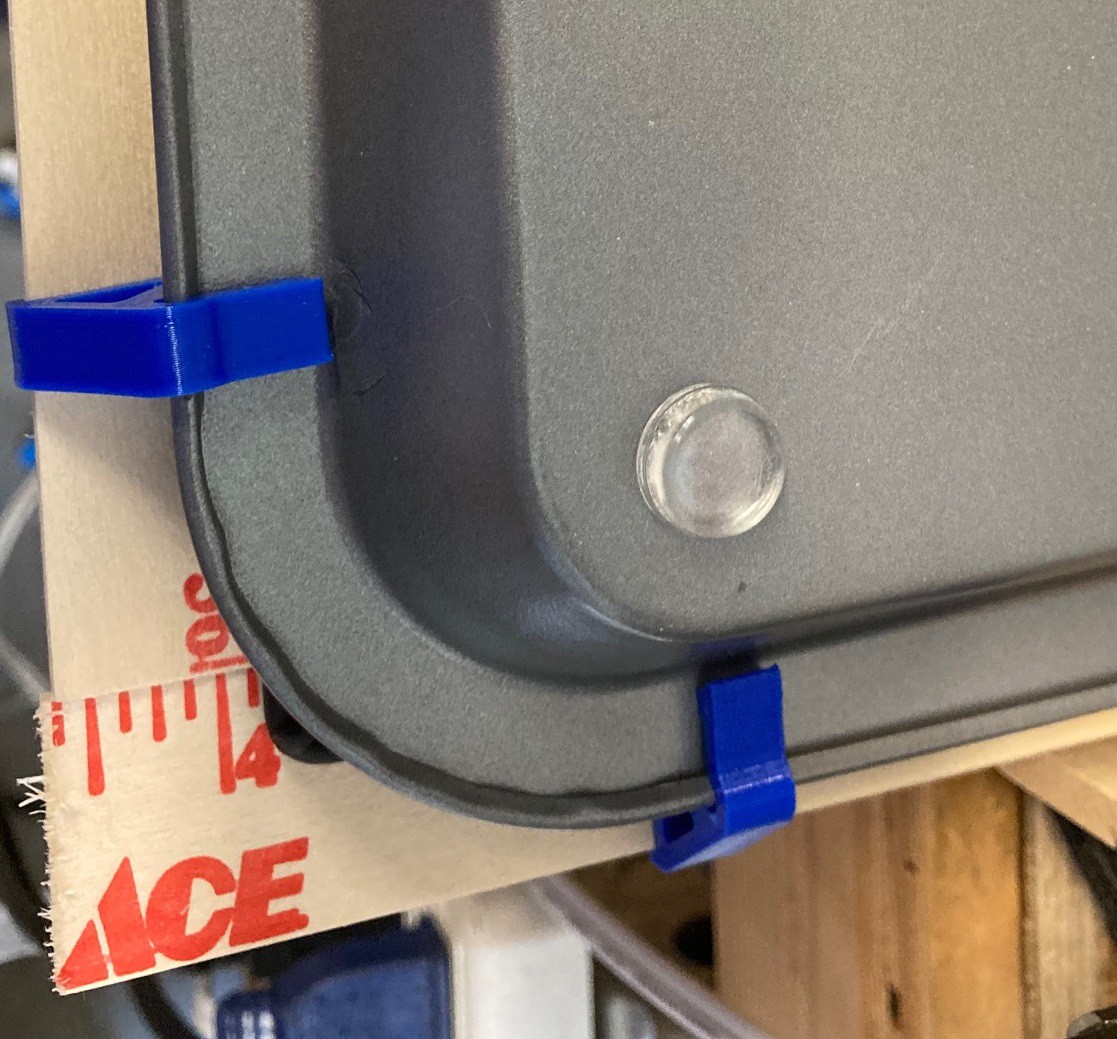
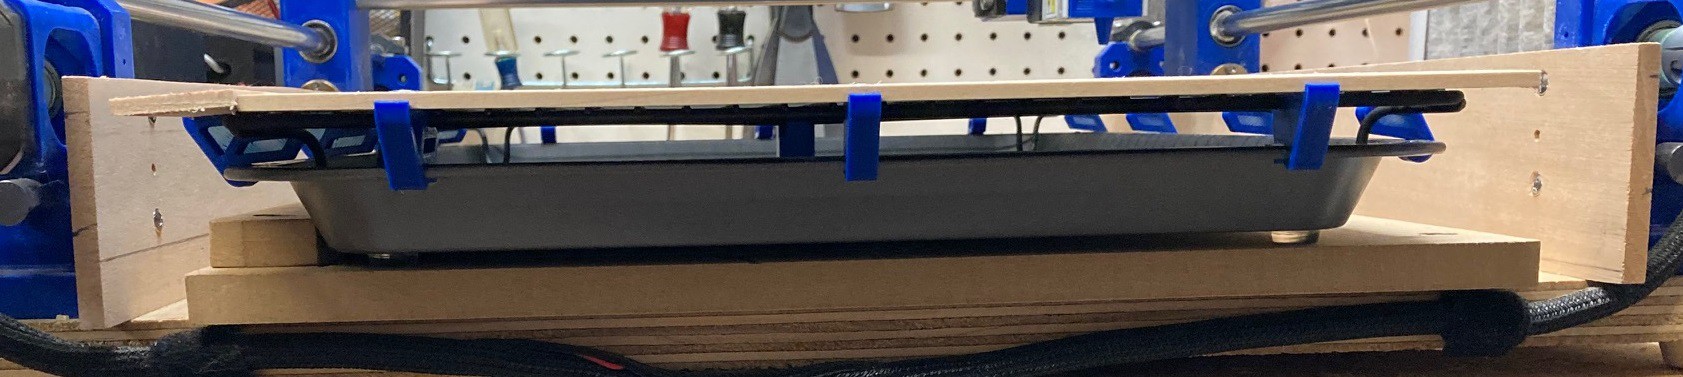
I printed up several standoffs to clip the rack to the pain, with a center support as well to keep the middle level with the sides.
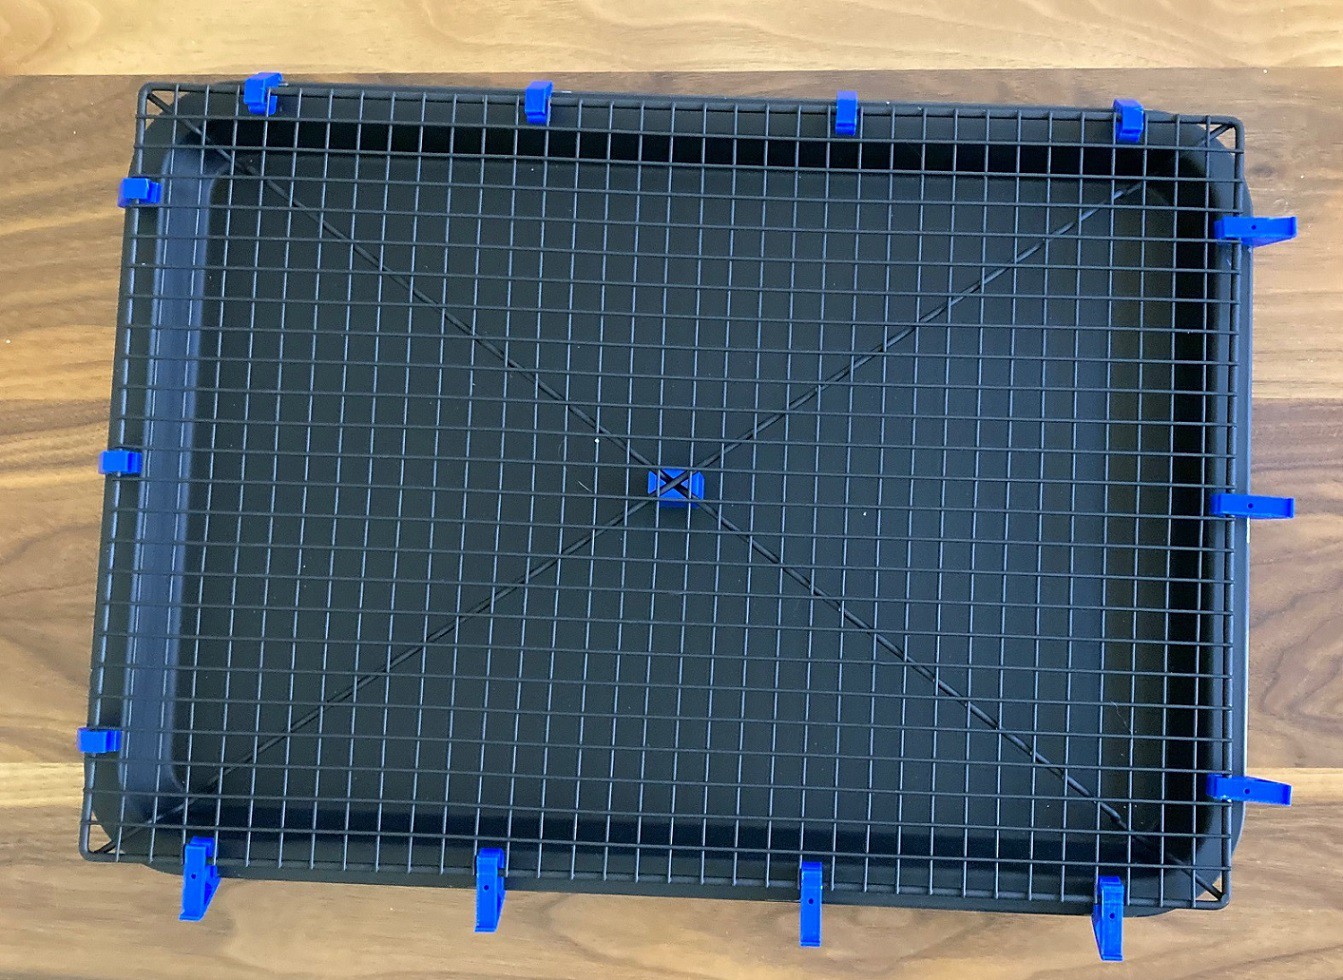
These are setup to provide a 10mm gap between the pan and the rack so smoke can find its way out easily.
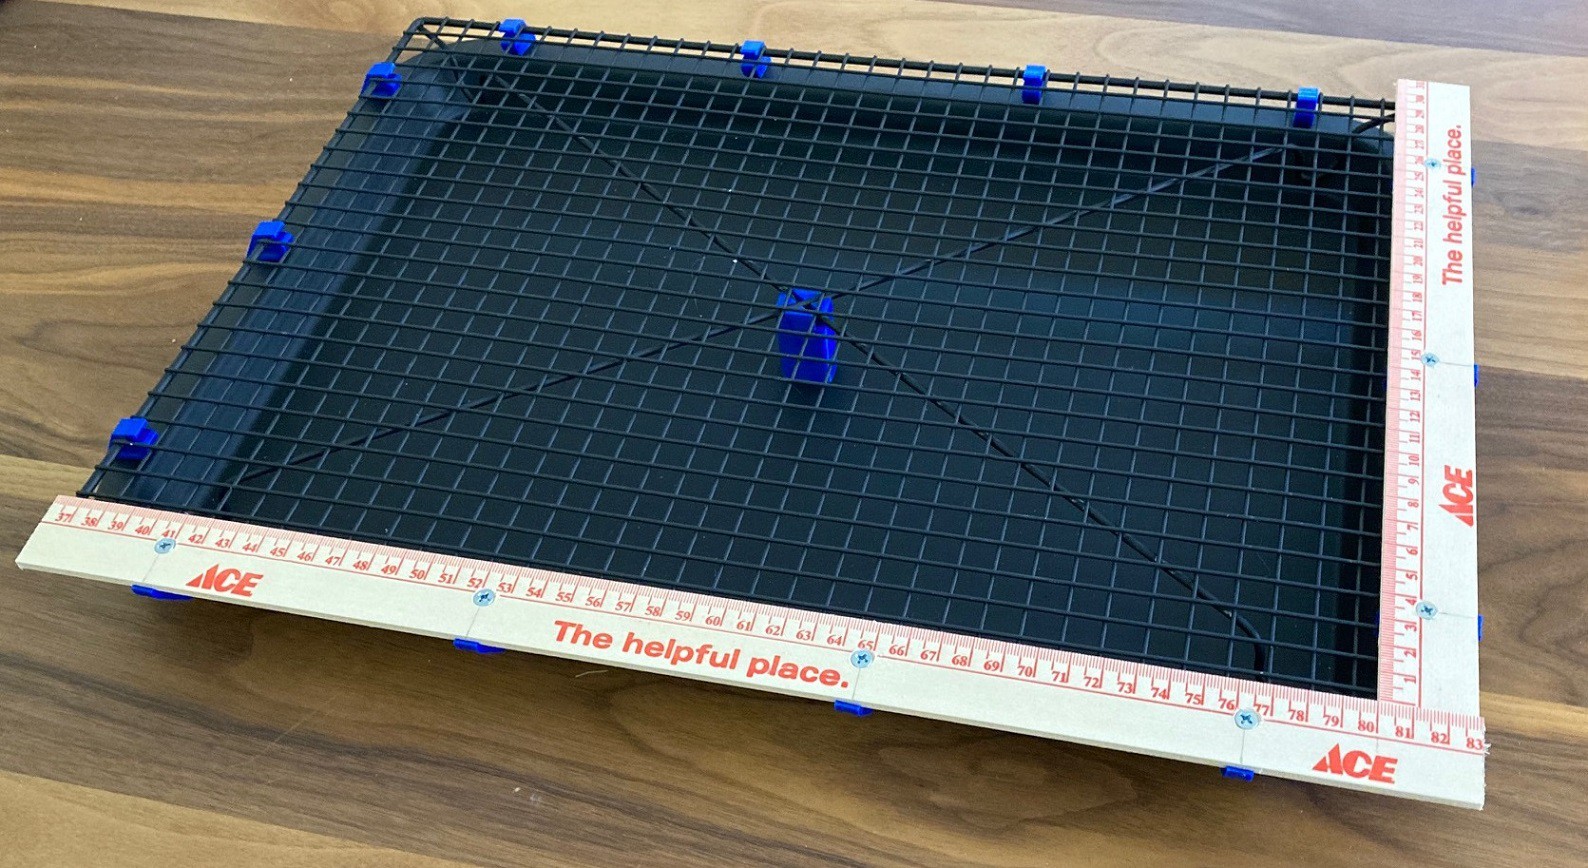
To make things more repeatable I cut a yardstick in two and screwed it into my plastic standoffs.
Finally I added some rubber feet to the bottom of the pan to keep it stable and stop it from sliding around.
My spoiler board has a straight edge on it to help align the wood when cutting, I went ahead and used that to hold the laser bed square to the gantry, and I added a pin in the bed to secure it in the y axis as well. You can see from this view that even if we use a full sheet of material we will still get good air flow under the bed.
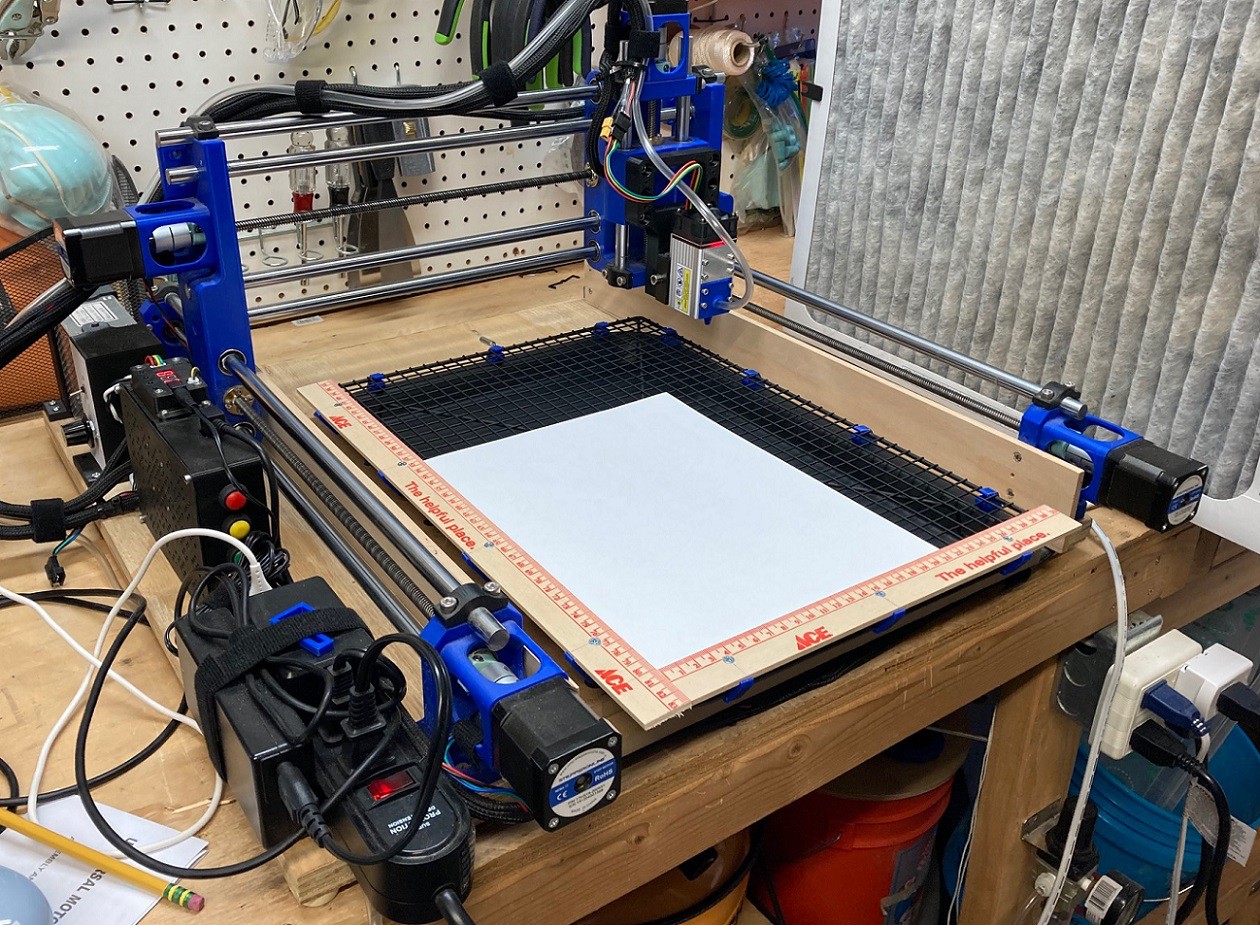
When all setup I have a working volume of 430x300 mm and I'm seeing less than 1 mm of deviation across the whole bed, it is quite flat. On top of that it is very sturdy, with little flex when I push down on the bed. All in I probably spent $20 on this, not bad for a laser bed.
You can download the 3D printed files from my Thingiverse page.