Close
0%
0%

Stop Motion Animated Hologram (like)

This project details the production of a stop motion, animated autostereoscopic presentation (view 3d without glasses or headgear).

Similar projects worth following
Imagine a shadowbox (or shoe box). Place colorful felt or clay creatures in the box. Let the creatures come alive and move around--this is the project. No glasses or headgear are required to view the presentation.

Since the advent of Star Wars, I have been interested in the presentation of 3d images without use of glasses or headgear. Now, these can be displayed at home using a "Looking Glass."  My wife and I have created a project called "Santa's Shop" that resides in a local store window every Christmas season and we're always looking for something new. 

Producing a stop motion video (eight seconds long) for the Looking Glass will require production and management of more than 9000 images. A single image on the display requires 48 photos (taken left to right). Here's the leftmost and rightmost images for a static 3d presentation.
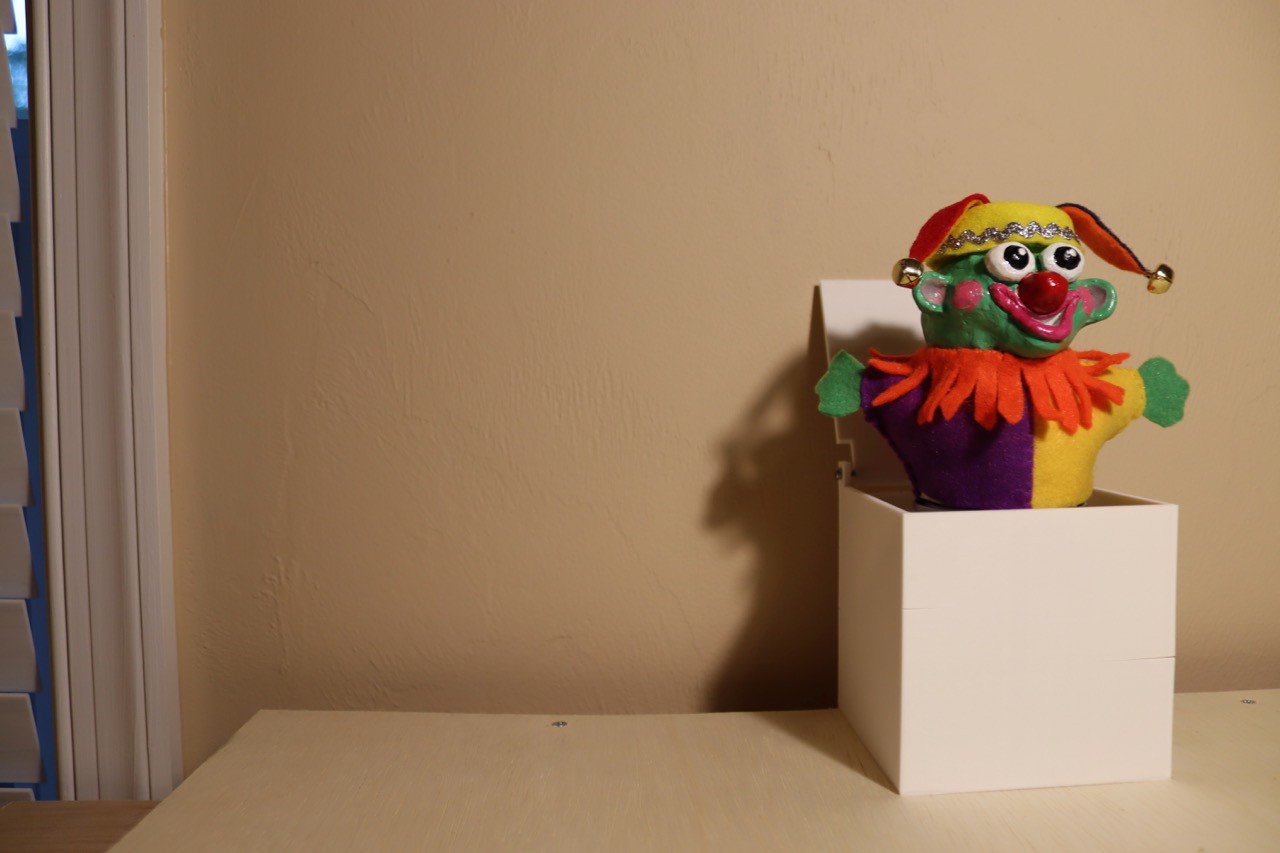
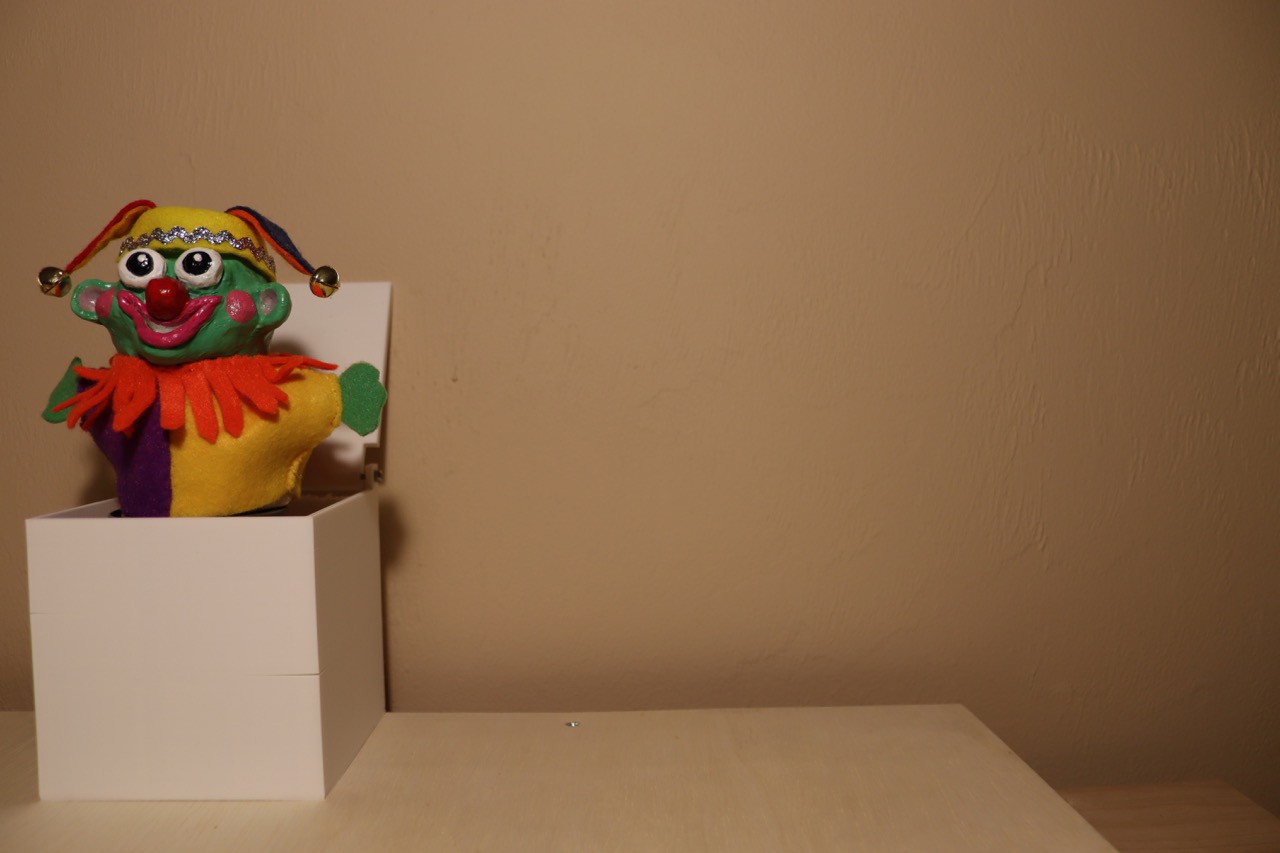
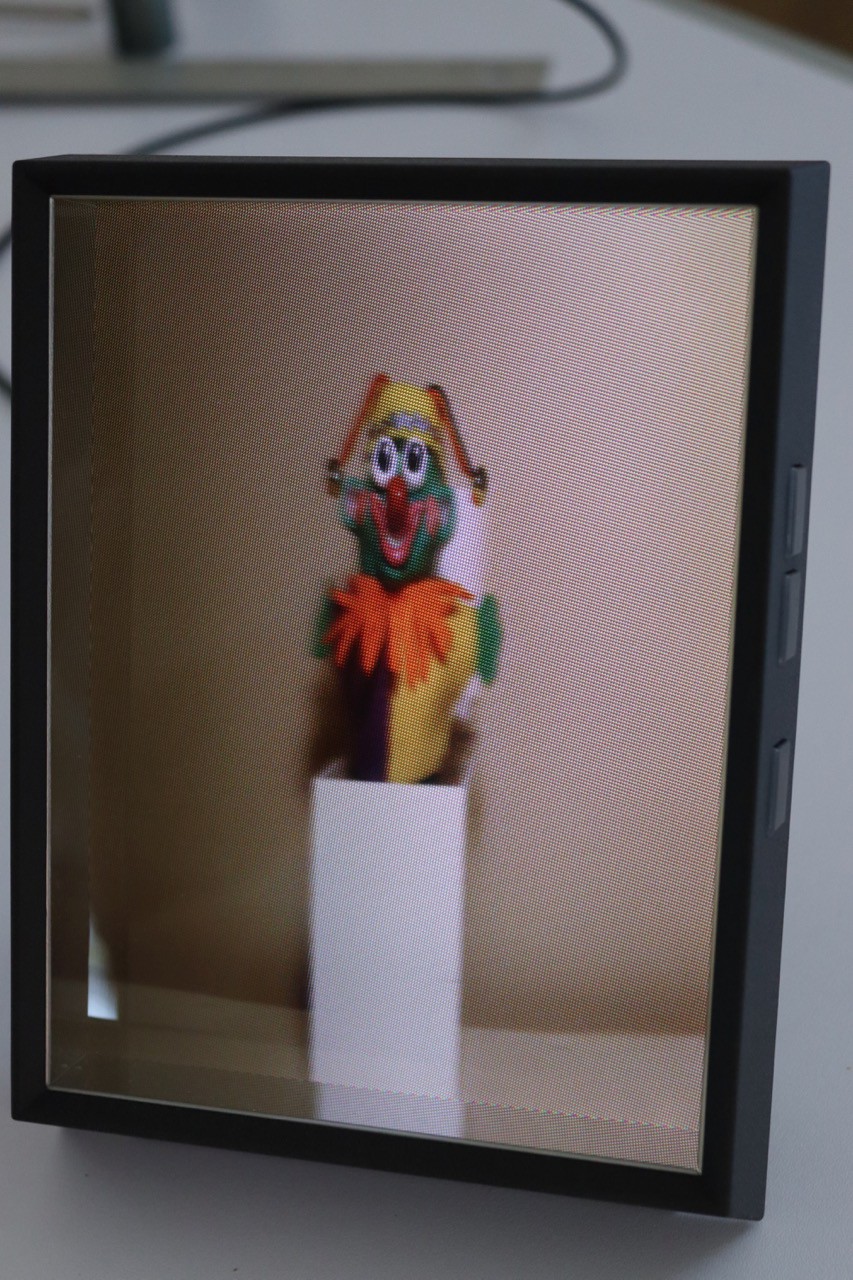
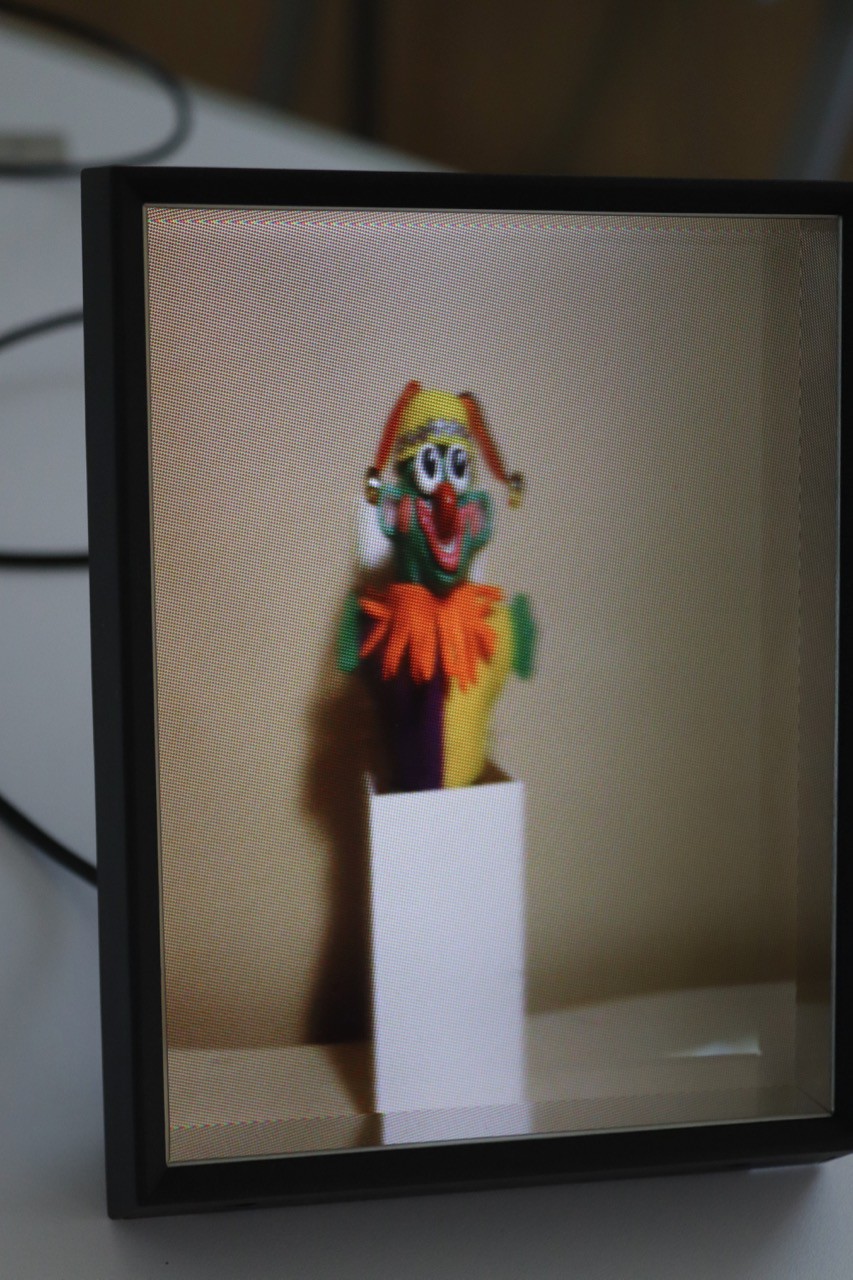
The end result looks something like this.
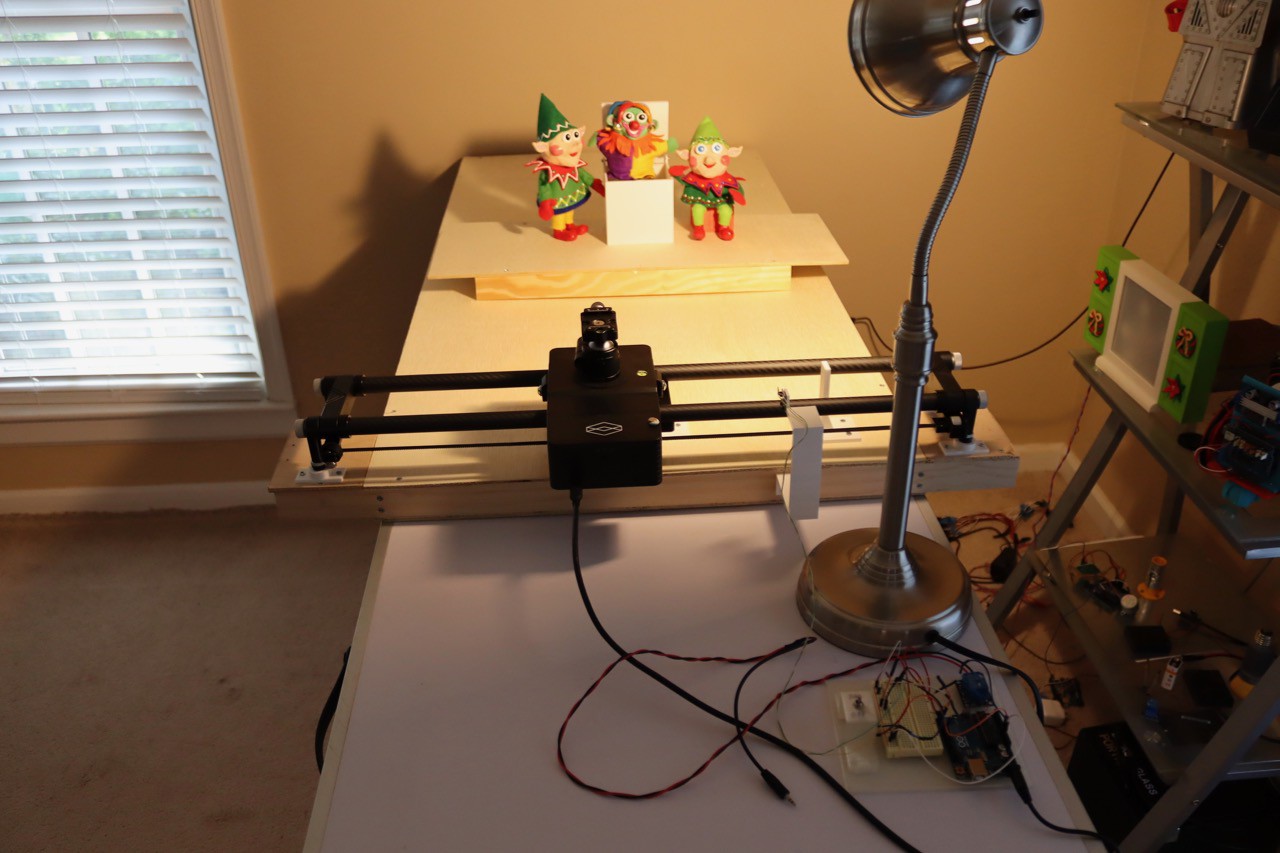
The photo rail is set up like this.
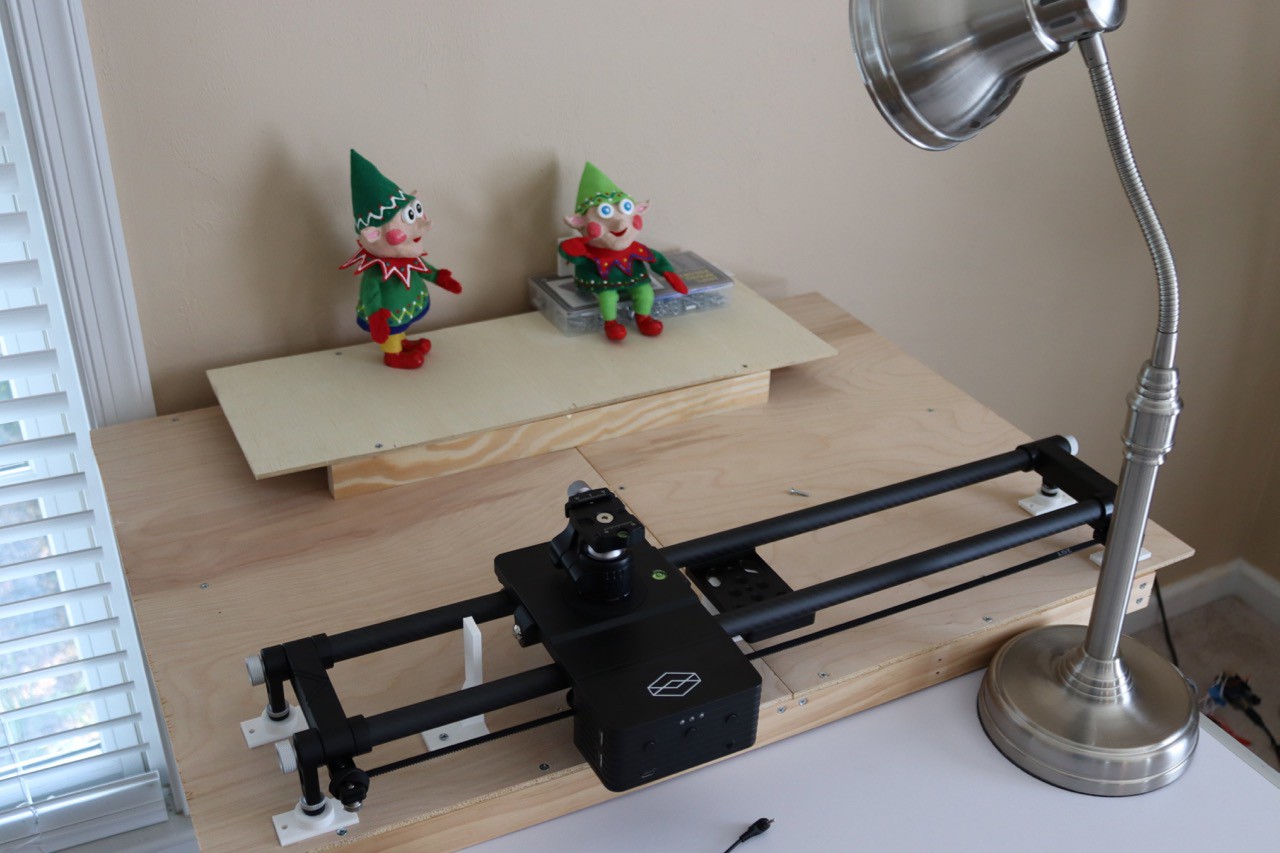
Everything has to be mounted securely--only moving in required exact steps. I'll have to create "rail start" and "shutter" controls (Arduino) to maintain consistent photography. The elves will have to stay in place, only moving in tiny increments. The stage and camera rail will have to be fixed and not move relative to one another during production.

I realize that the aspect ratio is incorrect on my first attempt, but I anticipate the arrival of a horizontal Looking Glass display in April.

As a side note, I first saw a version of the "Looking Glass' at the Hackaday super conference in 2018--it's been on my radar ever since that time.

More will follow as we develop this project.

April 7, 2022:

Due to the Covid situation in Shanghai and Hong Kong, the horizontal Looking Glass Display (scheduled for delivery in April) has now been pushed back to June--and that time frame is speculative at this point.

magnet sensor.f3d

f3d - 152.01 kB - 03/28/2022 at 21:10

Download

rail stop.stl

Standard Tesselated Geometry - 20.79 kB - 03/28/2022 at 21:10

Download

rail stop.f3d

f3d - 70.86 kB - 03/28/2022 at 21:10

Download

magnet sensor.stl

Standard Tesselated Geometry - 32.60 kB - 03/28/2022 at 21:10

Download

leg support.f3d

f3d - 57.29 kB - 03/28/2022 at 21:10

Download

View all 9 files

  • Controlling the Camera

    Mike Rigsby03/26/2022 at 13:35 0 comments

    I have to start somewhere, so my "actors" occupy an area 14 inches wide by 9 inches high by 5 inches deep. My "stage" is 2 feet by 4 feet (with two 4 inch by 5 inch "wings" to support the photo rail).

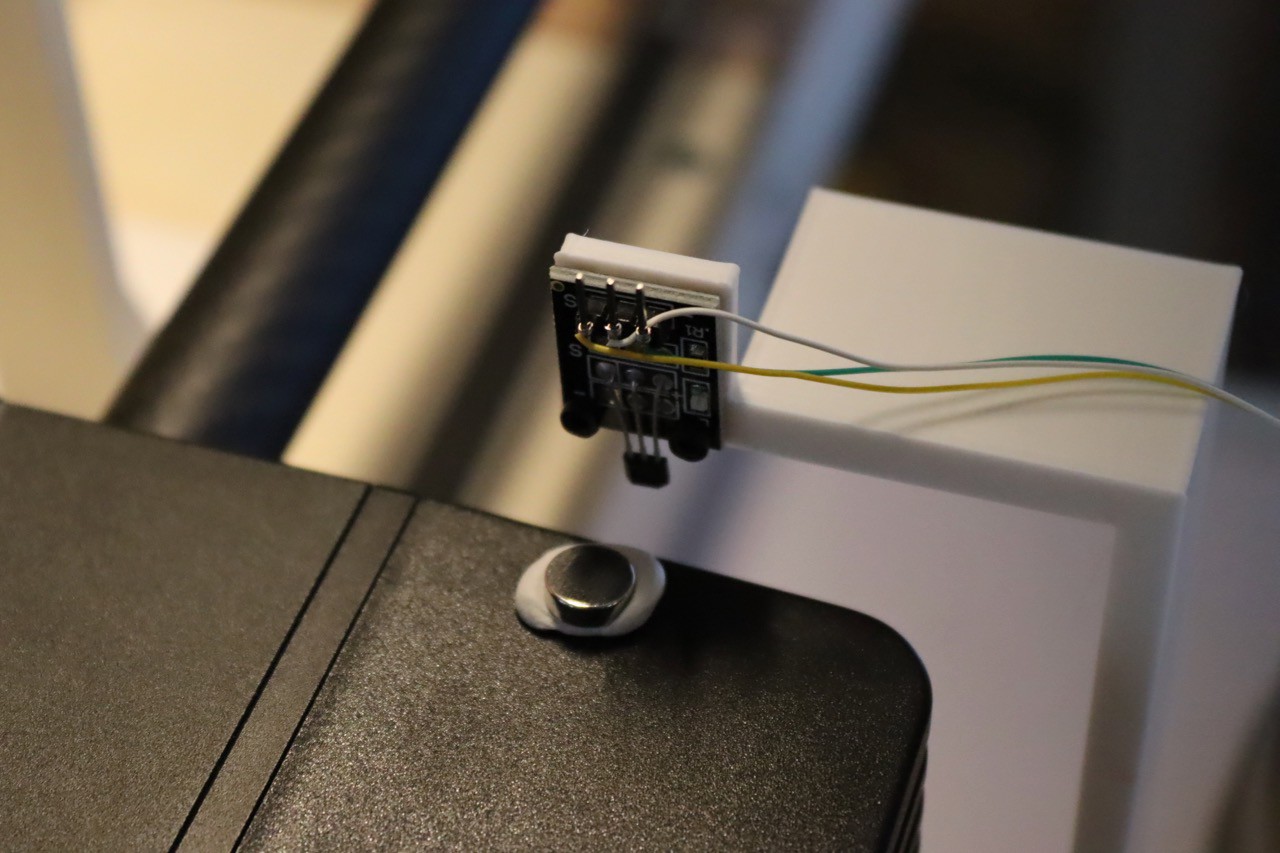
    To create an animated product, the camera must start and sequence at the same spot every time (48 or 45 photos to represent one "frame" for the stop motion production). I placed a magnet on the photo rail.

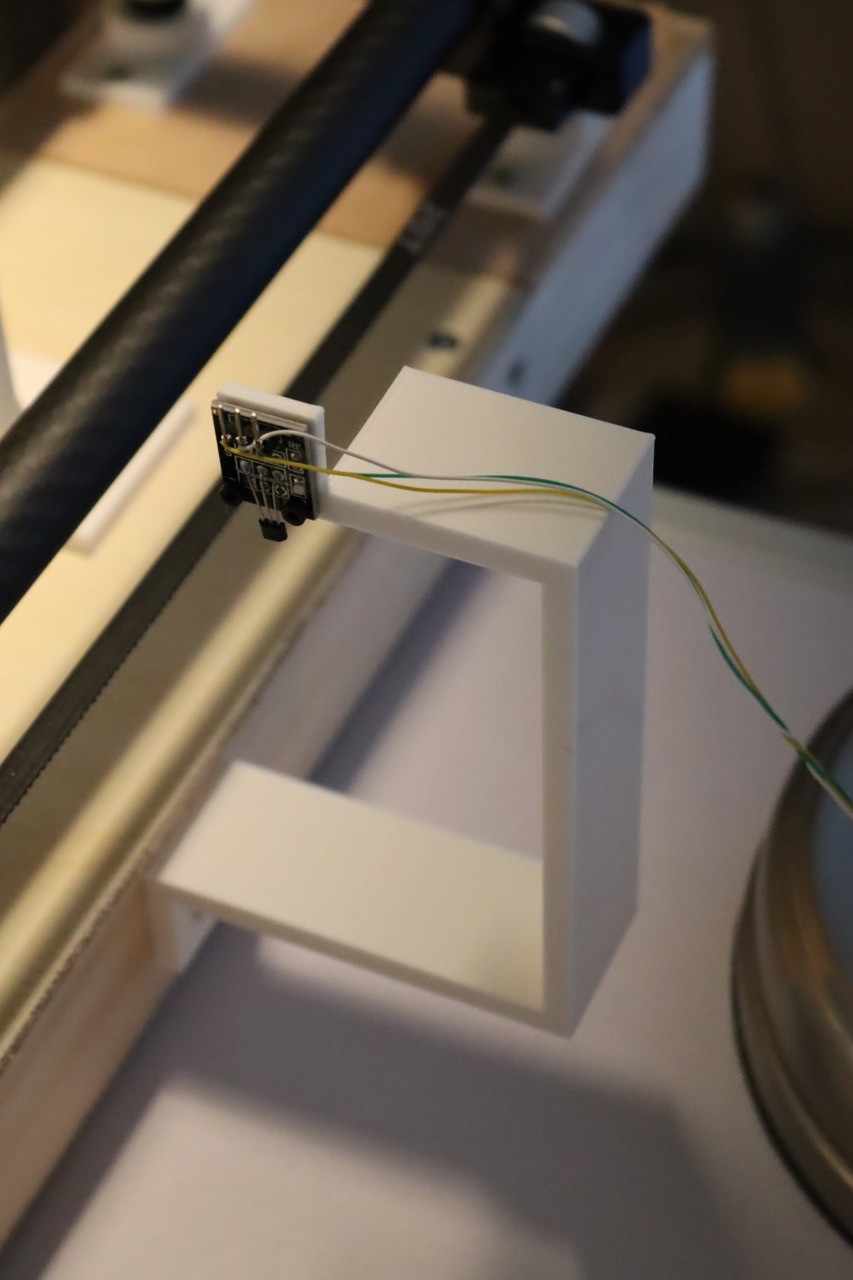
    A 3d printed bracket allows the magnet to move under the rail.

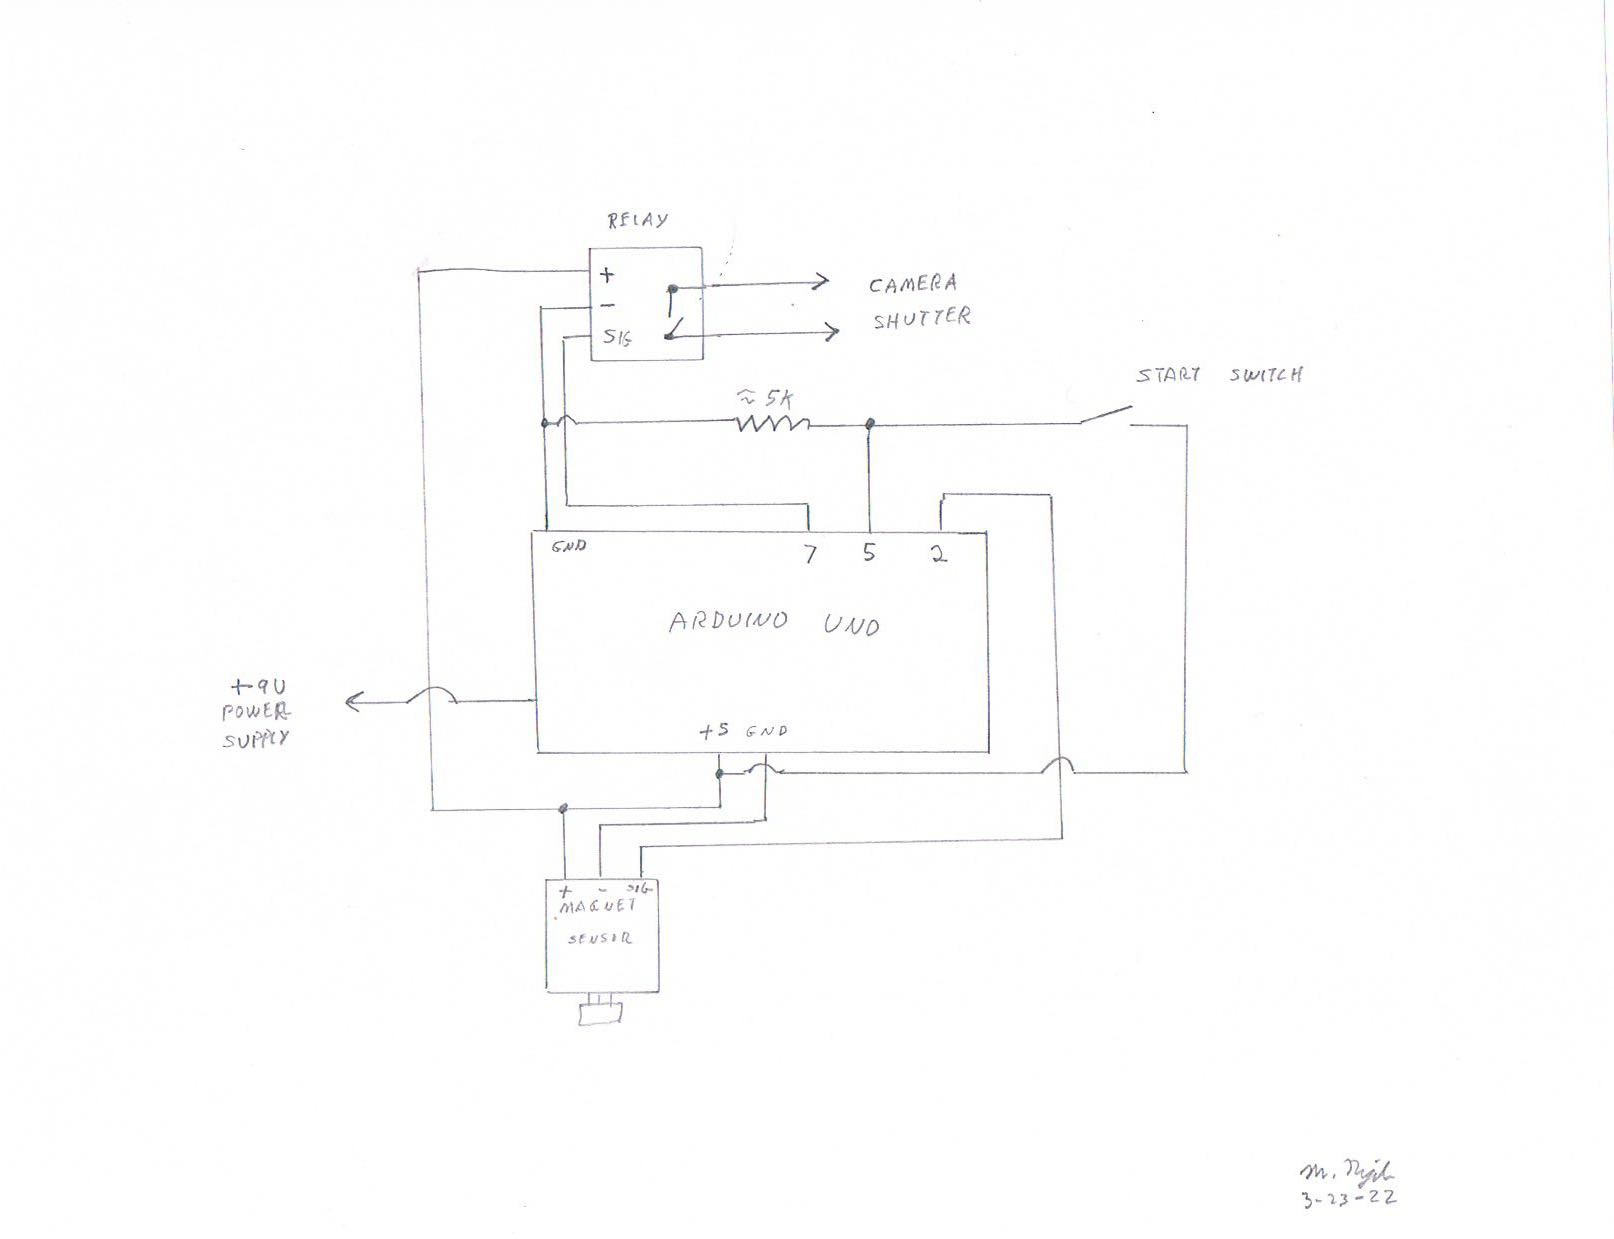
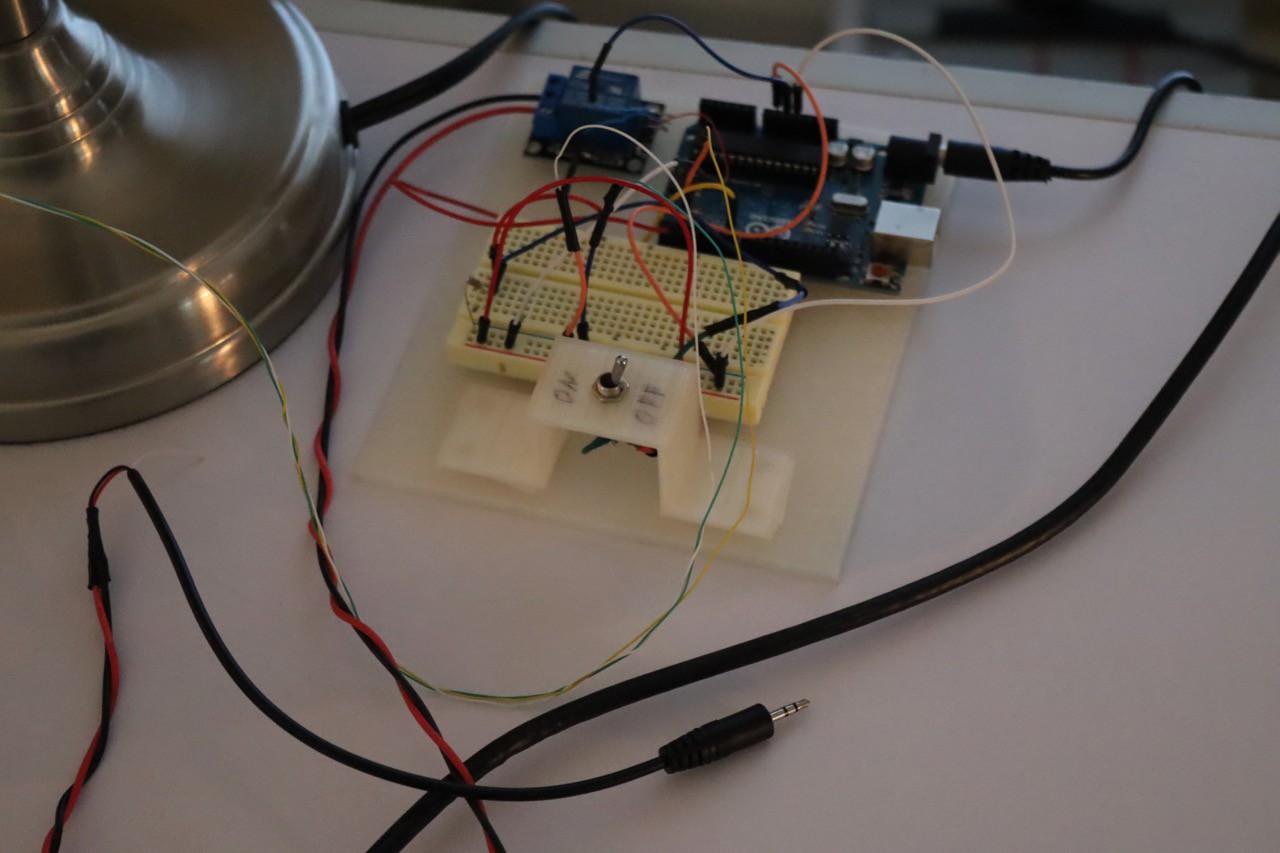
    An Arduino controller senses the magnet position and (with a relay connected to a camera remote cable) takes the photos.

    At the slowest speed for the camera rail, my camera (Canon EOS 250D) needed to take about 4 images per second. It would only take 2 per second. I need to slow the rail or speed up the camera--that's my next subject.

View project log

Enjoy this project?

Share

Discussions

Similar Projects

Does this project spark your interest?

Become a member to follow this project and never miss any updates