It’s logic!
A simple and elegant logic demonstrator that teaches the basic principles for OR/NOR, AND/NAND and XOR/XNOR logic.
The logic used for the gates is a clever but very simple circuit that uses 9 diodes and two relays. Connector a represents 0 and 0, connector b 0 and 1 and connector c 1 and 1. If the output needs to be 1 for the given combination of inputs, a 1 is put on the corresponding input. So, an AND-gate needs only an input for connector c, an XOR gate an input for connector b. Diodes are used to make sure only the required connectors will receive a 1.
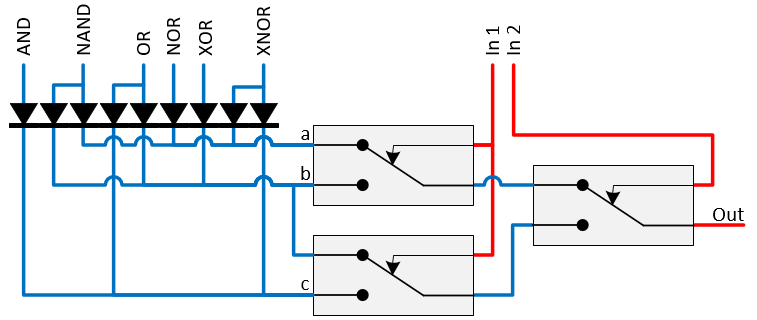
The elegant schematic for the multiplexer-based universal port for the gate logic.
The leftmost three columns in the diode matrix are used for the gate logic. The other columns display the characters on the 7-segment displays.
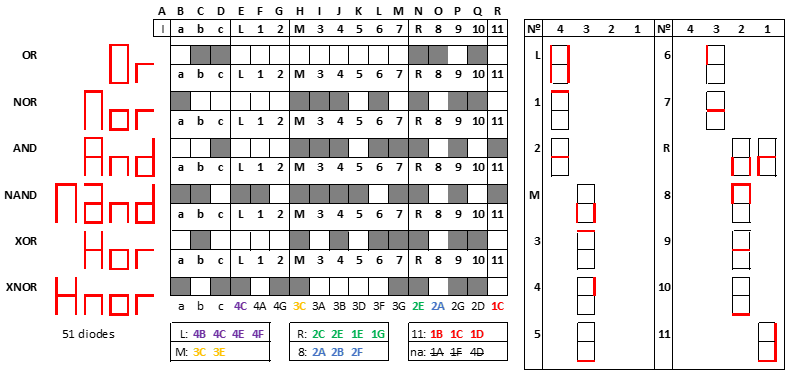
The diode matrix for the logic and for the character display on the 7-sement displays. A dark square represents a diode. Horizontally the required gate is inputted, vertically the output can be found.
The first thing to do is to solder the diode matrix by soldering horizontal strings of diodes together as shown in the figure below.
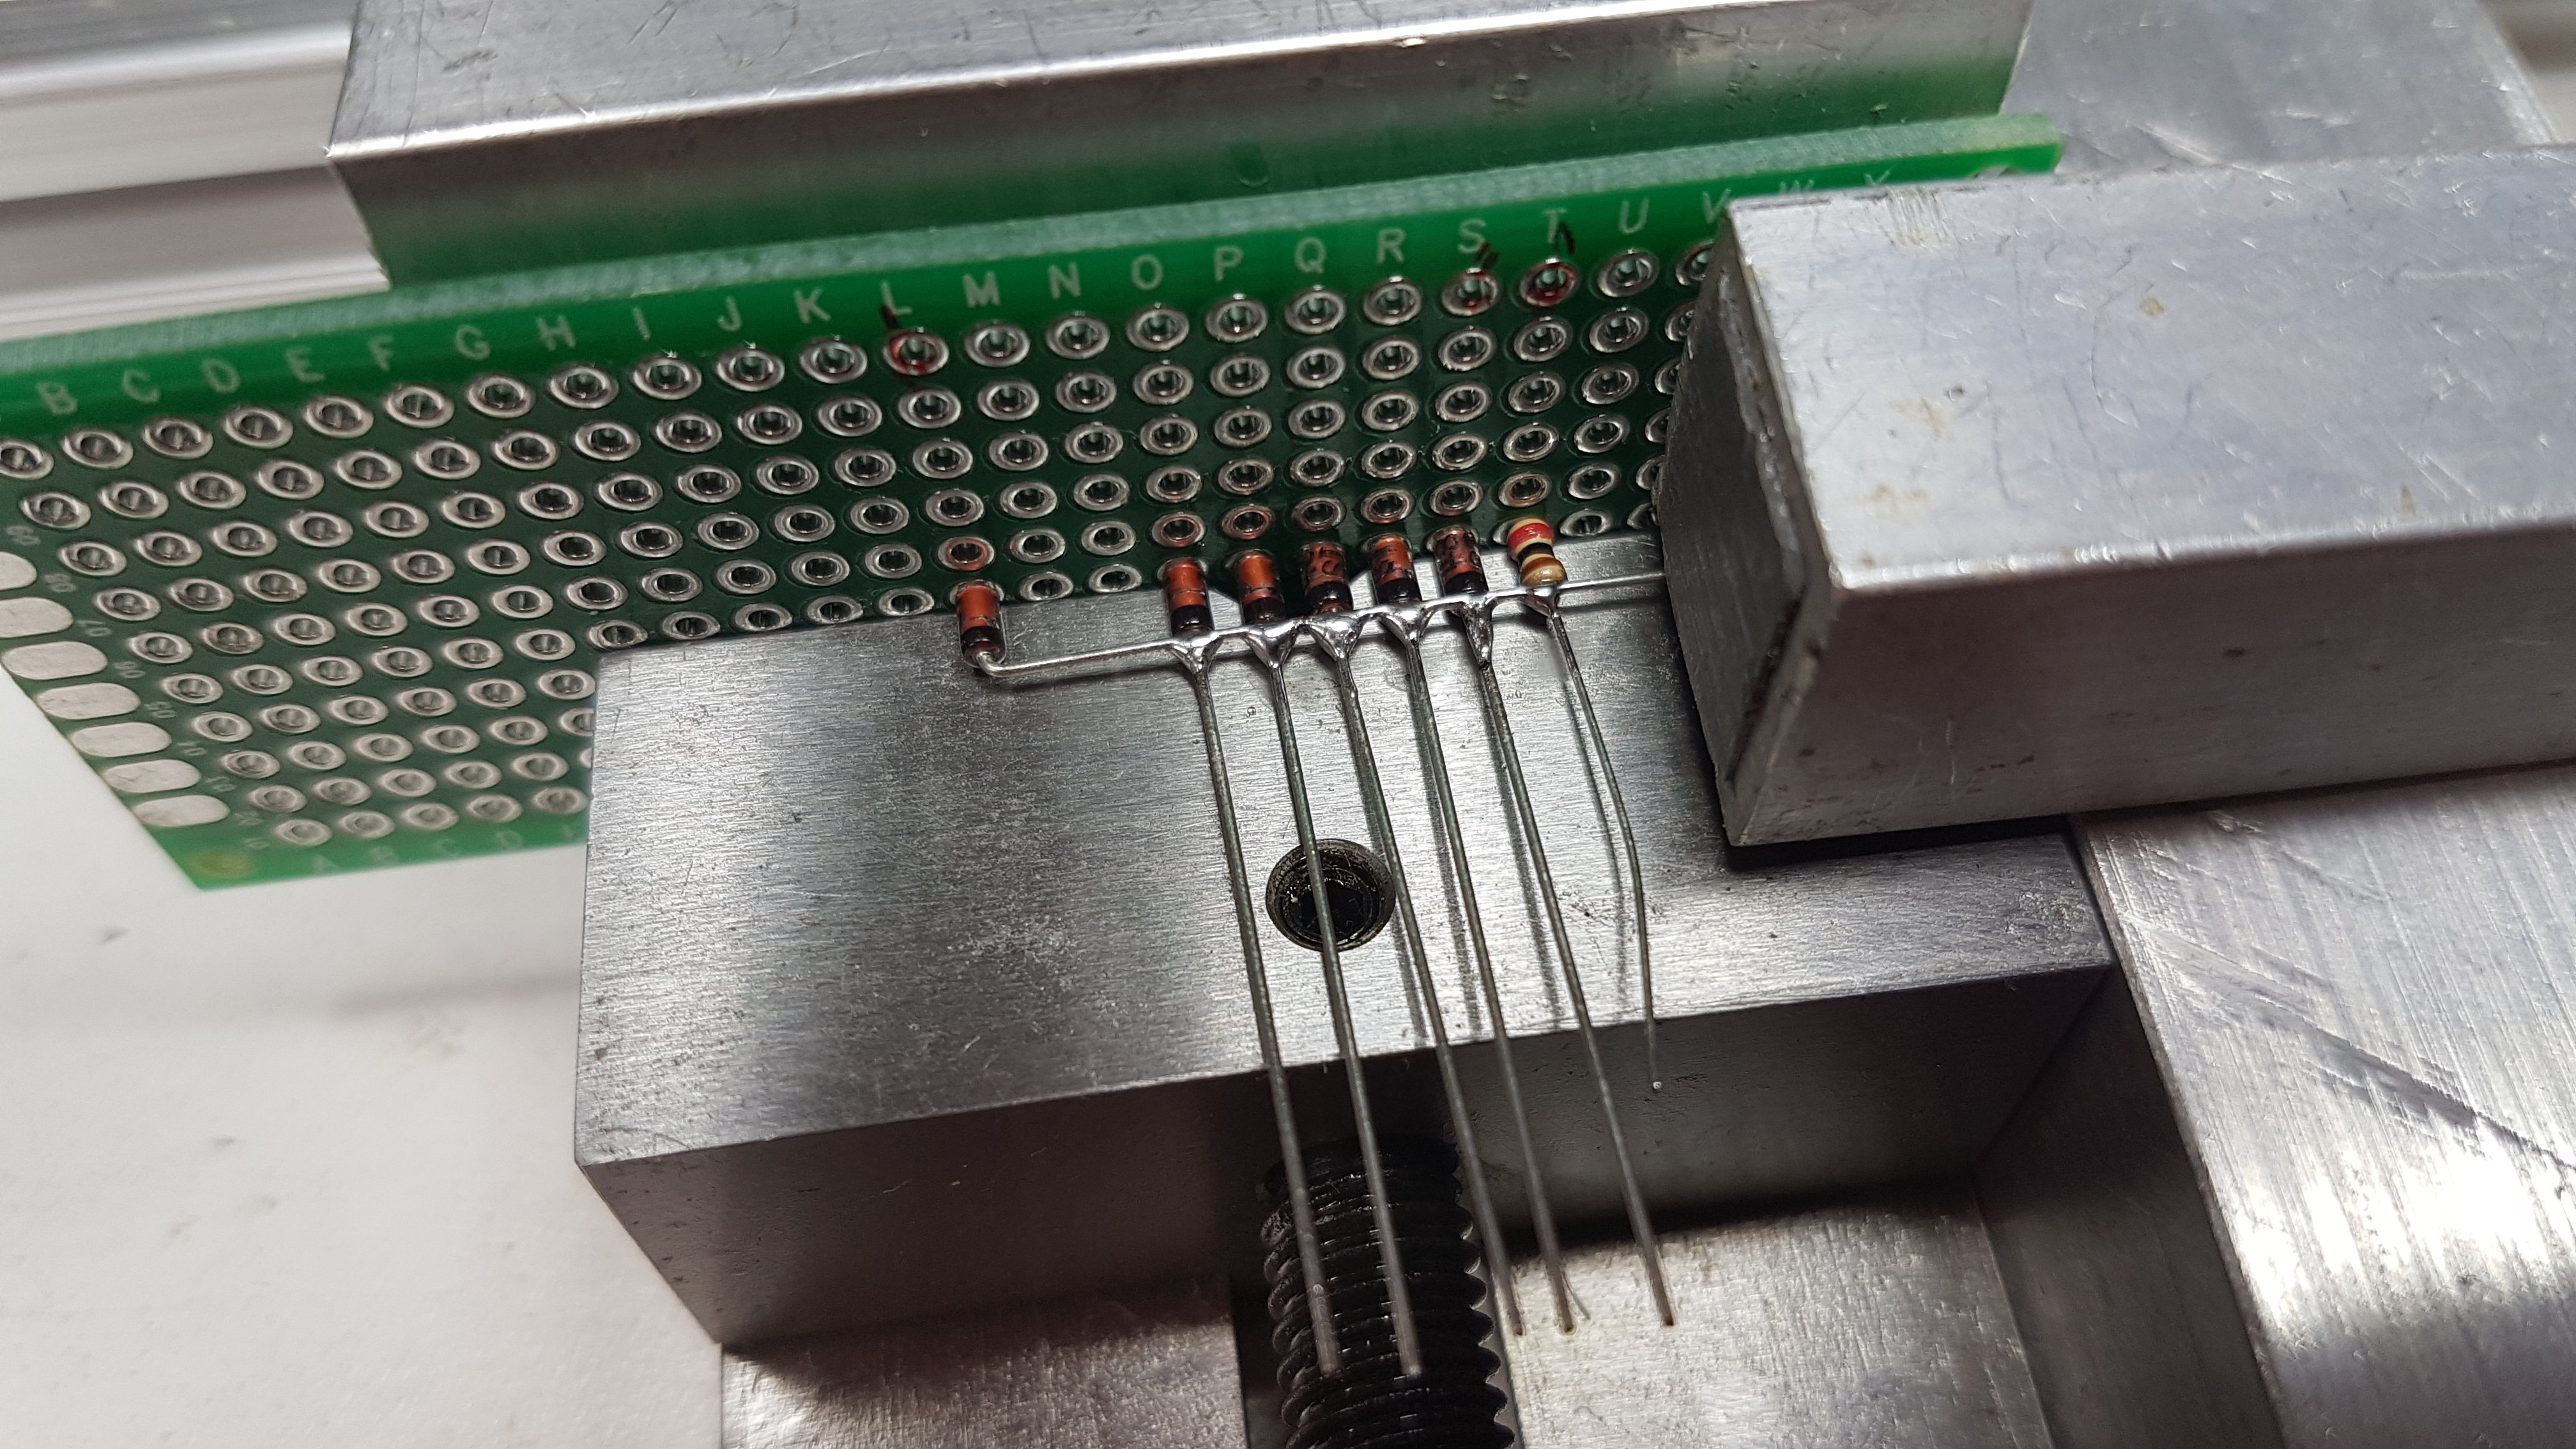
Soldering of the diode matrix. In this case the diodes are placed upwards, that would suit common anode displays. For common cathode displays the diode should be placed downwards.
After that is finished, the strings are placed on the perfboard and at the bottom side the diode s are interconnected so that per column one connected vertical output
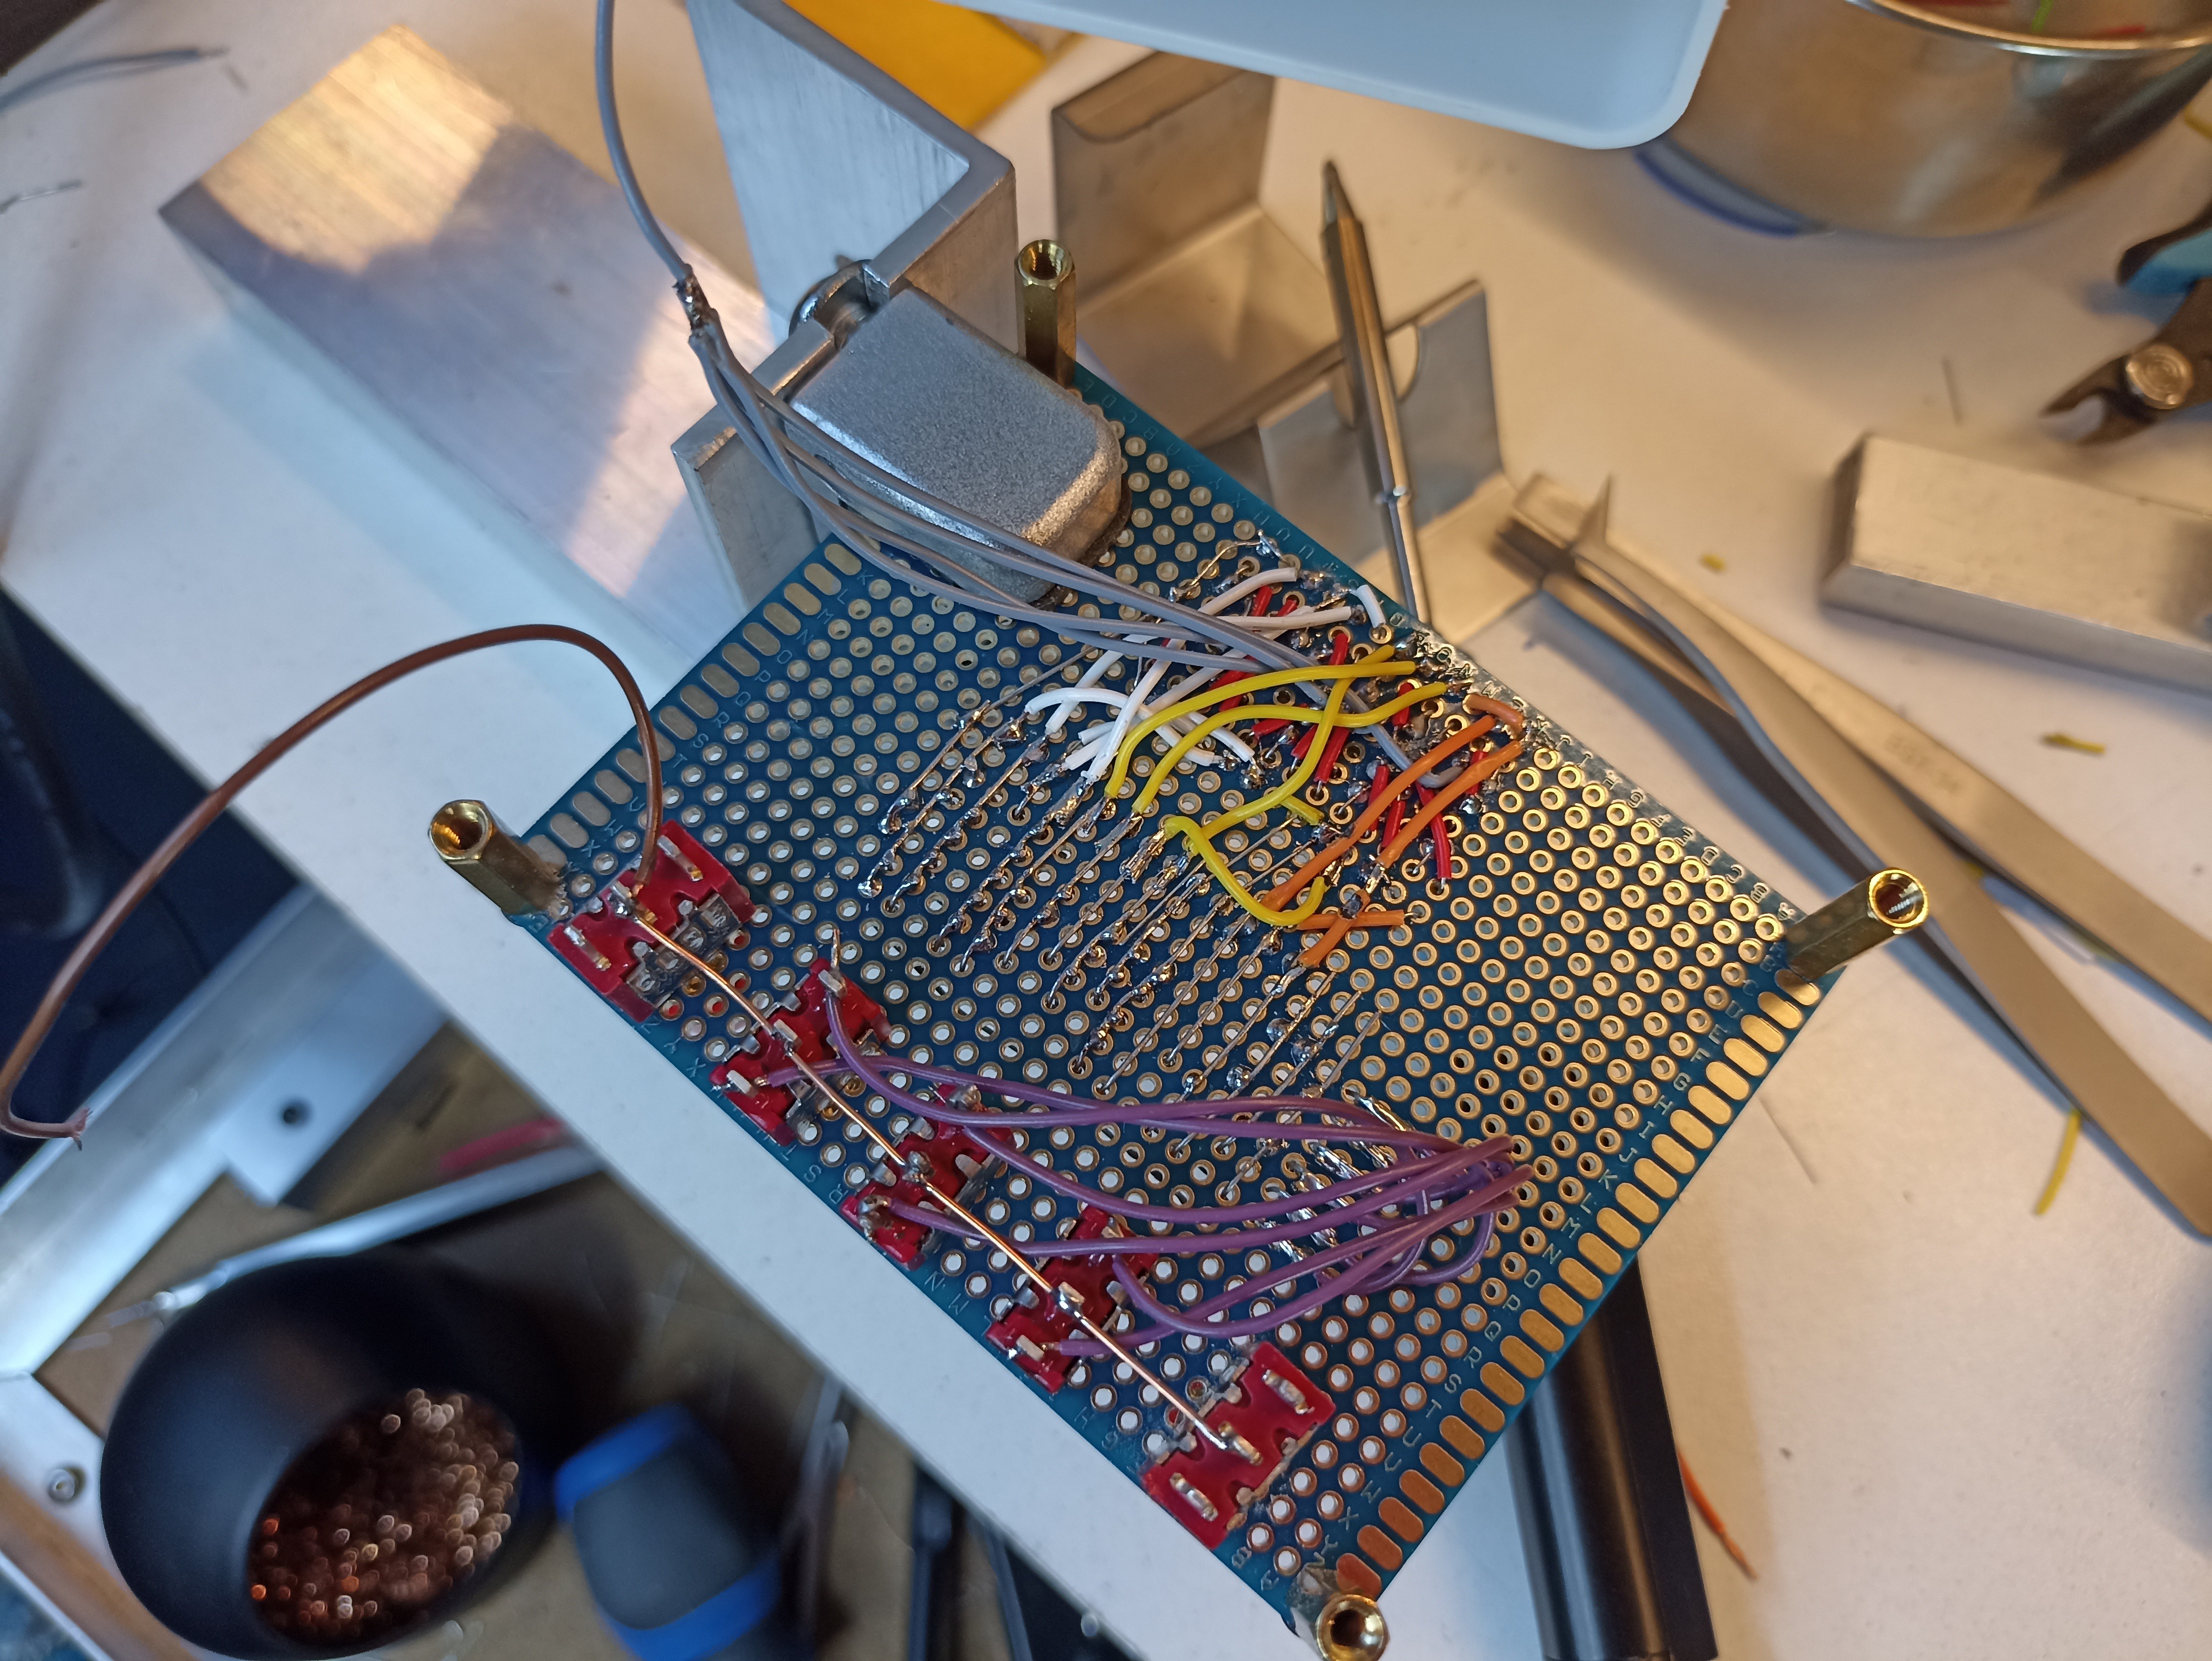
After that, the basic setup of the perfboard is soldered. First solder the 7-segment displays with their resistors attached to the perfboard. Then place the standoffs and solder the switches on the perfboard. Connect the switches with the horizontal input (i) of the diode matrix. Solder the three LED's and connect the outer two to the push buttons. Don't forget to use current limit the resistors for the LED's.
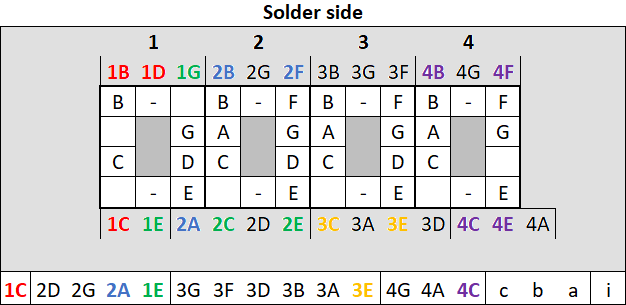
Solder guide for the 2181AS common cathode displays.
After that the tedious process of connecting the output of the diode matrix tot the several segments of the 7-segment displays. Since some diode signals need to light several segments, pins with the same colour need to be connected. Be sure that every segment has its own resistor!
Finally the relays are soldered and connected to the LEDs and the USB connector is soldered tot the perfbord.
Happy logic!
 Jeroen Brinkman