 Joseph Marlin
I have added the hopper!
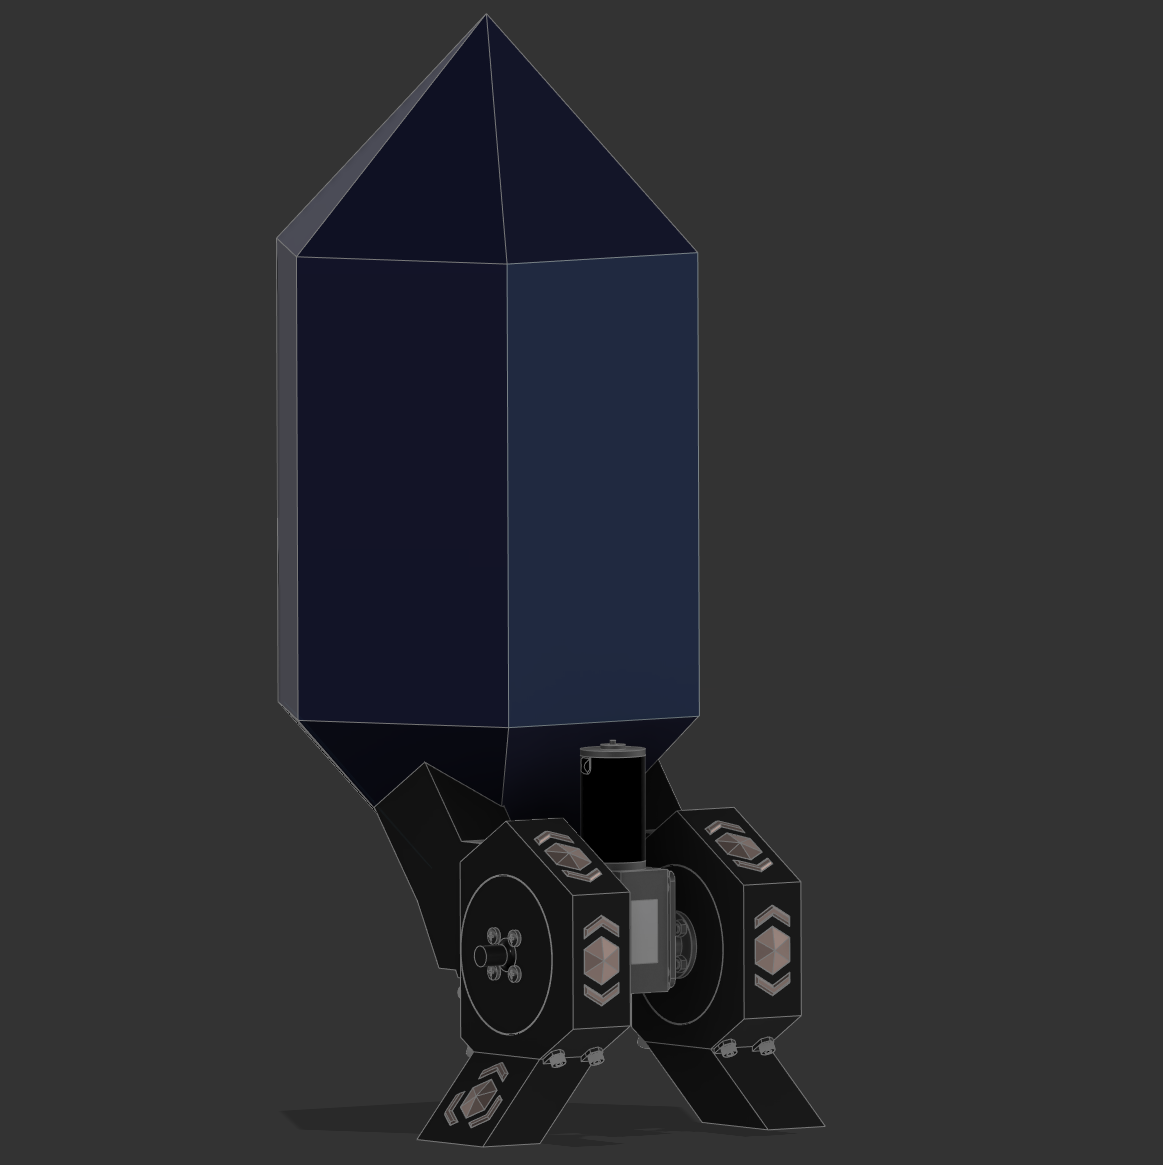
The goal is to print this out of translucent blue PLA and put LEDs inside of it to make it look like it is glowing.
I have also printed the bottom feed mechanisms with both wheels and tested it out.
And wow was it bad.
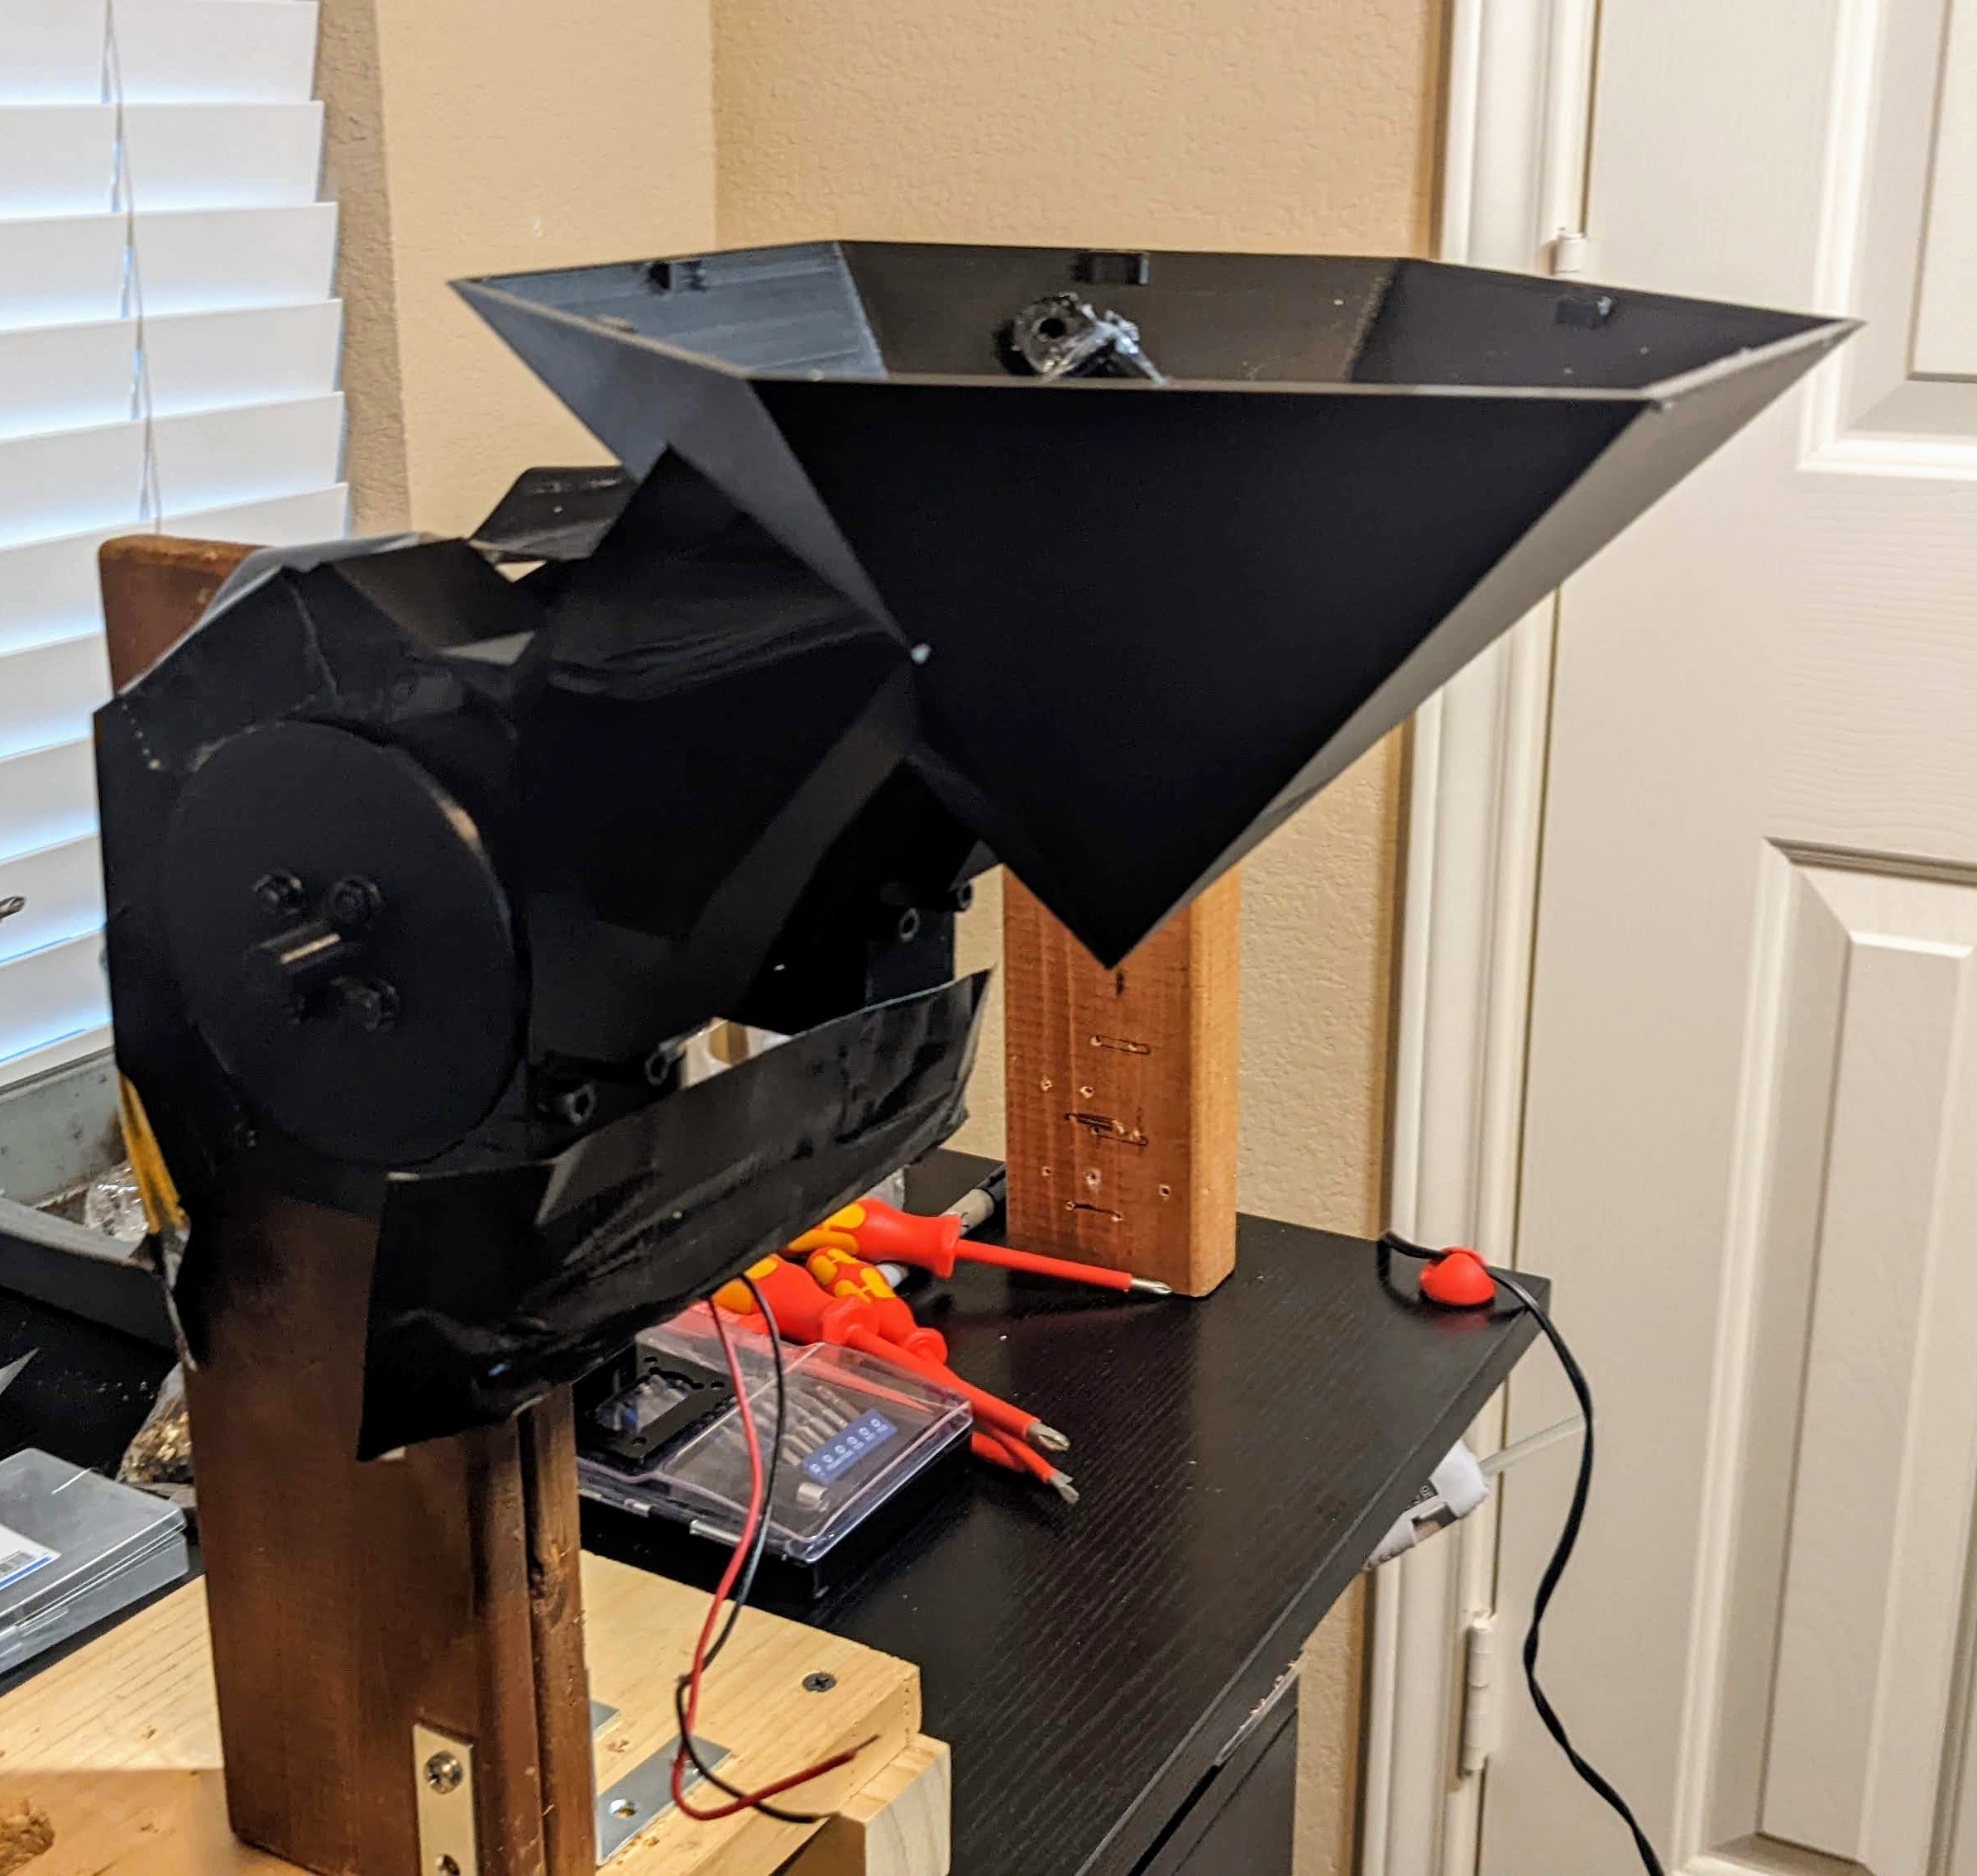
I am ashamed to even post these.
Here are a list of failures:
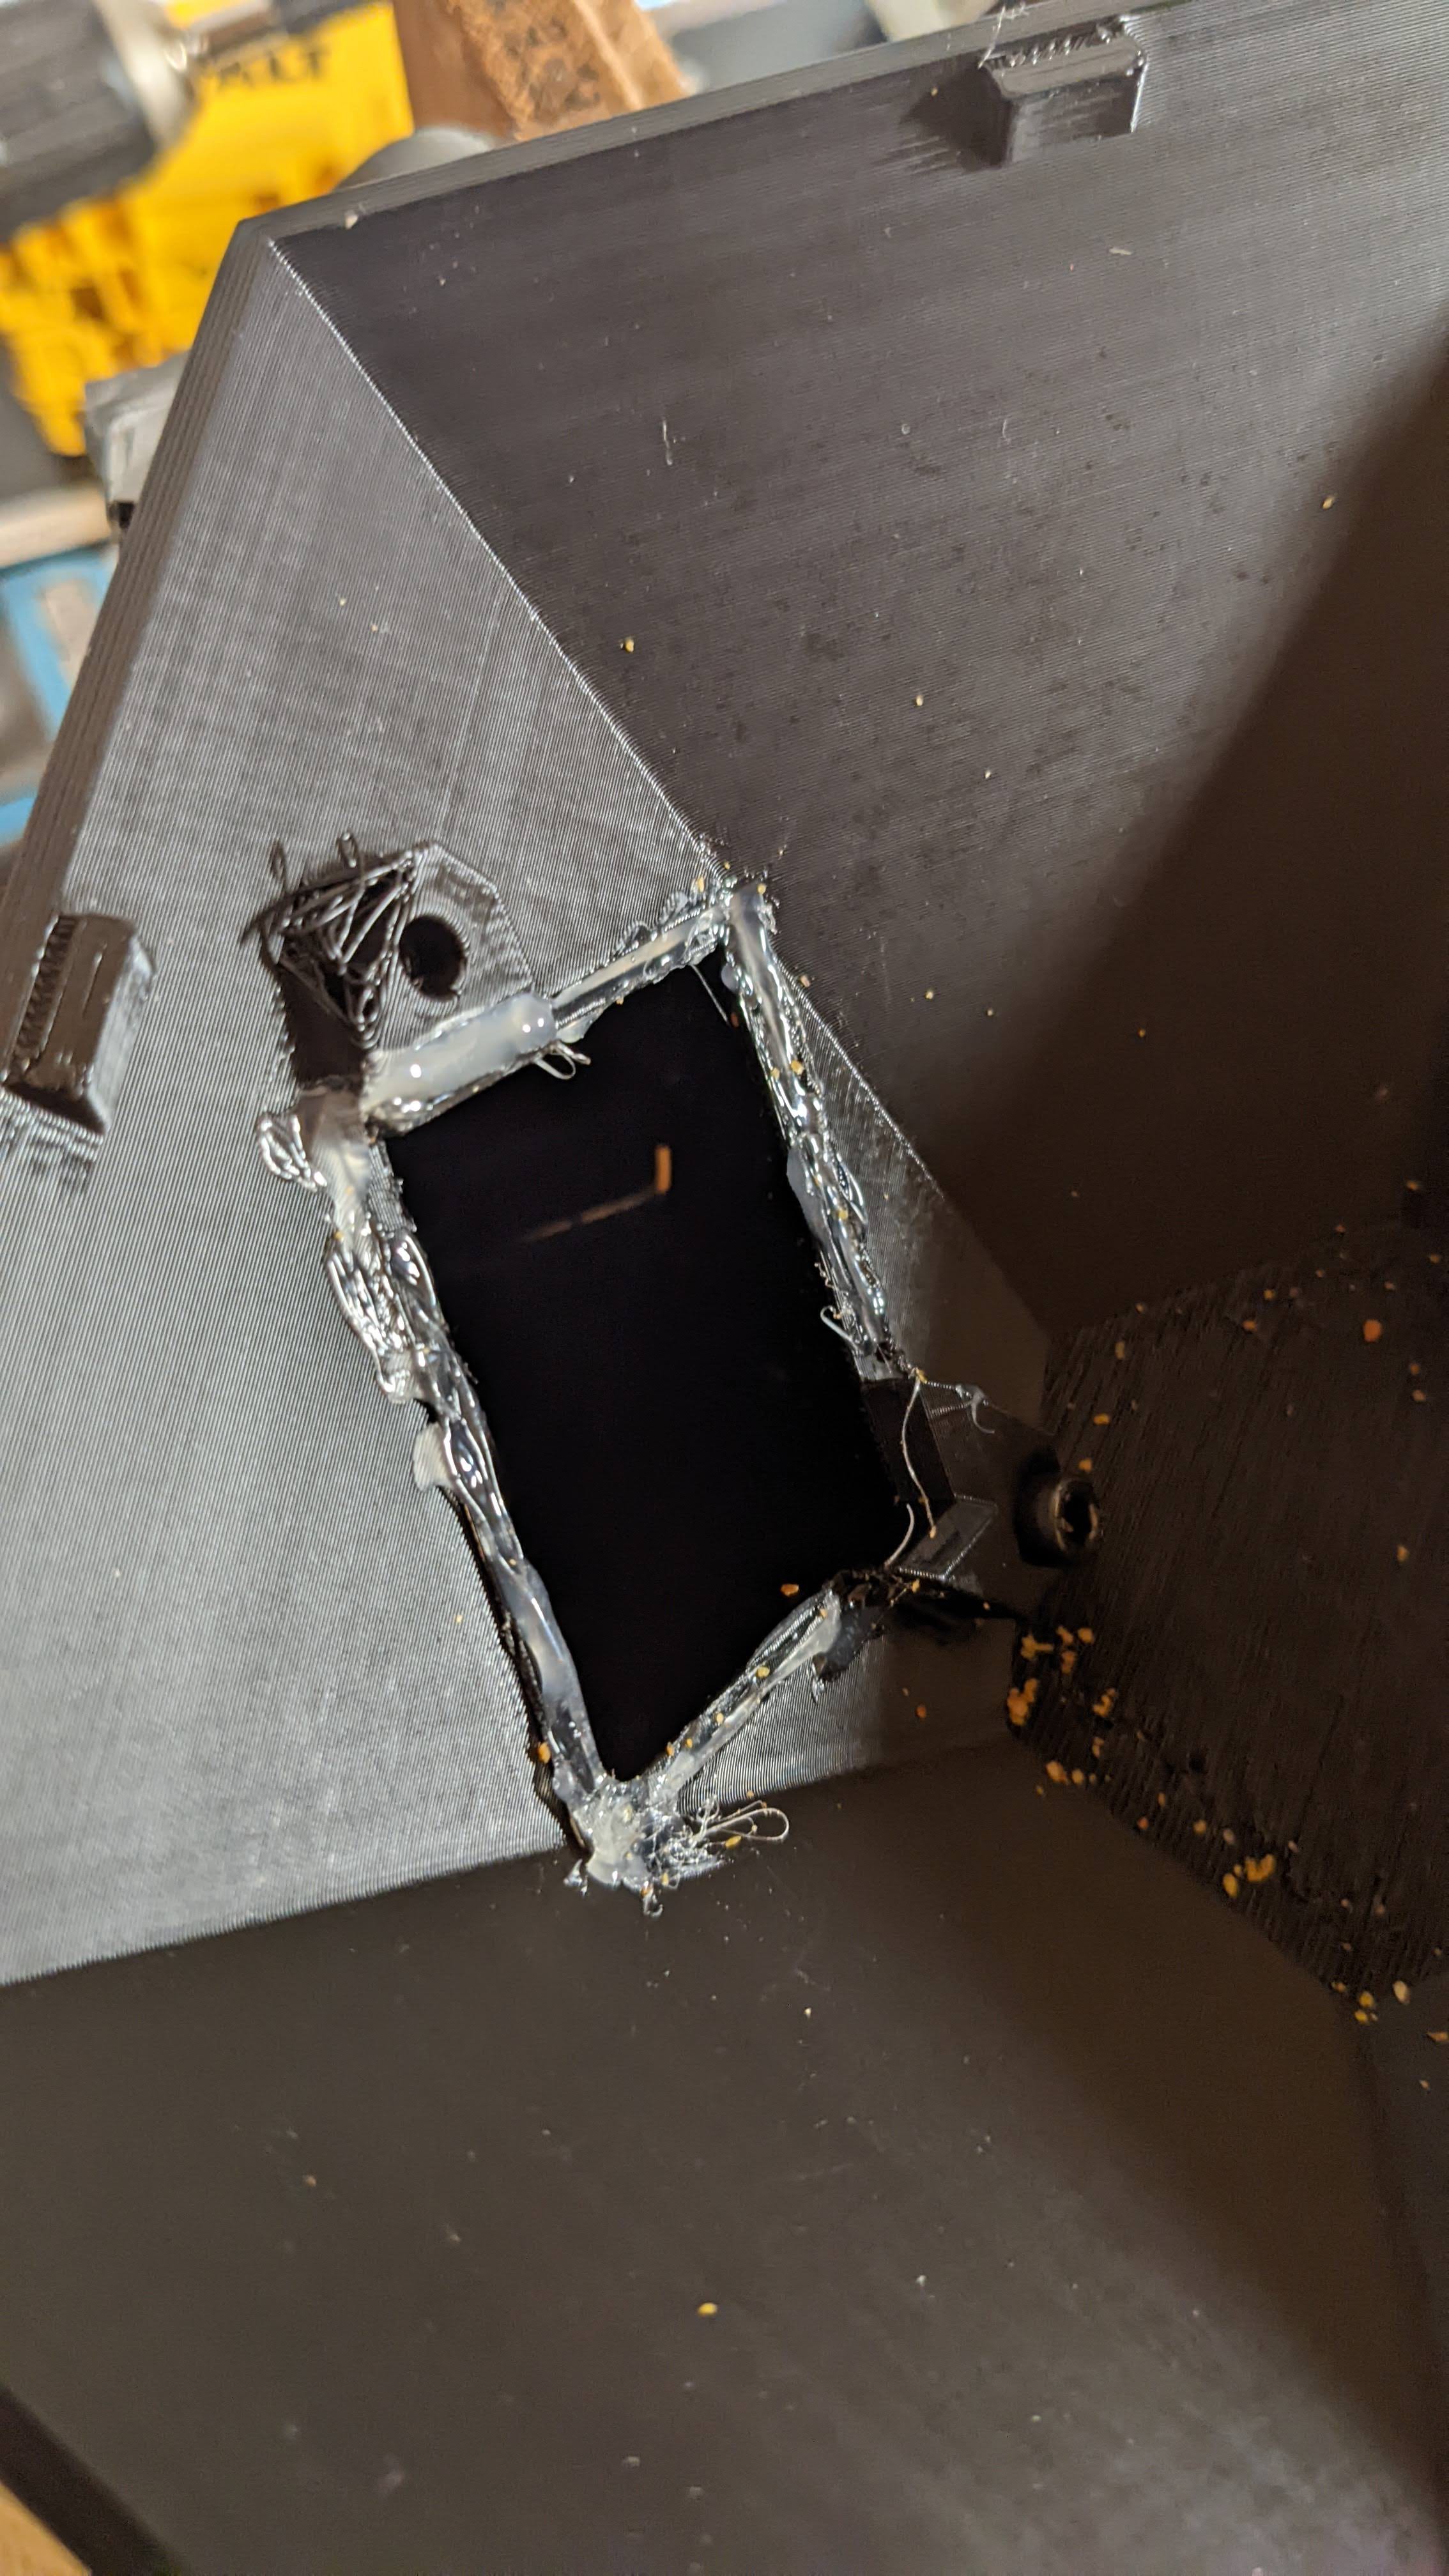
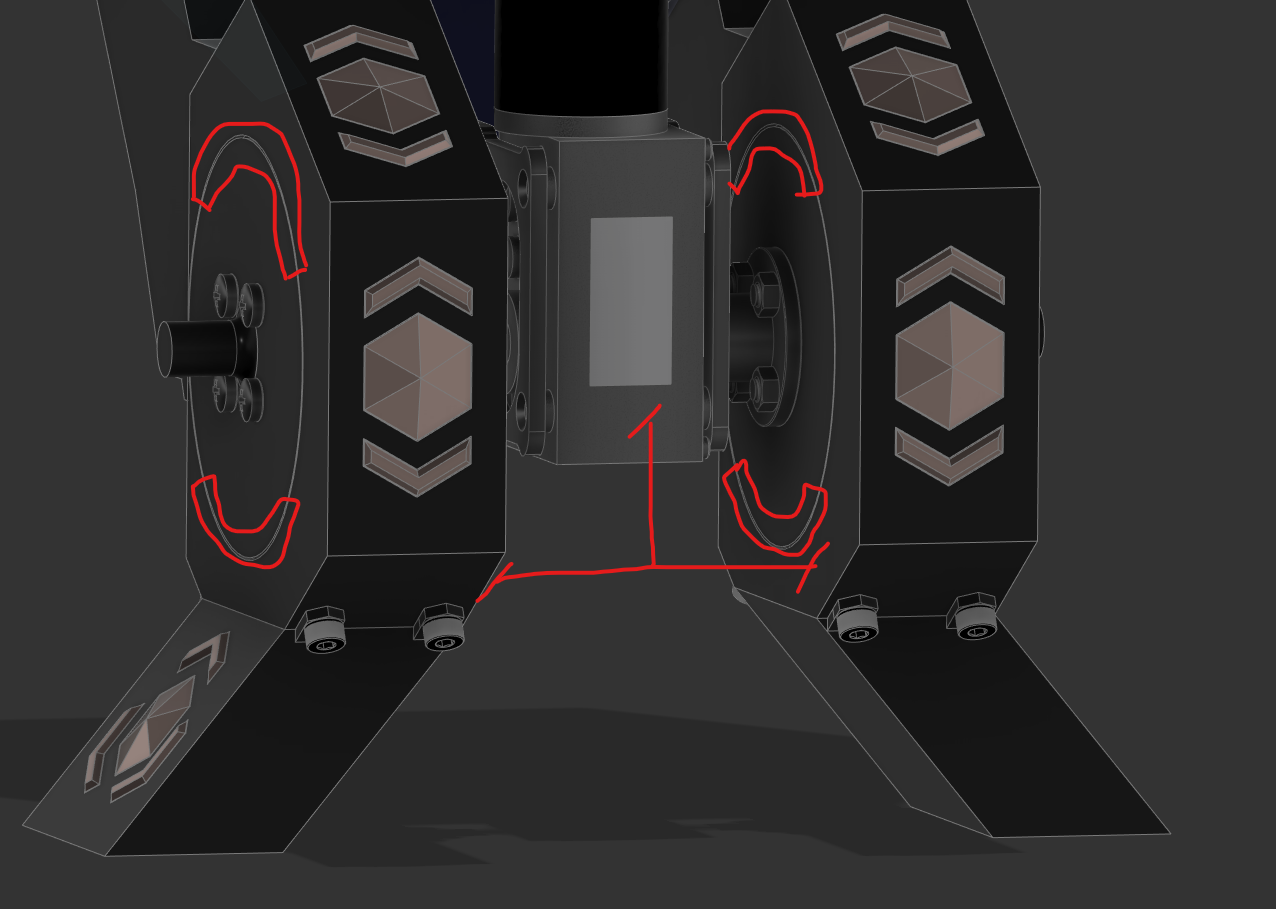
- I was unable to fit the hopper exit chutes into the hopper in order to mate them.
- I had planned on sliding them in through the top, but they did not fit through the opening. They also could not clear coming up from the bottom.
- See image #3 above.
- As a result, I had to cut off one of the two mounting tabs. This caused the exit chutes to bow outwards.
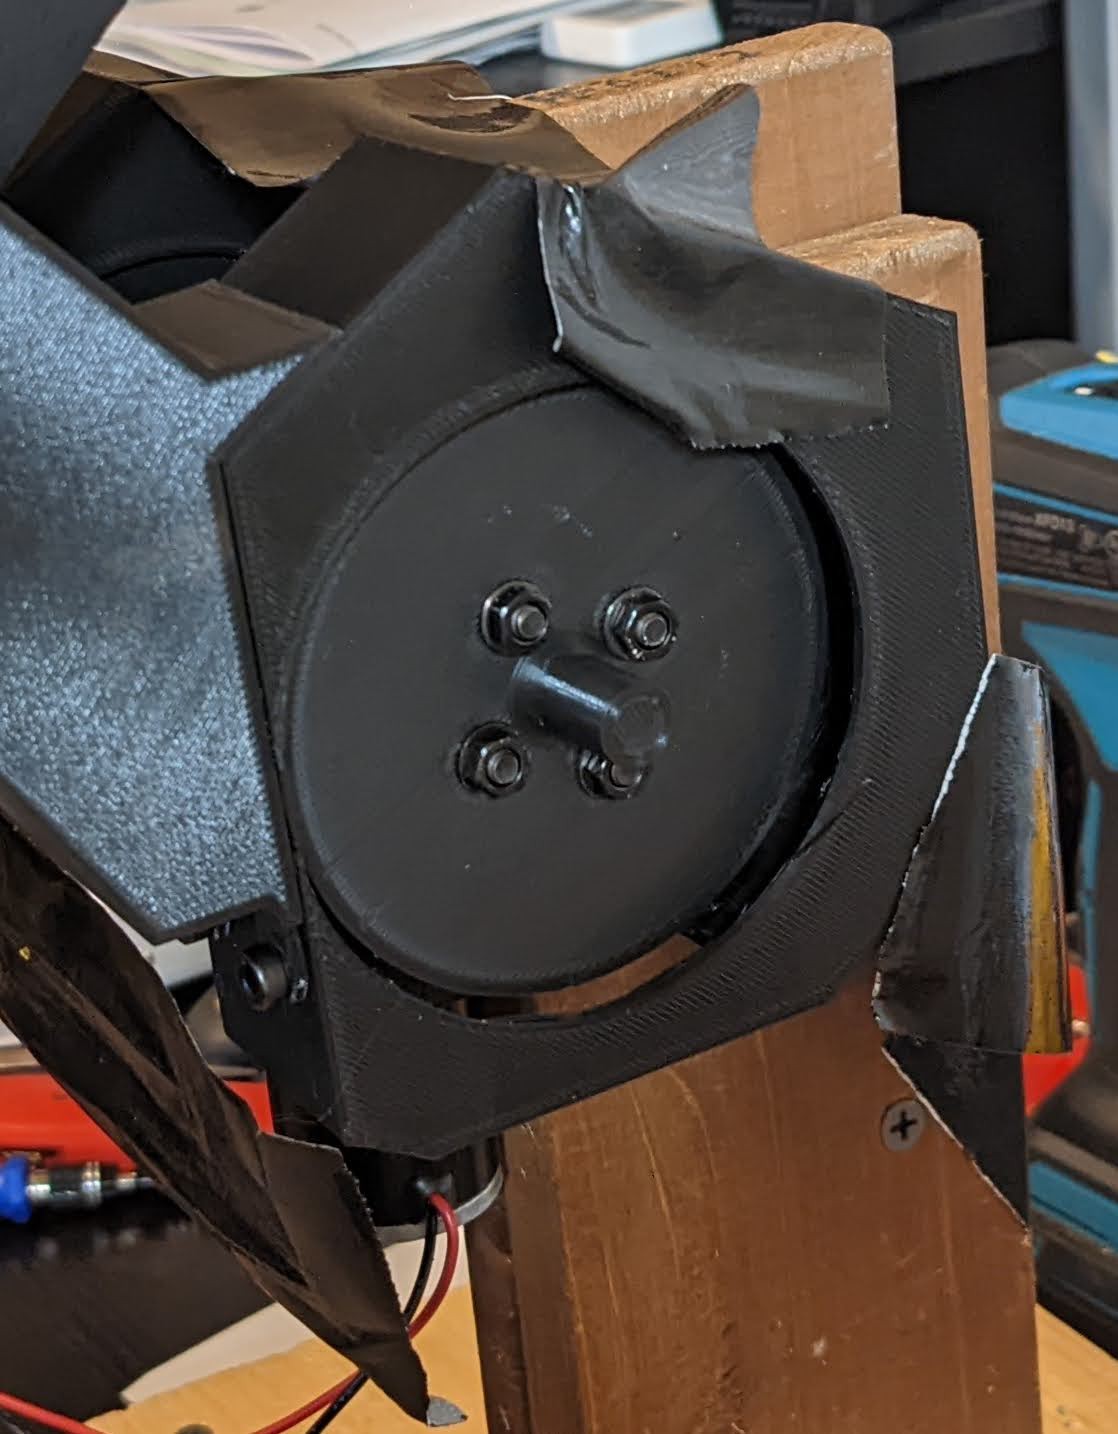
- This caused the wheel housings to pull outwards, away from the wheels.
- See images #1 and #2 above.
- This caused extensive duct taping to be required, and even this was insufficient to prevent momentary violent jams due to the misalignment.
Changes required:
- Redesign exit chute to allow mating to hopper.
- Add lateral supports between the two hopper containers.
- Further develop design to provide mounting of hopper exit chutes to main support structure so they aren't floating.
- Add flanges around the outside and inside of the wheel housings to keep the wheels from leaving the housing. Note these must be removeable because the wheels install by sliding onto the motor shafts through the housing.
- Don't get impatient and skimp on supports when printing parts.
And to stay positive, what went well:
- The threaded inserts - these guys worked delightfully. See my previous project log for my learnings about using these guys.
- Dimensions - I've never used a CAD assembly before, so it's very pleasant to make a multi-part 3D printed contraption and have everything just magically be the right dimensions on the first try.
Discussions
Become a Hackaday.io Member
Create an account to leave a comment. Already have an account? Log In.