Close
0%
0%

3D Pottery Machine for kids' STEM education

Cornstarch mini pottery machine, built with an old printer and cd-player, and useful for kids' STEM education

Similar projects worth following
My idea was born from the experience of seeing and buying samples of miniature pottery made of clay. Some time later, I had the concern to learn to work this art but with recycled material and I found that in my country it is popular to do it with corn starch only that certain rules had to be followed to obtain a good quality mixture. Finally, I am exploring this project that continually undergoes changes because I am experiencing many things that I share with you in this work. This is a machine to work 3D miniature pottery, and made mainly with cornstarch. This is a sustainable idea that respects nature and promotes the circular economy. APPLICATION AND INNOVATION: This project can be used as kit that makes STEM education more accessible for kids, since they can intuitively learn how to make 2D figures such as circles, squares and triangles, or even 3D figures such as cylinders, or cubes

This is a project focused on sustainability, and in its first version I faced the challenges shown below:

  1. Reuse and modify an old printer to place and organize the components and supplies for this project;
  2. Reuse an old cd-payer motor to work and experiment with miniature pottery; 
  3. Recycle organic matter such as cornstarch to create miniature pottery. To achieve this goal, I have experimented and found the amount of material necessary to obtain a good job, that is, of good quality and resistance; and 
  4. This work promotes the circular economy, since it proposes a completely different approach that allows stimulating economic growth and generating self-employment without compromising the environment. When this material ends its useful life, then it will be returned to nature as compost without any problem.

In the video below I show you a journey through the second version of my project so you can get to know it.

I also show you a demo of my project working.

libraries.zip

Libraries used in this project

x-zip-compressed - 42.11 kB - 06/02/2022 at 19:35

Download

pottery_machine_ver2.rar

Project Code (version 2)

RAR Archive - 2.02 kB - 06/02/2022 at 19:17

Download

schematic_diagram_ver2.zip

Schematic Diagram (version 2)

x-zip-compressed - 1.84 MB - 06/02/2022 at 20:23

Download

pottery_machine_ver1.zip

Project Code (version 1)

x-zip-compressed - 1.13 kB - 06/02/2022 at 19:06

Download

schematic_diagram_ver1.zip

Schematic Diagram (version 1)

x-zip-compressed - 1.51 MB - 06/02/2022 at 18:57

Download

View all 6 files

  • 1 × Arduino MEGA 2560
  • 1 × TB6612FNG Driver
  • 1 × Motor 5V
  • 1 × Battery 5V
  • 1 × Pot 10 k

View all 11 components

  • 8. Test and Analysis of the 2nd Version

    Guillermo Perez Guillen06/02/2022 at 05:50 0 comments

    Below I show you a video with the tests carried out on the second version of this machine.

    Another additional test I show you in the video below.

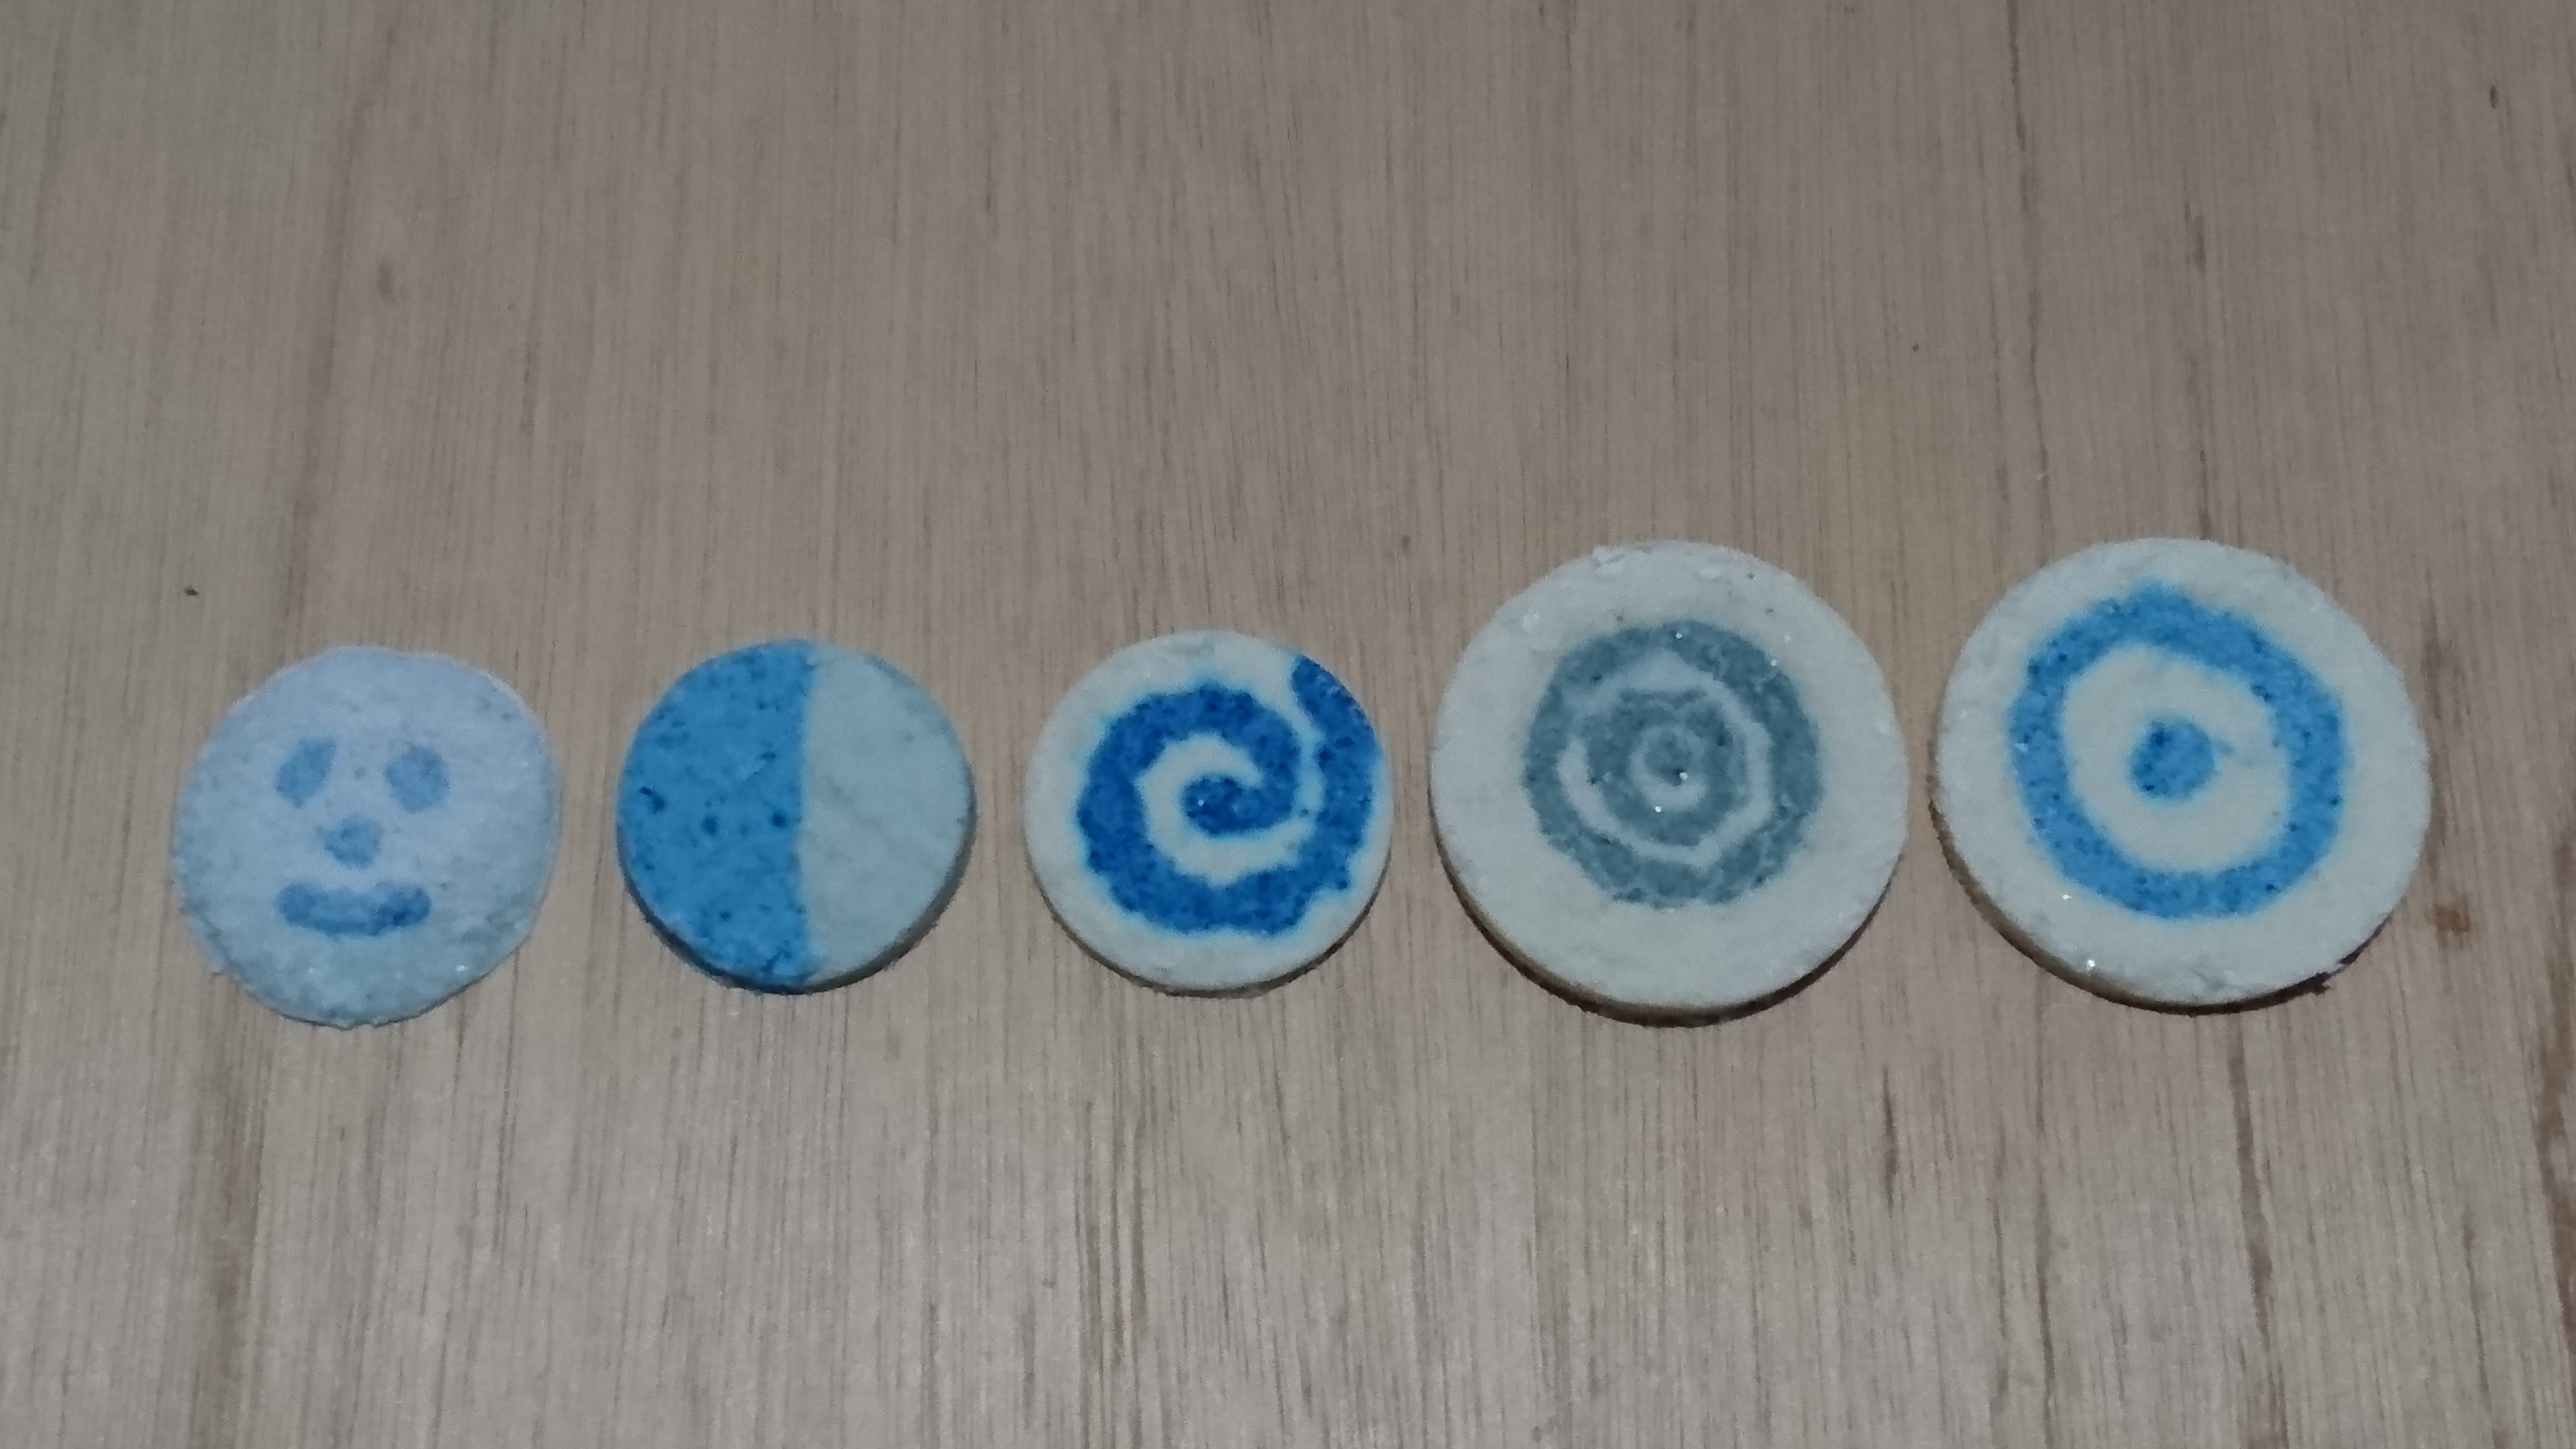
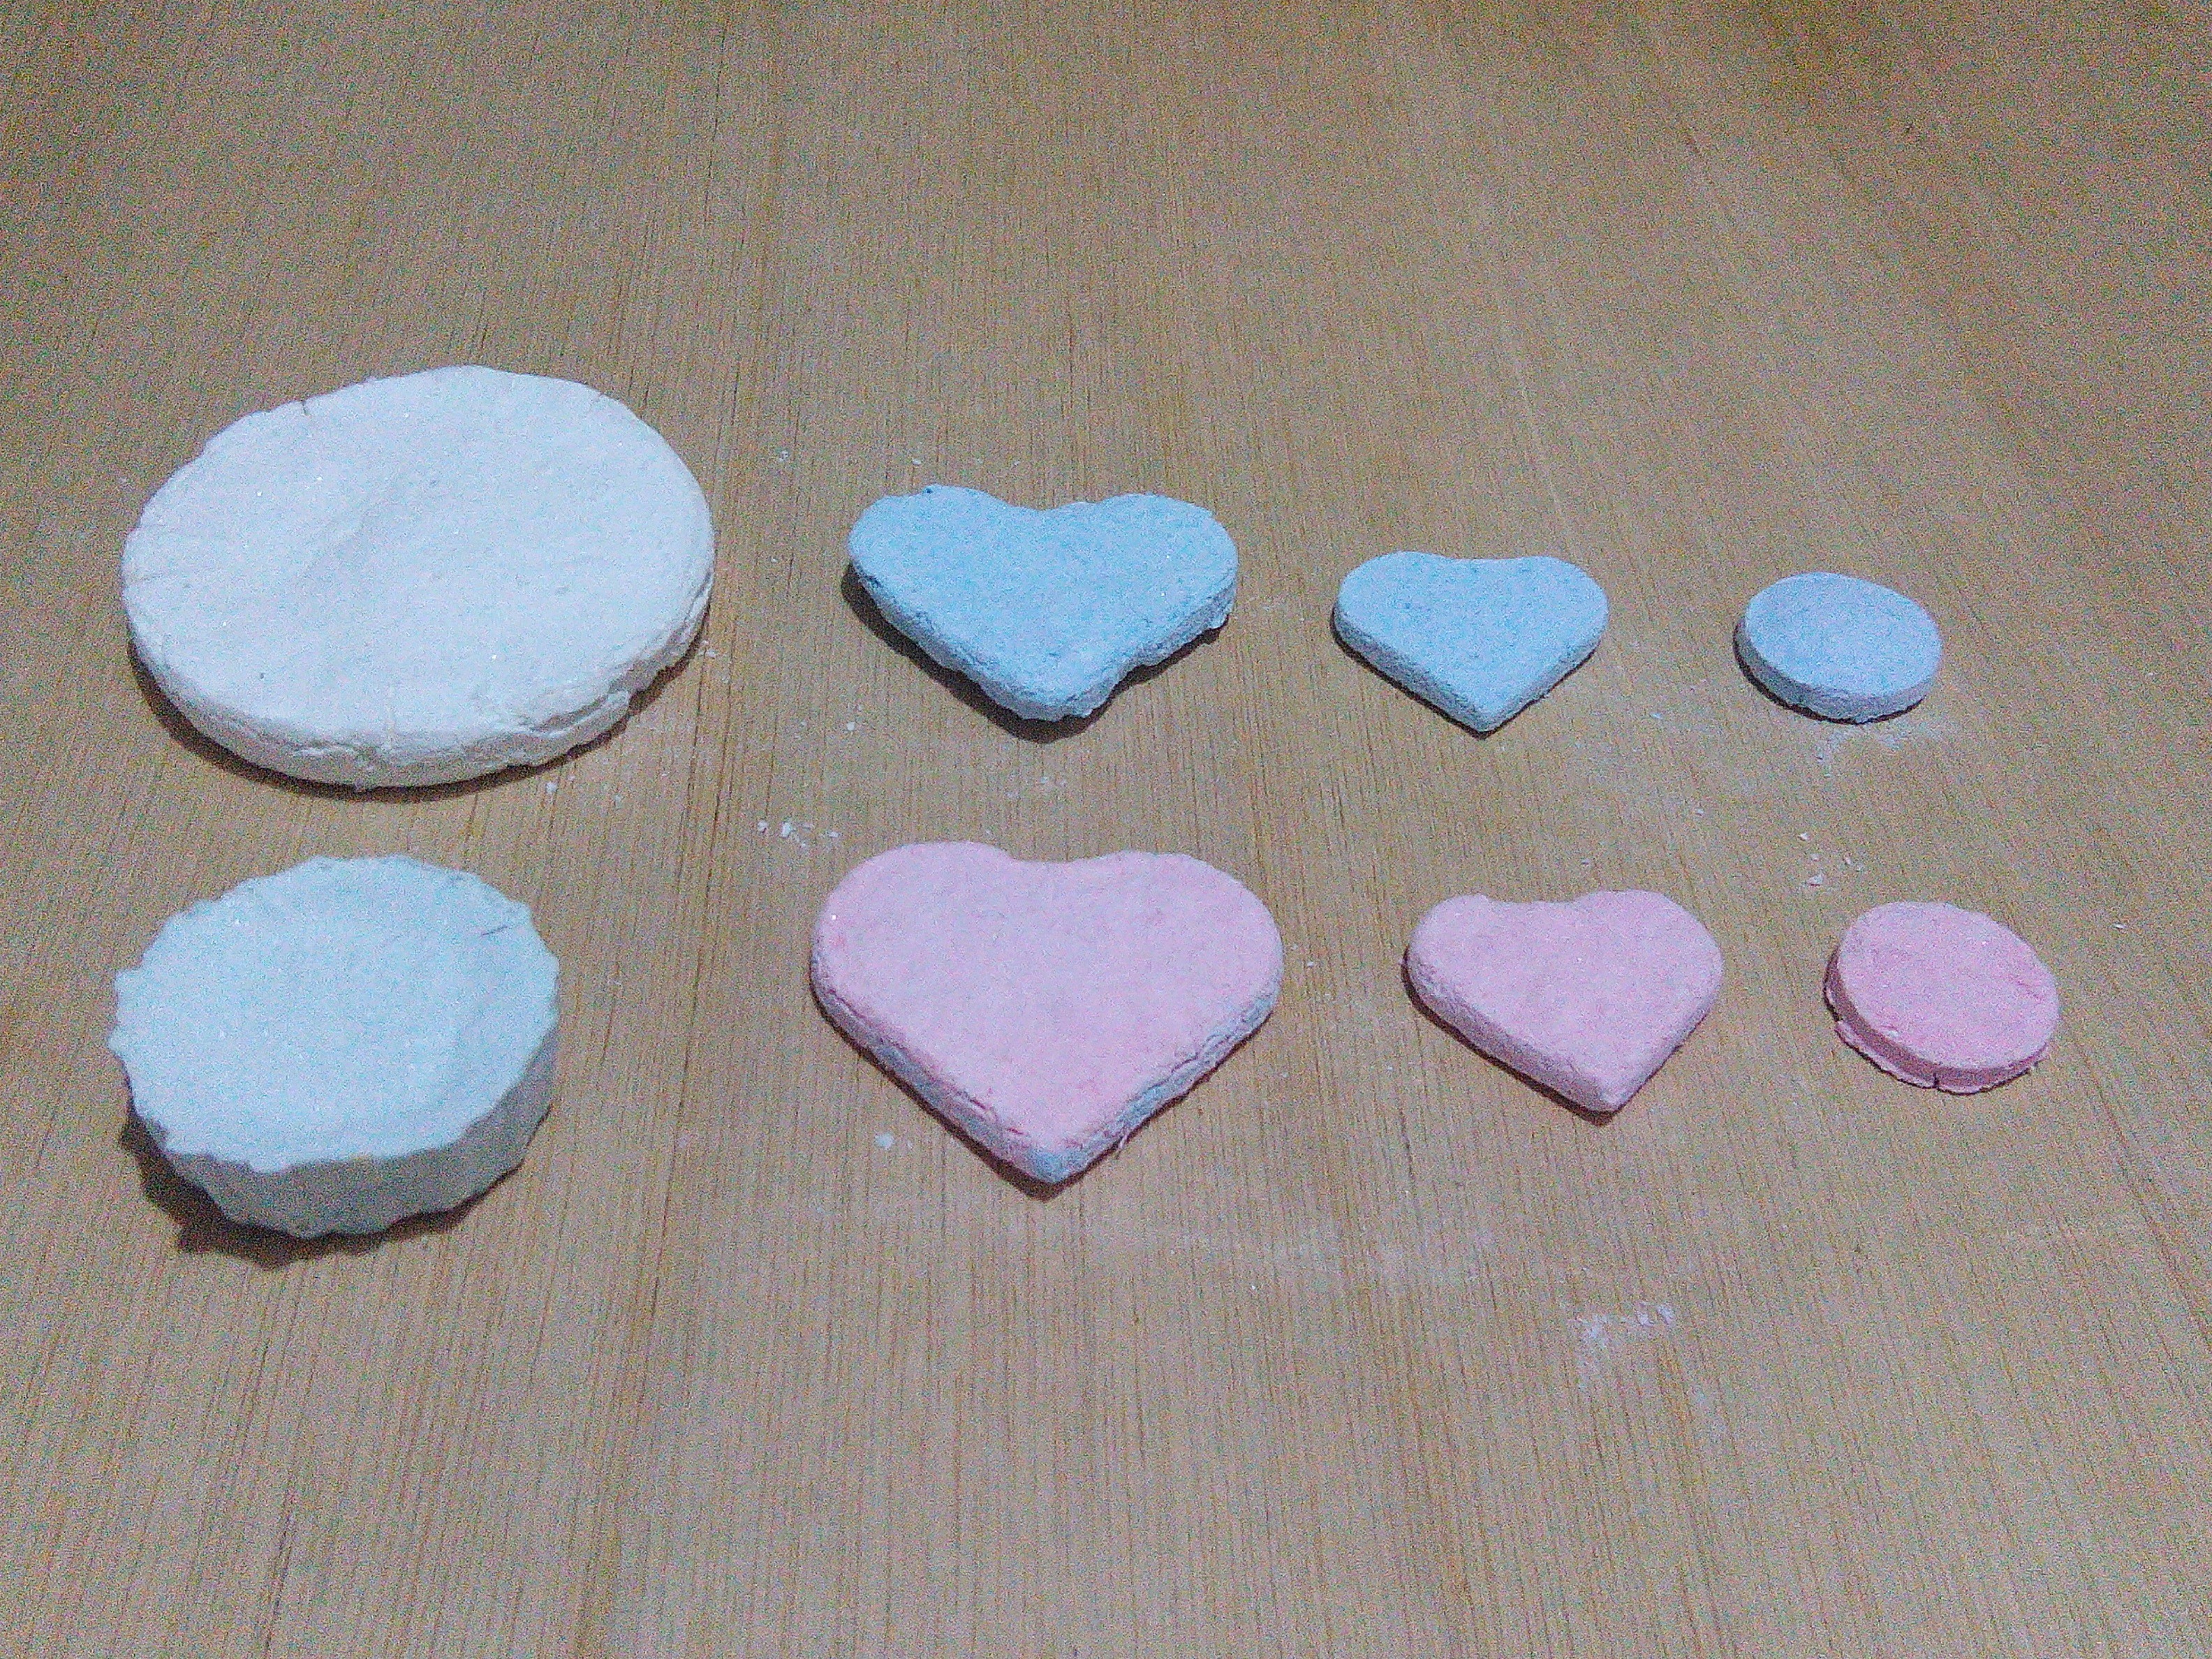
    Making grooves in the figures allows me to have more variations in my work. Below I show you some of the samples obtained in this session.

  • 7. Groove Mechanism

    Guillermo Perez Guillen06/02/2022 at 05:29 0 comments

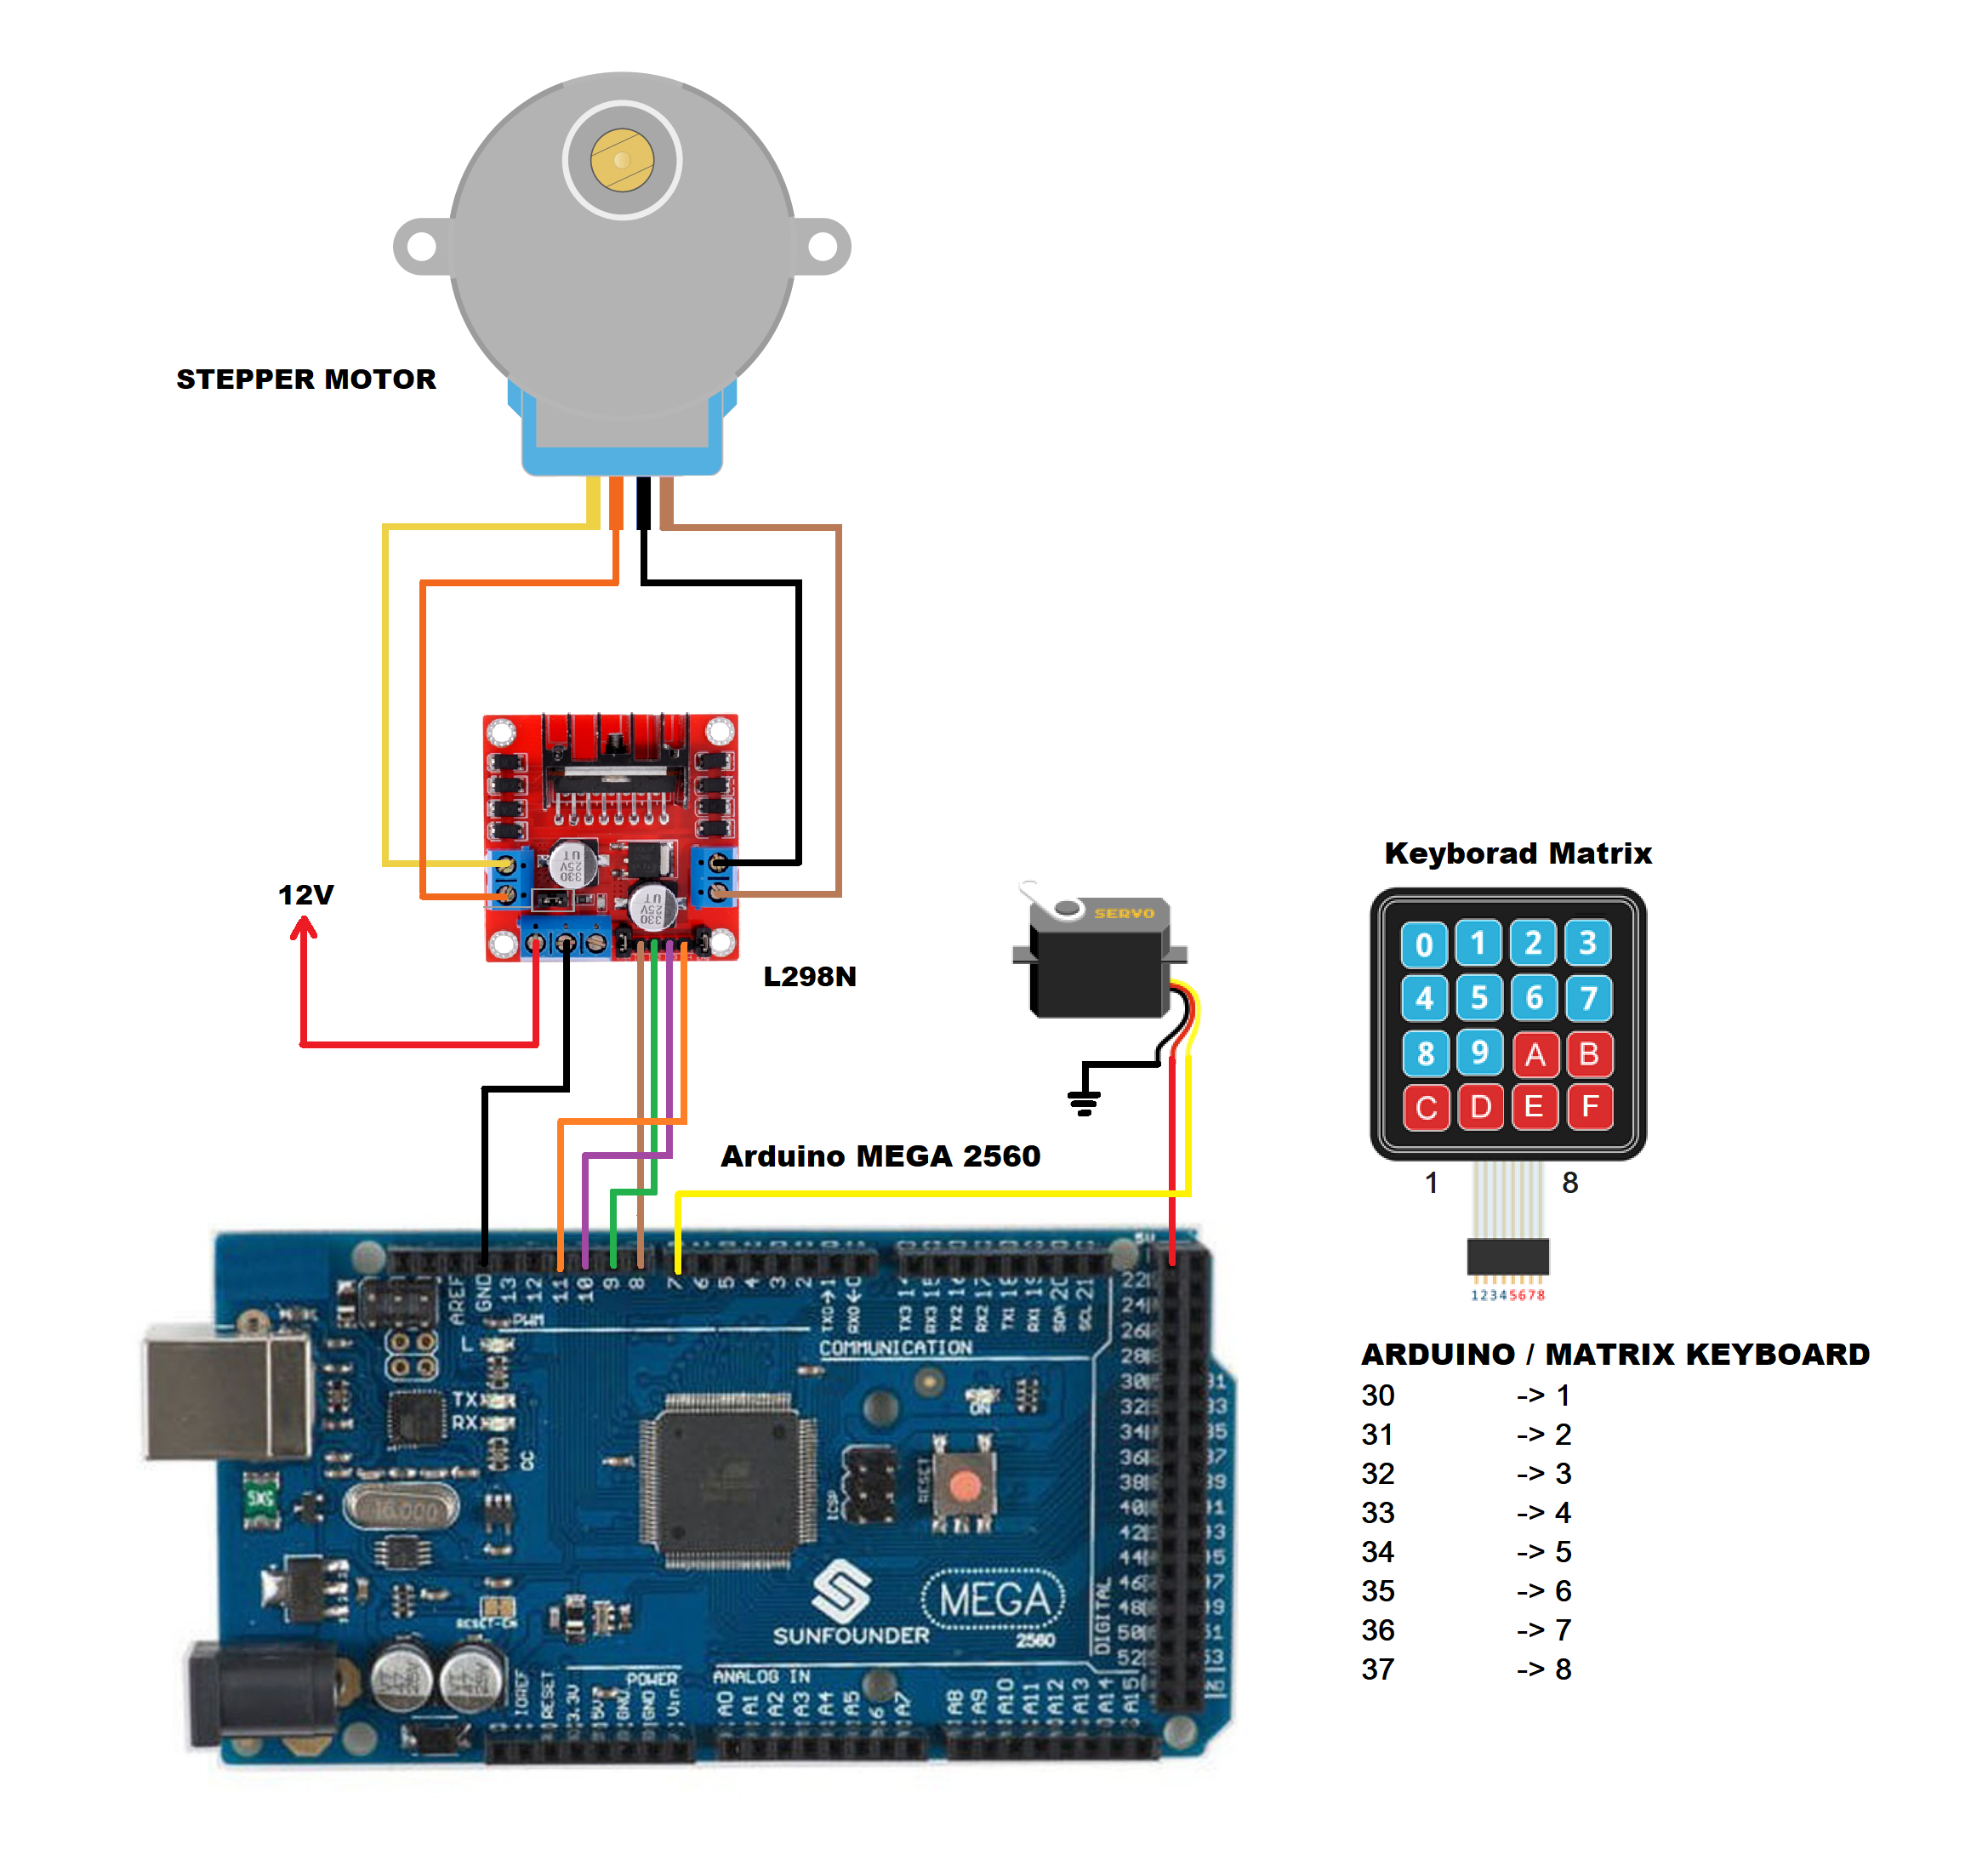
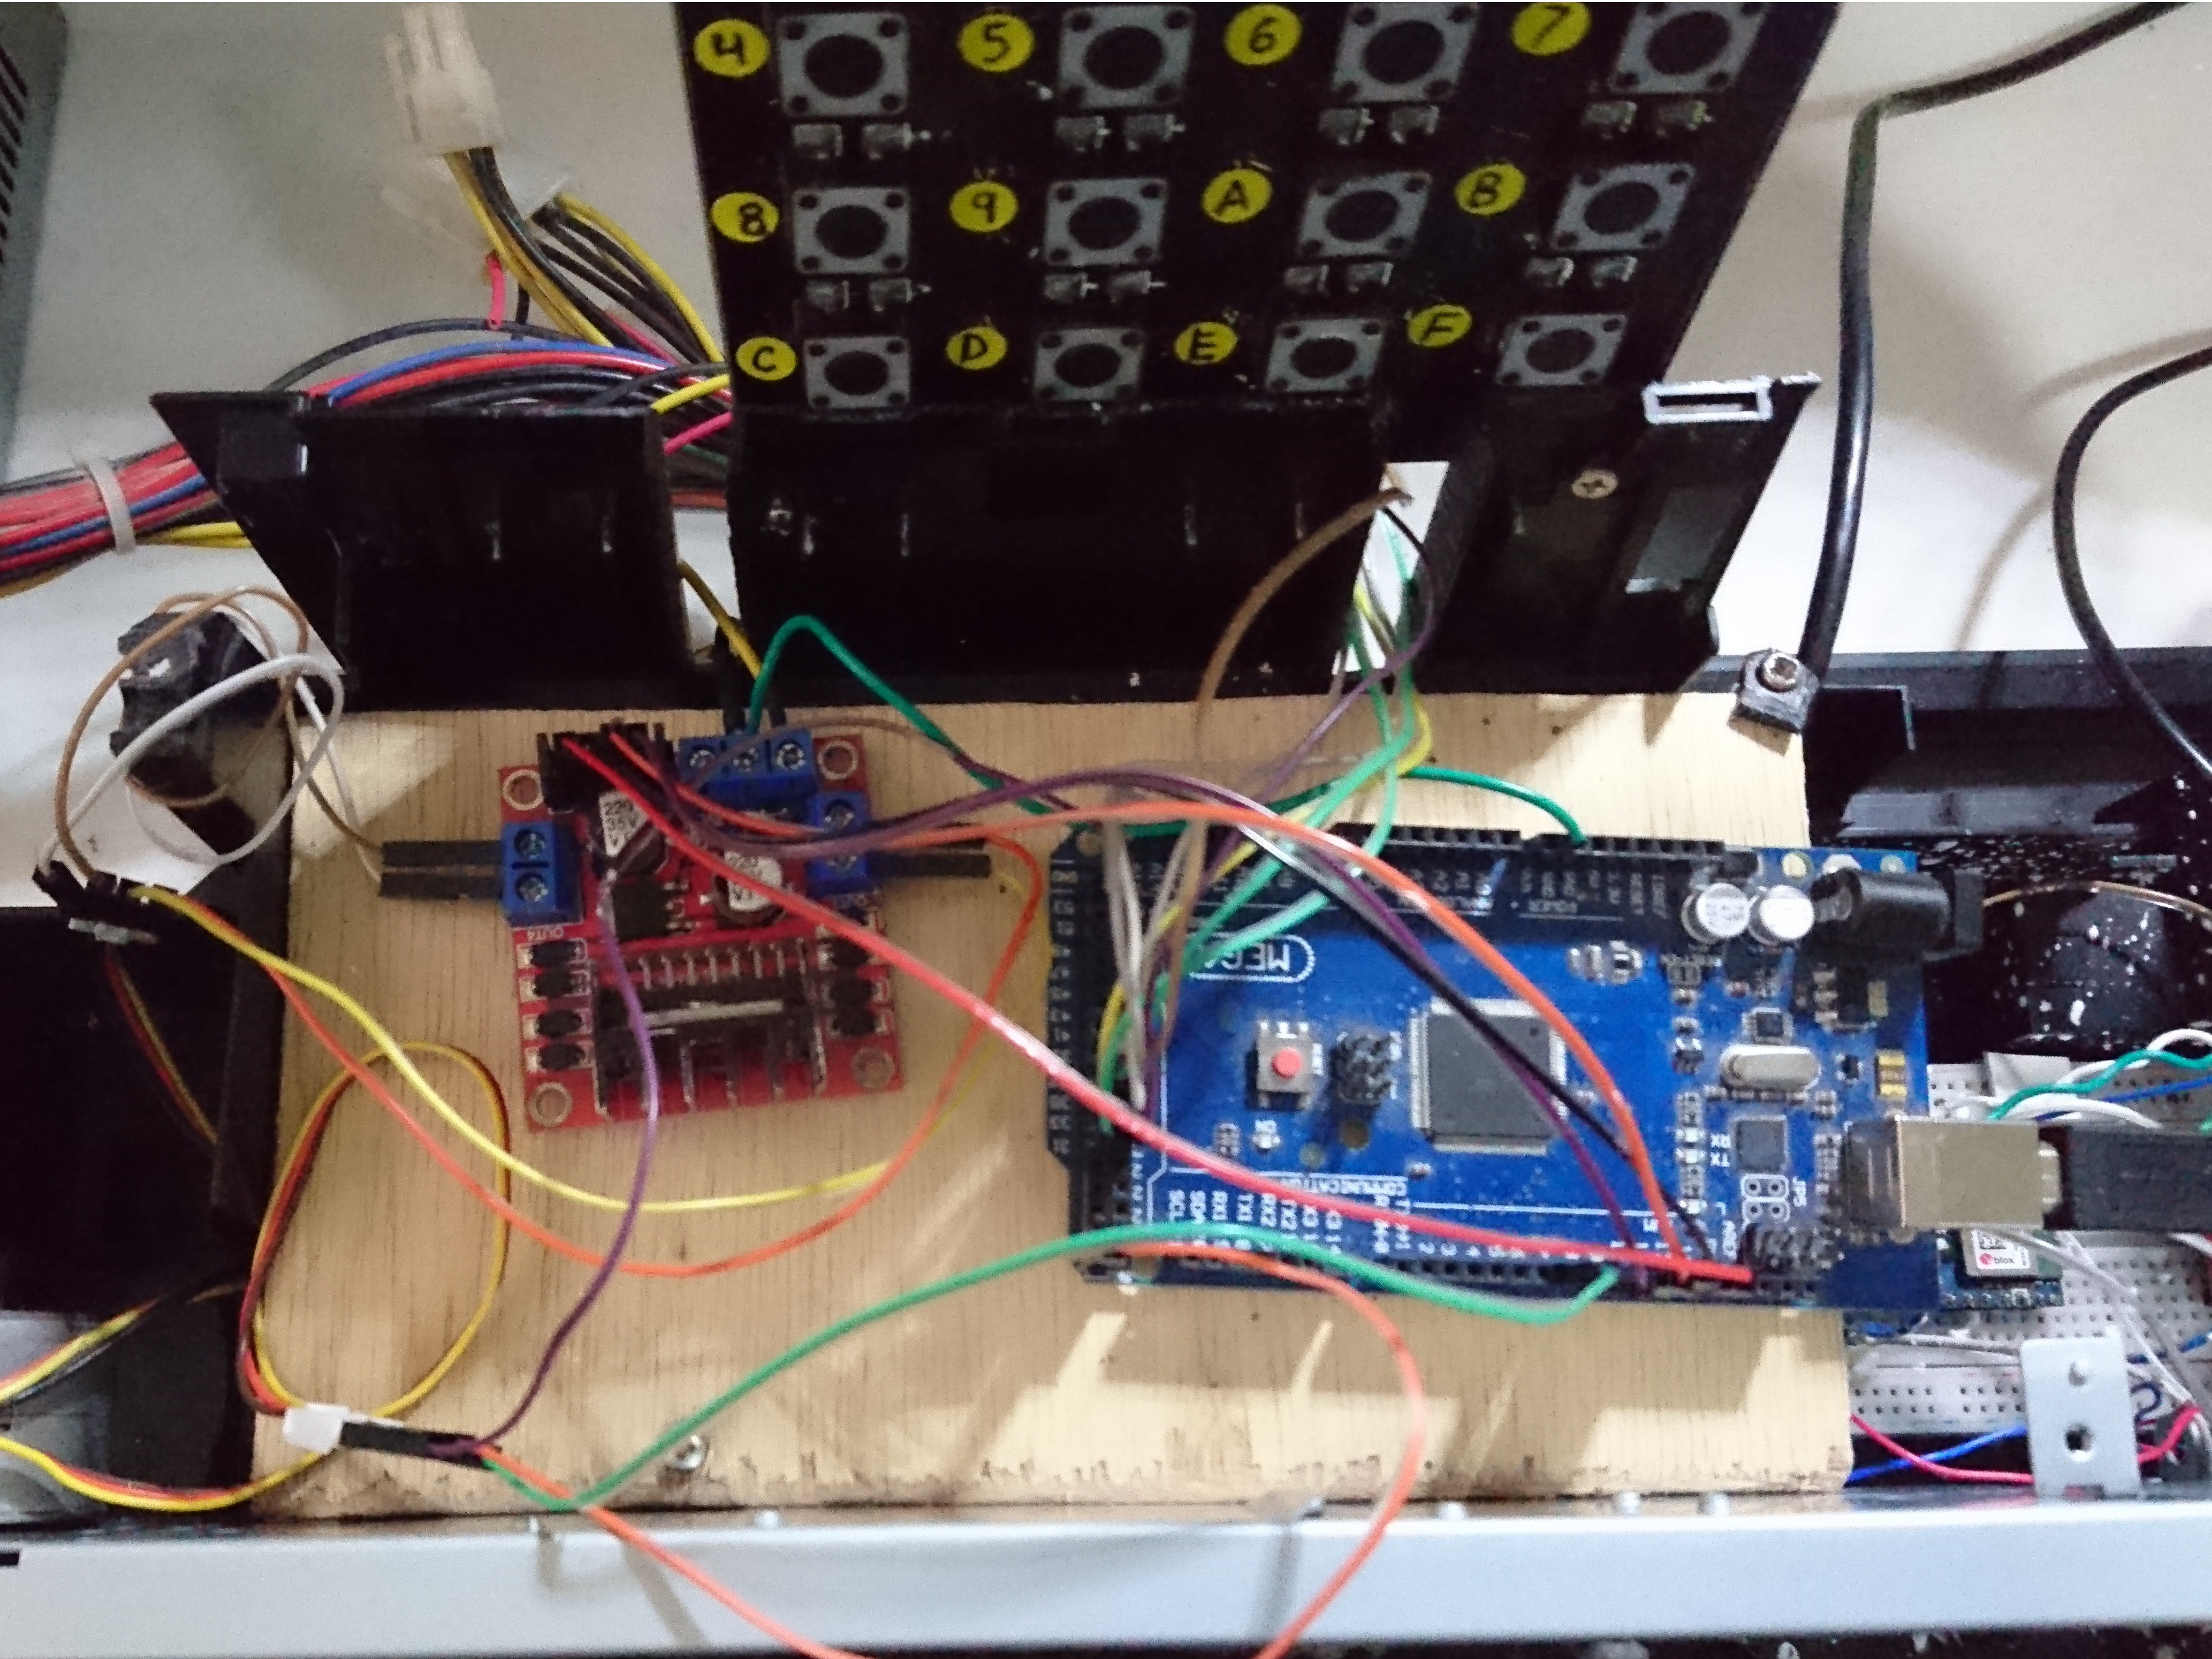
    I have added this system in order to create circular or elliptical grooves in the figures created with the cornstarch paste. Once the grooves are finished, I have added cornstarch paste of another color to cover these slots. Below I show you the schematic diagram.

    How does it work?

    • By means of the matrix keyboard we control the punch mechanism, that is to say that by pressing the F key the mechanism goes down, and by pressing the E key the mechanism goes up.
    • The matrix keyboard also controls the movement of the stepper motor. Eg, pressing the D key moves the mechanism to the first groove position, and If we press the C key, the mechanism returns to the origin.

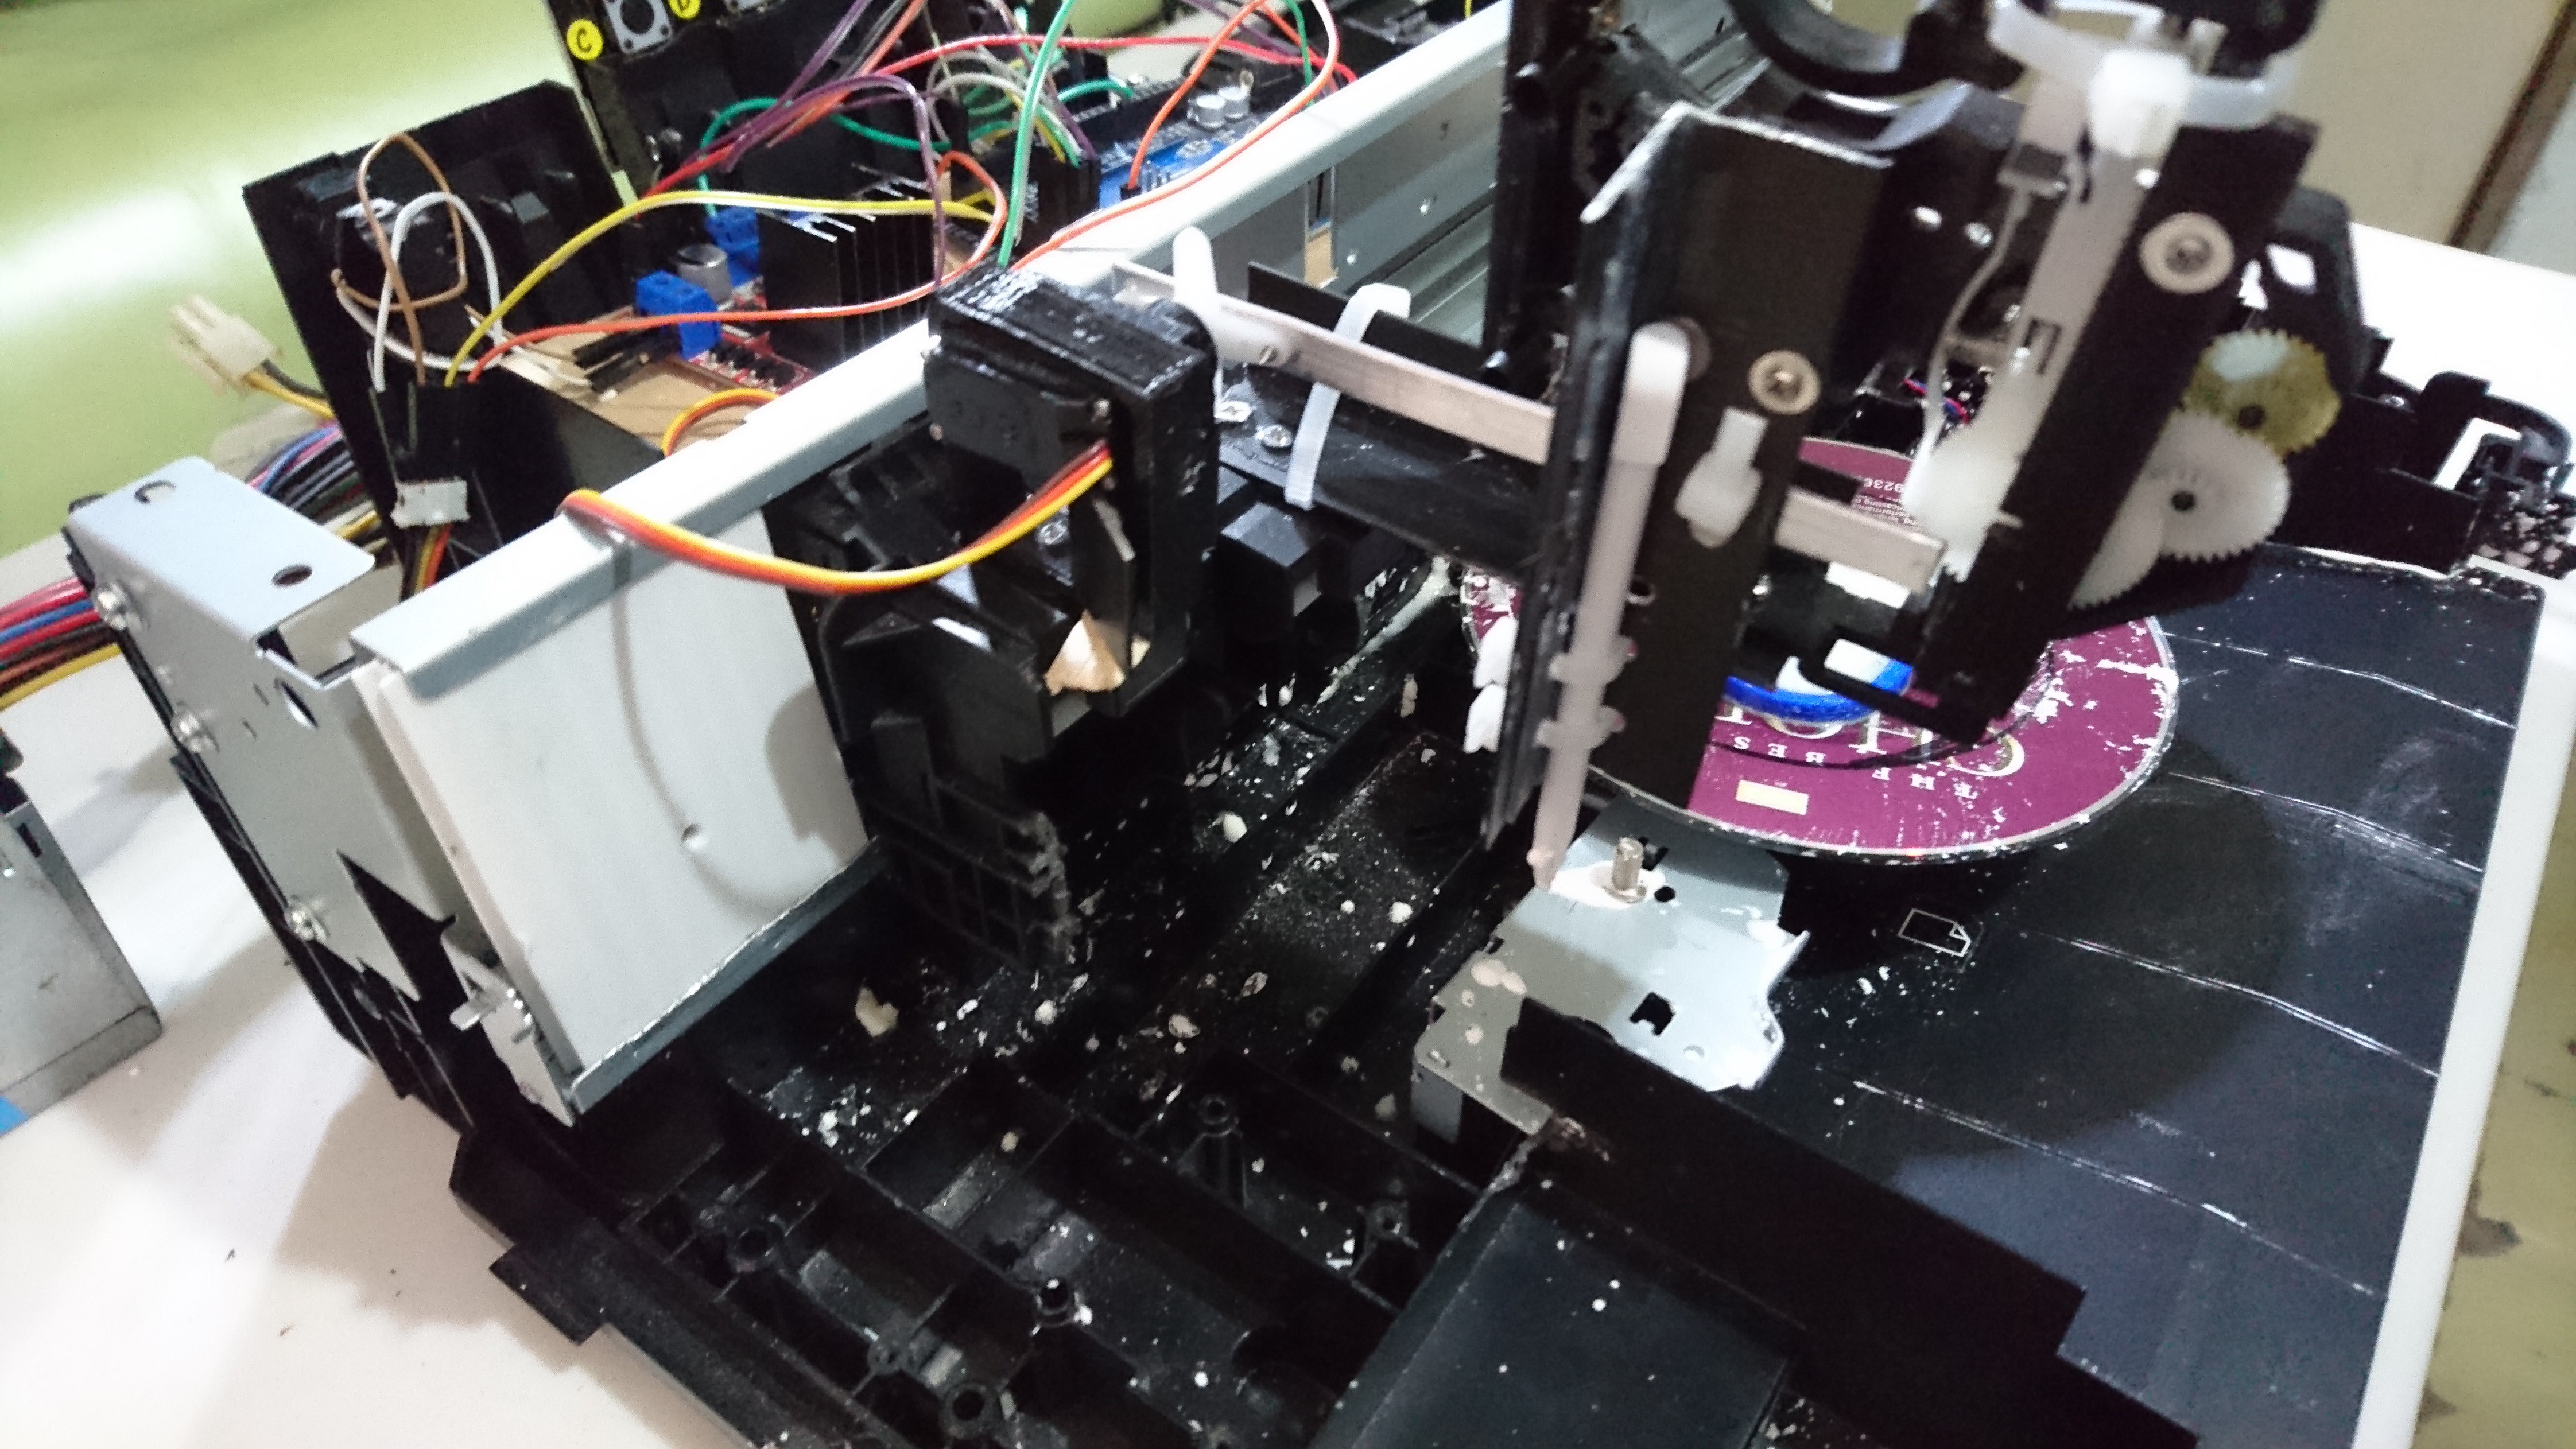
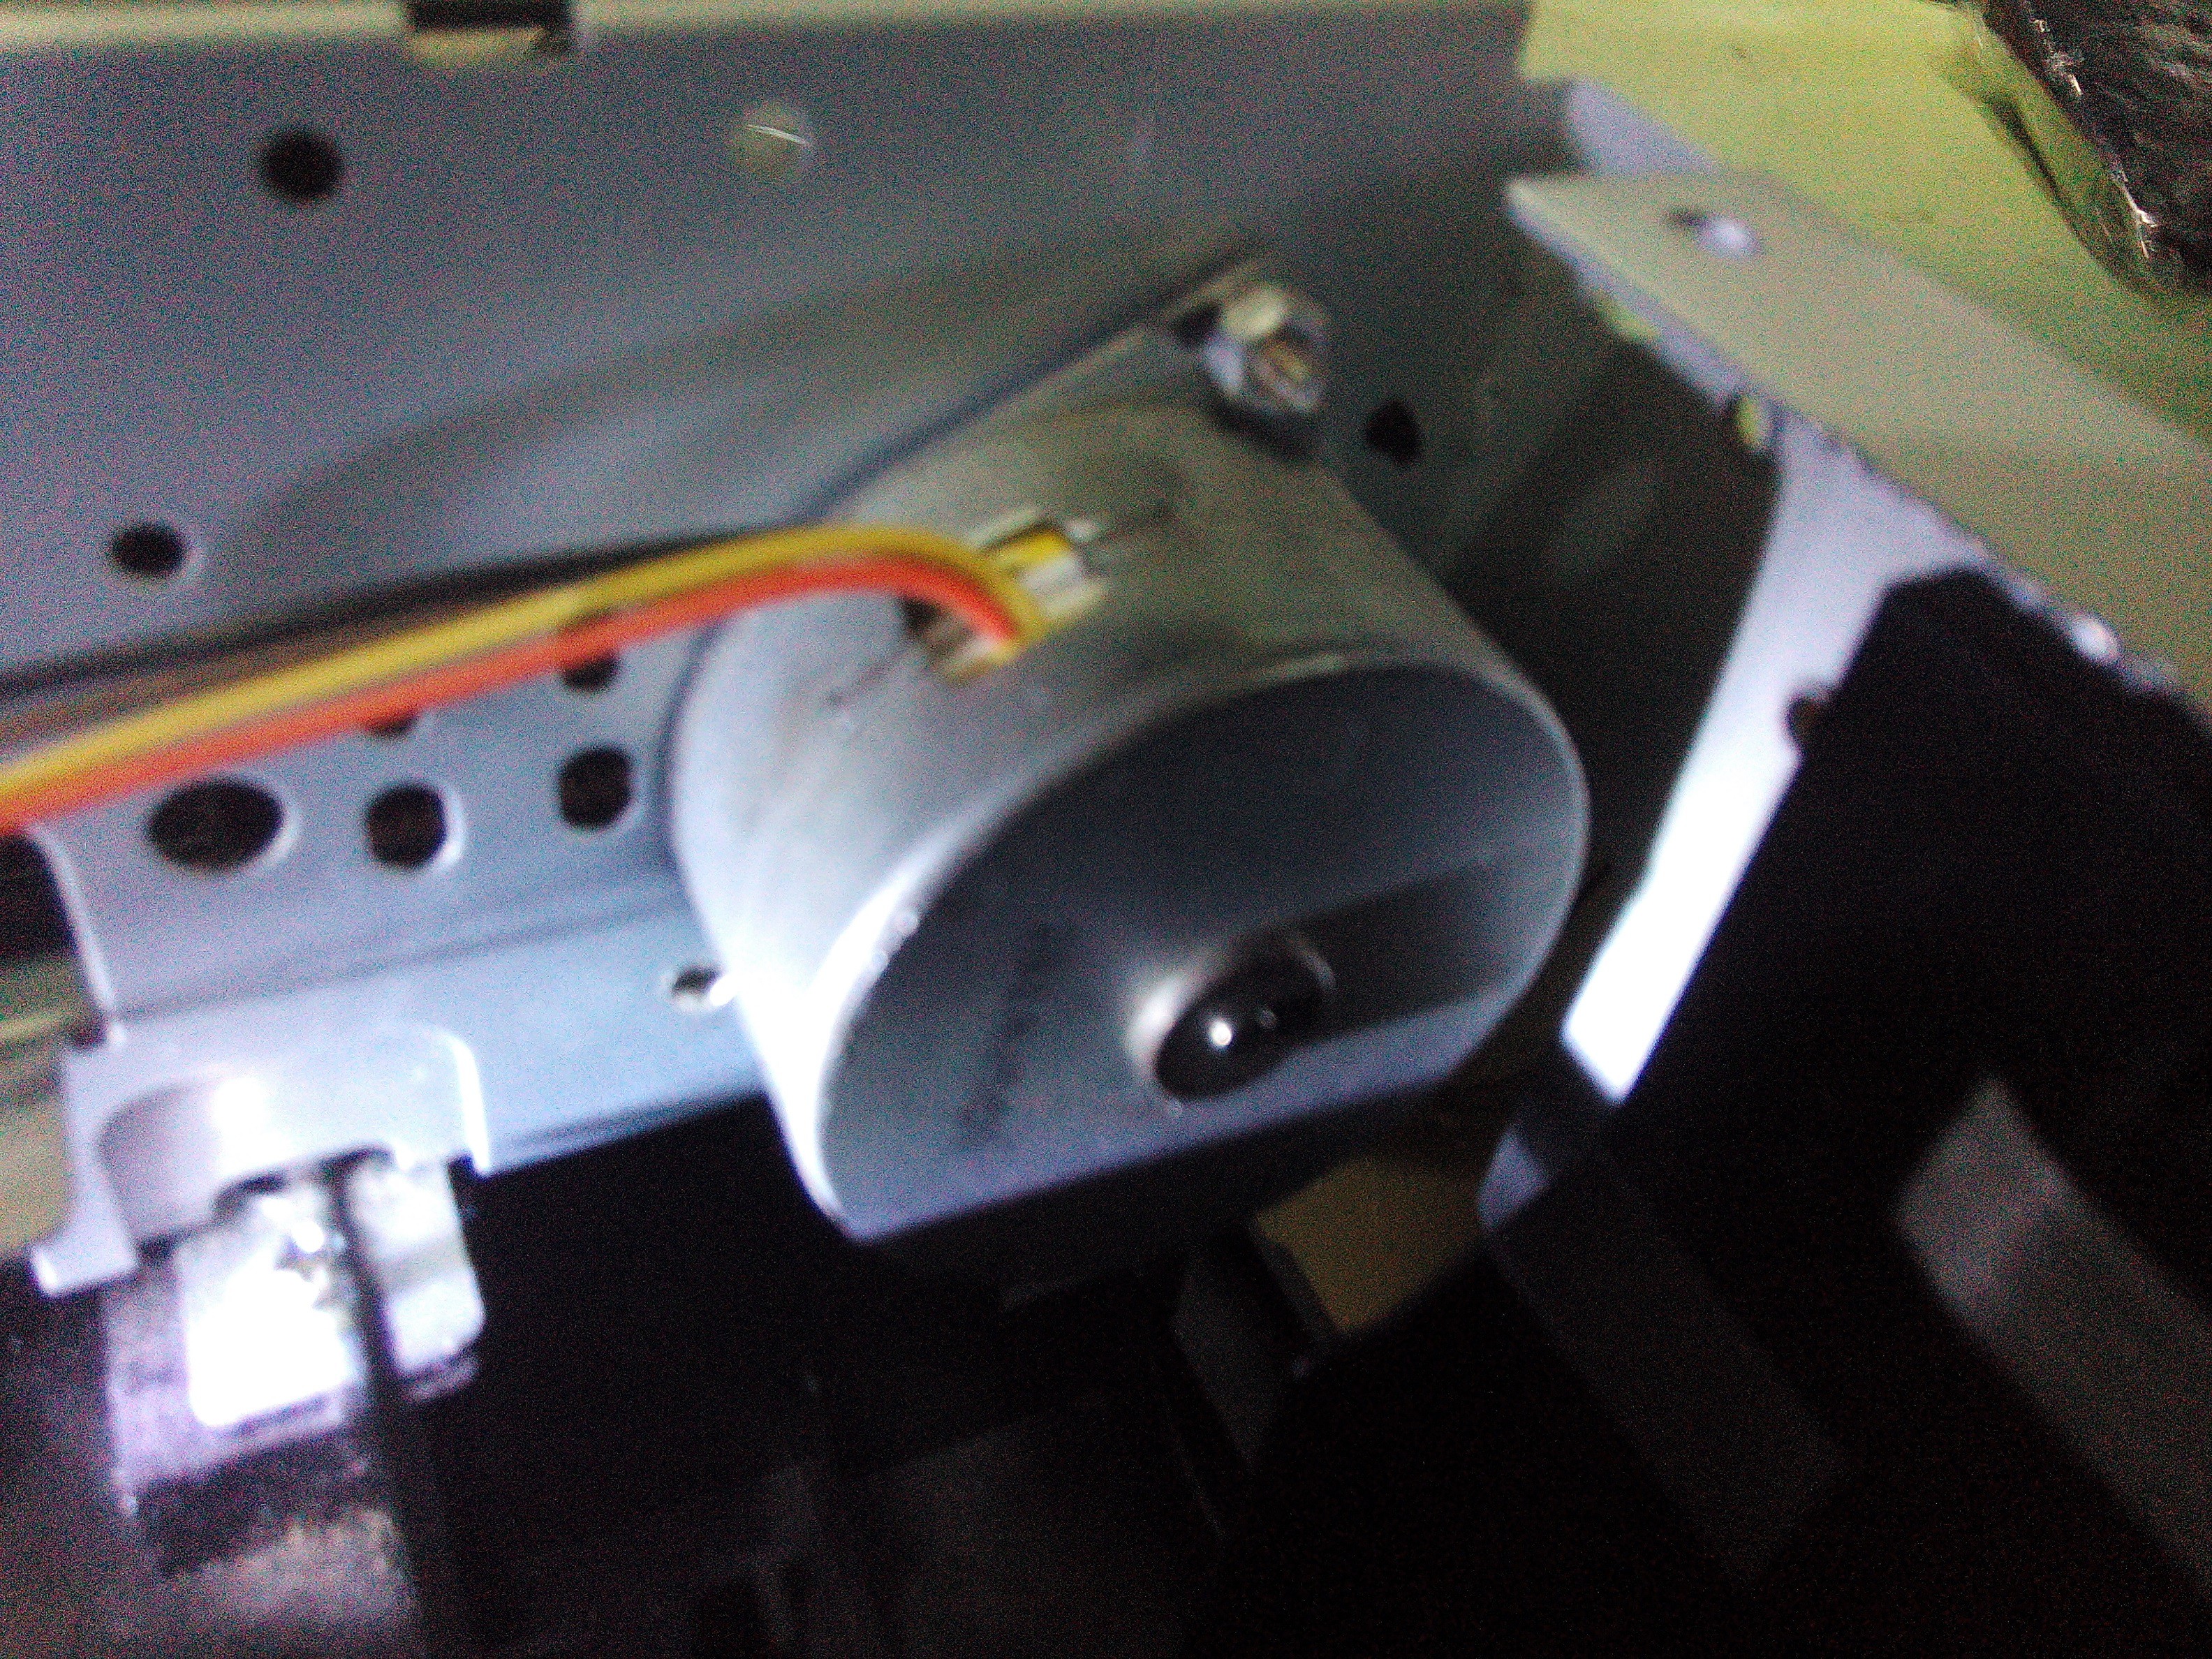
    The punch mechanism was made with parts from an audio player and aluminum angles.

    Below I show you the code:

    pottery_machine_ver2.ino

    // AUTHOR: GUILLERMO PEREZ GUILLEN
    
    #include <Keypad.h> 
    #include <Servo.h> 
    #include <Stepper.h> 
     
    #define STEPS 48 //We put the number of steps you need to go around. 48 in our case
     
    // Name of the motor, the number of steps and the control pins
    Stepper stepper(STEPS, 8, 9, 10, 11);
    
    Servo myservo;  
    int pos = 103;    
    
    const byte ROWS = 4; //four rows
    const byte COLS = 4; //four columns
    //define the symbols on the buttons of the keypads
    char hexaKeys[ROWS][COLS] = {
      {'0','1','2','3'},
      {'4','5','6','7'},
      {'8','9','A','B'},
      {'C','D','E','F'}
    };
    byte rowPins[ROWS] = {30, 31, 32, 33}; //connect to the row pinouts of the keypad
    byte colPins[COLS] = {34, 35, 36, 37}; //connect to the column pinouts of the keypad
    
    //initialize an instance of class NewKeypad
    Keypad customKeypad = Keypad( makeKeymap(hexaKeys), rowPins, colPins, ROWS, COLS); 
    
    void setup(){
      Serial.begin(9600);
      myservo.attach(7);  
      stepper.setSpeed(60); // velocity of the etepper motor at 60 RPM
    }
      
    void loop(){
      char customKey = customKeypad.getKey();
      
      // go down the servo
      if (customKey == 'F'){ 
       Serial.println(customKey); 
       for (pos = 103; pos <= 140; pos += 1) 
       {
        myservo.write(pos);              
        delay(15);                       
       }
      }
    
      // go up the servo
      if (customKey == 'E'){ 
       Serial.println(customKey); 
       for (pos = 140; pos >= 103; pos -= 1) 
       {
        myservo.write(pos);              
        delay(15);                       
       }
      }  
    
      // move the mechanism to the first groove
      if (customKey == 'D'){    
        Serial.println(customKey);
        stepper.step(135);
        delay(15);         
      }
    
      // return the mechanism to the  origin
      if (customKey == 'C'){
        Serial.println(customKey);
        stepper.step(-135); 
        delay(15);     
      }
    
      // move the mechanism to the second groove
      if (customKey == 'B'){    
        Serial.println(customKey);
        stepper.step(120);
        delay(15);        
      }
    
      // return the mechanism to the origin
      if (customKey == 'A'){
        Serial.println(customKey);
        stepper.step(-120); 
        delay(15);    
      }
    
      // move the mechanism to the third groove
      if (customKey == '9'){    
        Serial.println(customKey);
        stepper.step(105);
        delay(15);   
      }
    
      // return the mechanism to the origin
      if (customKey == '8'){
        Serial.println(customKey);
        stepper.step(-105); 
        delay(15); 
      }
    
      // move the mechanism to the fourth groove
      if (customKey == '7'){    
        Serial.println(customKey);
        stepper.step(90);
        delay(15);     
      }
    
      // return the mechanism to the origin
      if (customKey == '6'){
        Serial.println(customKey);
        stepper.step(-90); 
        delay(15); 
      }
    }
    

  • 6. Updating Speed Control

    Guillermo Perez Guillen06/02/2022 at 04:54 0 comments

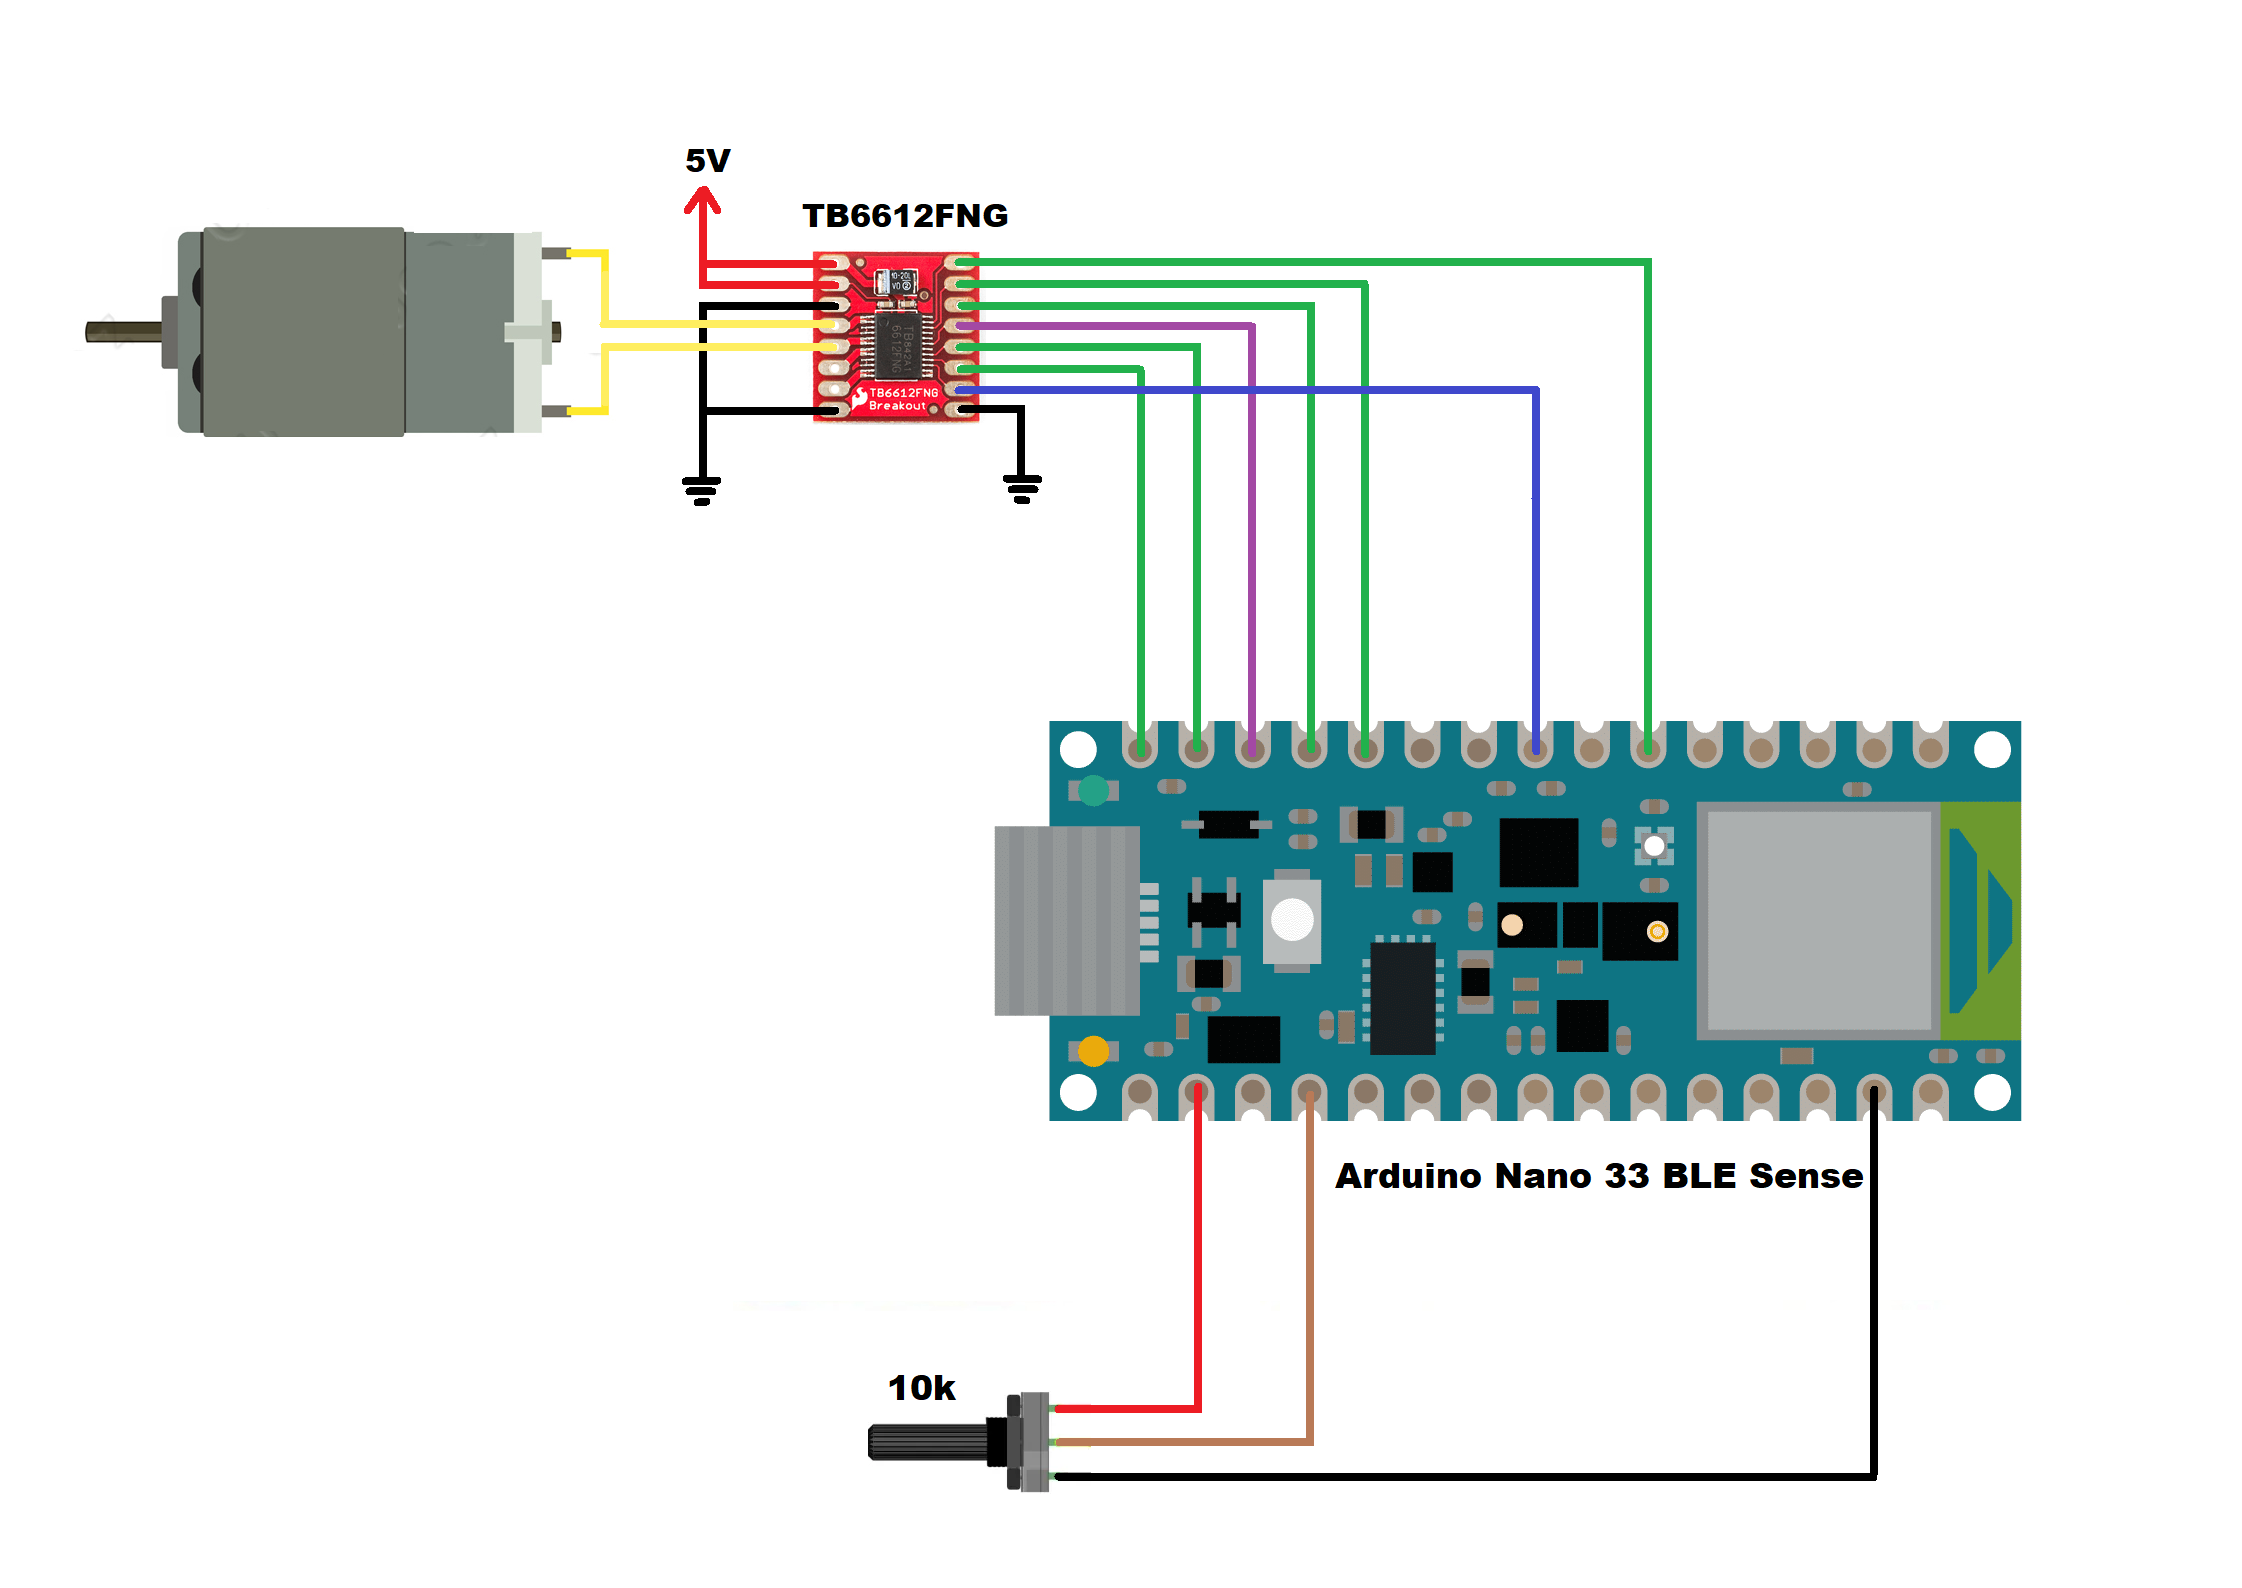
    As part of the hardware updates, I have re-designed my project and in the image below I show you the schematic diagram of the speed control.

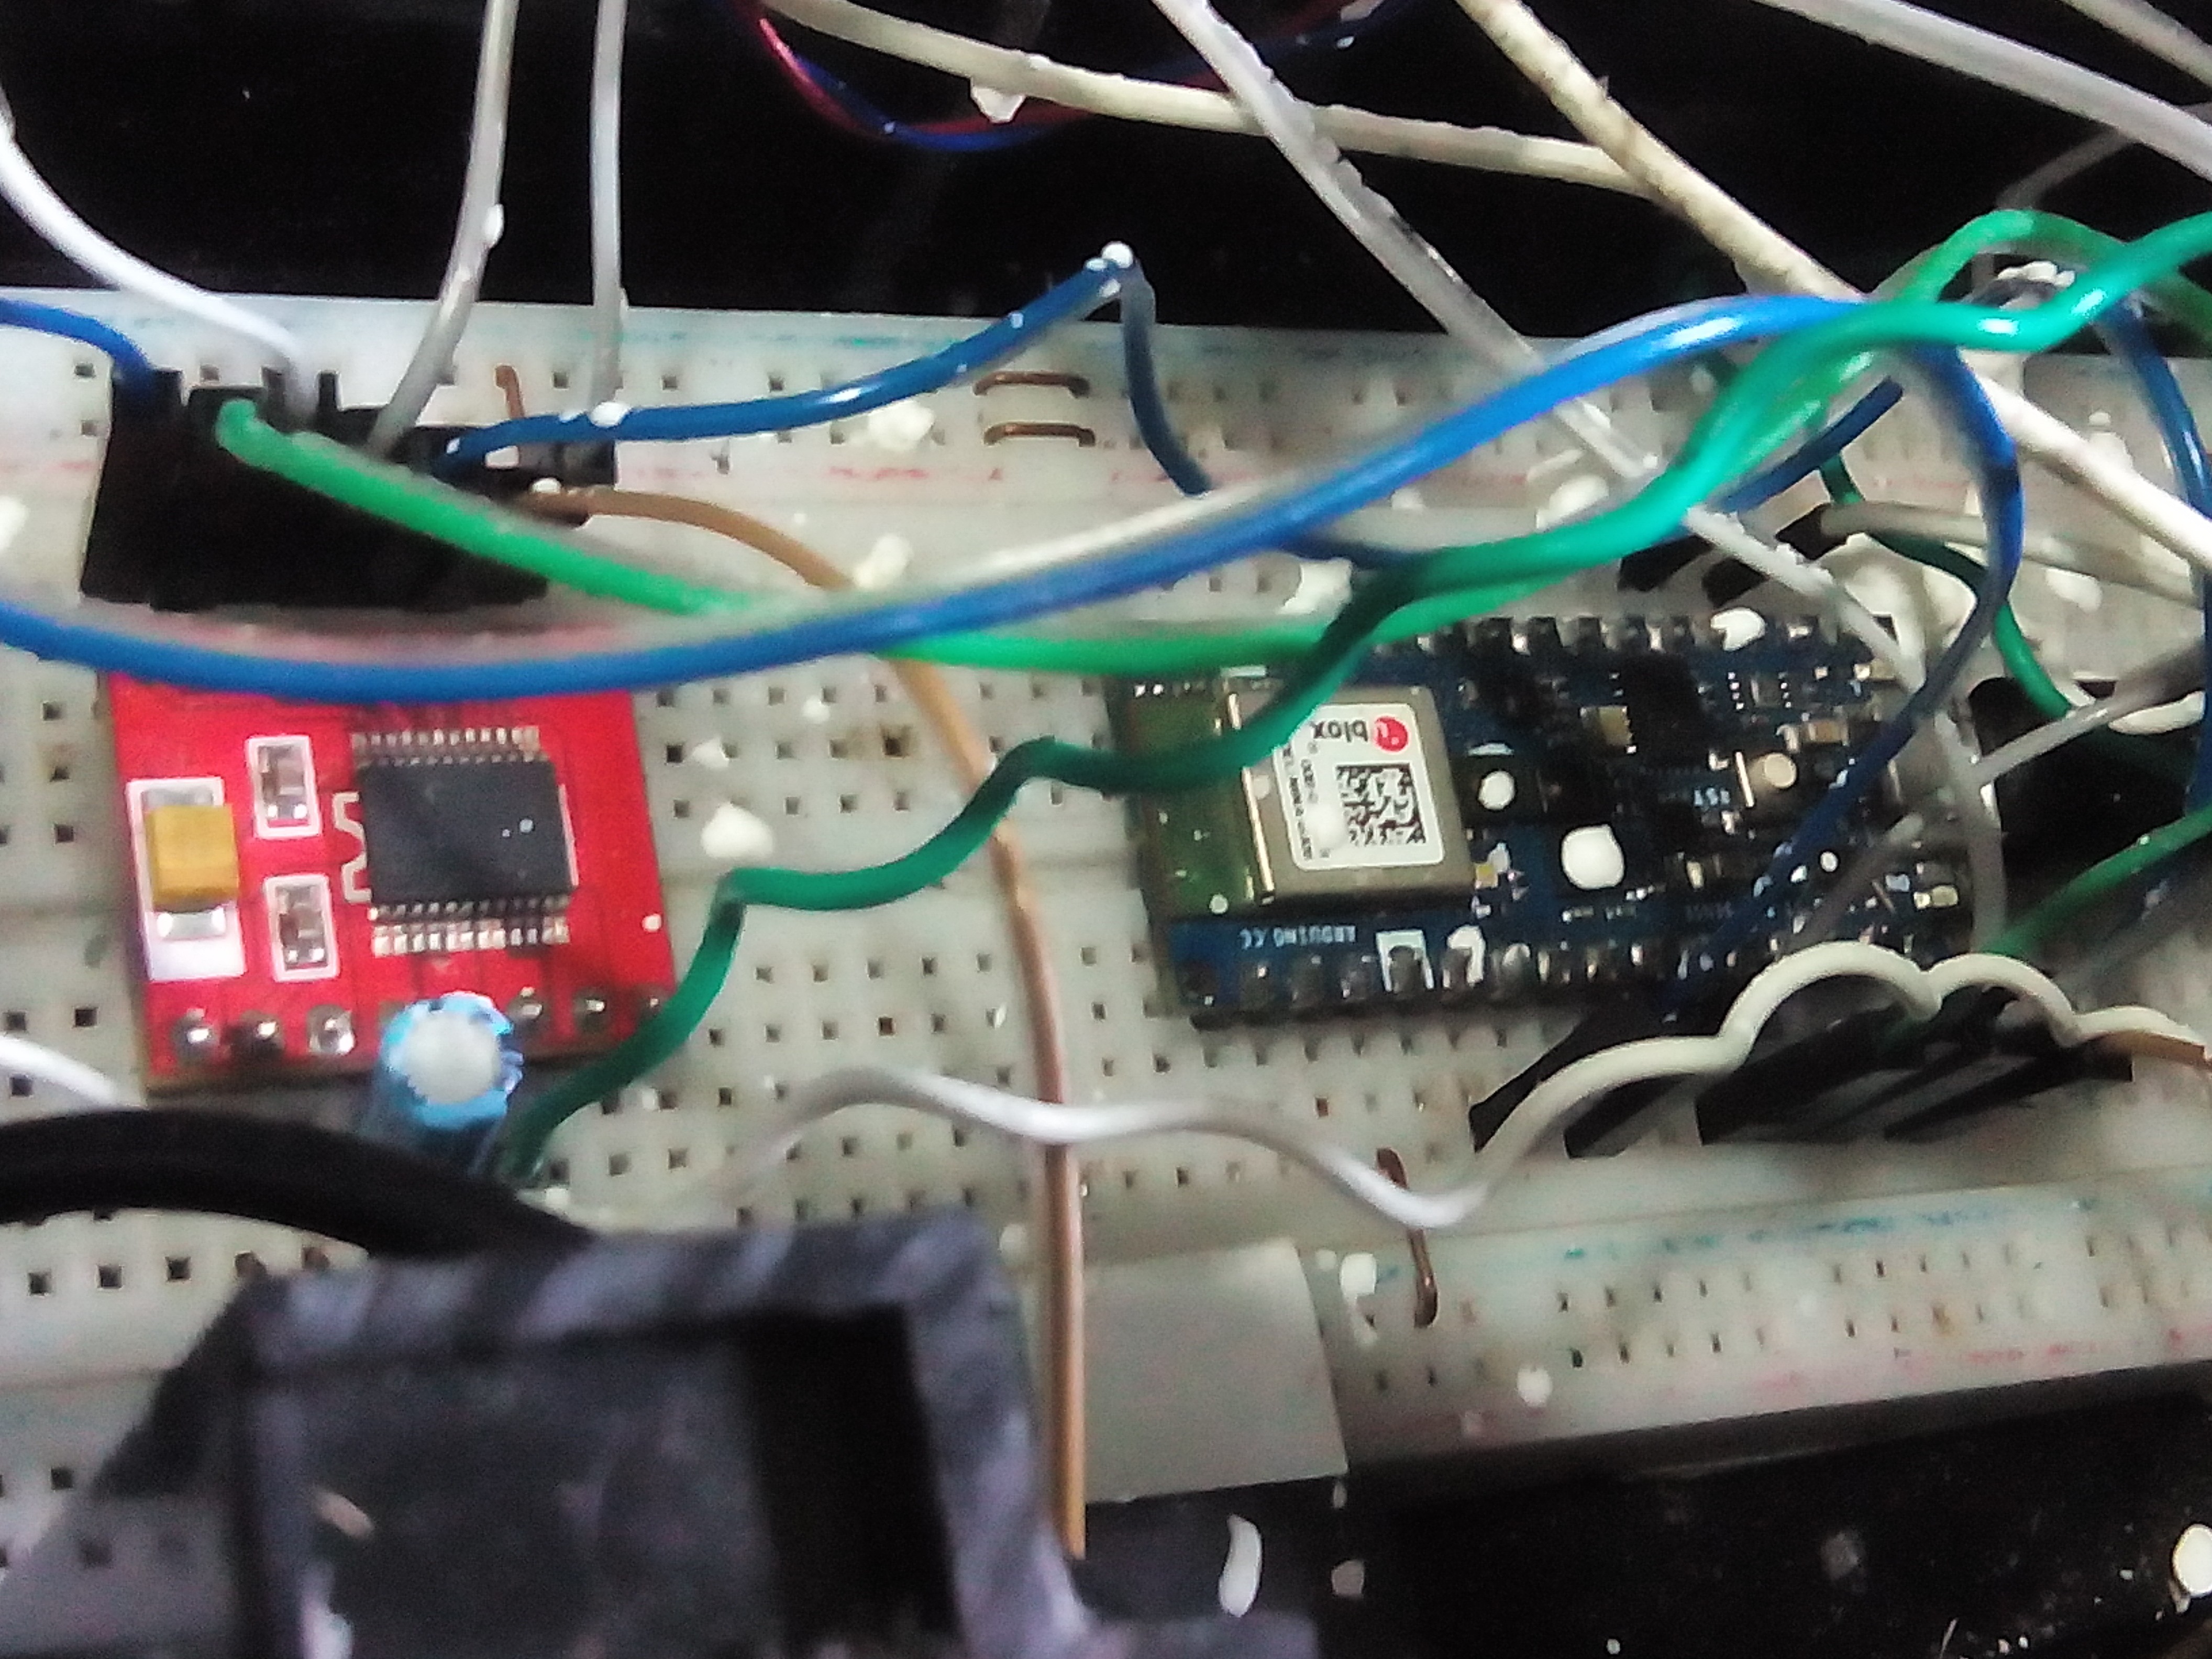
    Below I show you an image of these devices.

    In this way I optimized the spaces, and the energy consumption is lower with this Arduino Nano 33 BLE Sense board. Next I show you the code.

    speed_control.ino

    //AUTHOR: GUILLERMO PEREZ GUILLEN
    
    #define POT A0  // Pot 10k
    int raw_pot; // Store value of the pot
    int duty;   // duty cycle - PWM
    
    int STBY = 10;        // standby pin
    // motor A
    int PWMA = 3;        // velocity
    int ain1 = 9;                           
    int ain2 = 8;                           
    // motor B
    int PWMB = 5;        // velocity
    int bin1 = 11;                         
    int bin2 = 12;                         
    
    void setup(){
      pinMode(STBY, OUTPUT);  
      pinMode(PWMA, OUTPUT);
      pinMode(ain1, OUTPUT);
      pinMode(ain2, OUTPUT);
      pinMode(PWMB, OUTPUT);
      pinMode(bin1, OUTPUT);
      pinMode(bin2, OUTPUT);
    }
    
    void loop(){
      raw_pot = analogRead(POT);
      duty = map(raw_pot, 0, 1023, 0, 255); // range vaalue from 0-255
      
      mover(1, duty, 1);                                // motor 1, velocity, forward
      mover(2, duty, 1);                                // motor 2, velocity, forward
      delay(50);                                        // 50 ms
    }
    void mover(int motor, int velocidad, int direccion){    //Let's define the move function,                                                                                            a acciona un motor, fijar su velocidad y el                                                                                            sentido de giro. Definimos:    //motor:                                                                                                    llamaremos 1 al motor A, y 2 al motor B
                                                            //velocity: from 0 to 255
                                                            //direction: 0 for clockwise, 1 for counter-clock wise
    digitalWrite(STBY, HIGH);          //disable standby to move
     boolean inPin1 = LOW;             // we create the boolean variable (it can only be HIGH/LOW) inpin1
     boolean inPin2 = HIGH;             // and we assign the value LOW. To inPin2 we give the value                                                                HIGH
    if(direccion == 1){
    inPin1 = HIGH;
    inPin2 = LOW;
    }
    if(motor == 1){
    digitalWrite(ain1, inPin1);
    digitalWrite(ain2, inPin2);
     analogWrite(PWMA, velocidad);
      }else{
        digitalWrite(bin1, inPin1);
        digitalWrite(bin2, inPin2);
        analogWrite(PWMB, velocidad);
      }
    }
    void stop(){                           // standby action 
      digitalWrite(STBY, LOW);
    }


  • 5. Test and Conclusion

    Guillermo Perez Guillen05/23/2022 at 02:15 0 comments

    In the video below I show you the device already assembled and ready to experiment with homemade cornstarch clay.

    Here are some experiments I did with this homemade clay.

    Conclusion:

    • In this first version, I learned to make basic forms of pottery with this homemade clay made mainly with cornstarch;
    • I discovered that hardness depends on the quality and consistency of the mixed materials;
    • The idea of controlling the spin speed of the CD-rom was useful since sometimes we only require a slow spin and sometimes a fast spin;
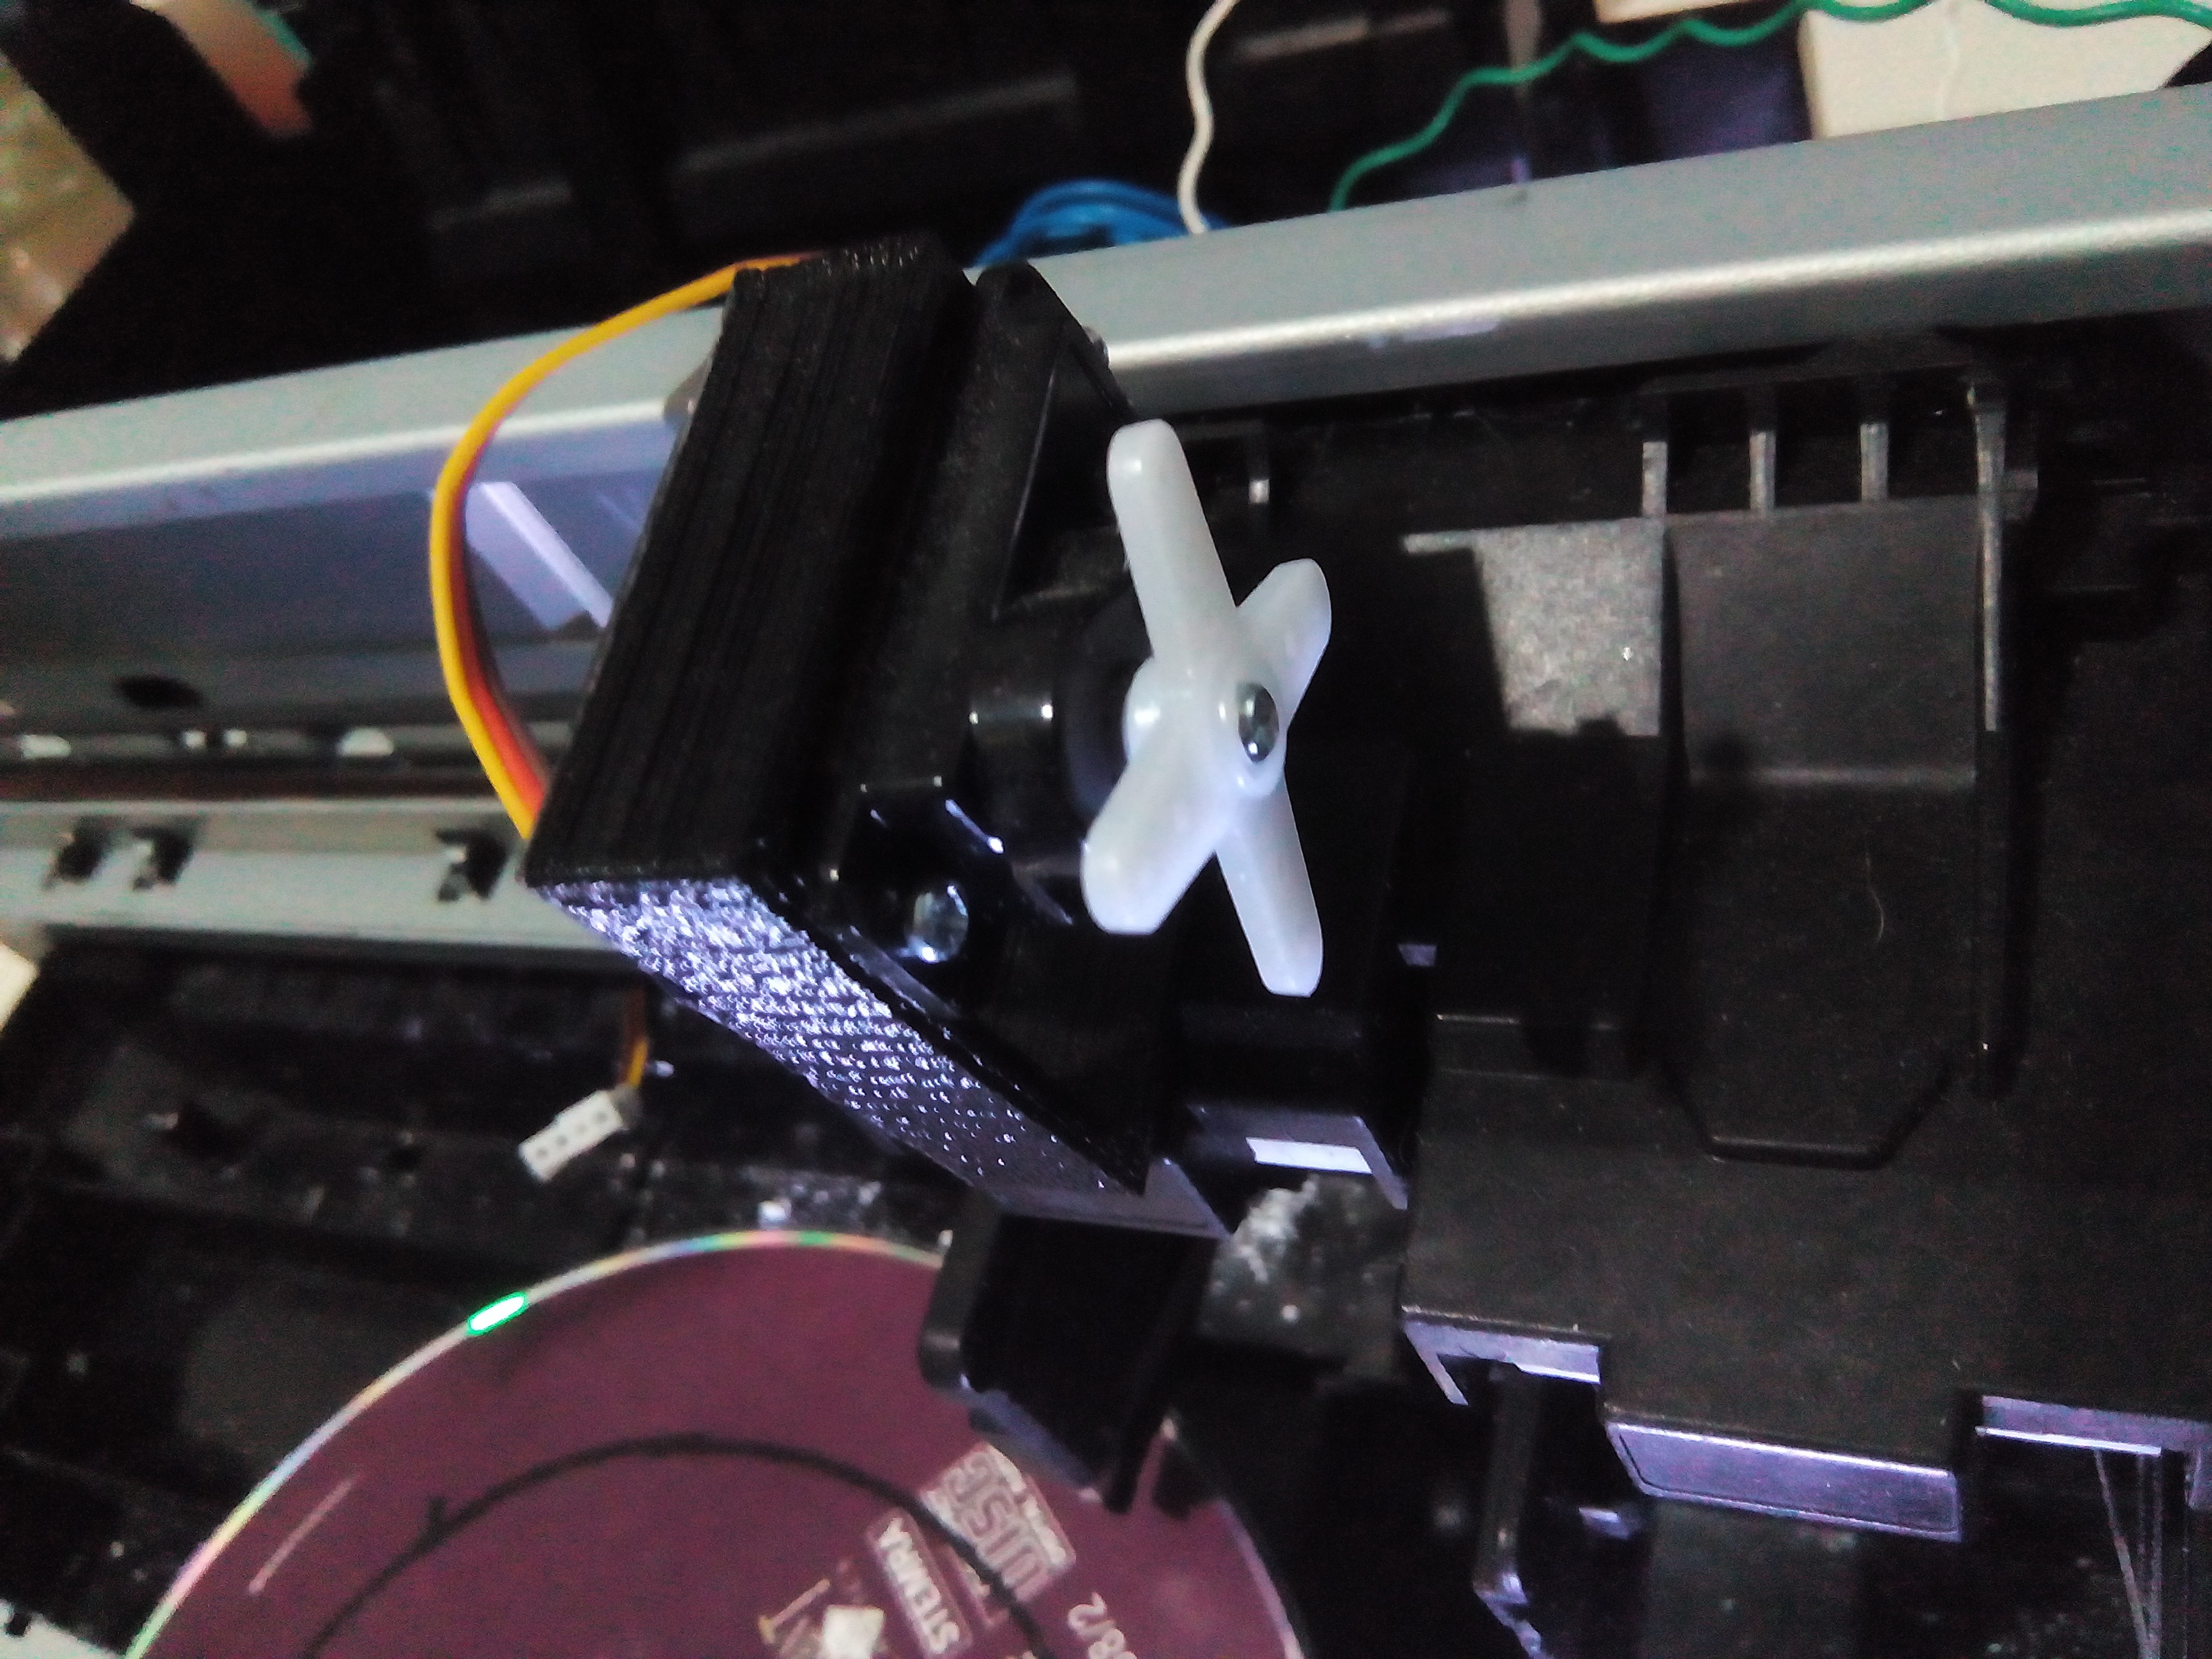
    • In the second version I have the idea to add and use a stepper motor and a servo motor in order to add details to the final product, for the moment I have only assembled these devices as shown in the image below.

  • 4. Homemade Clay with Cornstarch

    Guillermo Perez Guillen05/23/2022 at 02:00 0 comments

    Modeling clay has one main drawback: the high cost price. It is a material that, although it is within the reach of most people, it is also true that it is considered expensive for those who do not have a clear idea of its use or simply do not know how to use it correctly yet and, therefore, might think that They waste the investment. For this reason, you can start learning with another material similar to the clay that artists use and it is also convenient to know several methods to make homemade moldable clay in order to have it without having to buy it, because although it is not exactly the same as the used by artists can be used to practice or to entertain children for a long time and get them to learn while having fun.

    Many people, when thinking of making homemade clay for children, may also be thinking of a material such as plasticine or polymer clay (also called Fimo). However, although they are moldable materials that may have similarities, several aspects must be taken into account. In the case of polymer clay and plasticine, we can indicate some important aspects:

    • Unlike plasticine, this clay hardens when heated in the oven.
    • Polymer clay has the ability to combine different colors. It gives the option of mixing two tones, thus creating an original marbled effect. If you prolong the kneading a lot, you will end up obtaining a homogeneous mixture, that is, a polymer clay of another color.
    • Polymer clays are made from plasticized PVC. If you want to harden once the figures are created, these clays have to be baked between 110 °C and 130 °C.
    • If you were wondering how to make polymer clay, we are sorry to tell you that it is not possible to make Fimo clay, since the plastic ingredients it is made of are only available to companies and professionals on the market, not to individuals. So if you want exactly this type of clay you can only buy it.

    After knowing all this, we help you discover how to make homemade clay with different easy-to-find materials. We start by teaching you how to make clay with cornstarch, cornstarch or starch or corn flour.

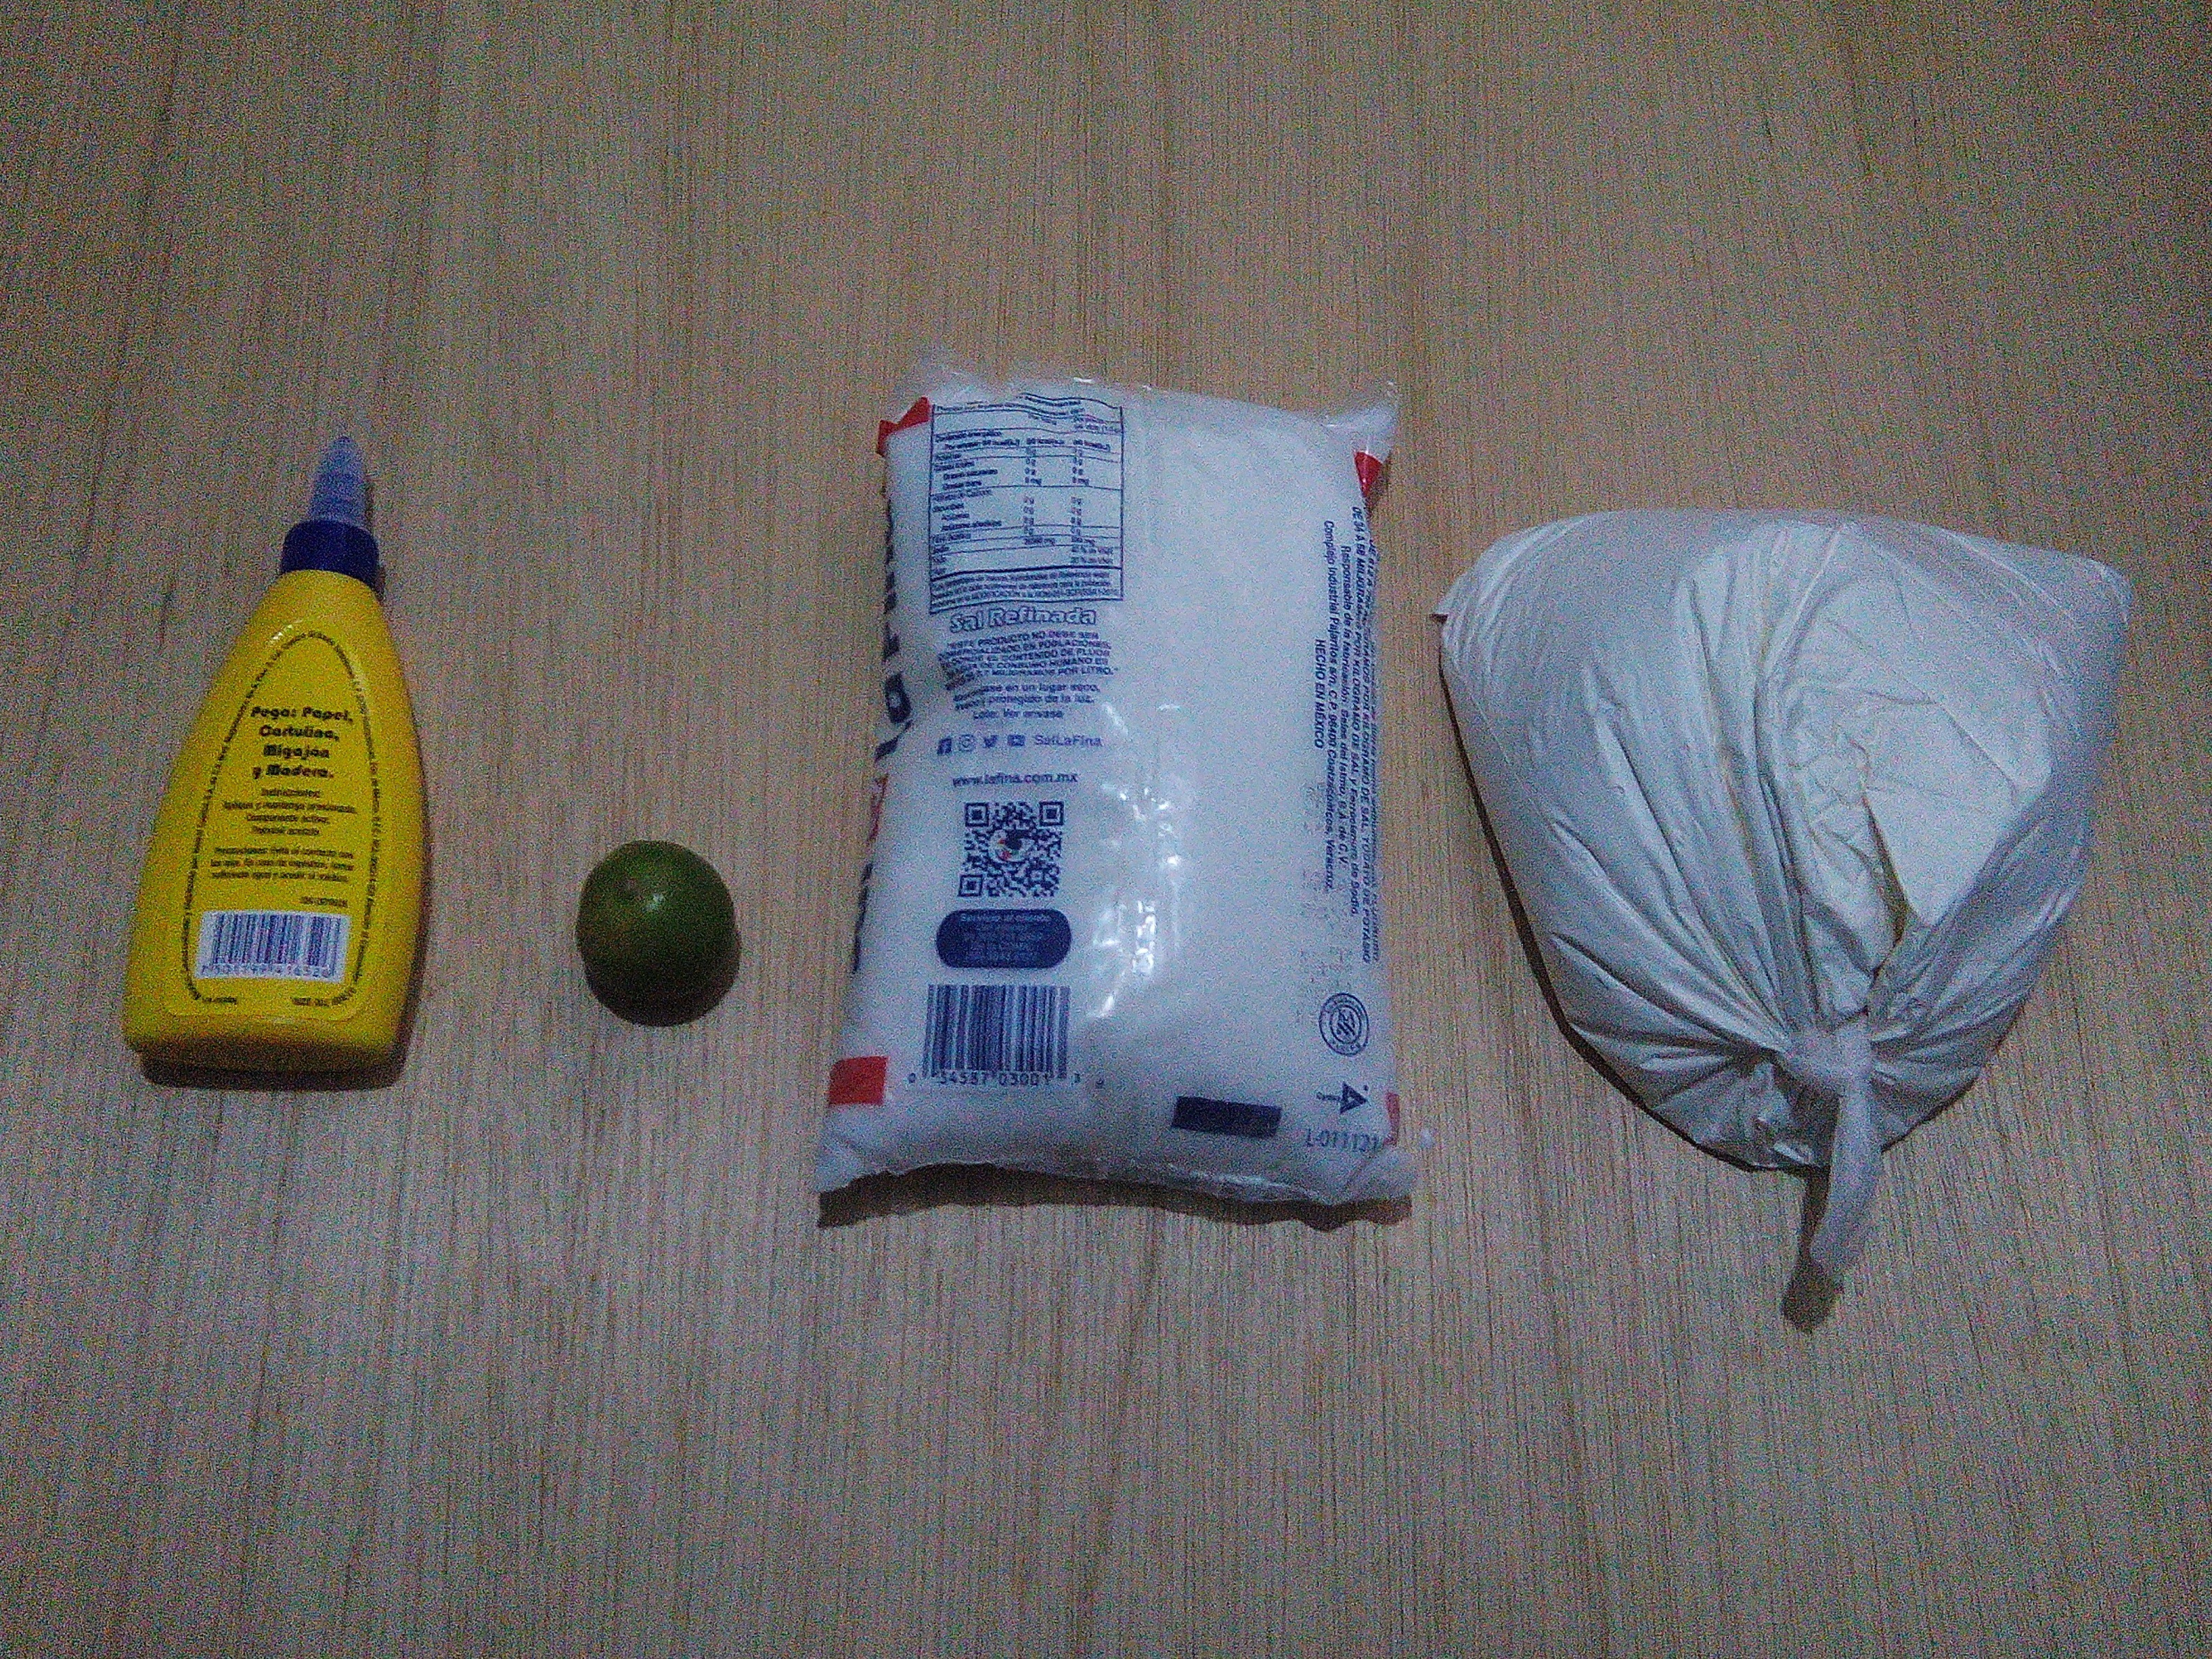
    Ingredients

    • Cornstarch.
    • Salt.
    • Water.
    • Acrylic paint or food coloring.
    • White glue used in furniture (optional)

    Steps to make homemade clay with cornstarch

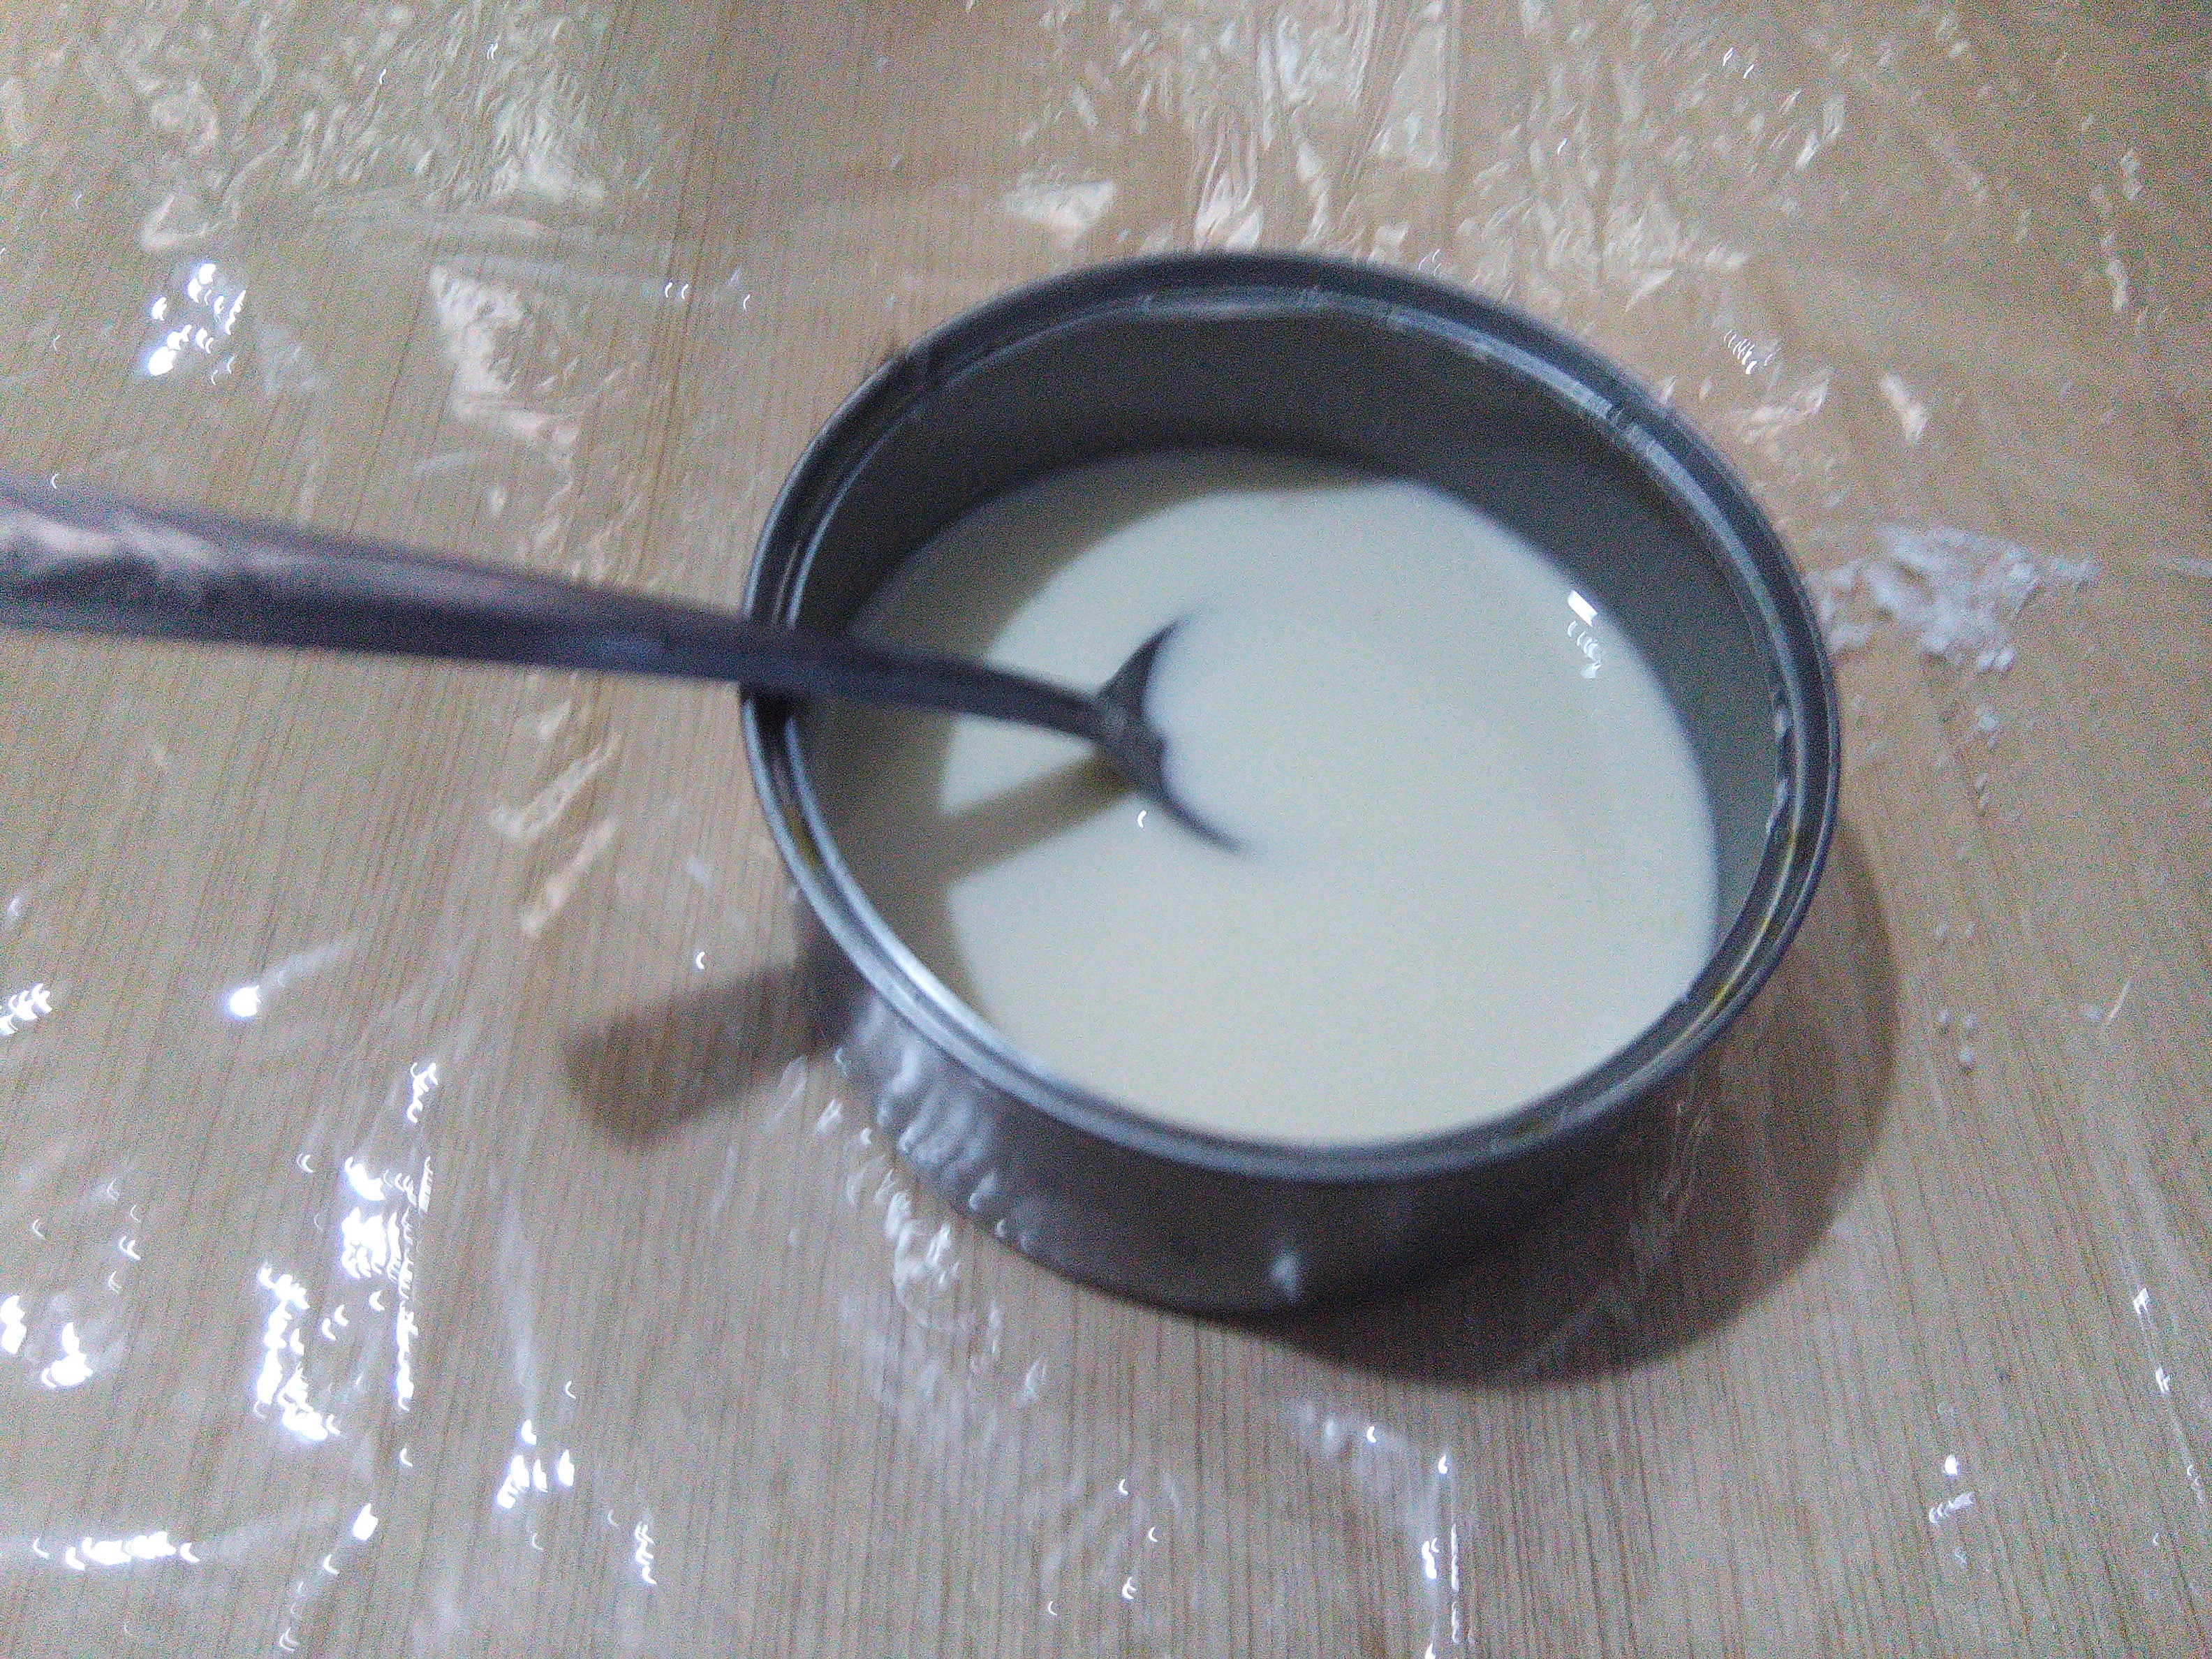
    1. Mix the cornstarch with the salt in a bowl. Use the amount you consider appropriate depending on the project you have in mind to work with the clay, but you should always add twice as much flour as salt.
    2. Gradually add water to the mixture. Do it using small spoonfuls to stir it with the flour and salt until you get the ideal texture.
    3. If you detect that the mixture is getting especially sticky, choose to add more flour. Thus, the material will have a greater consistency.
    4. Add the food coloring to add color to the clay if you want.
    5. Finally, knead the mixture and you can start creating figures with this homemade material.

  • 3. Software

    Guillermo Perez Guillen05/23/2022 at 01:33 0 comments

    I have used the Arduino IDE to experiment with this device, because it has many free tools that can be easily worked with. Next I show you the code in its first version.

    pottery_machine_ver1.ino

    //AUTHOR: GUILLERMO PEREZ GUILLEN
    
    #define POT A0  // Pot 10k
    int raw_pot; // Store value of the pot
    int duty;   // duty cycle - PWM
    
    int STBY = 10;        // standby pin
    // motor A
    int PWMA = 3;        // velocity
    int AIN1 = 9;                           
    int AIN2 = 8;                           
    // motor B
    int PWMB = 5;        // velocity
    int BIN1 = 11;                         
    int BIN2 = 12;                         
    
    void setup(){
      pinMode(STBY, OUTPUT);  
      pinMode(PWMA, OUTPUT);
      pinMode(AIN1, OUTPUT);
      pinMode(AIN2, OUTPUT);
      pinMode(PWMB, OUTPUT);
      pinMode(BIN1, OUTPUT);
      pinMode(BIN2, OUTPUT);
    }
    
    void loop(){
      raw_pot = analogRead(POT);
      duty = map(raw_pot, 0, 1023, 0, 255); // range vaalue from 0-255
      
      mover(1, duty, 1);                                // motor 1, velocity, forward
      mover(2, duty, 1);                                // motor 2, velocity, forward
      delay(50);                                        // 50 ms
    }
    void mover(int motor, int velocidad, int direccion){    //Let's define the move function,                                                                                            a acciona un motor, fijar su velocidad y el                                                                                            sentido de giro. Definimos:    //motor:                                                                                                    llamaremos 1 al motor A, y 2 al motor B
                                                            //velocity: from 0 to 255
                                                            //direction: 0 for clockwise, 1 for counter-clock wise
    digitalWrite(STBY, HIGH);          //disable standby to move
     boolean inPin1 = LOW;             // we create the boolean variable (it can only be HIGH/LOW) inpin1
     boolean inPin2 = HIGH;             // and we assign the value LOW. To inPin2 we give the value                                                                HIGH
    if(direccion == 1){
    inPin1 = HIGH;
    inPin2 = LOW;
    }
    if(motor == 1){
    digitalWrite(AIN1, inPin1);
    digitalWrite(AIN2, inPin2);
     analogWrite(PWMA, velocidad);
      }else{
        digitalWrite(BIN1, inPin1);
        digitalWrite(BIN2, inPin2);
        analogWrite(PWMB, velocidad);
      }
    }
    void stop(){                           // standby action 
      digitalWrite(STBY, LOW);
    }
    

    It is not complicated to analyze this code. We simply configure the microcontroller outputs to be able to use the TB6612FNG driver. The duty cycle of the PWM signal is regulated by means of a potentiometer placed on port A0.

  • 2. Hardware

    Guillermo Perez Guillen05/23/2022 at 01:23 0 comments

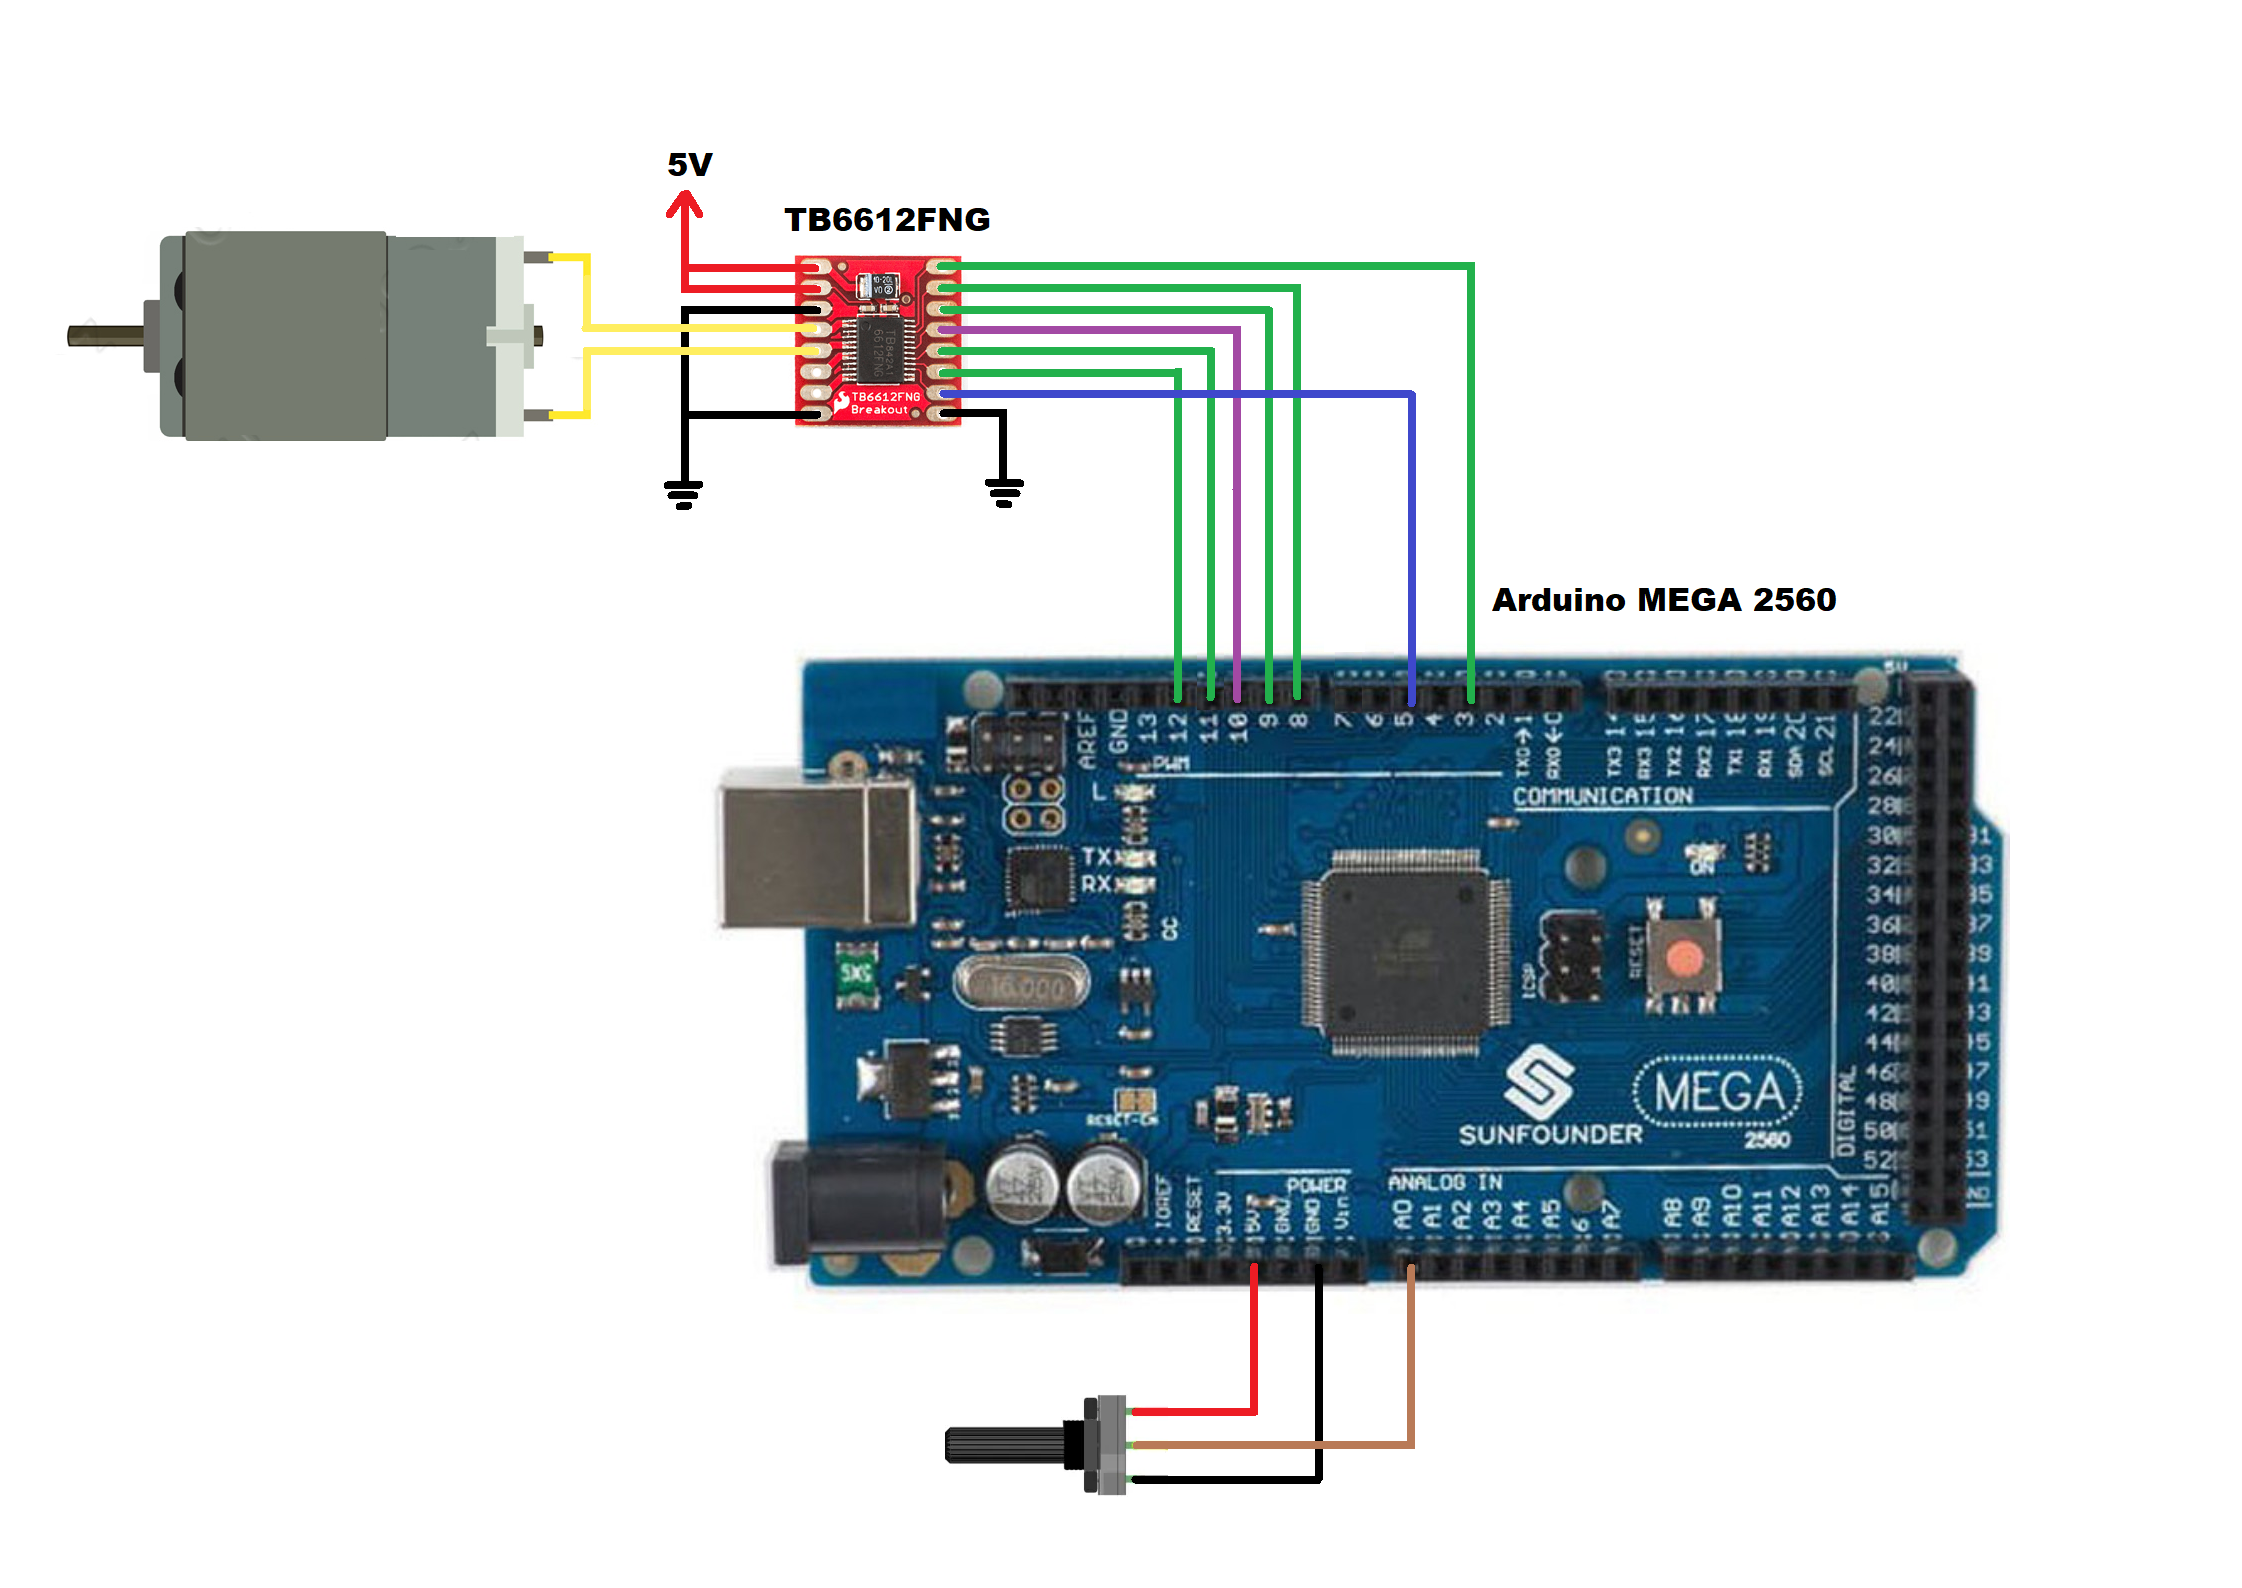
    In the image below I show you the electrical diagram of the device in its first version.

    How does it work?

    • By means of the 10k potentiometer, we can regulate the turning speed of the 5 volt DC motor;
    • We can increase or decrease the duty cycle of the PWM signal, and therefore the speed of the motor.

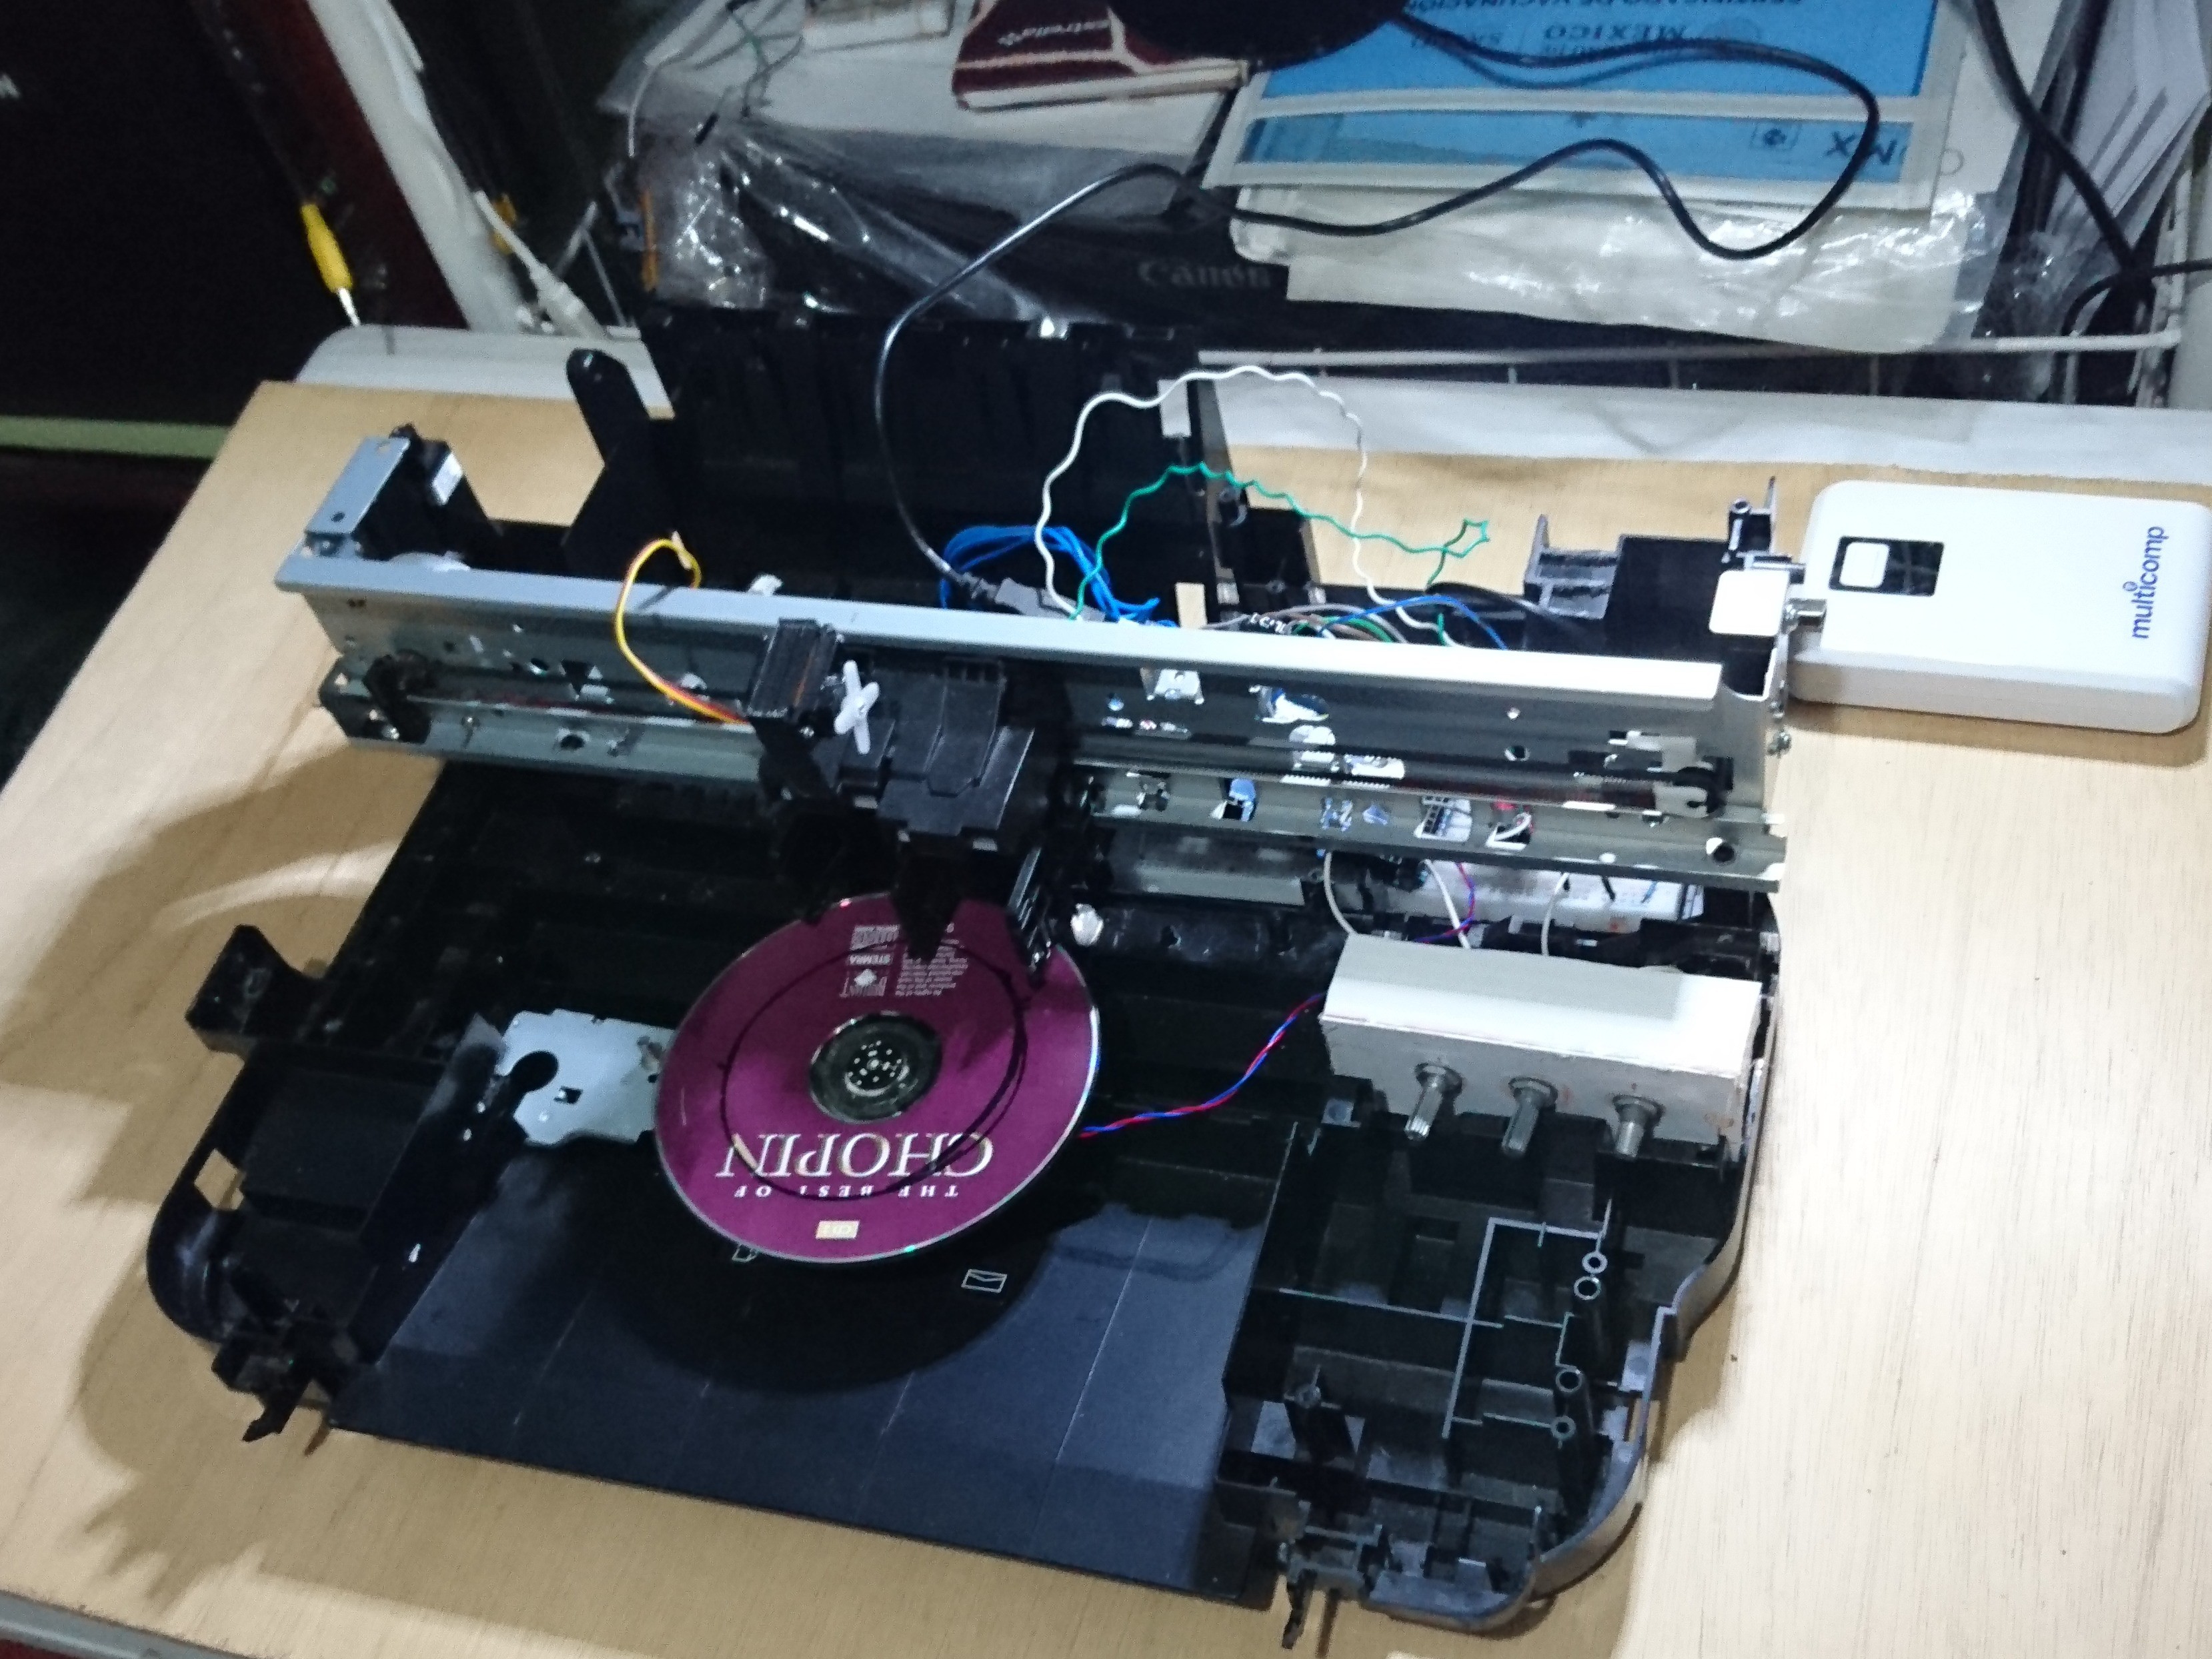
    As I explained in my project description, I have reused an old printer and some of its components to create this device. I have also recycled an old cd-player and added it to place the pottery dough and its molds on top. Next I show you what this device looks like.

  • 1. Introduction

    Guillermo Perez Guillen05/23/2022 at 00:44 0 comments

    Pottery is the process and the products of forming vessels and other objects with clay and other ceramic materials, which are fired at high temperatures to give them a hard and durable form. Major types include earthenware, stoneware and porcelain. The place where such wares are made by a potter is also called a pottery. In art history and archaeology, especially of ancient and prehistoric periods, "pottery" often means vessels only, and sculpted figurines of the same material are called "terracottas".

    Pottery is one of the oldest human inventions, originating before the Neolithic period, with ceramic objects like the Gravettian culture Venus of Dolní Věstonice figurine discovered in the Czech Republic dating back to 29,000–25,000 BC, and pottery vessels that were discovered in Jiangxi, China, which date back to 18,000 BC. 

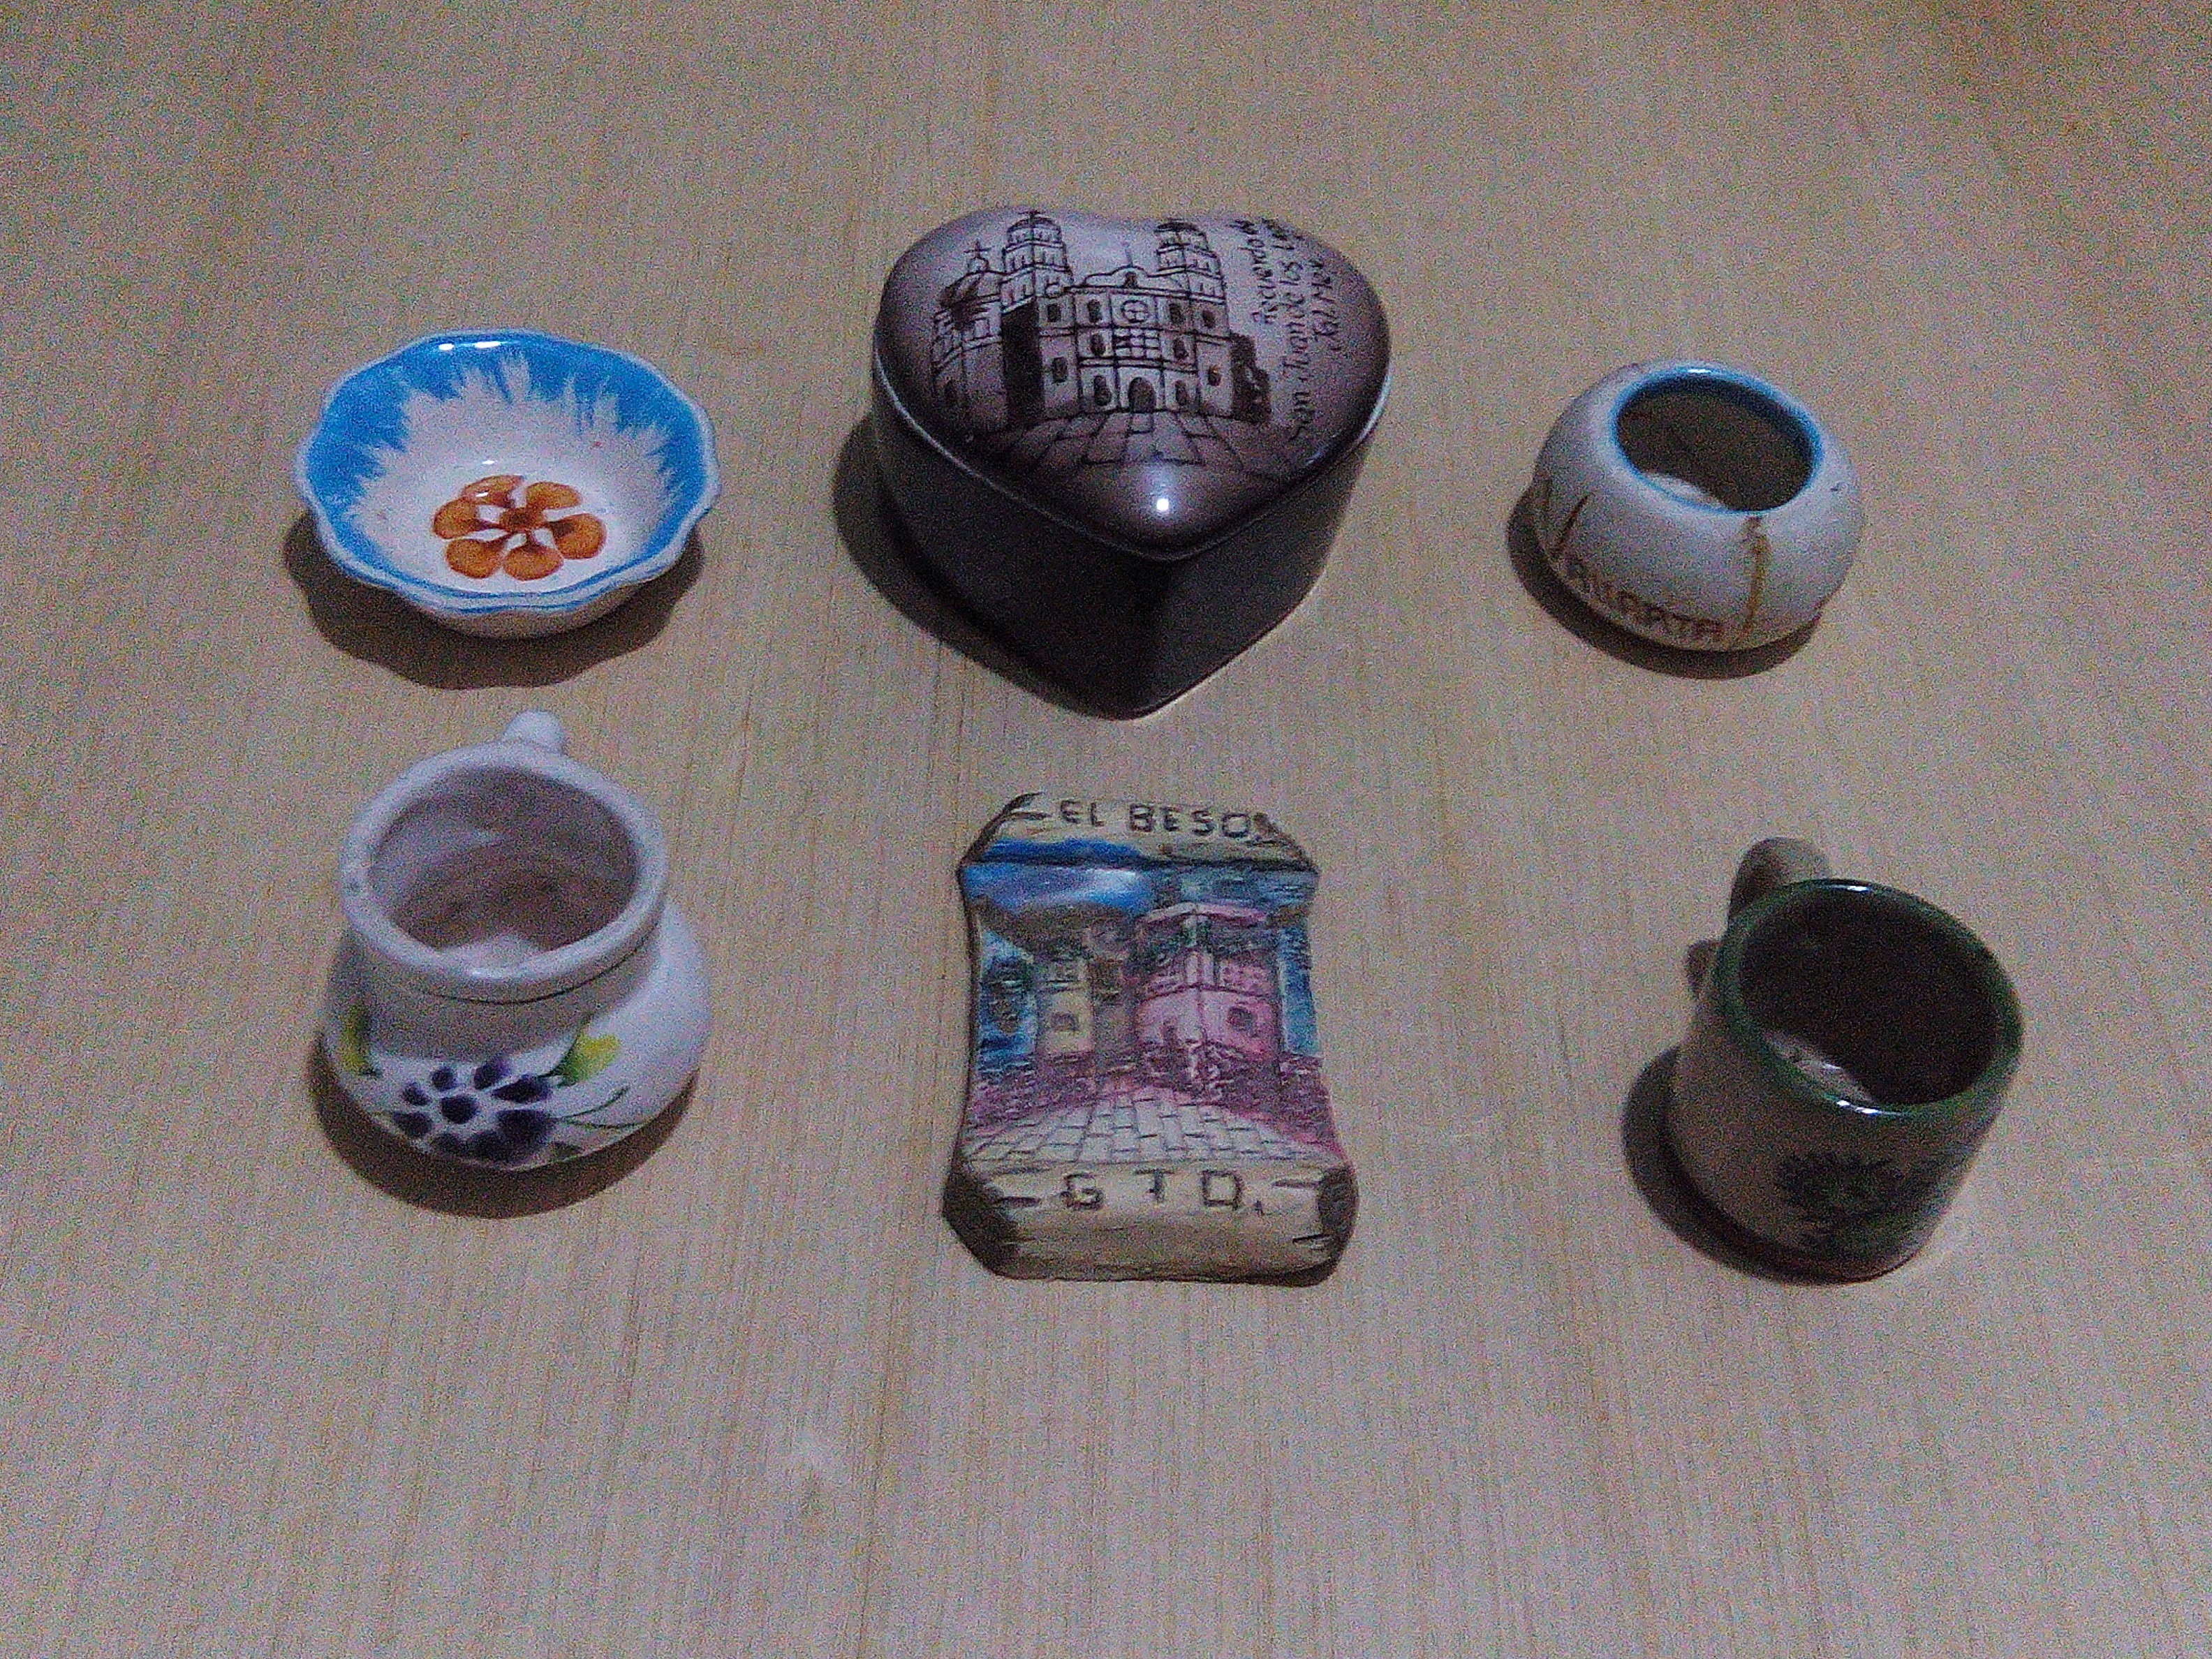
    In my case, I was inspired by the miniature pottery that is built in my country, below I show you an image of these samples:

    I got into this interesting art, but looking for homemade, not industrial goals. I discovered that some people use cornstarch to make a simple but attractive craft that can be experimented with, and even this can be viable for marketing in a sustainable way. Below I show you some experiences that I have achieved.

View all 8 project logs

  • 1
    Software apps and online services
    • Arduino IDE
  • 2
    Hand tools and fabrication machines
    • Old printer
    • Old CD player
  • 3
    Ingredients
    • Cornstarch
    • Salt
    • Water
    • Acrylic paint or food coloring
    • White glue used in furniture (optional)

View all 3 instructions

Enjoy this project?

Share

Discussions

Guillermo Perez Guillen wrote 06/28/2022 at 21:18 point

This project is sustainable because: 1) The raw materials to make this clay was made with natural and organic materials such as cornstarch, salt, water and natural color. When this product is not useful, raw materials can be returned to nature; and 2) To build this device, I've recycled old printer, stepper motor and CD player

  Are you sure? yes | no

Guillermo Perez Guillen wrote 06/28/2022 at 21:18 point

My project fits the "Save the World Wildcard" category because I've added new capabilities to my old printer to keep it useful, since I have developed a 3D pottery machine with it, and useful for kids learn how  to make mini pottery. So this solution makes STEM education more accessible for childs since they can make objetcs of different shapes, even animals, stars, furnitures, etc.

  Are you sure? yes | no

Similar Projects

Does this project spark your interest?

Become a member to follow this project and never miss any updates