Close
0%
0%

Laser Tag Robots

Why not combine two of the best things in one?

Similar projects worth following
448 views
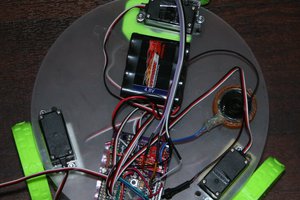
For my final project for the microcontroller class offered at my university, my partner and I didn't want to do something simplistic for our last lab, and we are both into robotics so hence this project. After an hour or two of goofing around, we came up with the idea of making a little robot that has basic obstacle detection and can fire IR beams upon its brethren. Powered by an ATMega328P, of course we could use arduino libraries but due to the nature of the course, we are working on everything from scratch. At the end, everything will be open sourced (including the schematic and PCB) as well as a small C library to control everything. If we are feeling super ambitious, maybe we will get the source code done in assembly to enter the 1KB challenge, but no promises.

This project is the final project for my microcontroller class at my university. It is a robot that has simple object avoidance capabilities with use of an Ultrasonic sensor, as well as IR ports for some laser tag action. This is a work in progress, but will be finished in upcoming weeks as the semester is almost over. The brains is an ATMega328P but without arduino libraries. For the peripherals, it is using a L293D H-Bridge to control two DC motors, Ultrasonic Sensor for obstacle avoidance, IR LED and IR Receiver for the laser tag, LDR with LM741 as a comparator for detecting opposing robots, of course numerous indicator LEDs, LM7805 for voltage regulation, and a servo port for panning the Ultrasonic sensor.

ECE216_Final_Project_PCB.png

Thanks PCB:NG for the quick and easy PCB fabrication! Should get the boards sometime this week and be able to start testing some of the stuff soon. It's a shame that I didn't catch some of the silkscreen overlap and one resistor misplacement until now, but no problem as they aren't deal breaking issues. It's always satisfying to make a PCB regardless. Plus I don't think anyone in the history of this class has made a PCB for their final project, so hope we get bonus points haha

Portable Network Graphics (PNG) - 171.60 kB - 11/27/2016 at 17:46

Preview

  • 1 × ATMega328P Microprocessors, Microcontrollers, DSPs / ARM, RISC-Based Microcontrollers
  • 1 × L293D Interface and IO ICs / Peripheral Drivers and Actuators
  • 1 × LDR Resistor Networks / Thick Film Networks
  • 1 × LM741 Amplifier and Linear ICs / Operational Amplifiers
  • 1 × IR LED (5mm) Any old IR LED, but the one we are using is backwards (long leg is negative for some stupid reason. yes the datasheet says this is not a photodiode), so mind the polarity!

View all 22 components

  • Only the beginning

    Dylan11/27/2016 at 18:19 0 comments

    To give a little background about this project, in one of the classes at my university we study microcontrollers and basic signal conditioning circuits for the semester (!!). Of course having enough background with AVRs, I didn't have much issue with the transition to PIC assembly code (except having to deal with the blasted w register too often...). Jokes aside, it is definitely a cool class to be able to go from stuff I do for fun, to actually having tests and homework on the topic. Anyway, after 6 or so labs we have a final project to do where it is entirely open ended to design whatever we feel like, as long as there is a microcontroller involved. My head was bursting with ideas, but couldn't settle on one in particular. As we work in groups of two, I kept on rattling off ideas to my lab partner and none of them seemed to stick particularly well. Then we got on the idea of robotics, as we are both interested in the subject. At first we wanted to do something rather simple, with just making a basic object avoidance robot that can roam the room. Nothing too fancy, and definitely more than feasible for a 2-3 week project. Eventually we thought to do something more, and add some fun to it. I've been wanting to make my own laser tag system, and after mentioning that as one of the potential ideas, we thought to incorporate that into the robot design. And thus this project was born!

    So in essence, our project is to have some robots roam the lab and shoot each other. No human involvement, because that's too easy. So the obstacle avoidance is our main focus, and then if we have more time in the semester to finish the laser tag part (which hopefully shouldn't be much more to add), will be added after. We will be implementing a small algorithm to detect if an obstacle is too close to just turn to avoid it, or just move around the obstacle if possible. Now you may be asking, "how will the robot know if there is another robot ahead in order to shoot at it?" Which we had the same question for a while. Our solution is to use the LDR for detection, and a bright LED on the enemy robot. So when the robot detects an obstacle, it simultaneously checks the 741, which is being used as a comparator and then would fire. This may be changed in future updates, but that is the idea at the moment for how to implement this system.

    Over the thanksgiving break I had ample time waiting for my plane in the airport, so I decided to start writing some of the basic functions for controlling the robot (and commenting the shit out of it, because reasons) to make our lives easier later on. Most of the controls are fairly simple like "move forward", "turn left/right", "check if there is an obstacle", etc. I'm tempted to rewrite it in assembly however, for two reasons. 1. for the hell of it, and 2. I'm obsessed with speed. (Or the hidden 3rd reason, to submit for the 1KB challenge because it would be pretty cool to do, and also fun to screw with my professor on making such a tiny program for a microcontroller with 32KB of flash). I'm just hoping that the code won't need too much tweaking once everything is all soldered together, though I don't have high hopes. Such is life with these things, though I've had better luck recently so who knows. On a side note, I found this remote controlled tank-like RC toy (don't badger me for forgetting the specific name, though I'm sure there will be comments on it) that would be perfect for the project so we don't have to make a chassis for it. Plus the turret control uses a DC motor, so we wouldn't need to use a servo motor which is nice. Just drill a small hole for the LED and bam, perfect IR output. More info on that will be included in subsequent updates. Hope all goes well with this as I'm pretty excited to see the outcome. *fingers crossed*

View project log

Enjoy this project?

Share

Discussions

Similar Projects

Does this project spark your interest?

Become a member to follow this project and never miss any updates