 JP Gleyzes
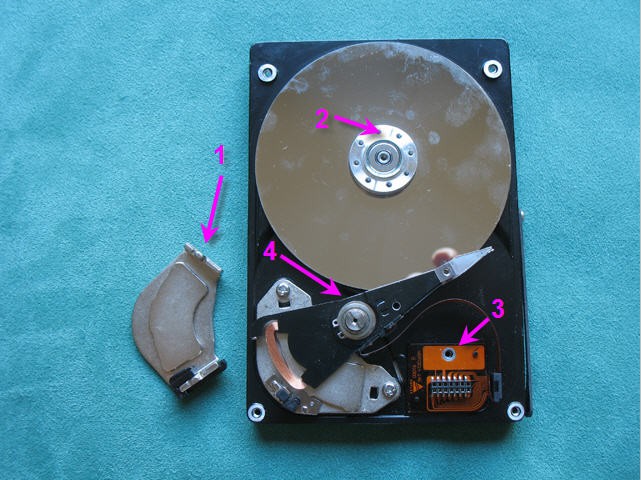
Open your HDD and remove the heads arm :
- remove the upper half magnet
- unscrew the the platter locker screws
- unscrew the connector screw
- unscrew the screw on the central axis of the heads arm
![]() The magnet is very strong, it is uneasy to remove it. You can use a screwdriver to help you, but beware that the coil is very fragile... and is absolutely needed for this clock. Same thing for the connector and the ribbon!
The magnet is very strong, it is uneasy to remove it. You can use a screwdriver to help you, but beware that the coil is very fragile... and is absolutely needed for this clock. Same thing for the connector and the ribbon!
The heads arm must be equiped with a litlle torsion spring to convert it into a moving-coil galvanometer..
The torsion spring is dissimulated under the heads arm. It is totally not visible.
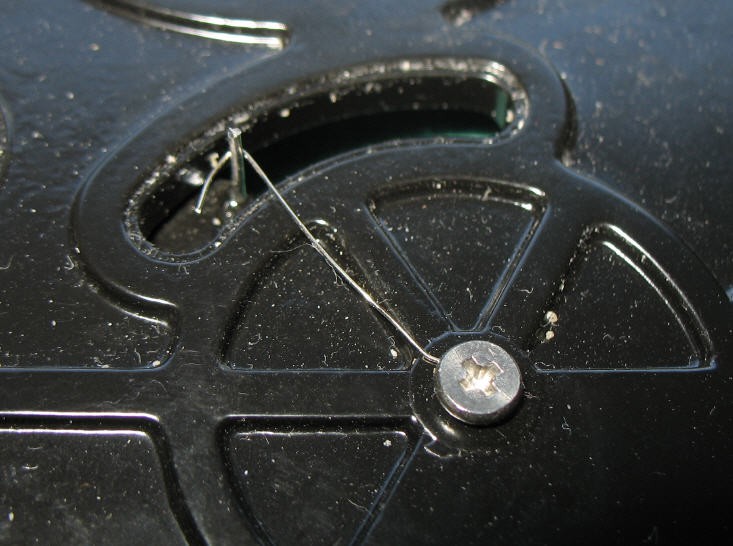
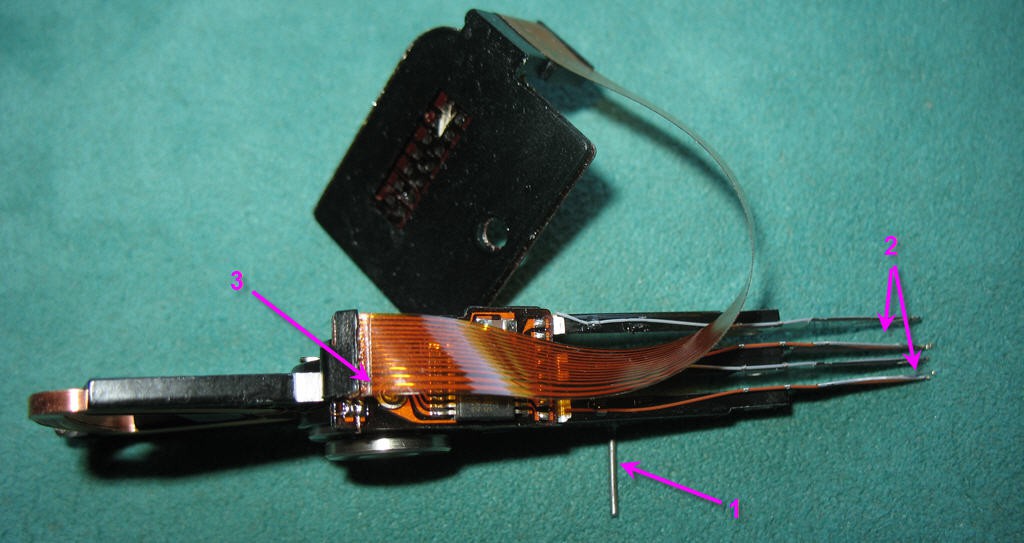
- the heads arm is drilled and a piece of piano wire is epoxy glued in the hole
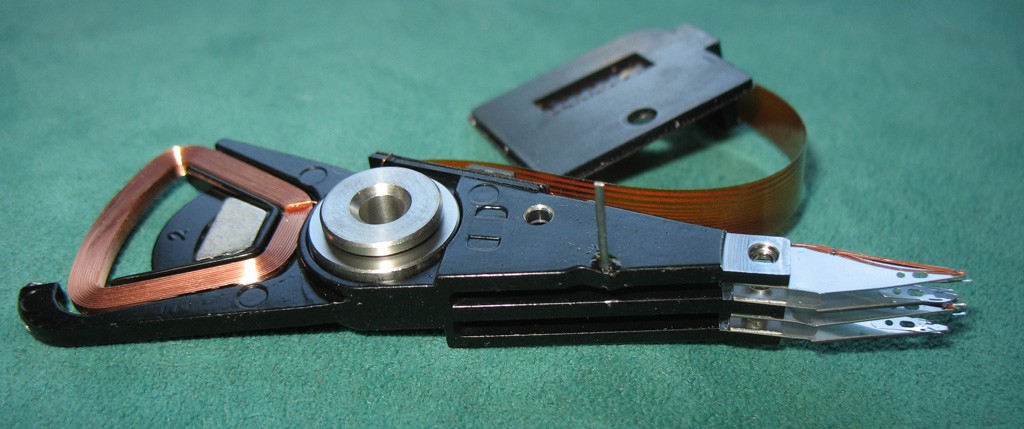
- the heads are properly removed and their fixations are slightly bended to avoid to touch the disk. .
- You need to find the two biggest wires on the connector. They shoud be the coil connections. We will use these connections to power the coil.
Removing the heads can be a delicate operation. Take your time, do it cleanly at least for the upper head (the only which is visible and used a the "hour pointer". So my advice would be to finish by this one and learn on the bottom others !
Discussions
Become a Hackaday.io Member
Create an account to leave a comment. Already have an account? Log In.